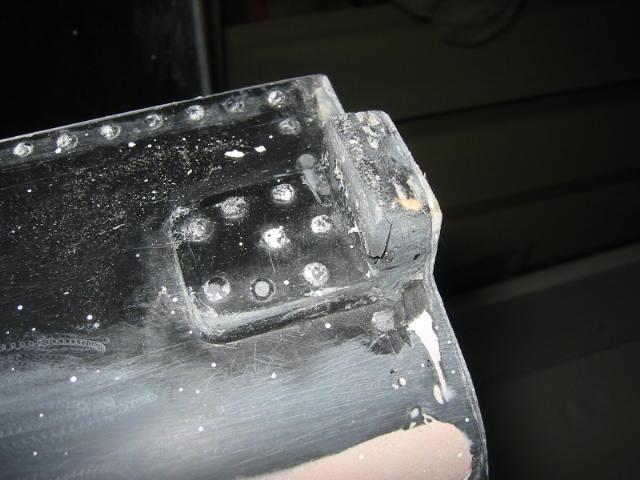
9-June-04 The damaged bracket on the fiberglass tender.
31-July-09 Since making the decision to use a commonwealth three axle truck instead of the USRA two axle truck set, I needed to switch to a slightly larger…

31-July-09 Since making the decision to use a commonwealth three axle truck instead of the USRA two axle truck set, I needed to switch to a slightly larger…
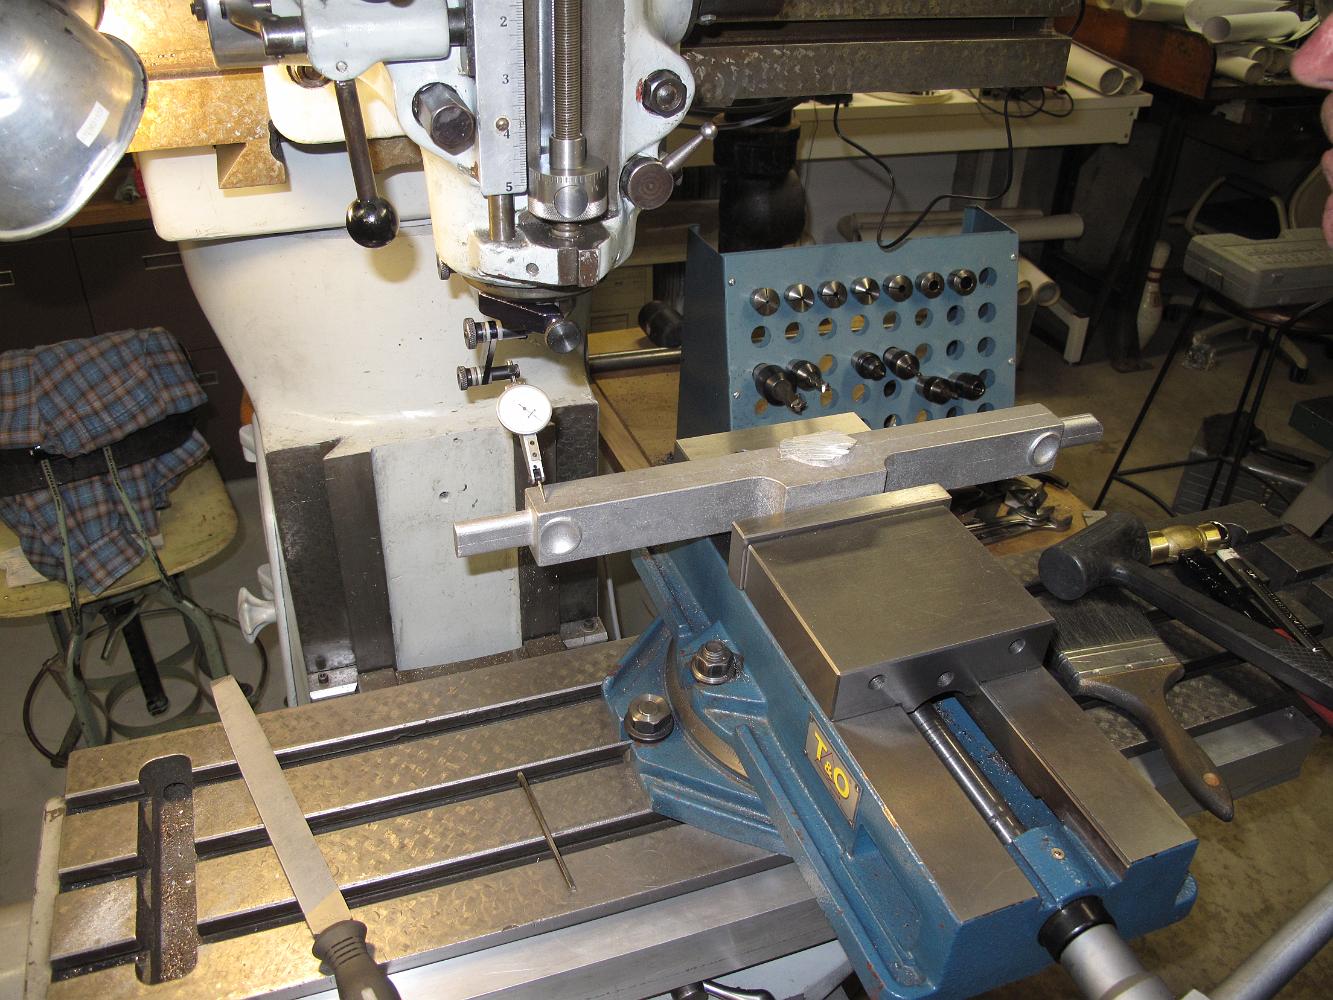
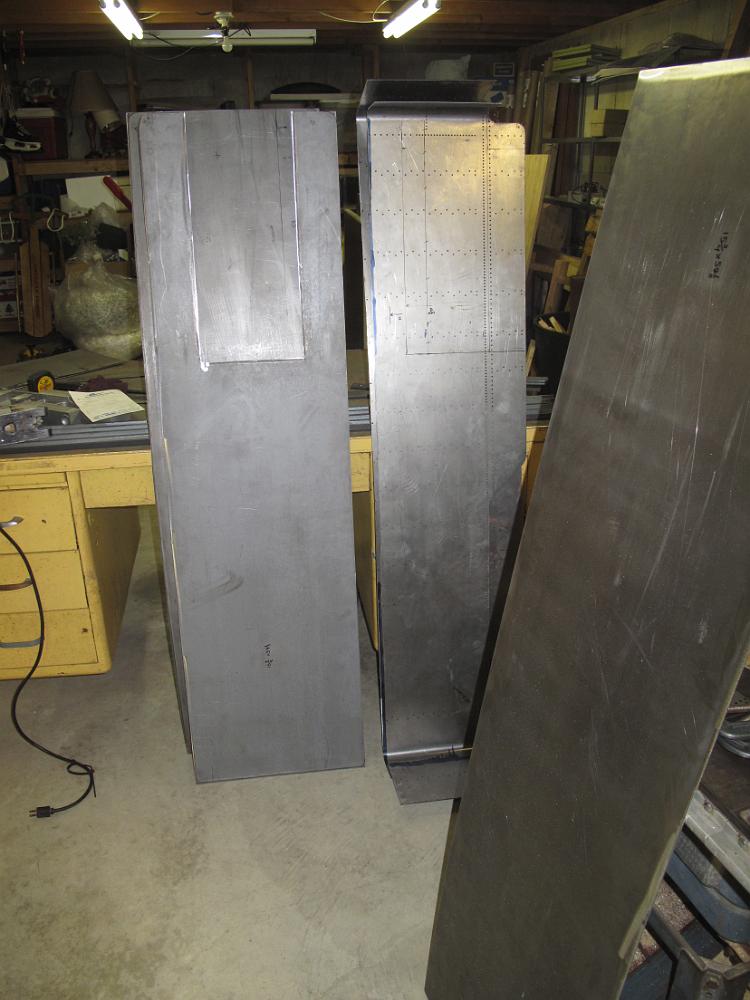
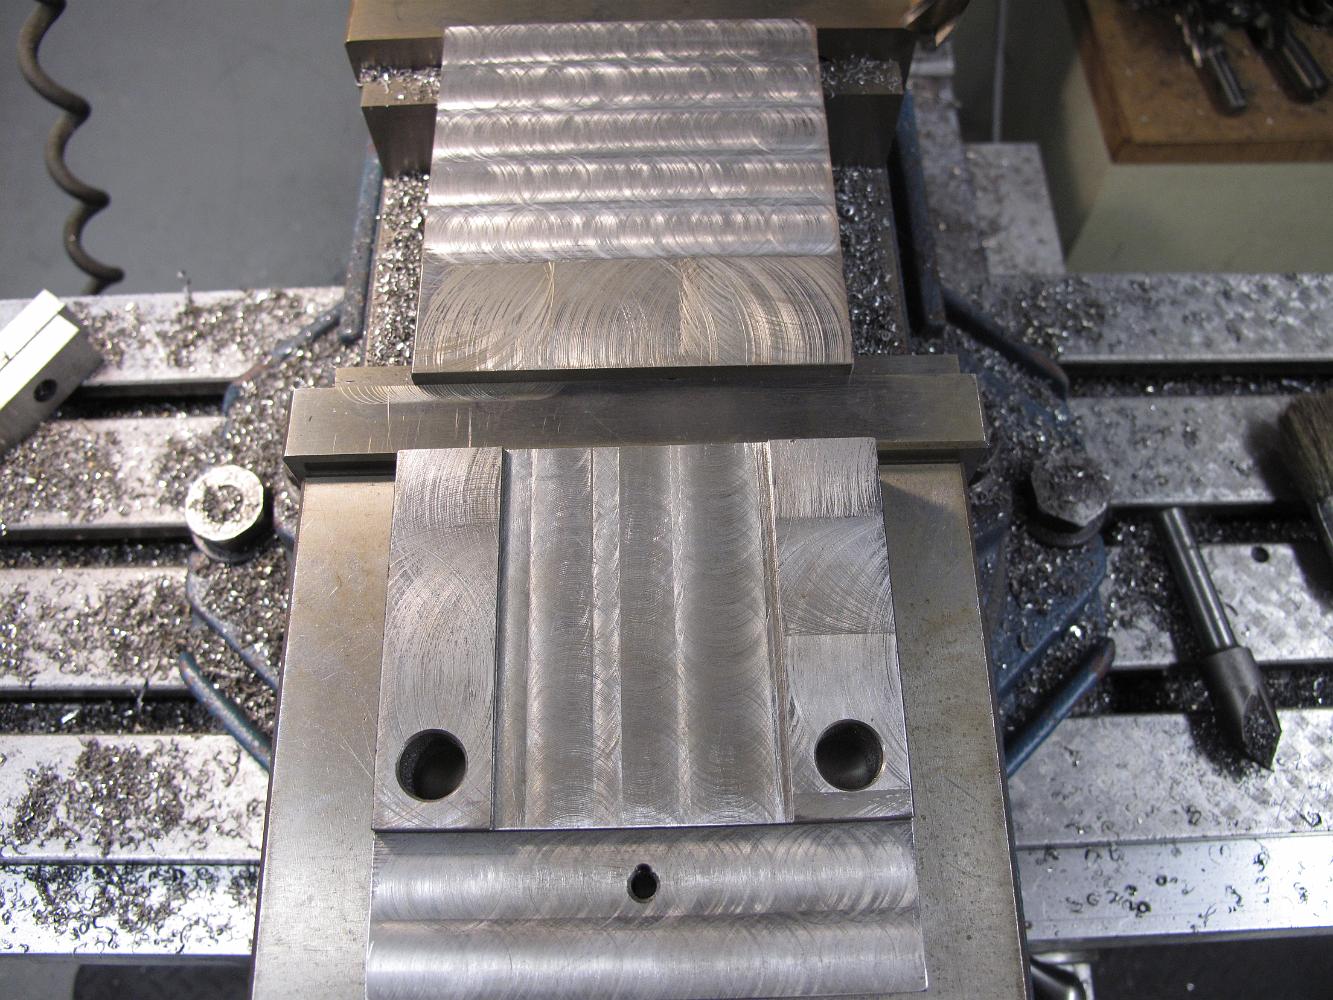
29-Oct-12 Machining the rear tender sill. We trim the ends to length and remove the casting sprue. The oval 'ears' sticking out are actually where a casting…
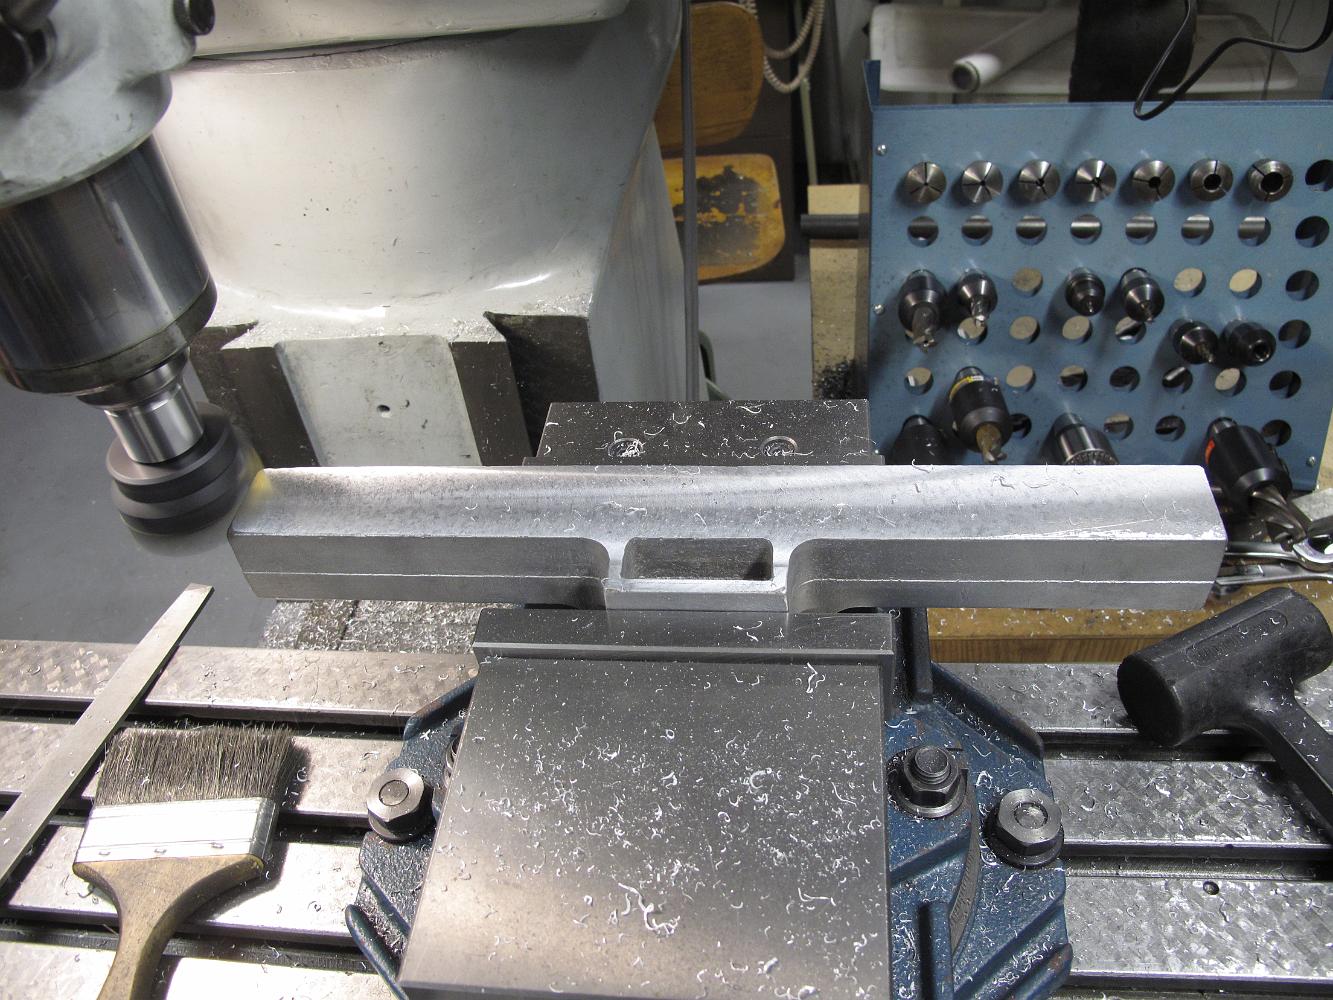
29-Oct-12 Machining the Front tender sill.
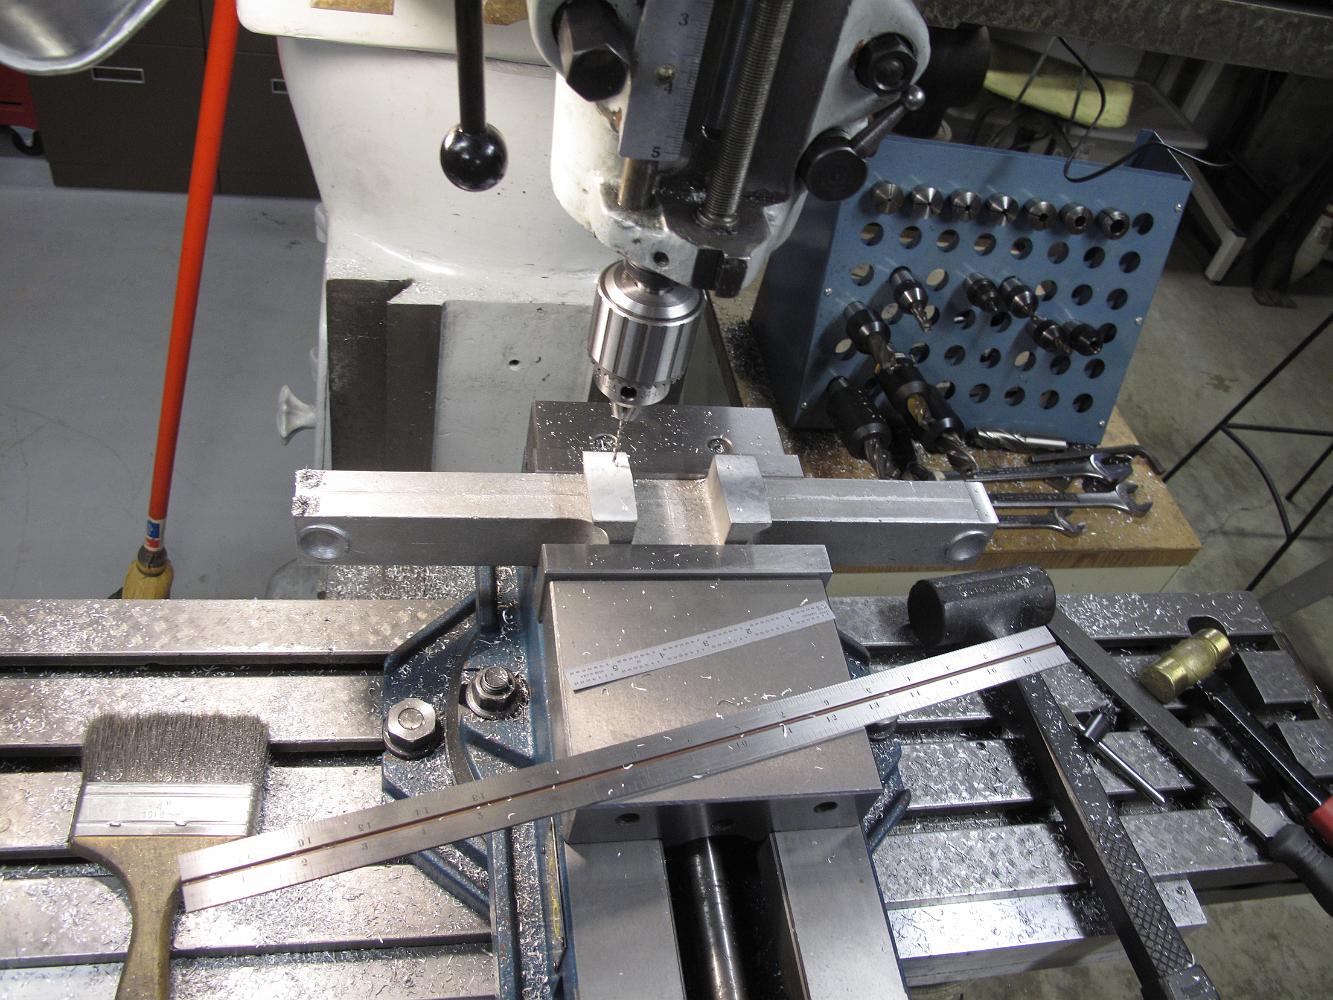
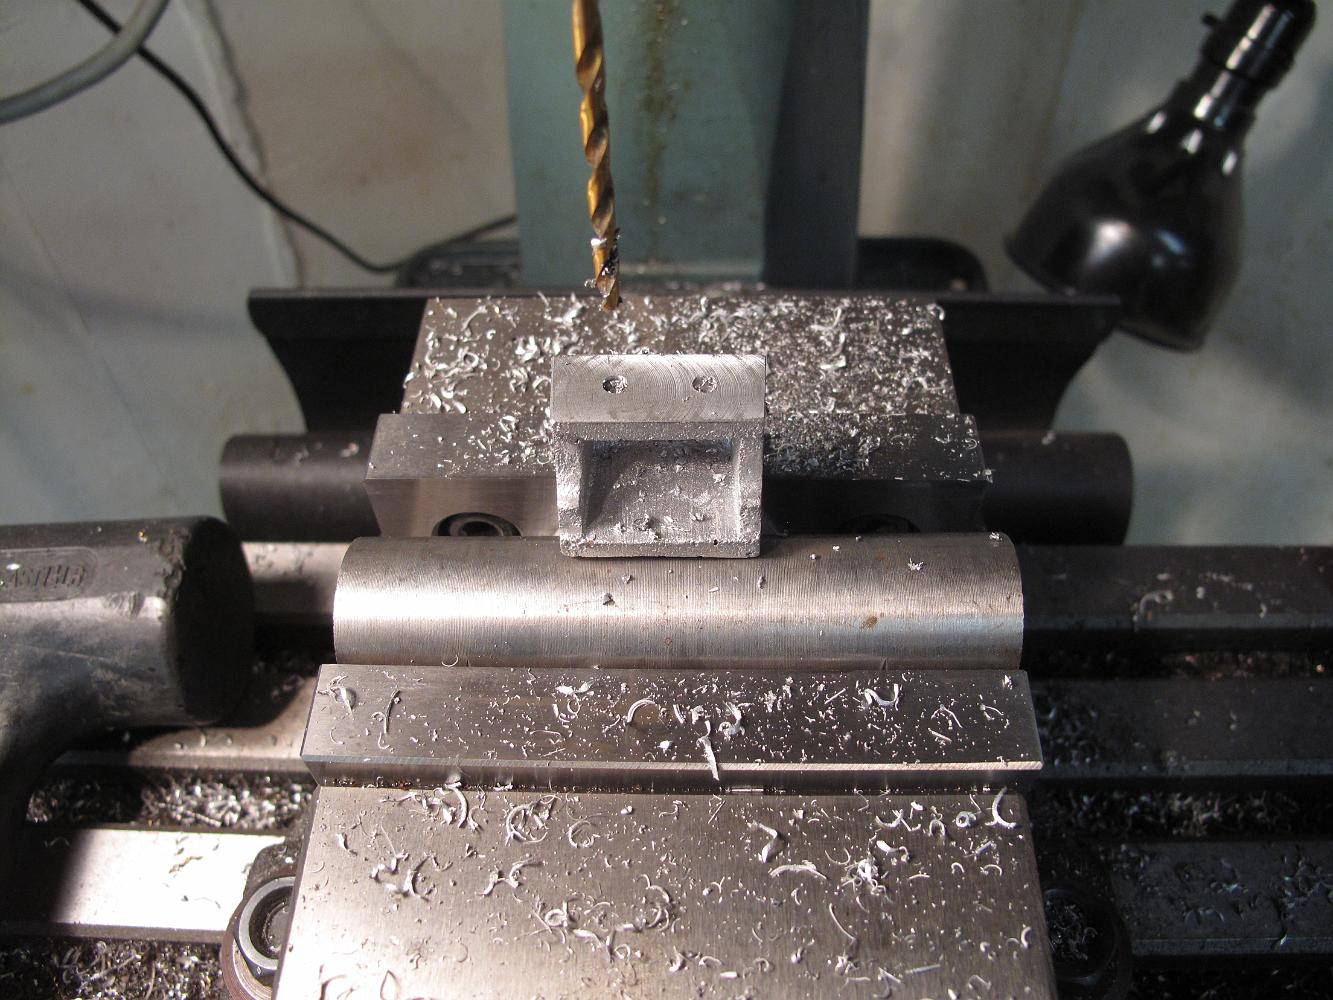
29-Oct-12 Drilling and tapping the tender steps holes, and the coupler chafing plate.
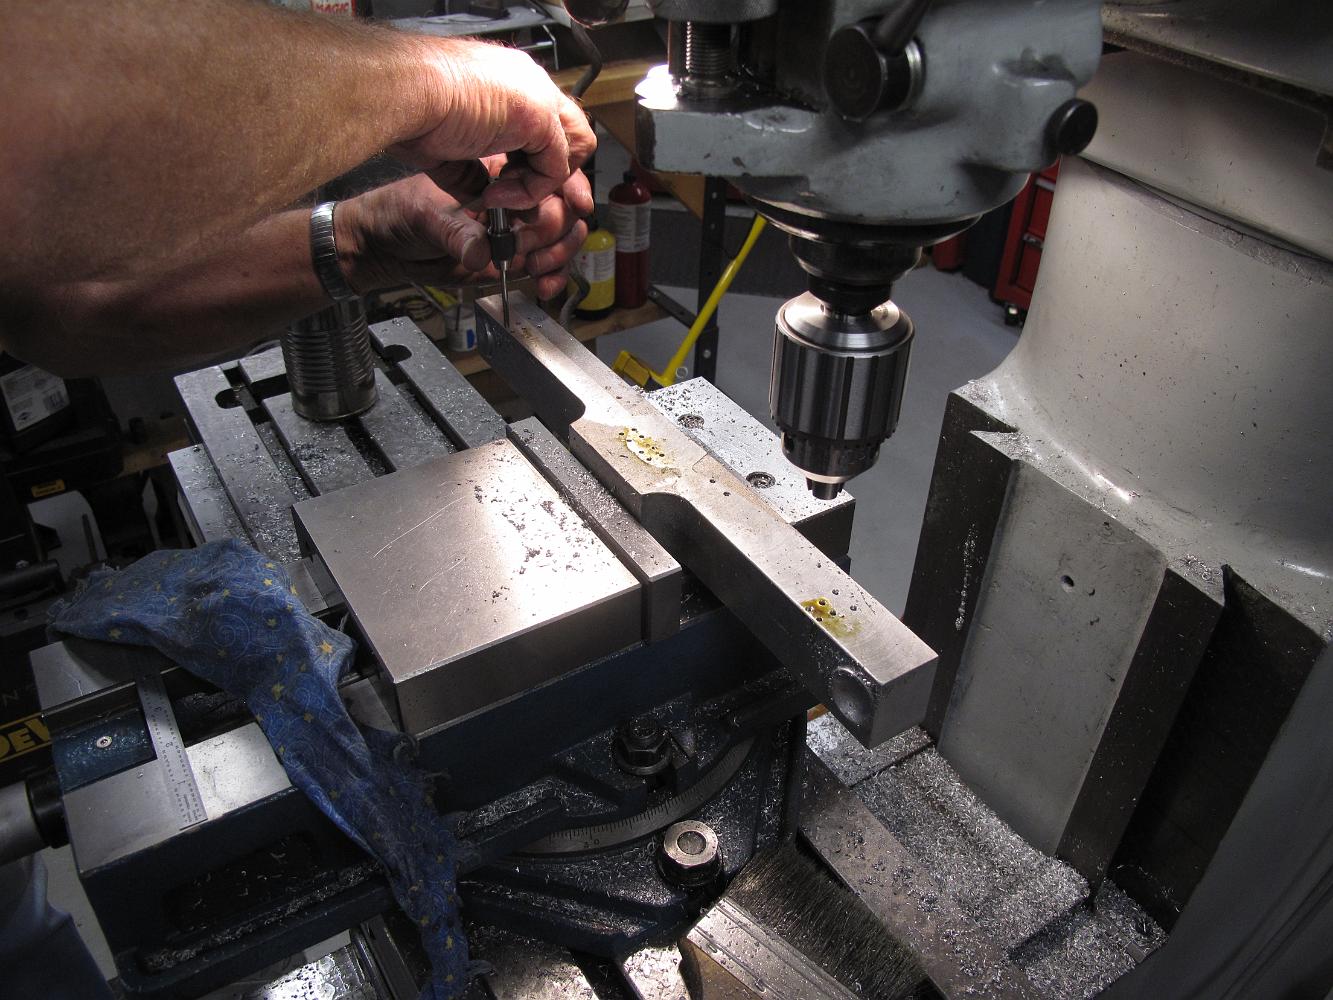
5-Nov-12 Tapping the tender mounting holes.
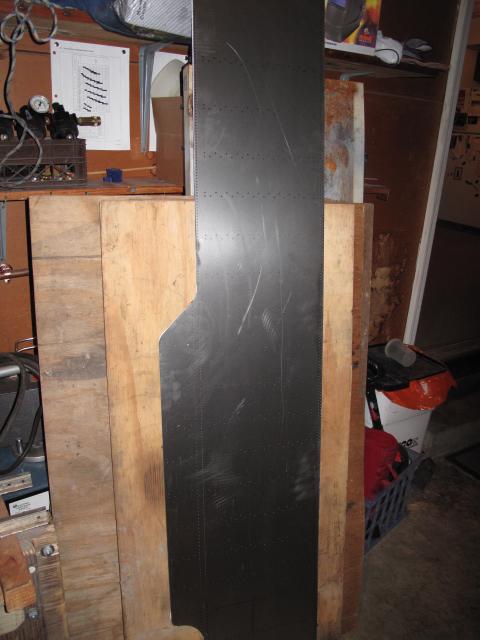
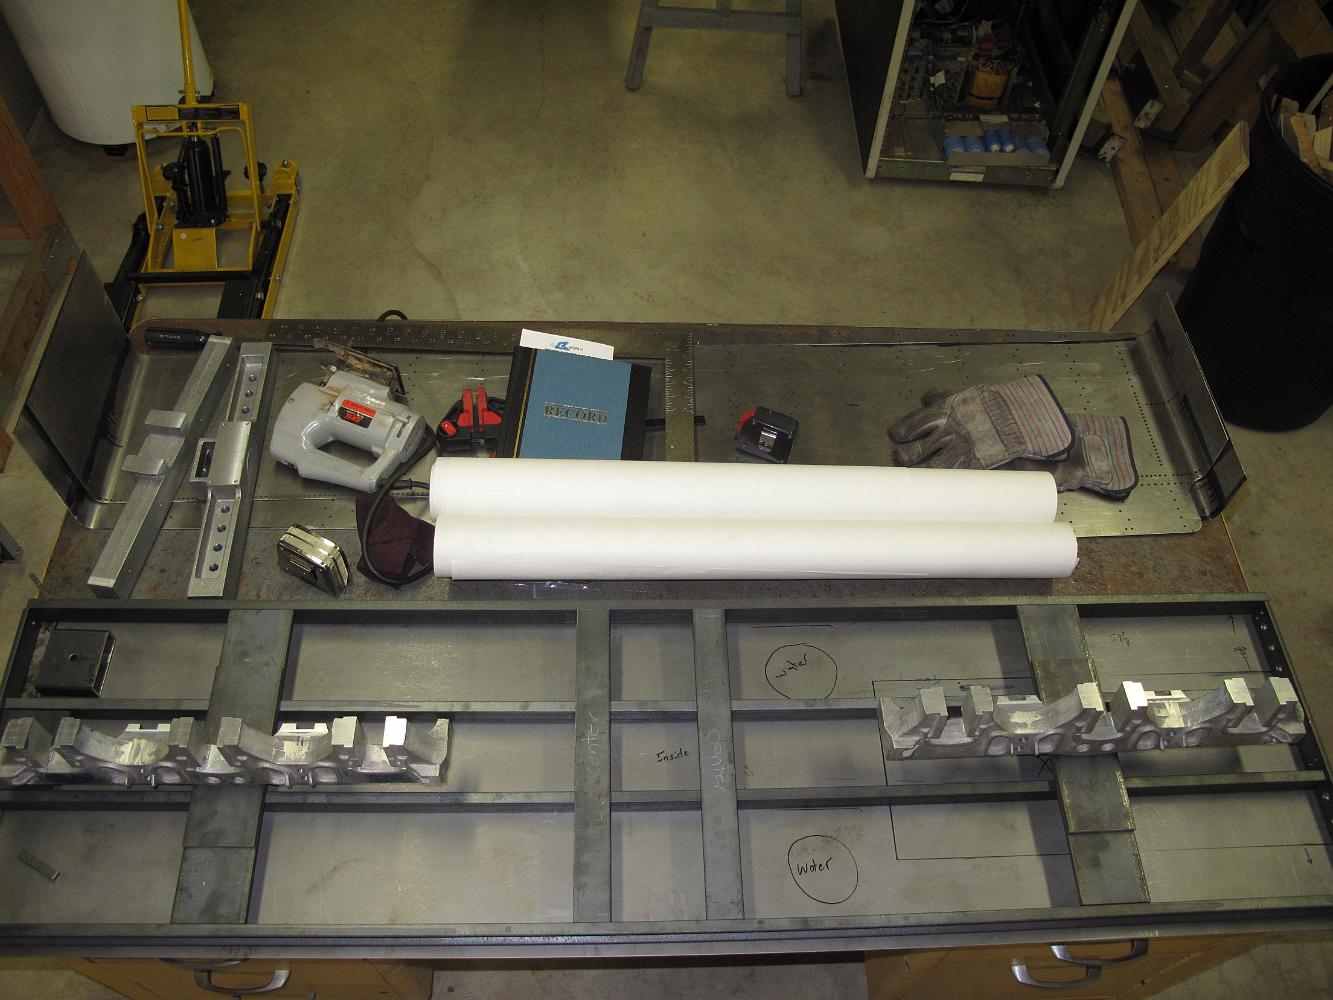
10-Nov-13 Trimming the frame pieces to length.
10-Nov-13 Trimming and drilling the frame pieces.
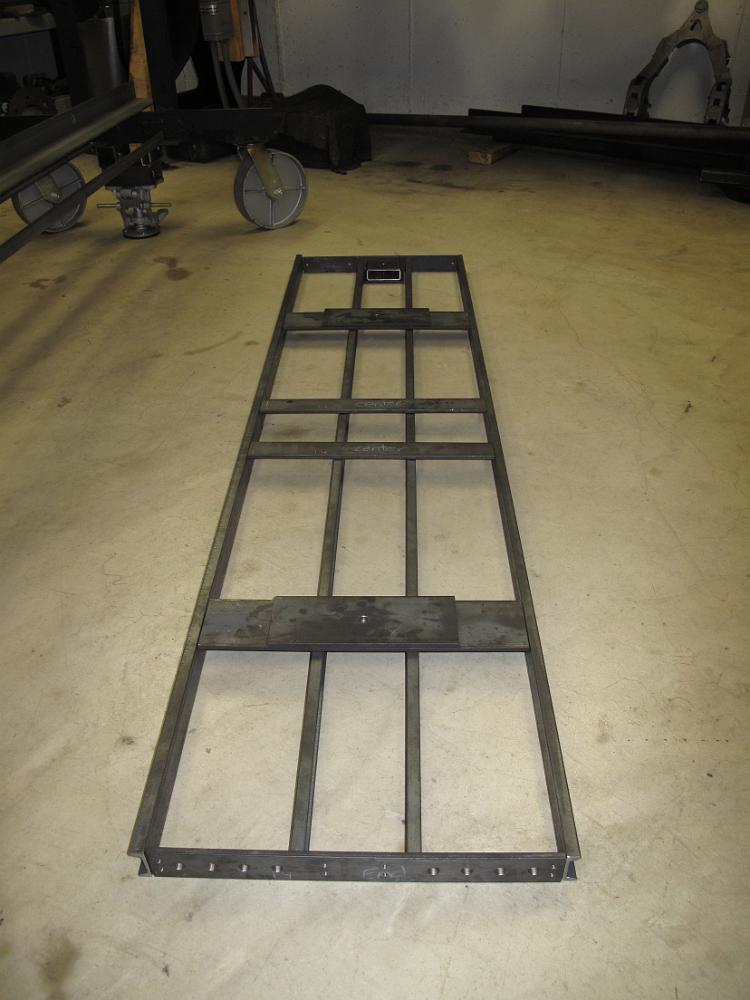
10-Nov-12 A good days progress! The tender frame pieces are cut.

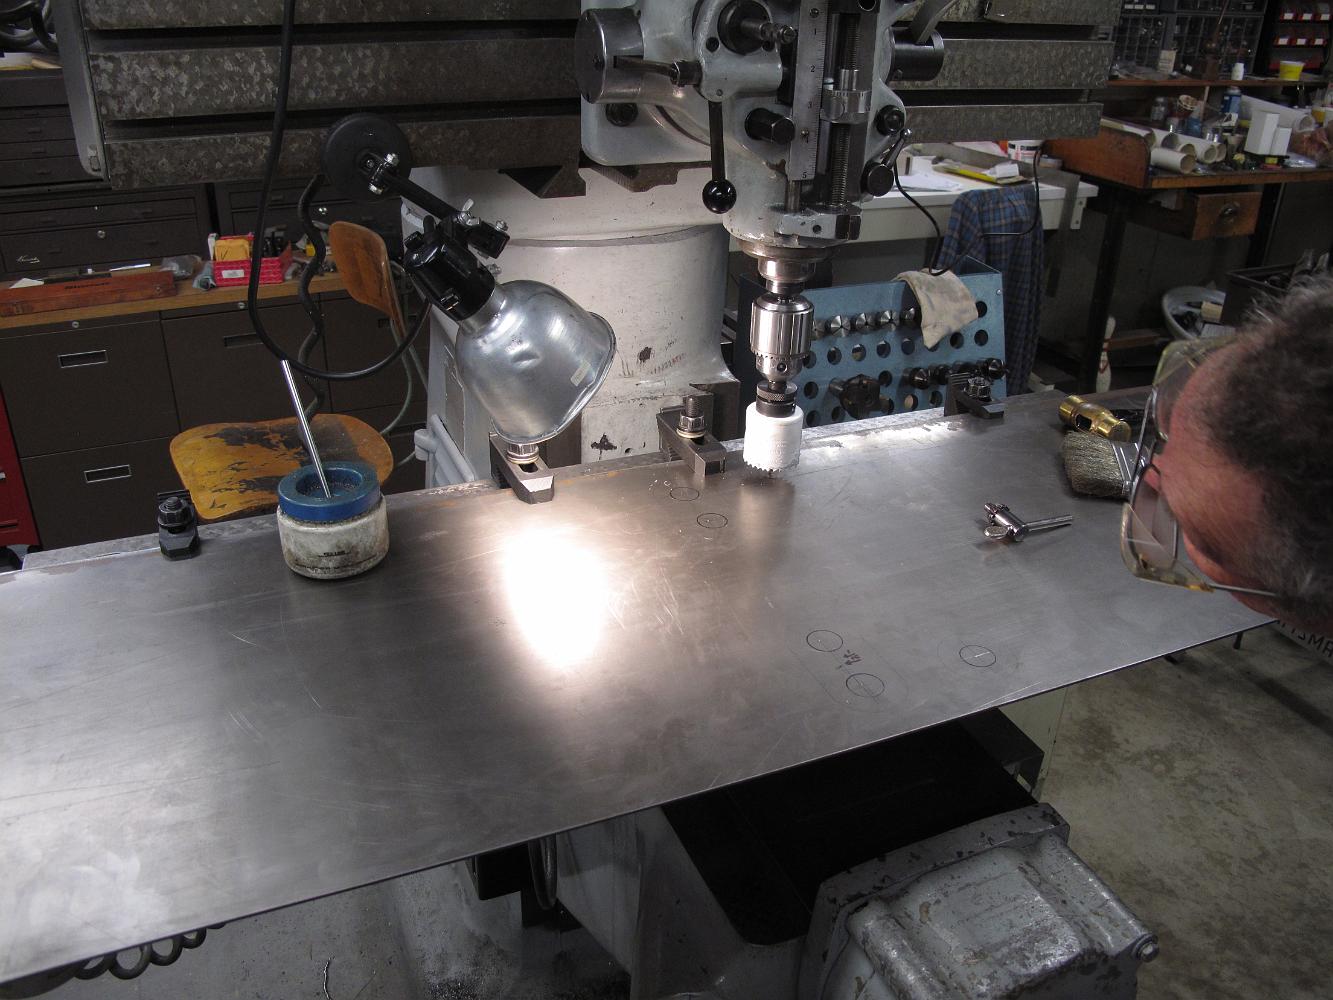
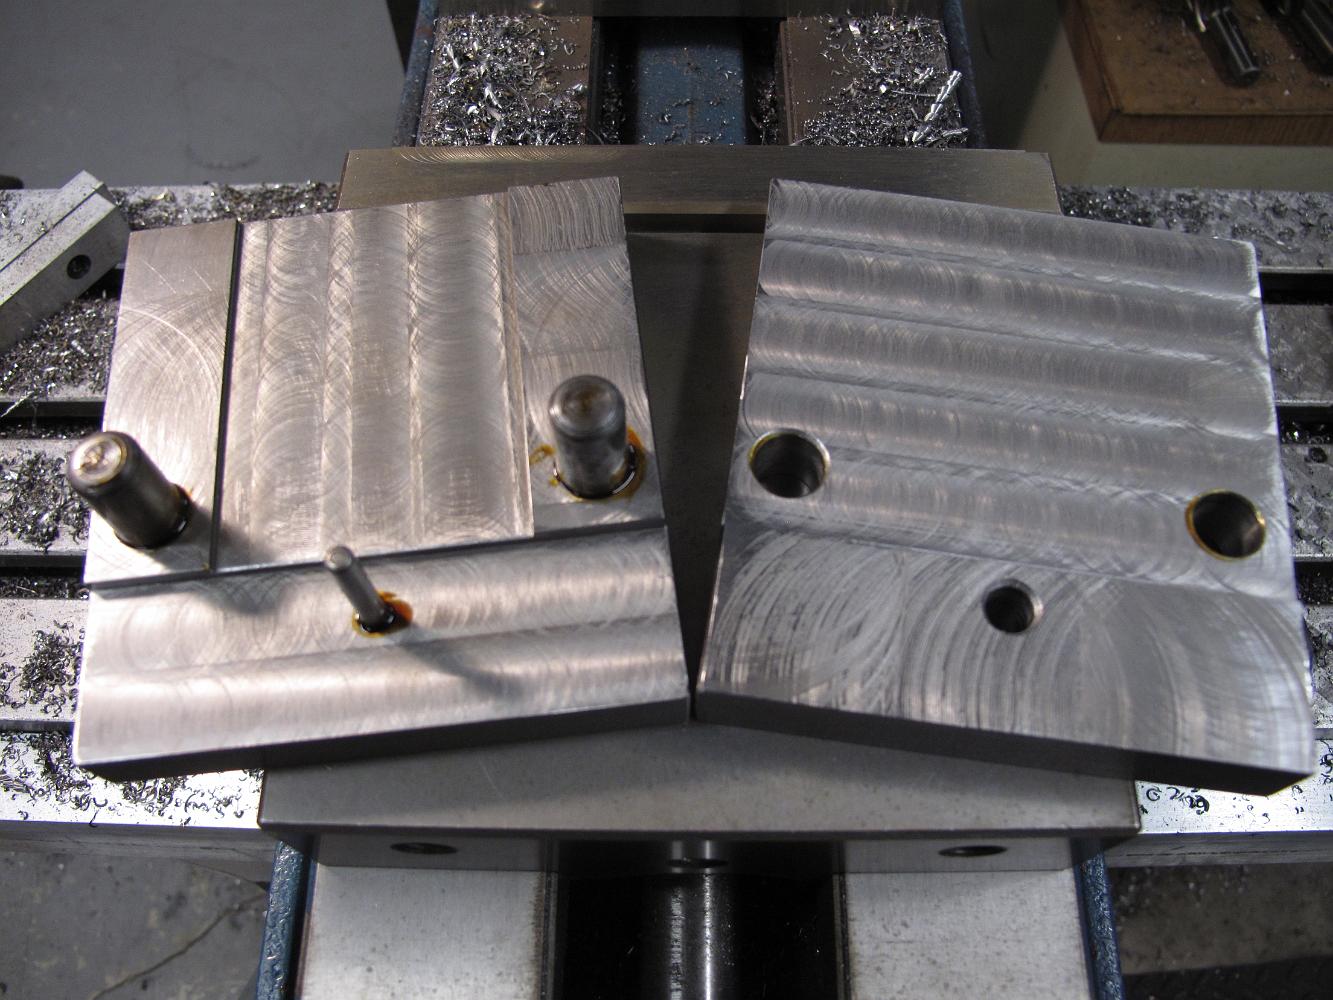
12-Nov-12 We drill water and oil holes in the front tender sill per the print.
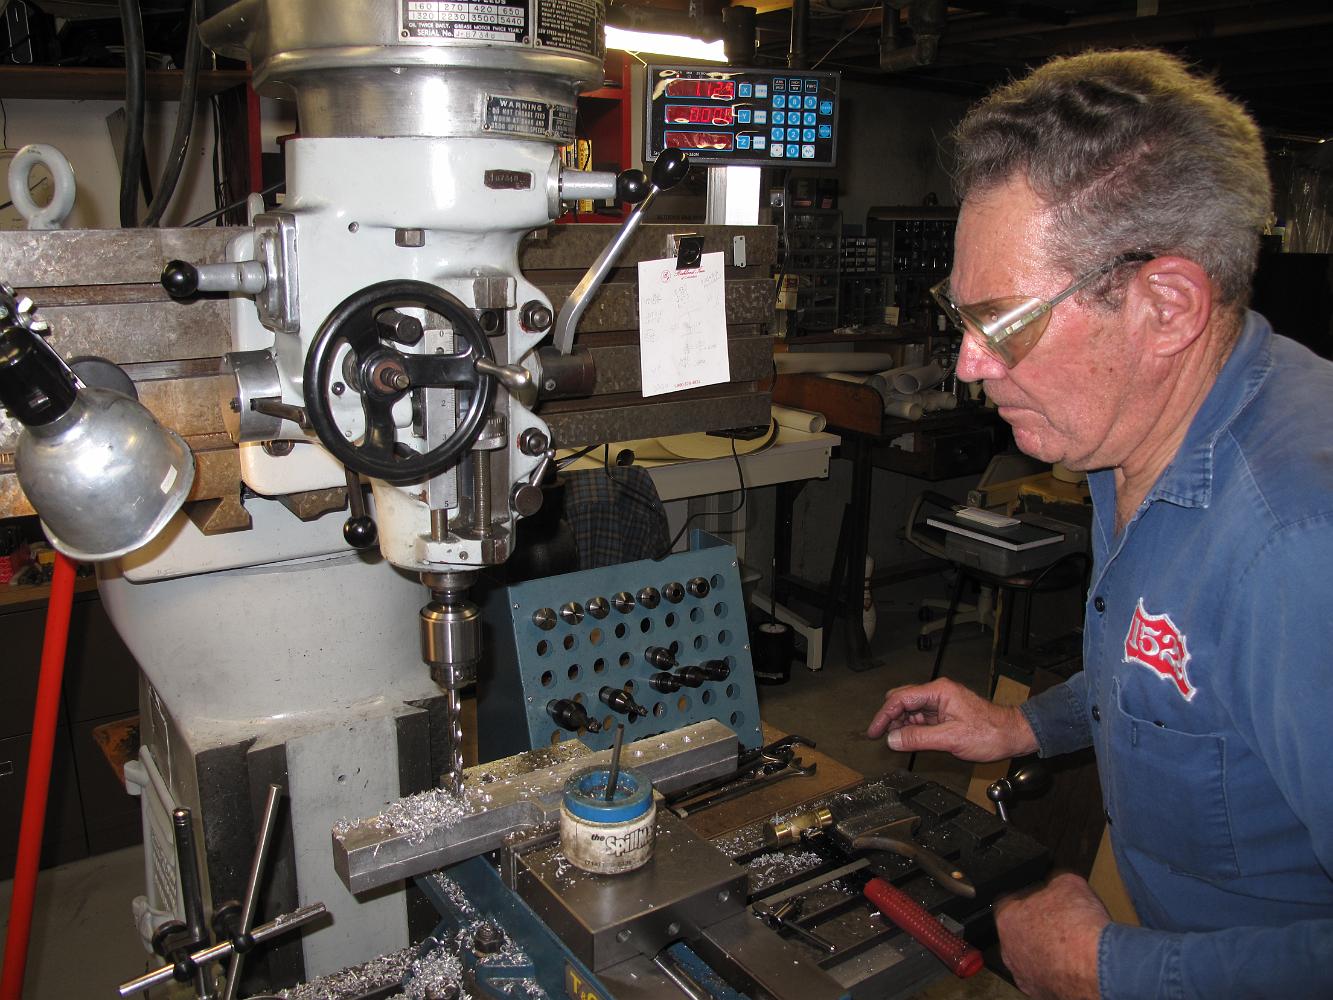
12-Nov-12 The master at the controls.
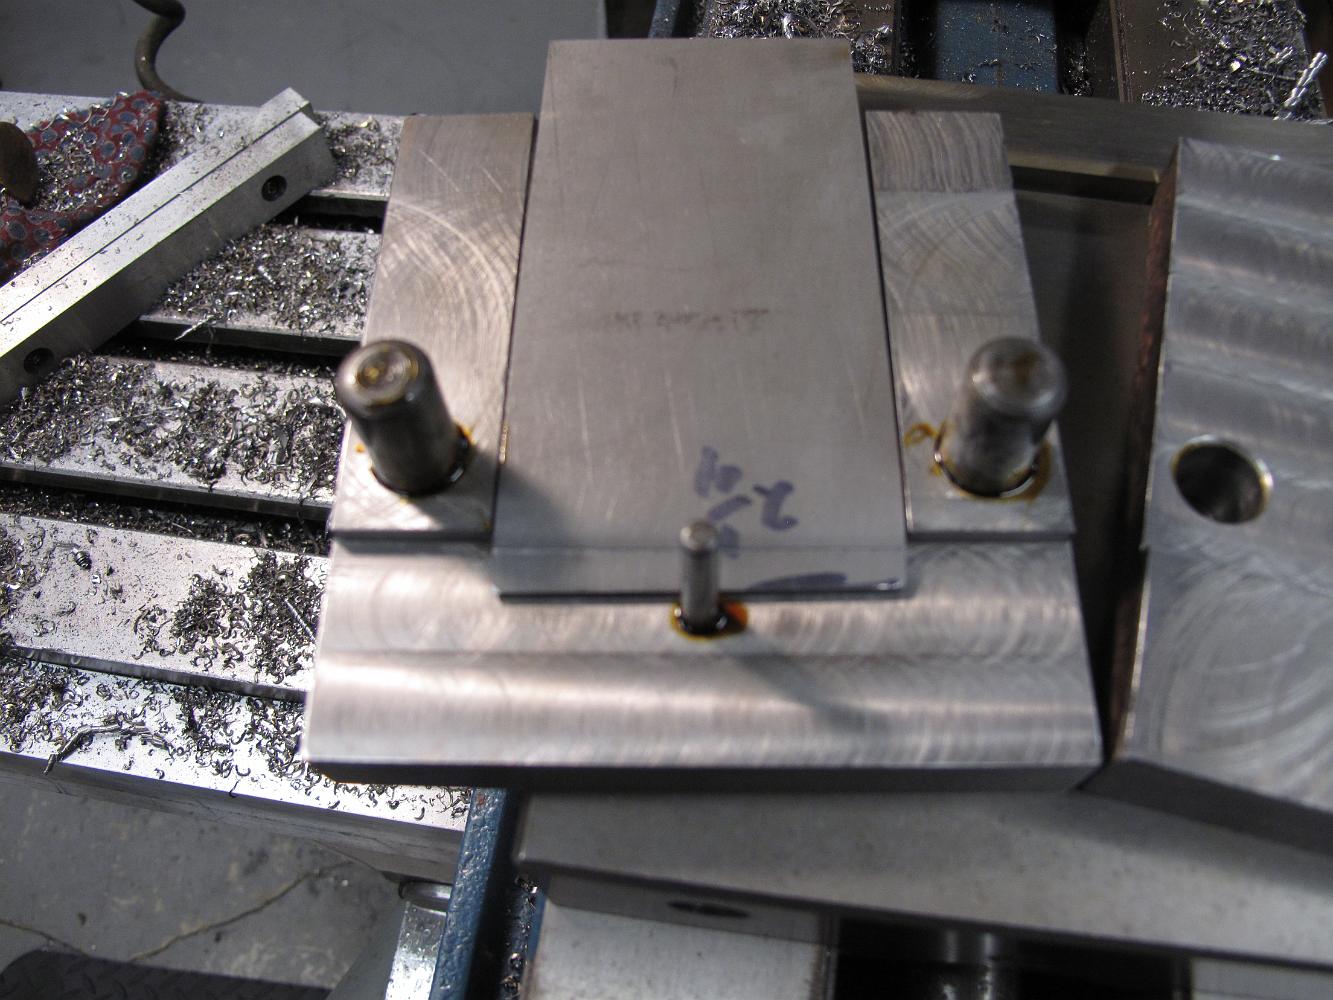
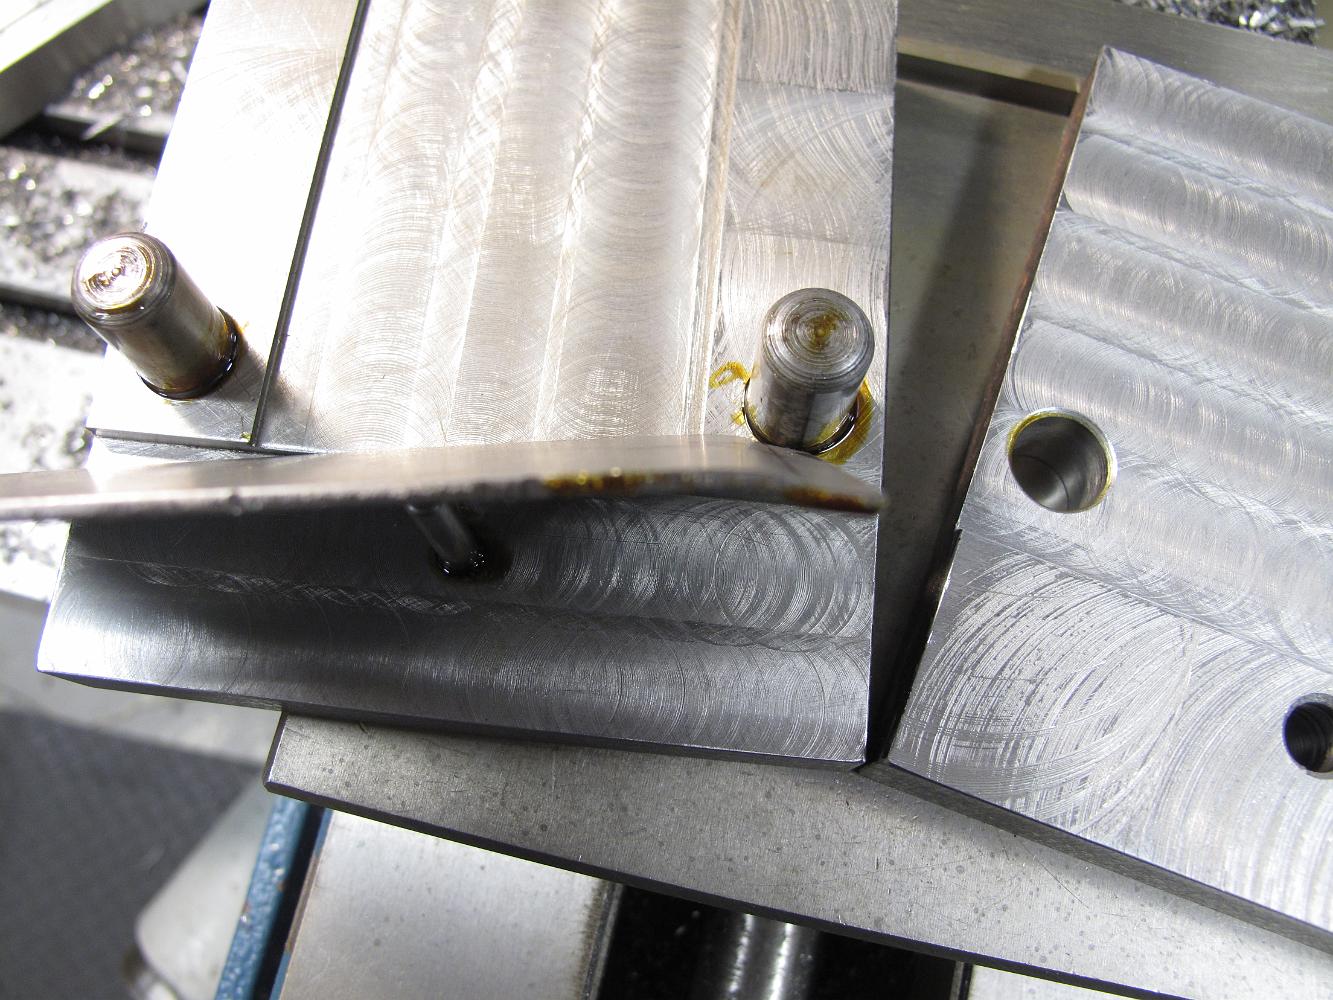
12-Nov-12 Drilling the tender steps, using a round bar to help clamp the awkward piece.
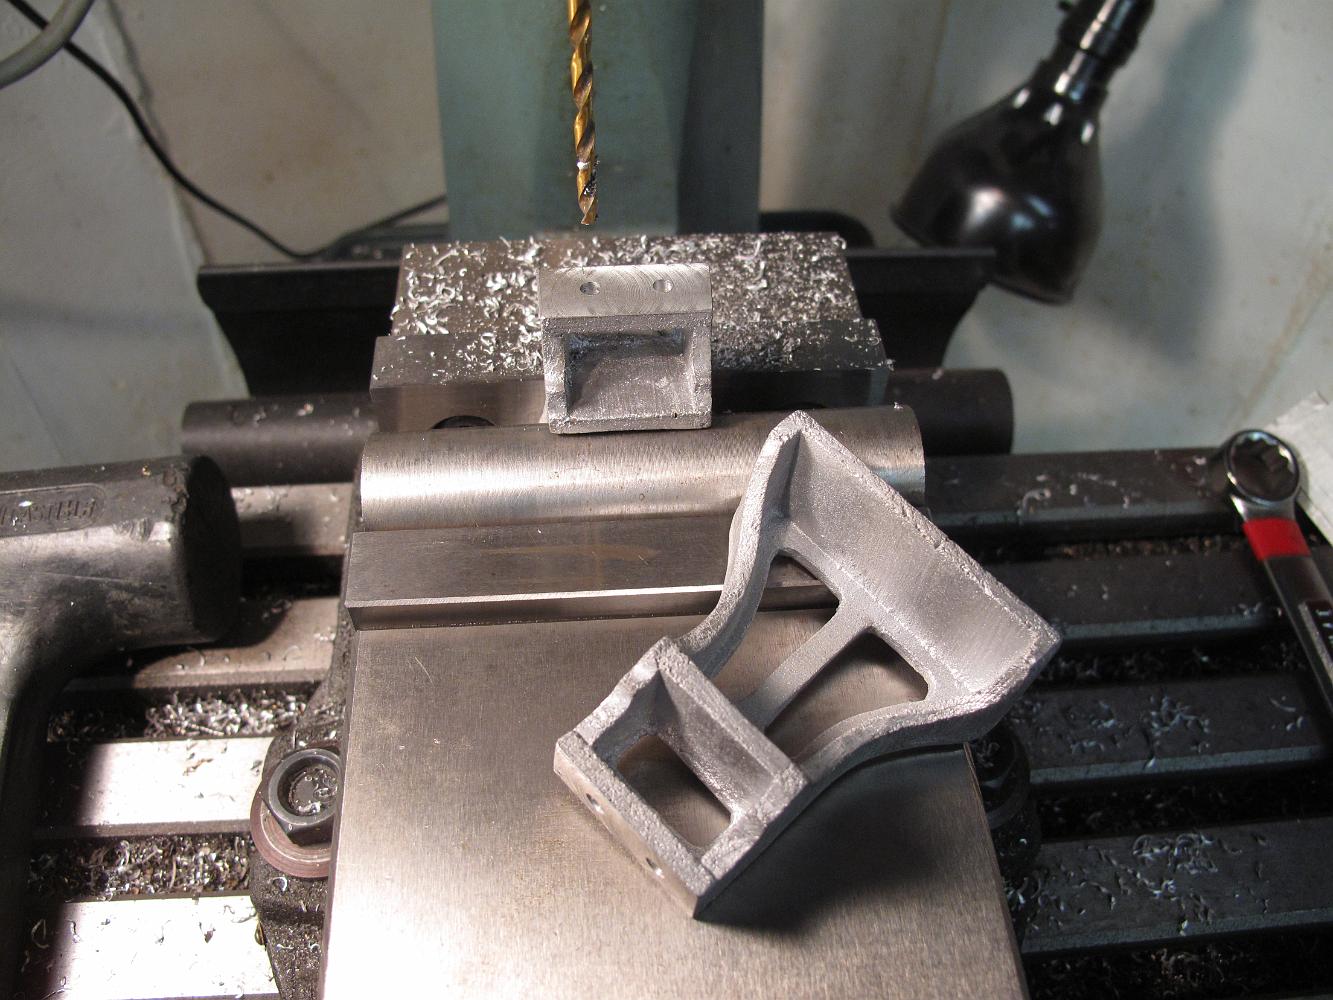
12-Nov-12 I hand dress the casting with a file, machining only the mounting flat and holes.
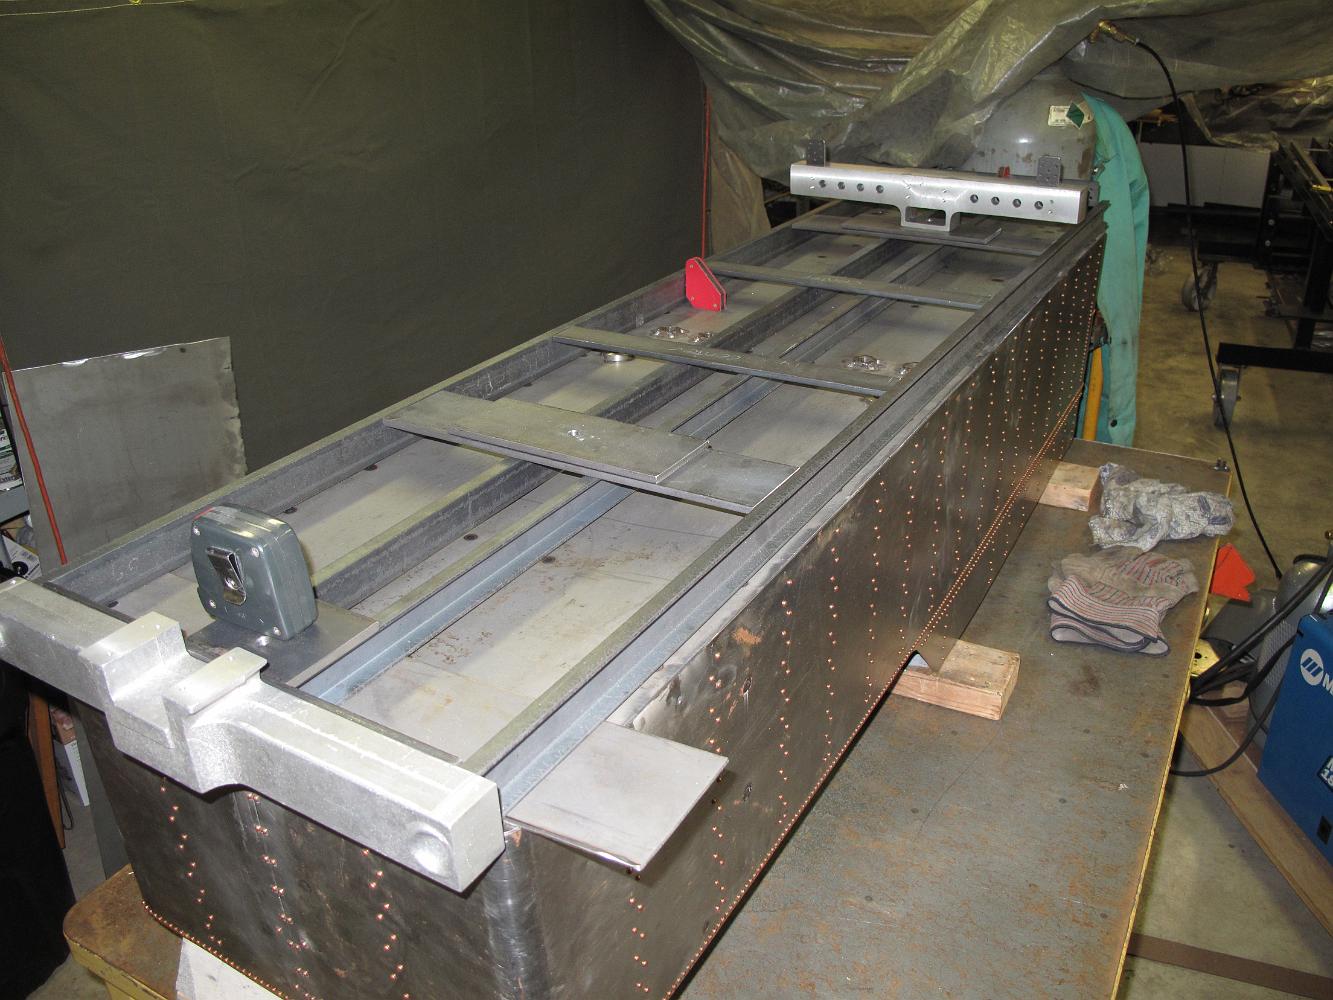
25-Nov-13 A trial layout of the tender trucks on the frame.
4-Mar-13 I borrowed Tim's bending jig and put the bends into the side sheets. Unfortunately, they did not end up exactly where I wanted -- they are about 1"…
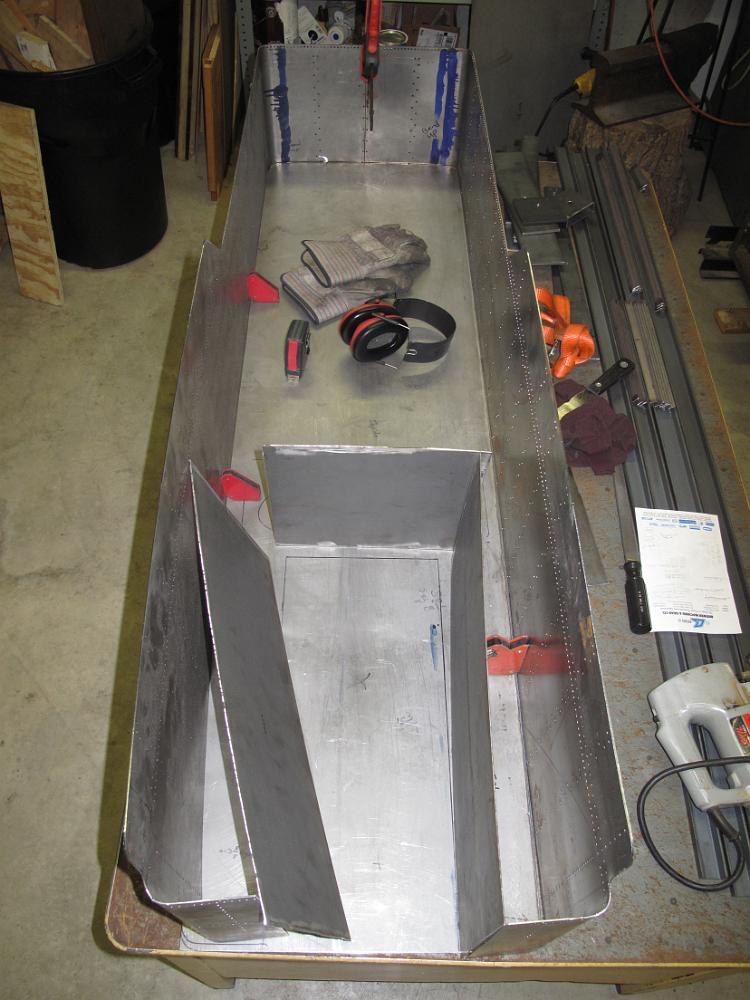
4-Mar-13 Trial assembly of tender tank. I estimate it will hold 30 gallons of water.
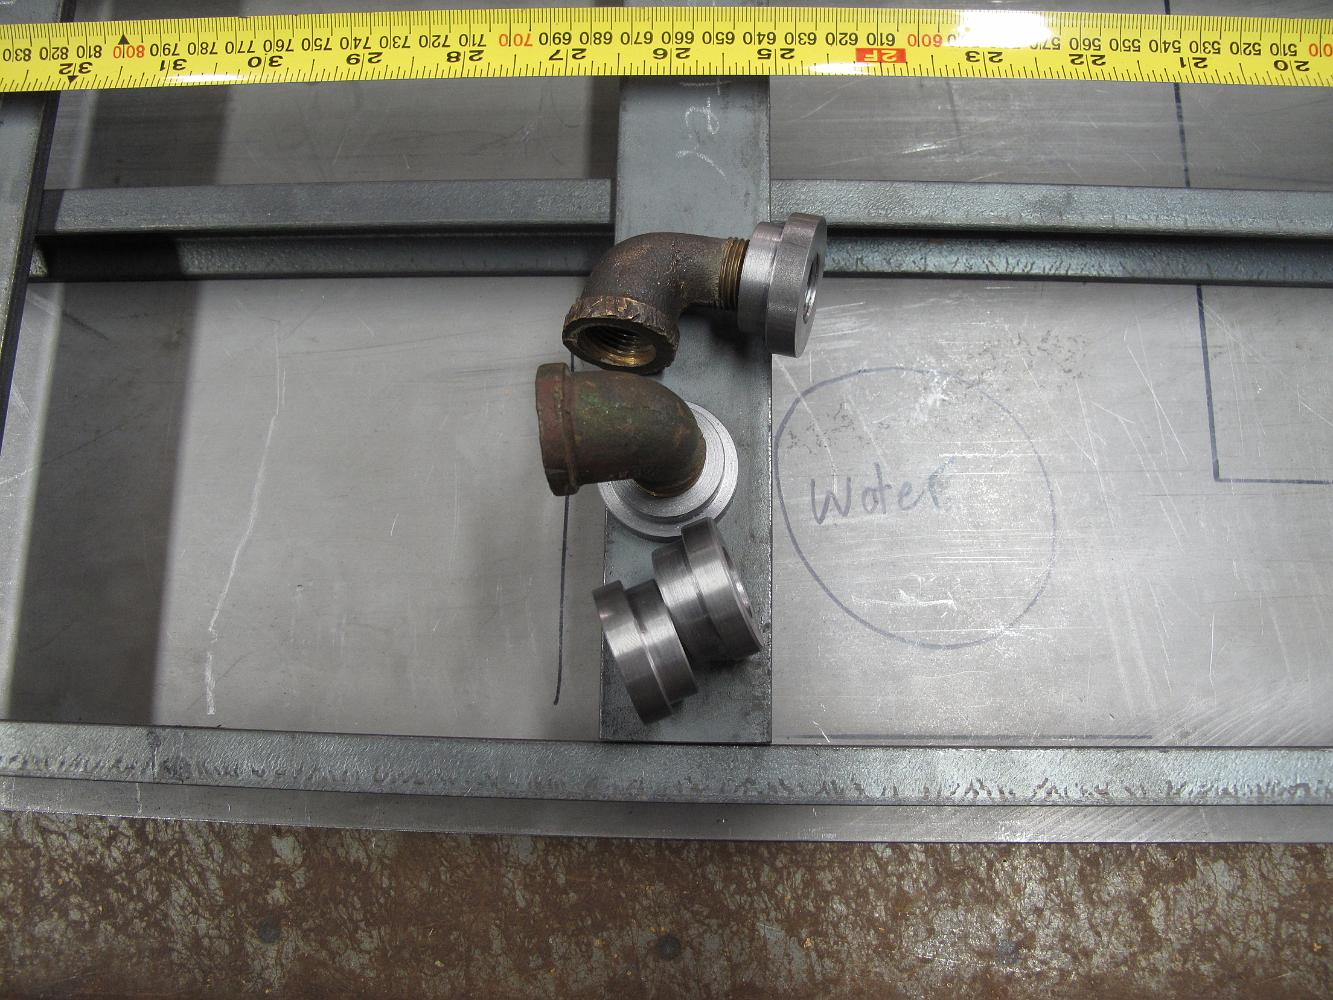
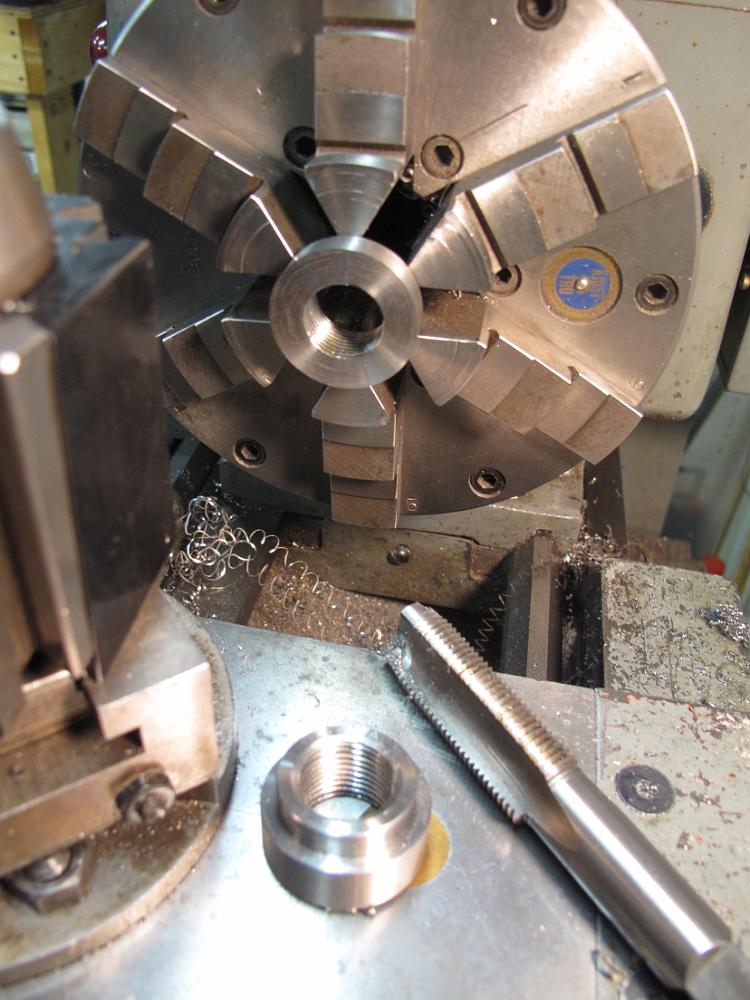
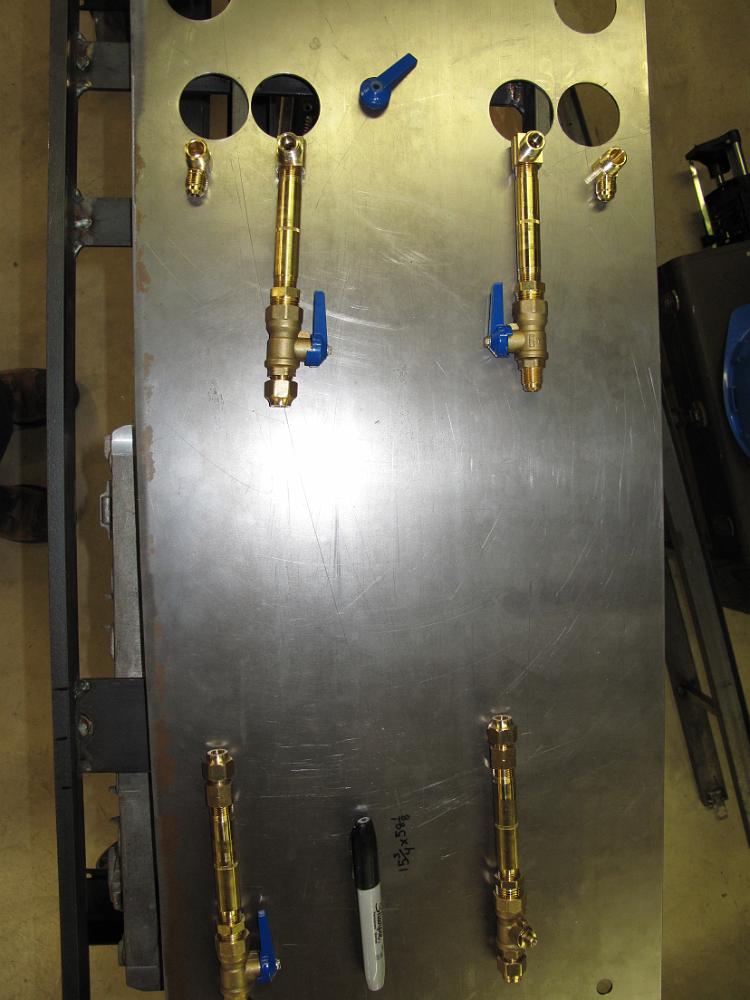
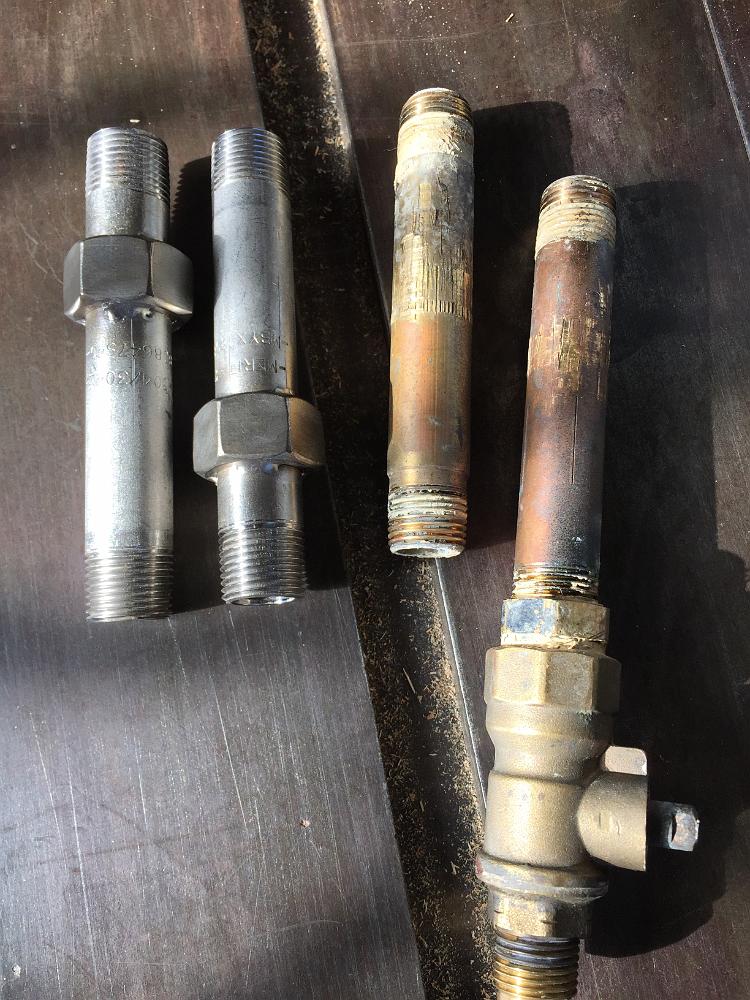
1-Apr-2013 Machined 3-8 NPT flange fittings for the water ports. I later found a source of weldable flanges at a reasonable price, I could have saved me several…
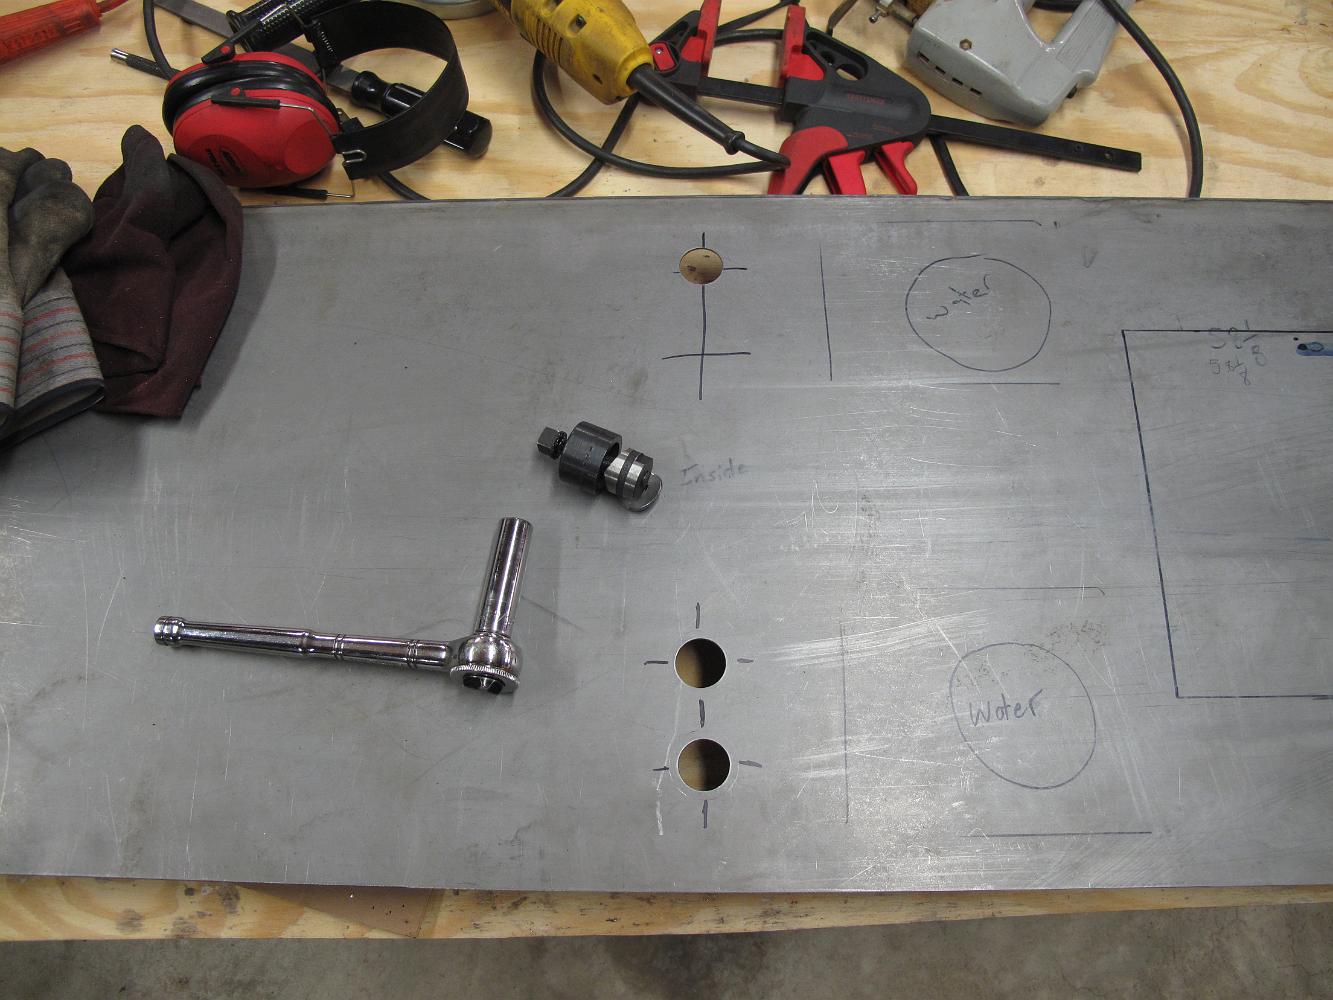
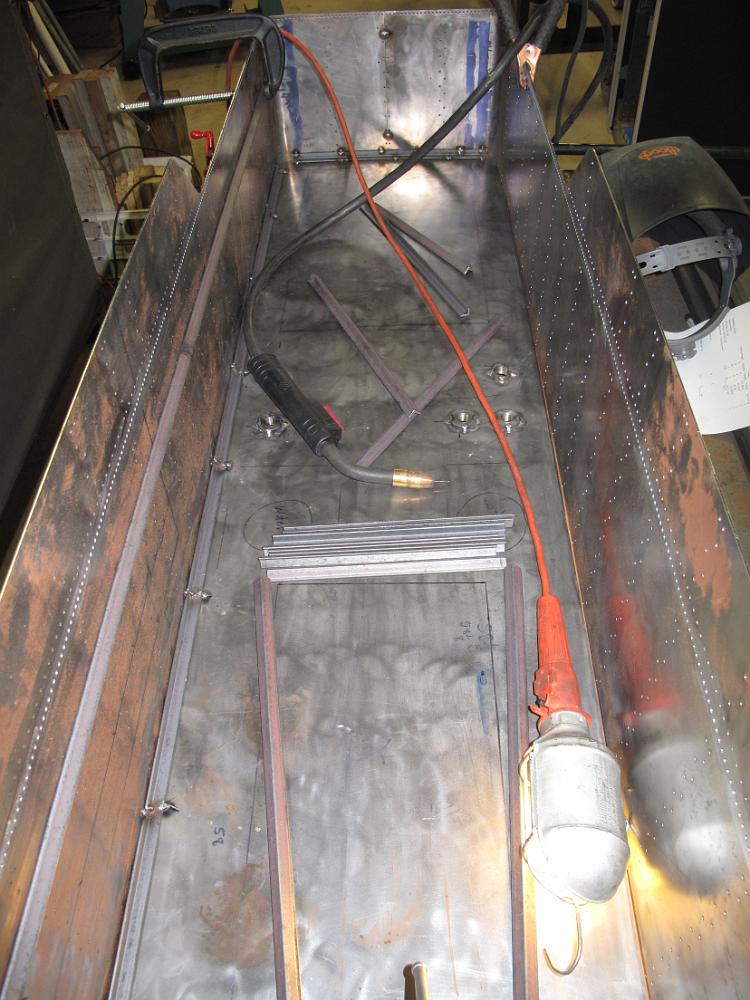
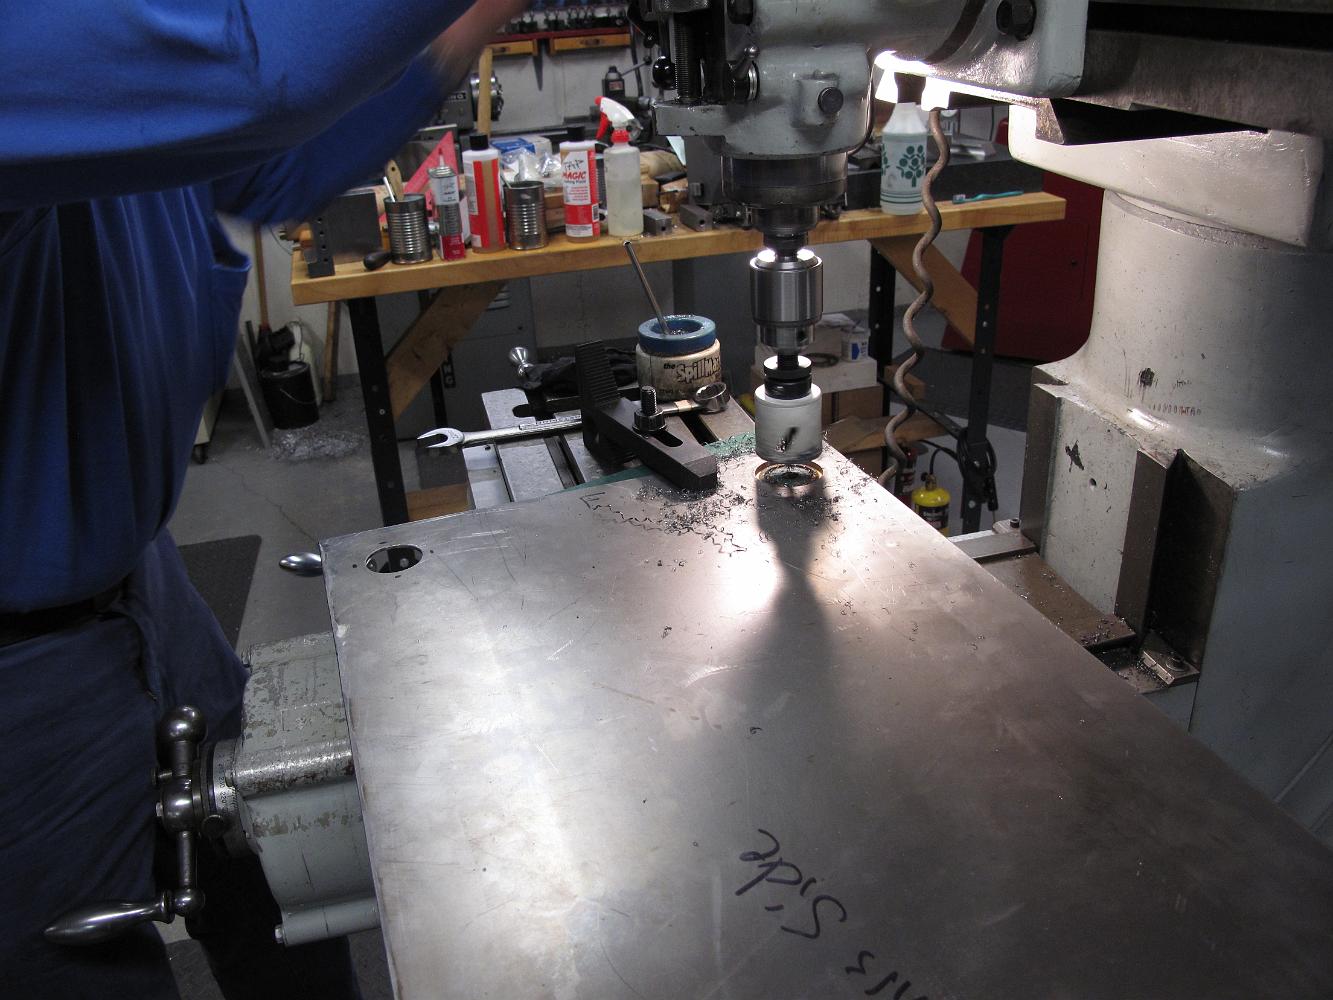
8-Apr-2013 Using the handy electrical knockout hole cutter, I put four holes in the tender tank floor.
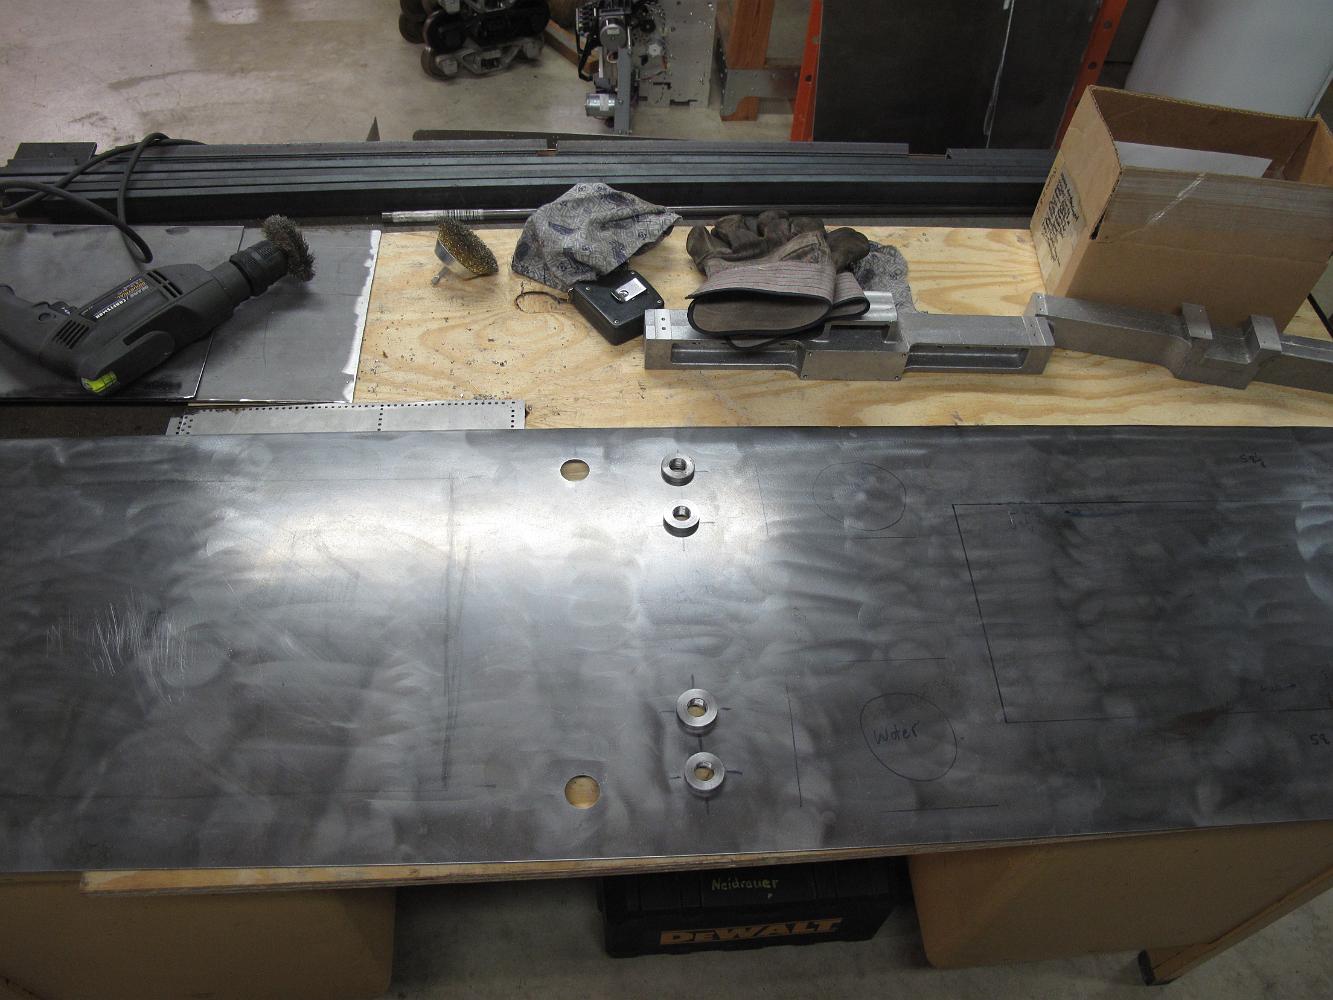
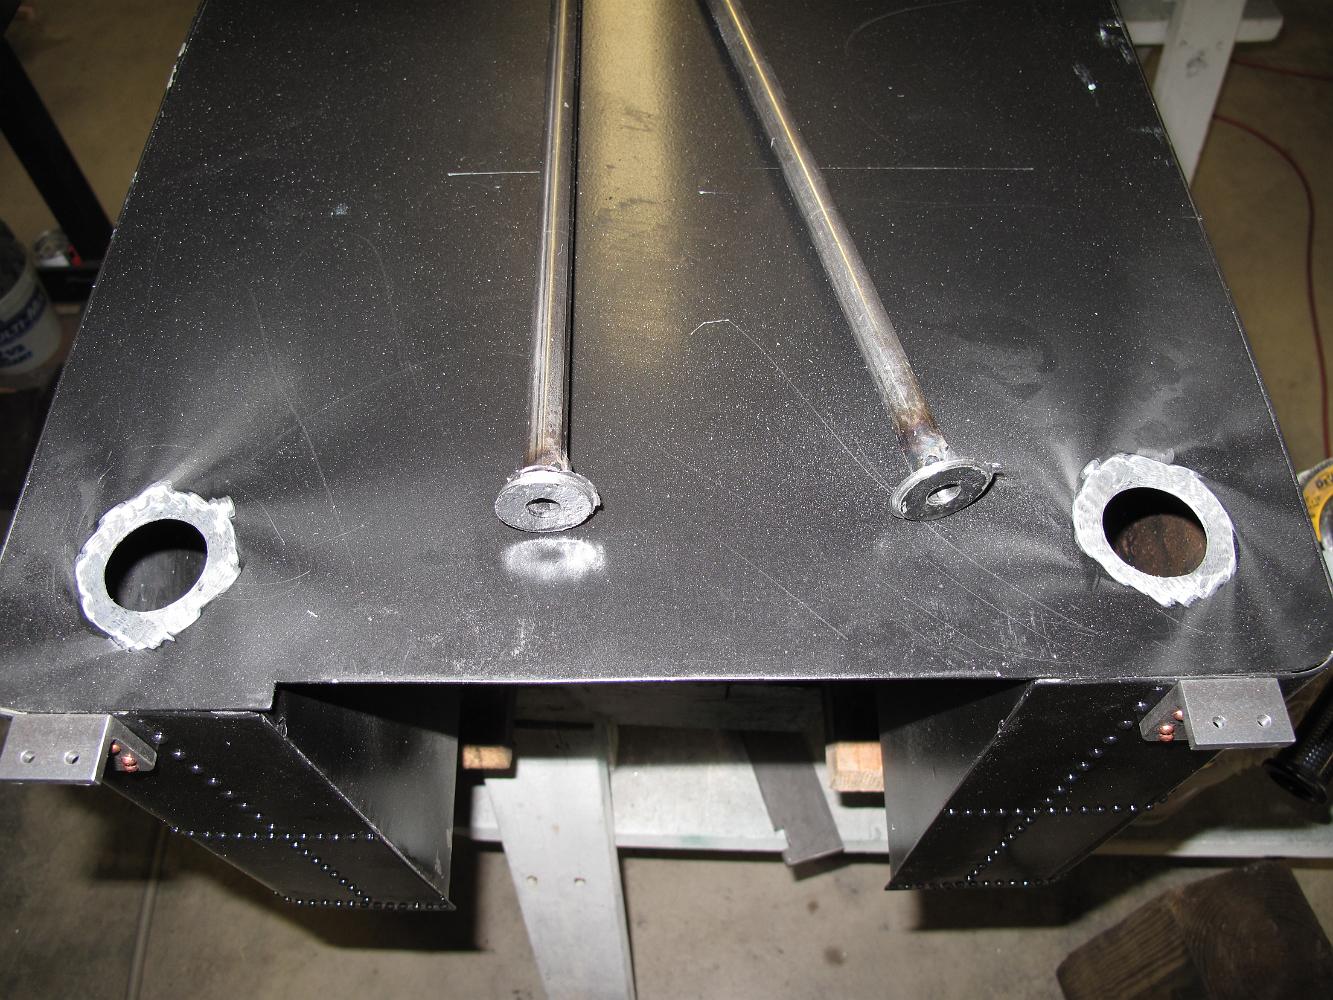
6-May-2013 Two more holes in the tender tank bottom, for the drains. I've cleaned up the surface and am ready to weld the flanges in.
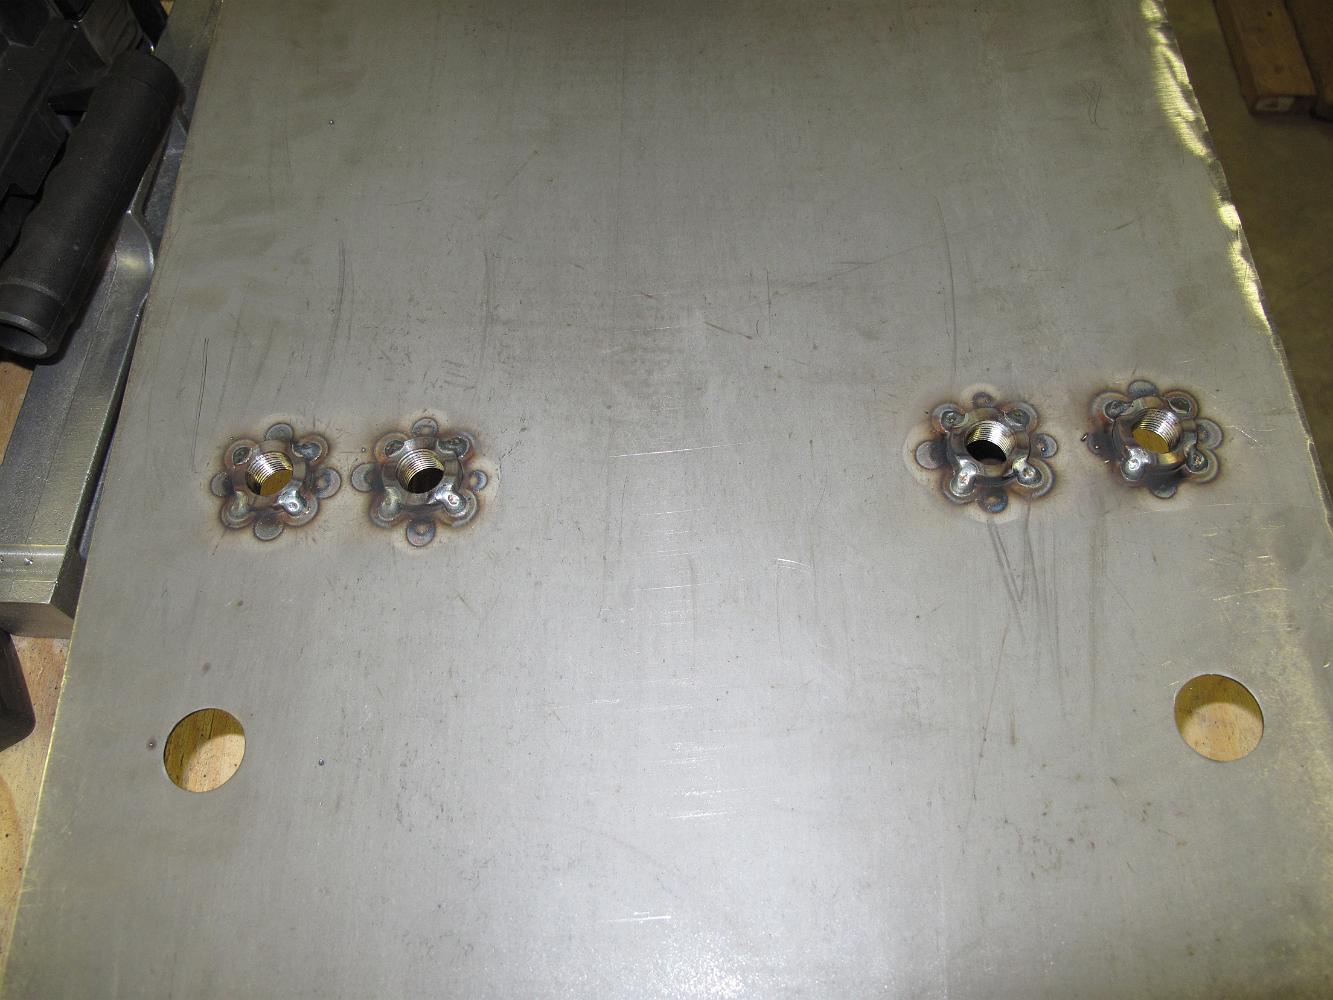
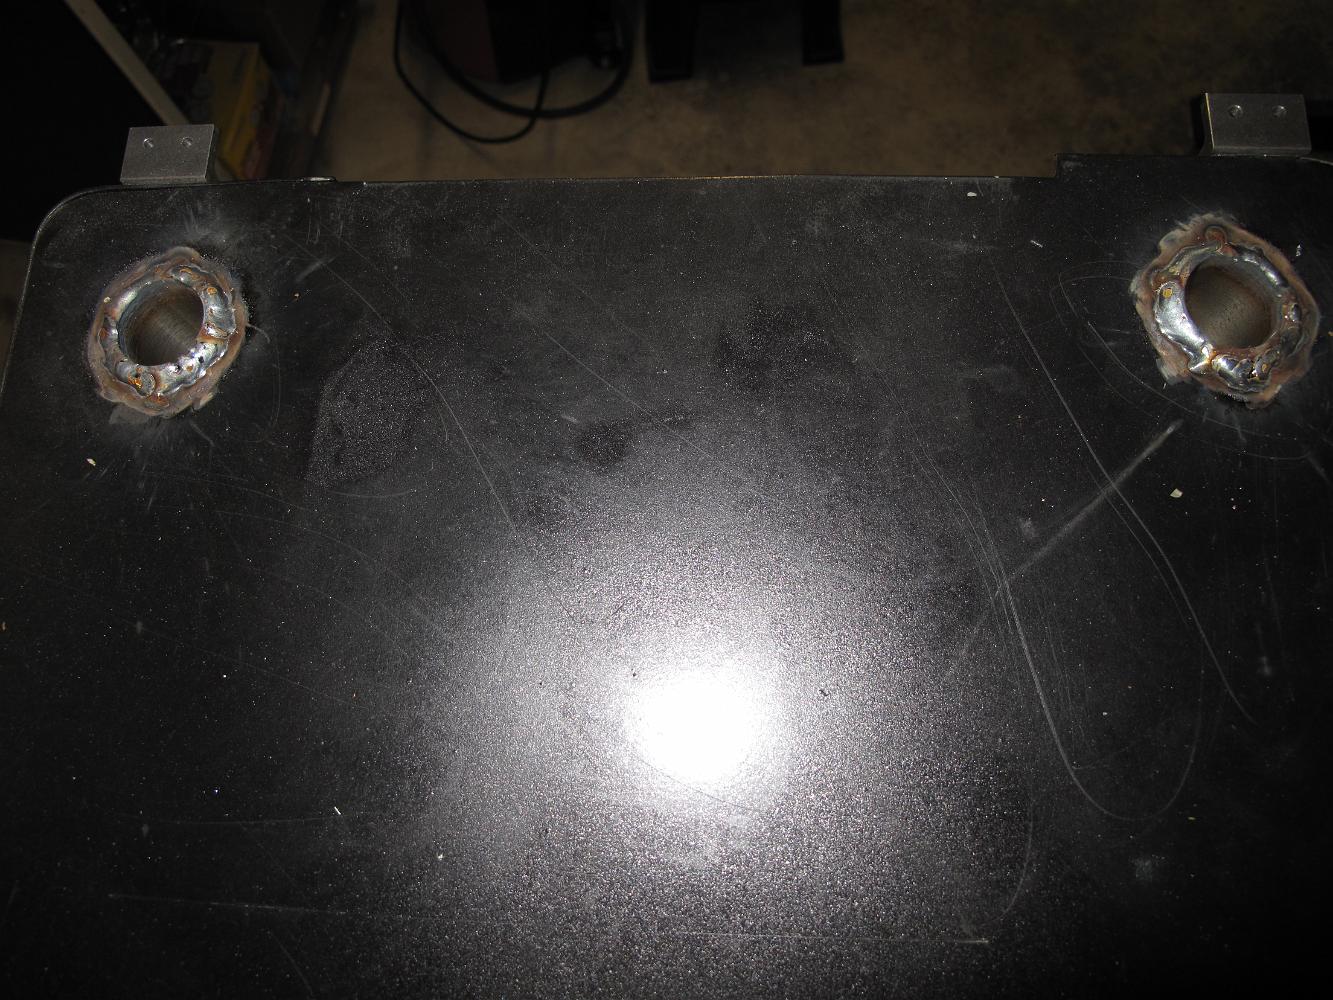
13-May-2013 The water flanges welded in place. I have not fillet welded all around to create a leak proof seal, I will later apply gas tank sealer to seal the…
13-May-2013 Having settled on a design for the drain plugs, Bill turns and taps two flanges out of stainless steel. The are tapped with straight 1/2"-13…
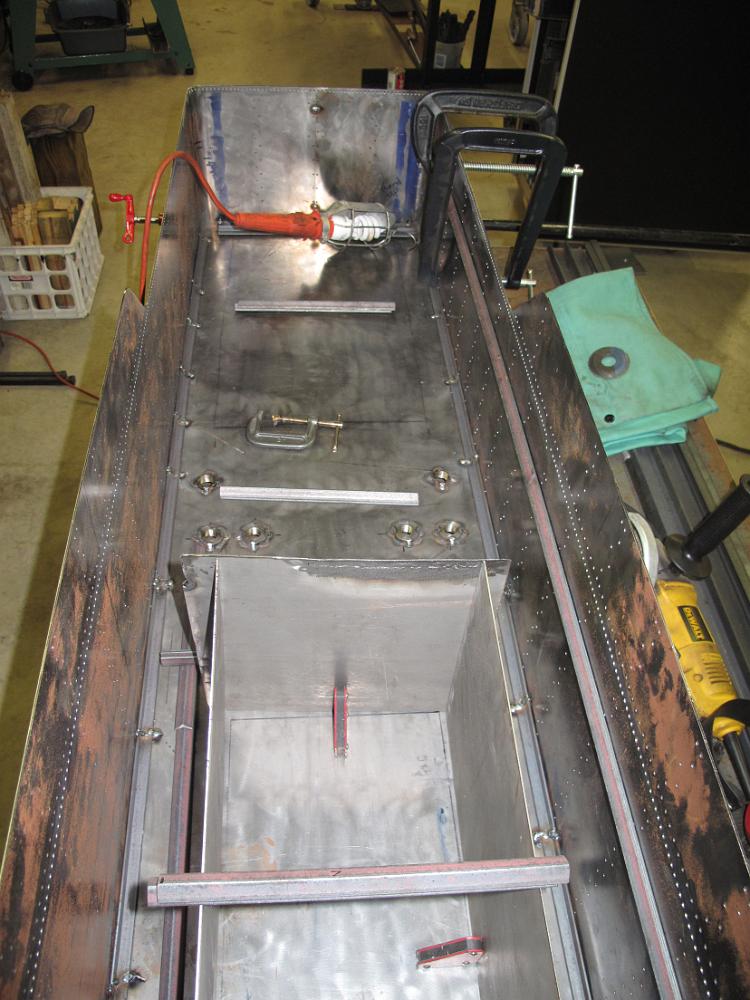
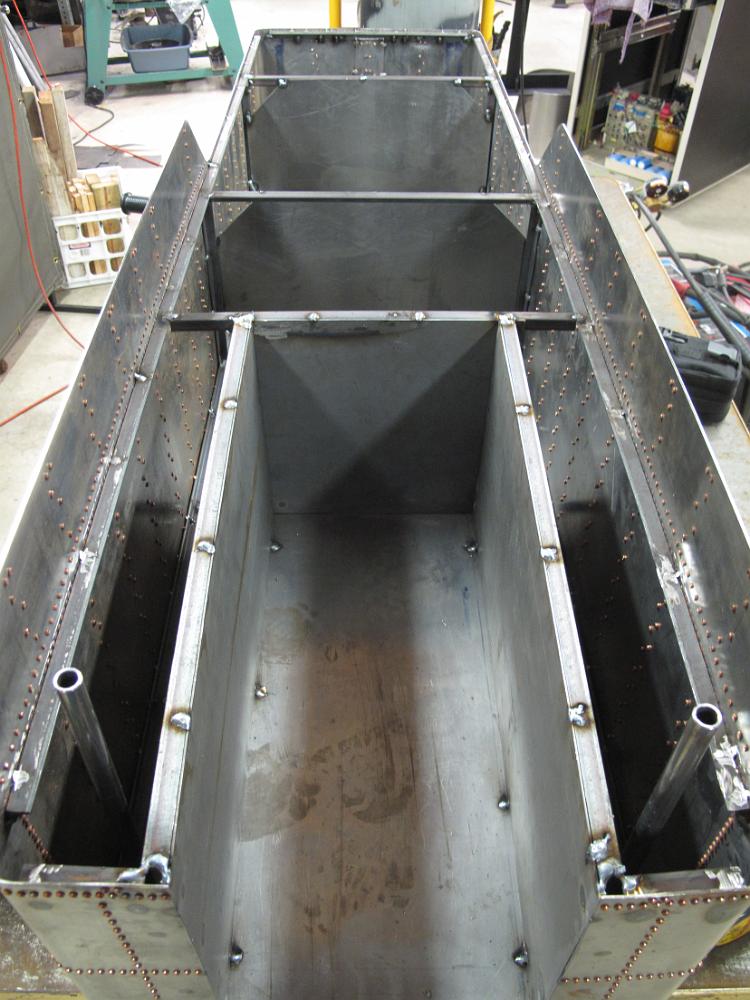
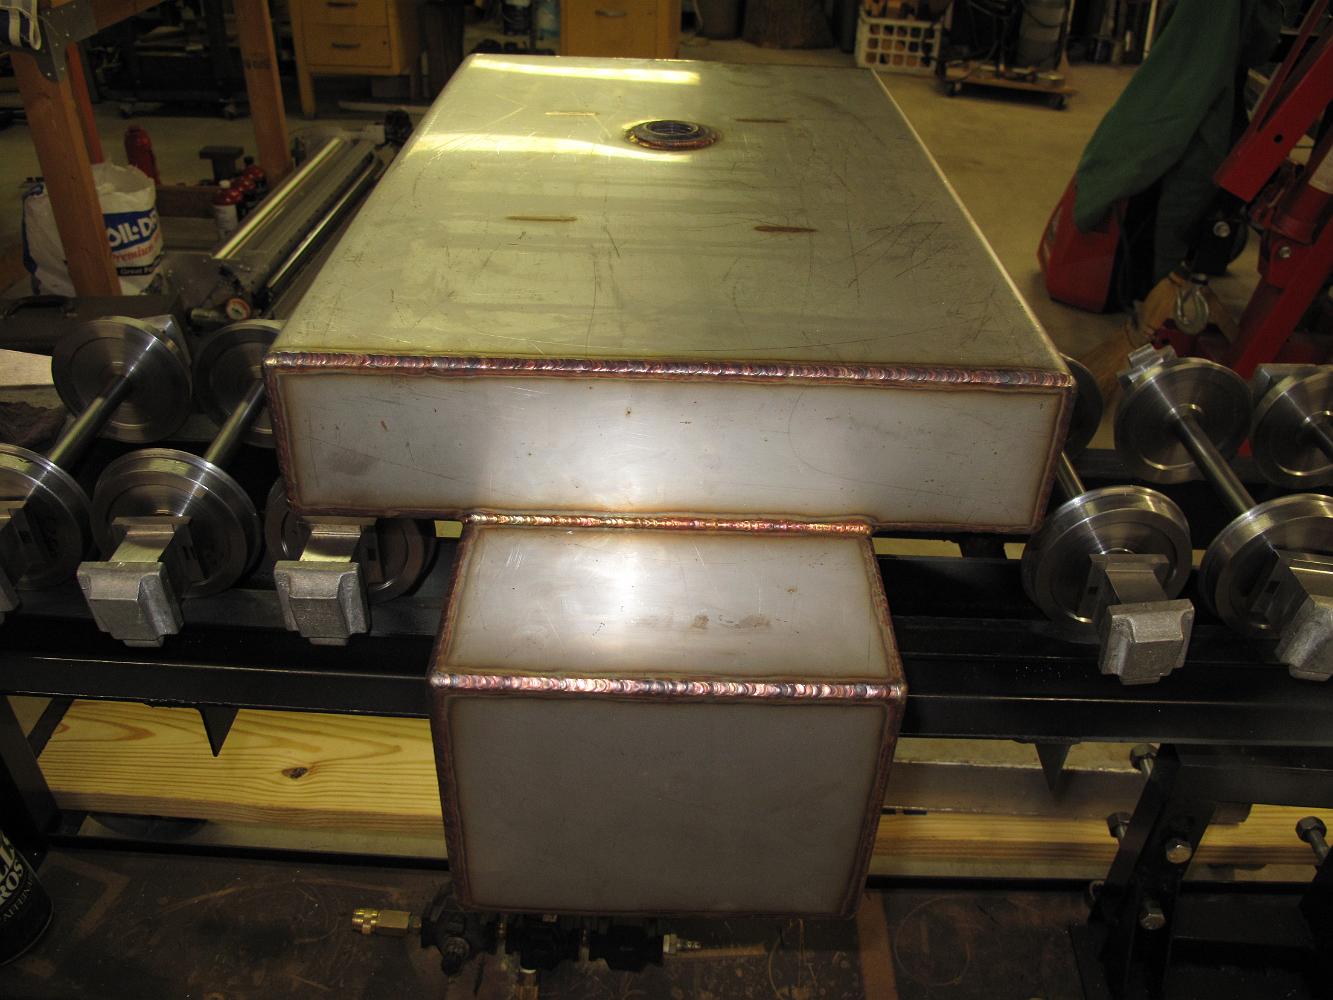
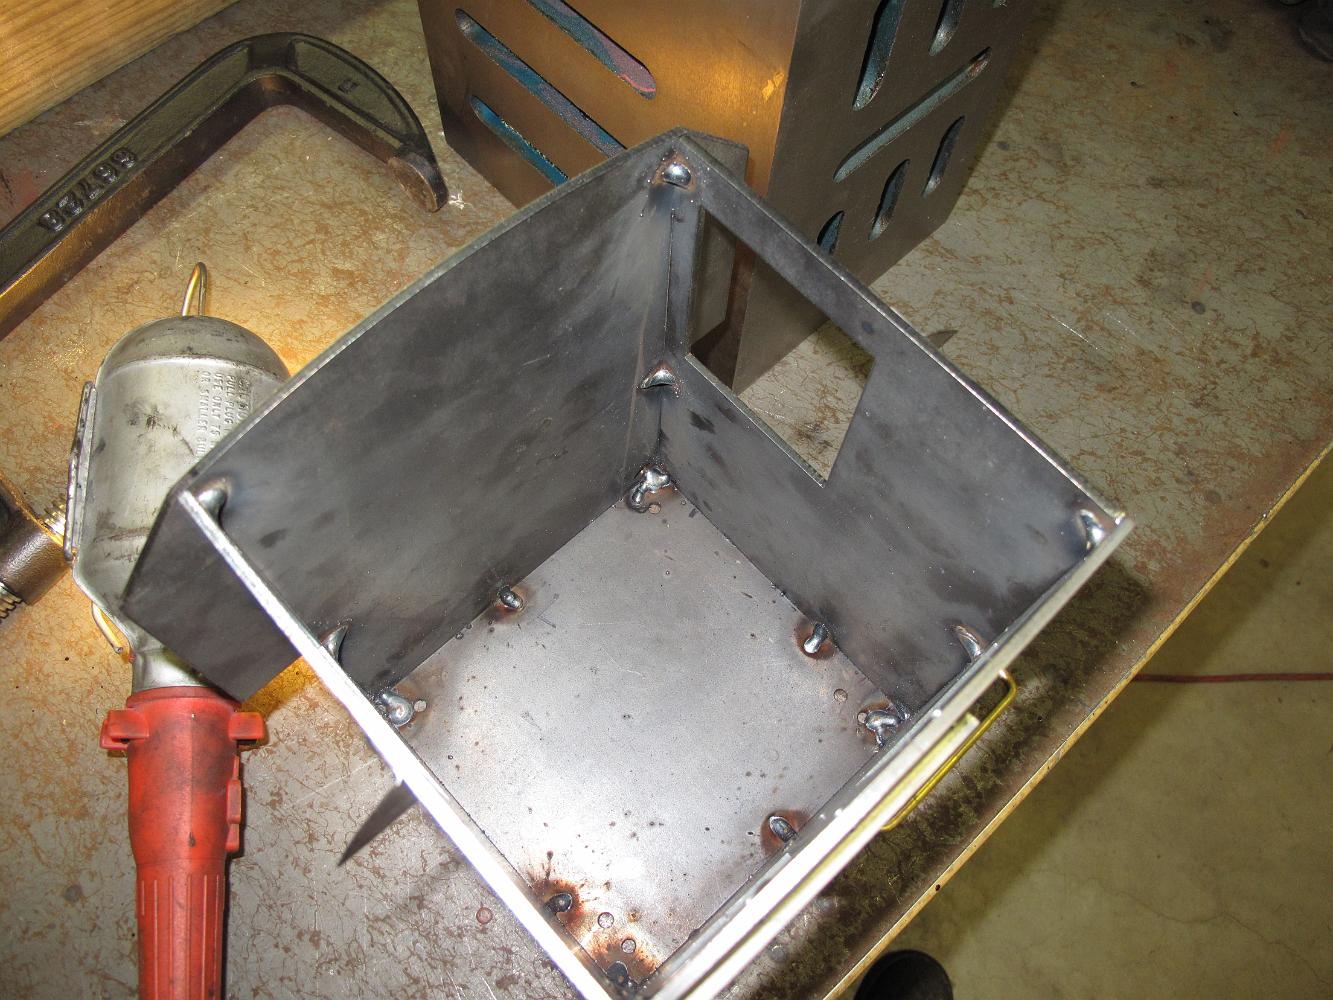
13-May-2013 Both sides of the tank bottom are tack welded. I put the fuel bunker sides and back in place to see how things are going. You can also see the drain…
10-Jun-2013 The trial fitting of the fuel bunker sides has revealed them to be too big. Since I have changed the dimensions of the tender from the original…
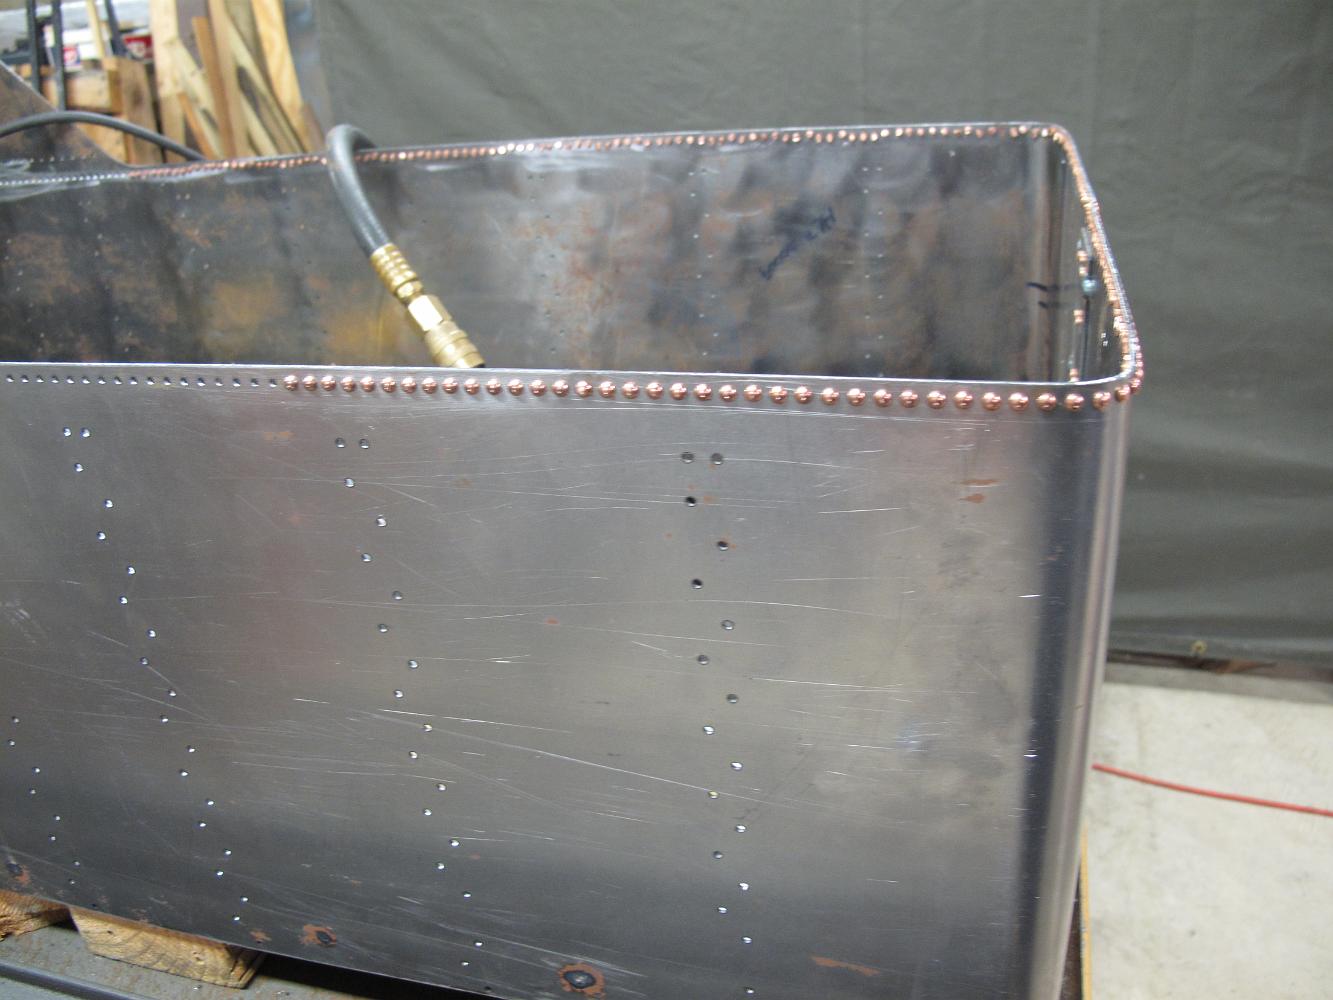
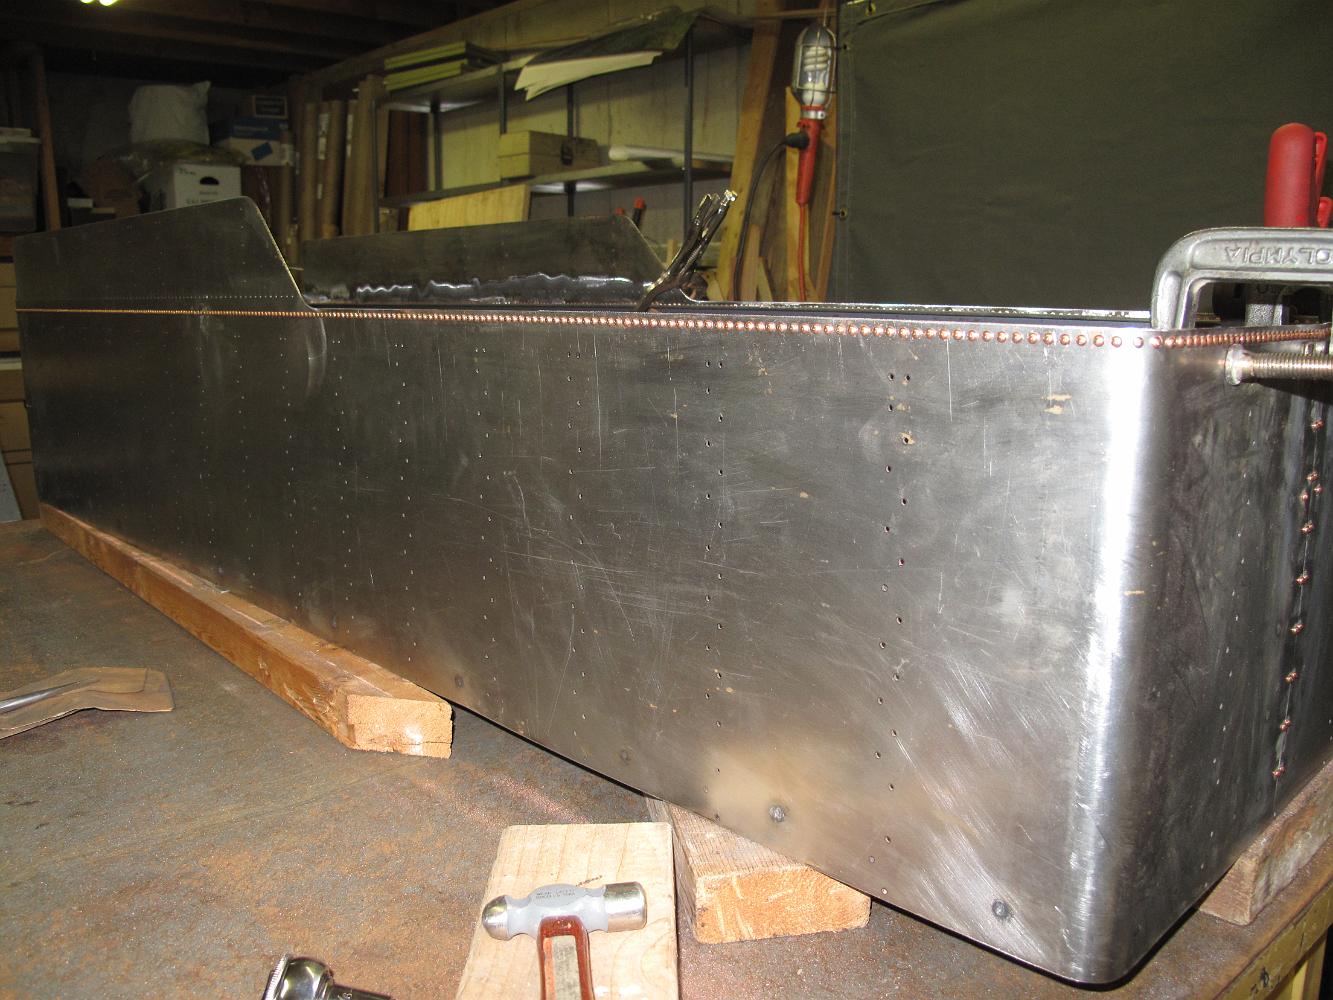
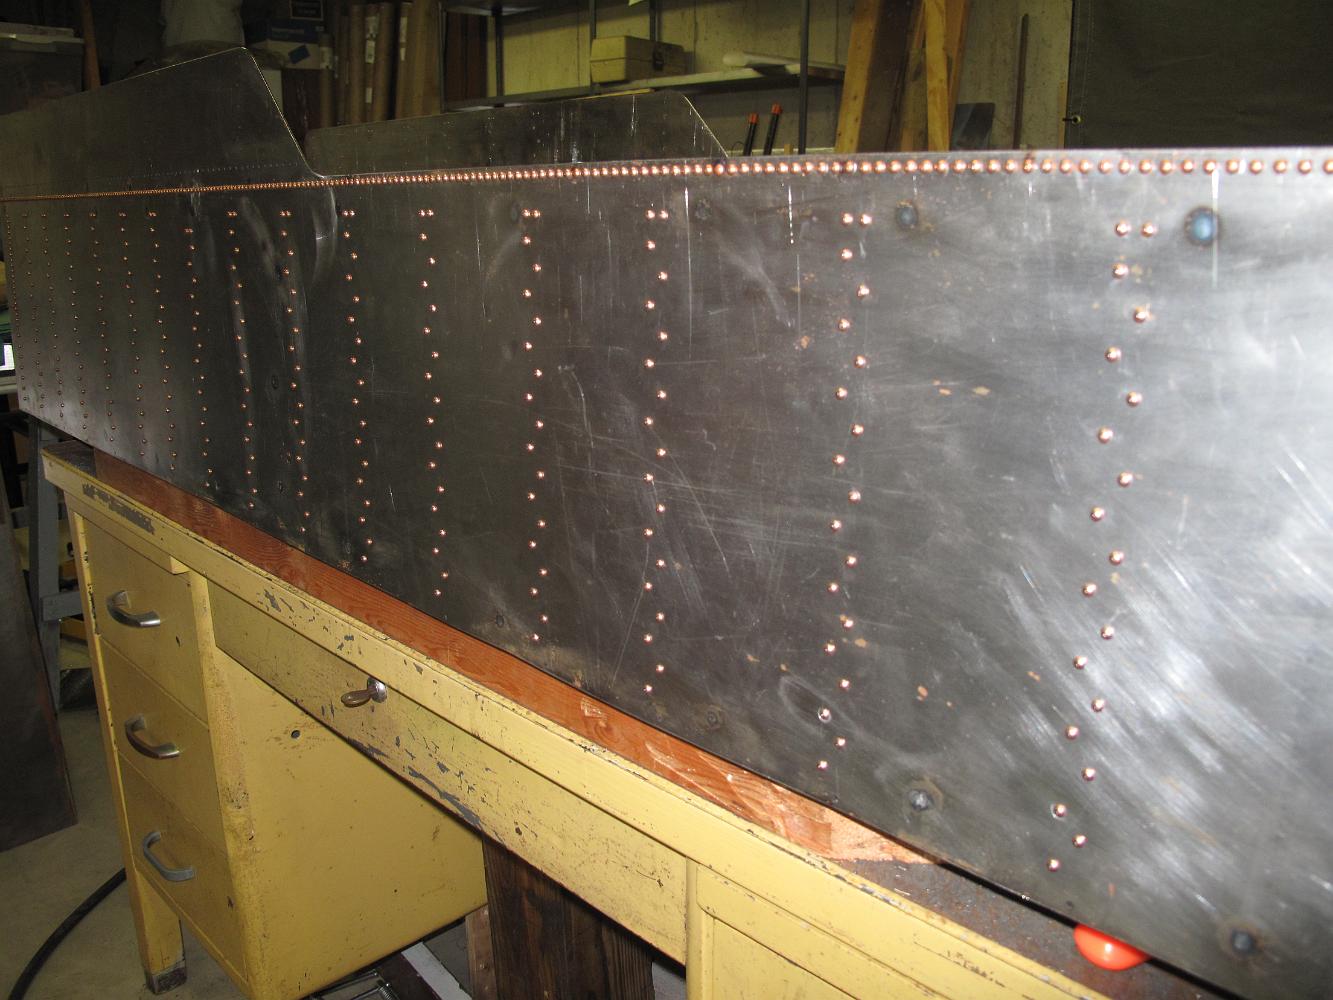
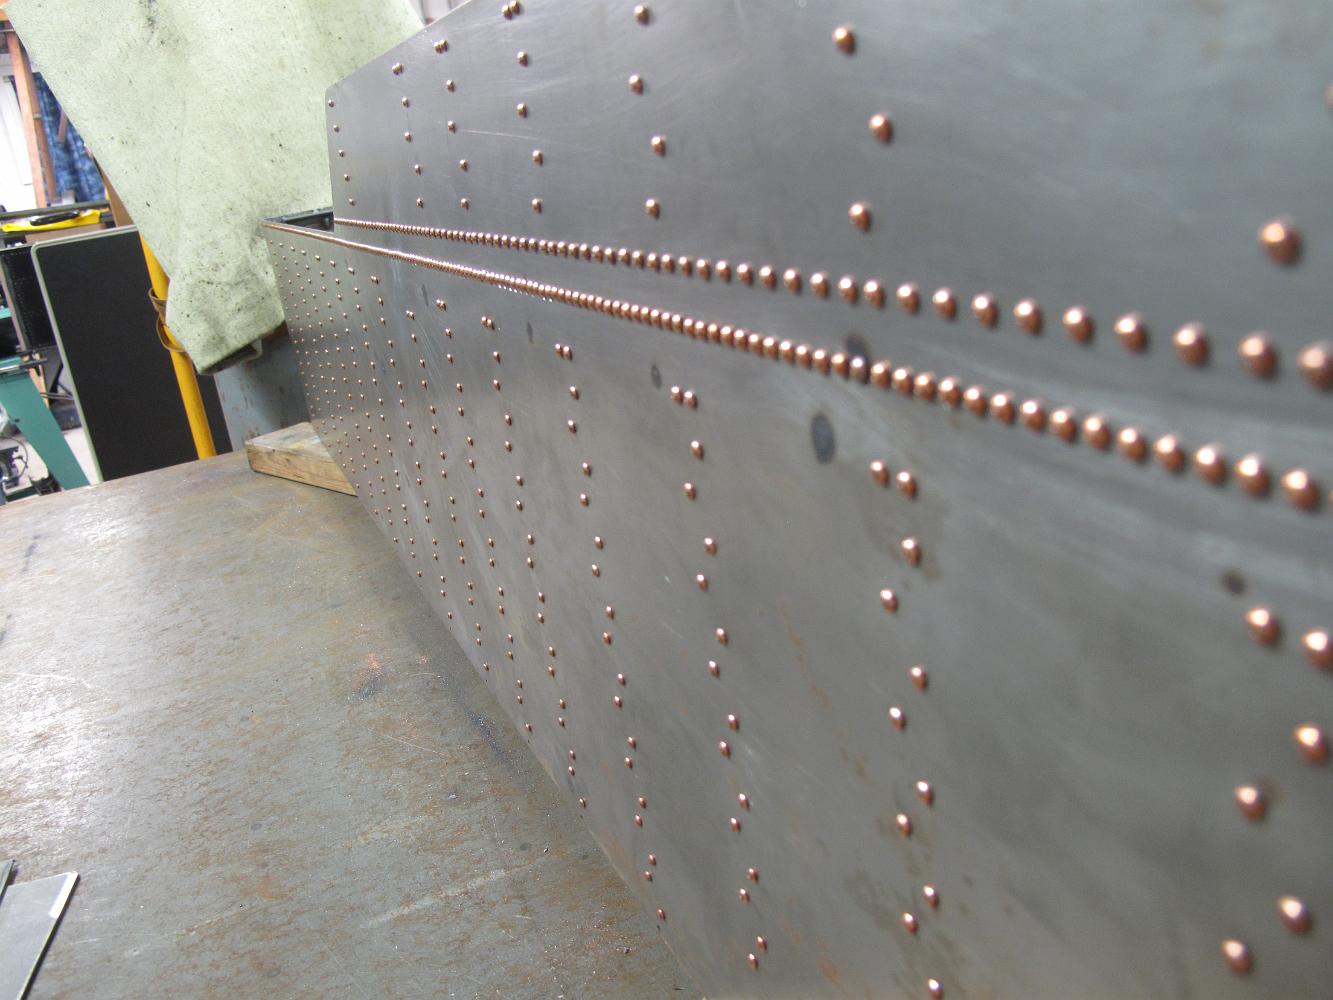
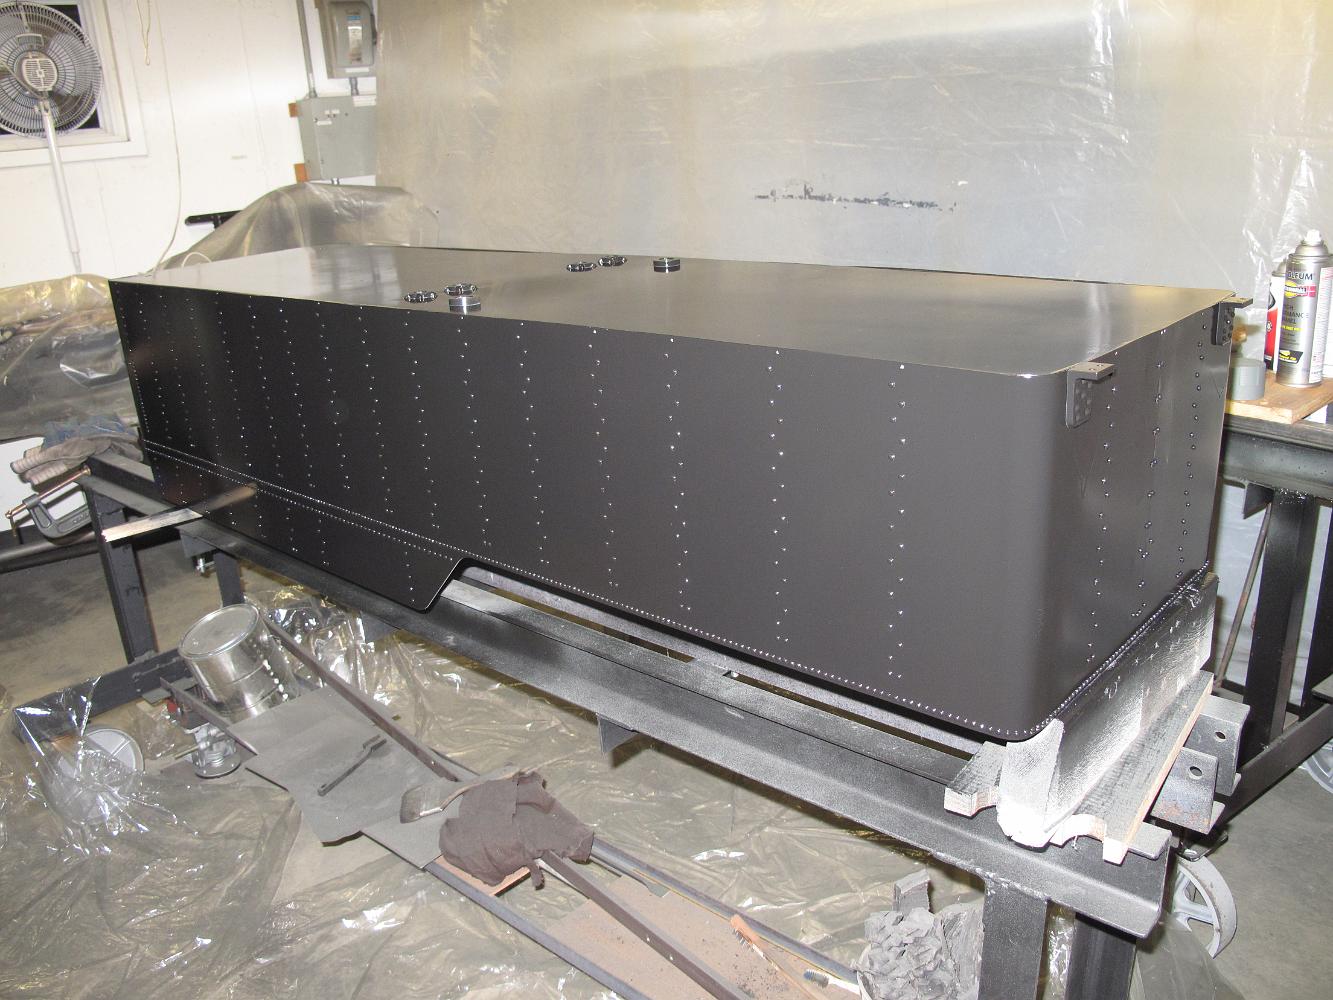
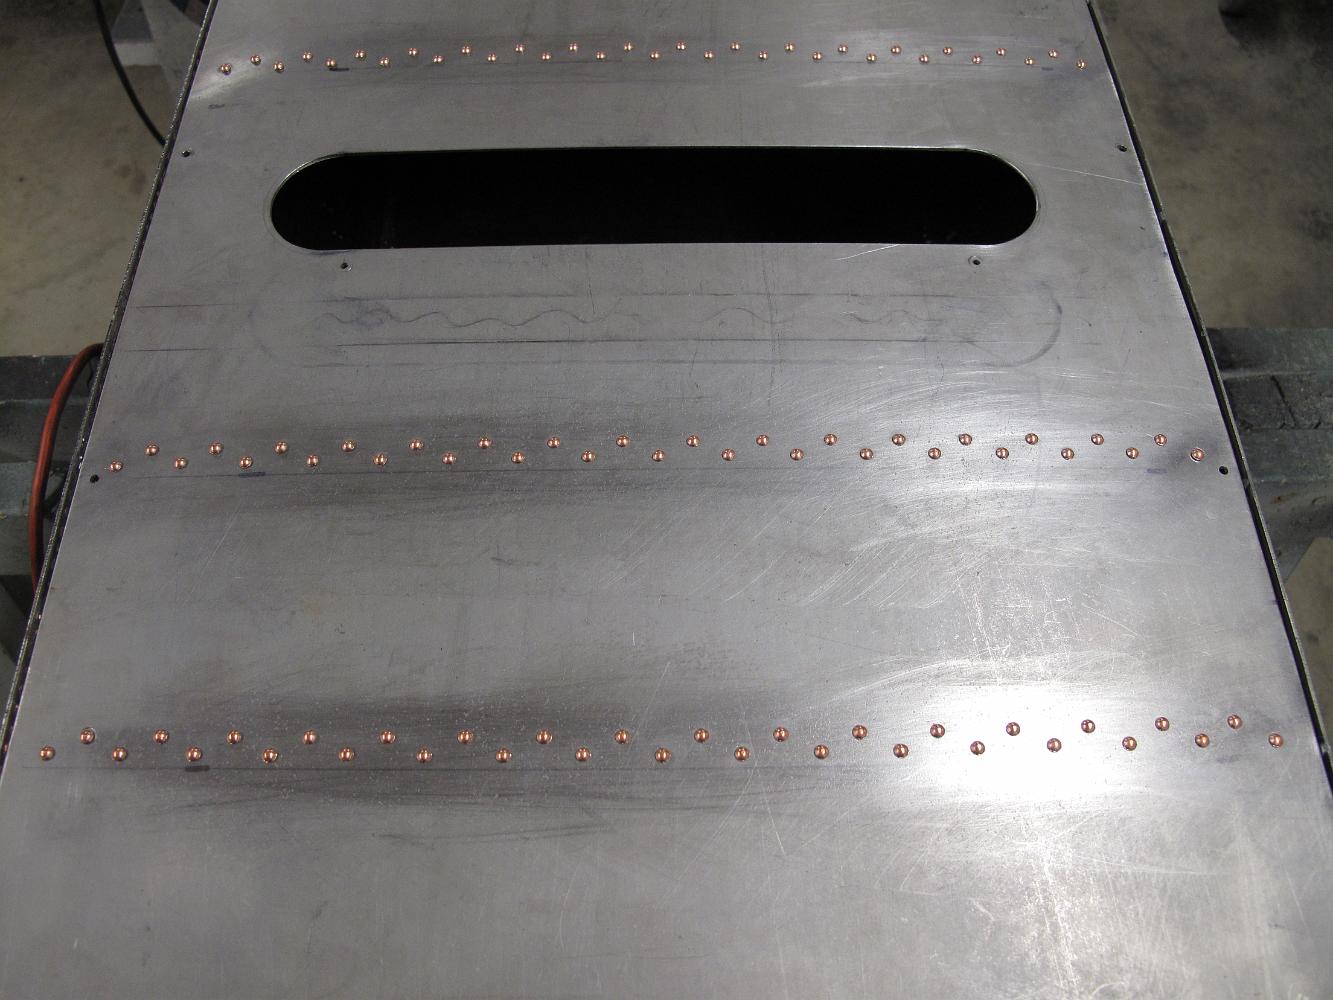
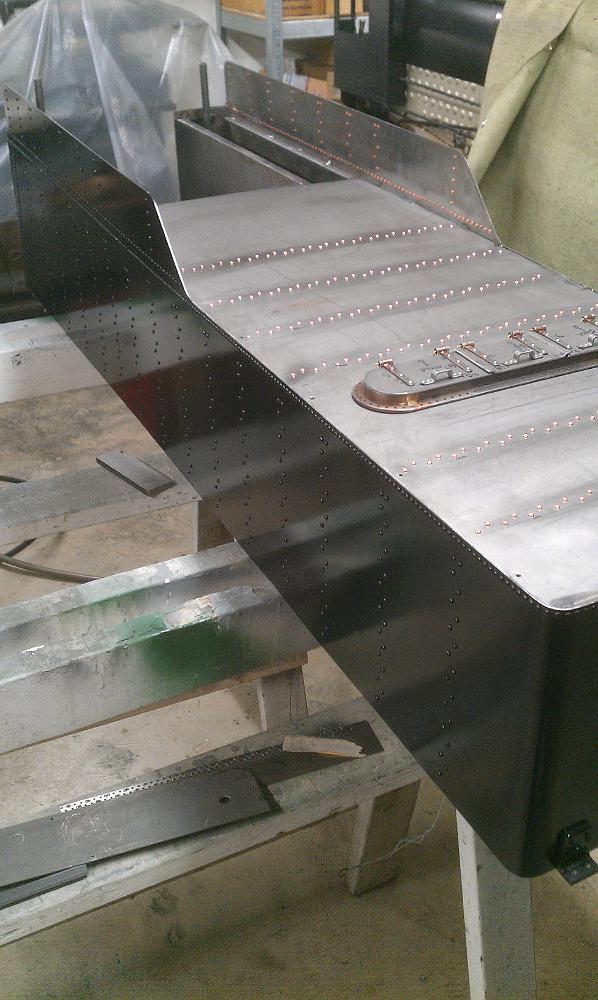
10-Jun-2013 One rivet, two rivet, three hundred more.... The rivets will be decorative, with bracing welded in at other places. I start with the top row so I…
17-Jun-2013 Working on small stretches of rivets at a time, I finish the top row. My back is a bit stiff from bending over and clasping my arms together with…
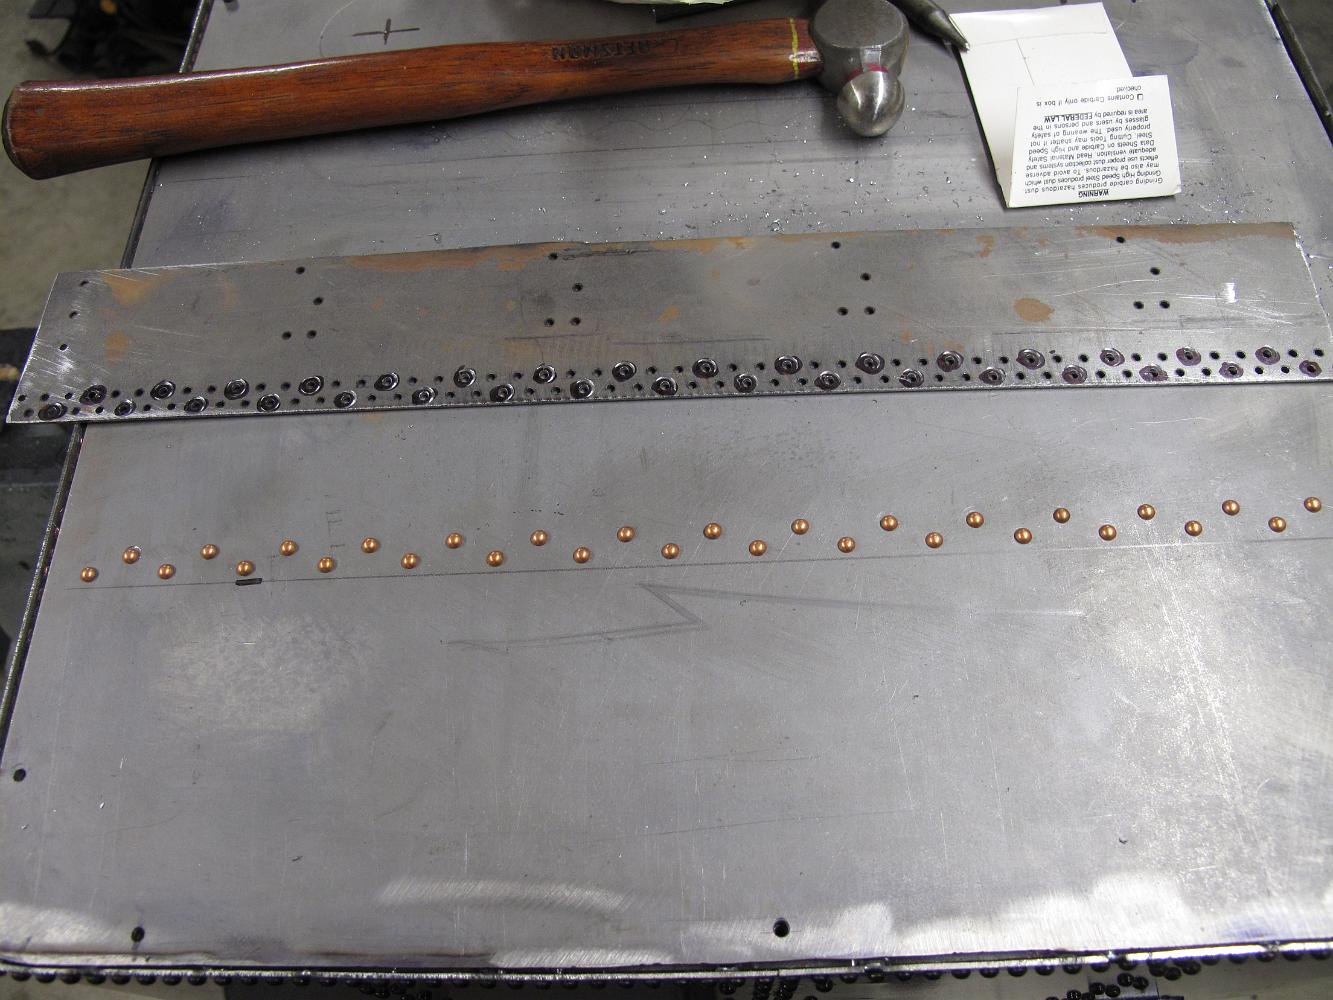
17-Jun-2013 Using a 60 grit flap sanding dick in the angle grinder, I trim the rivets flush on the inside of the tank. Now I have to figure out how to weld the…
24-June-2013 With the top row of rivets in and buzzed flush with a 40 grit sanding wheel, I weld the top deck angle bracket on. I can't say I am entirely happy…
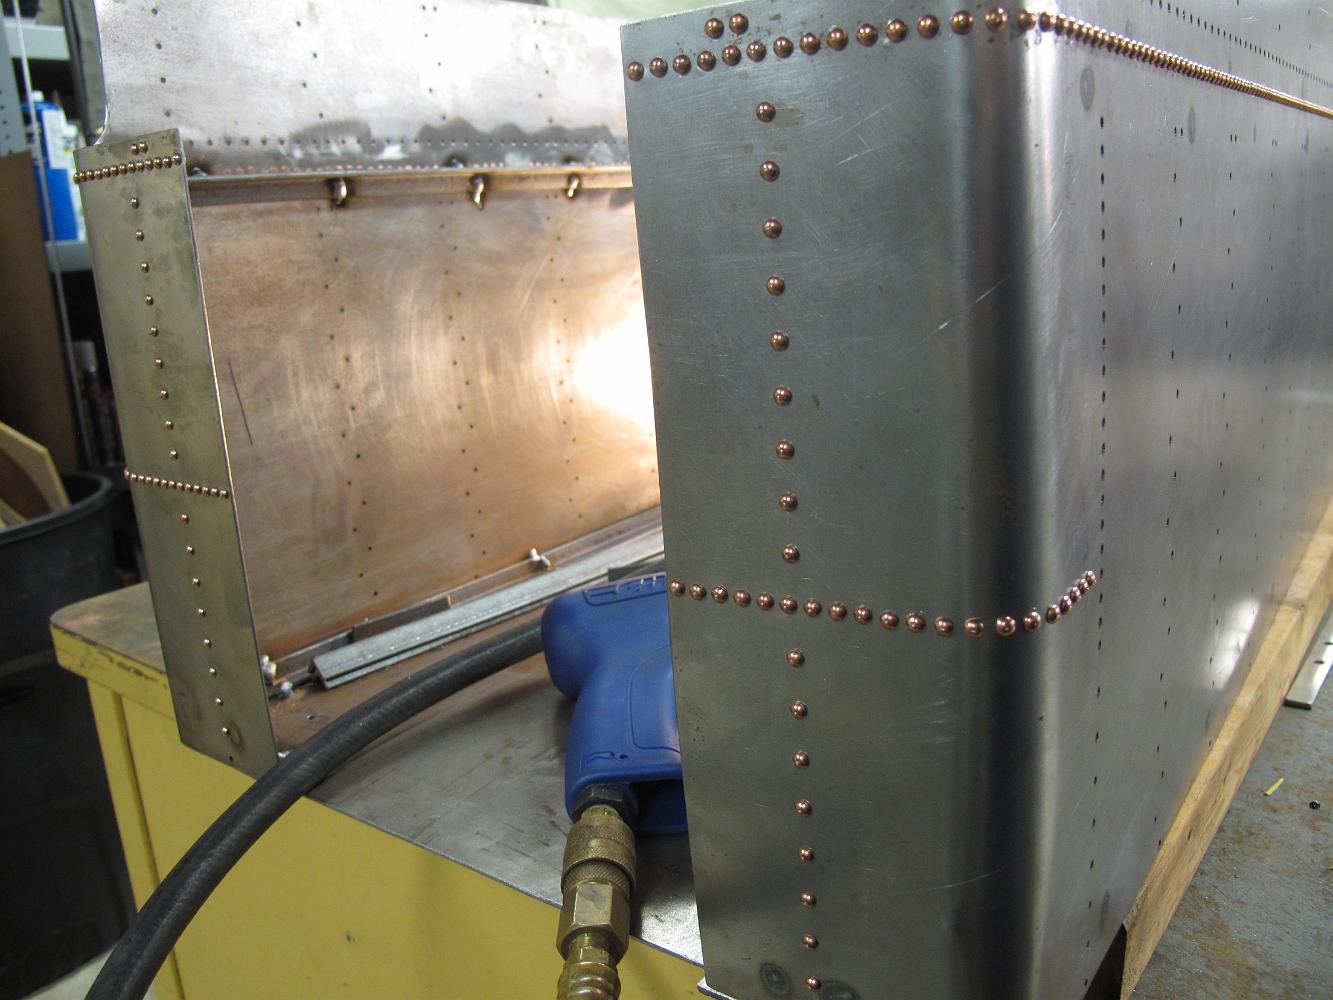
1-July-2013 I have finished the top row of rivets and begin work on the front legs, which will be nearly inaccessible once the inside leg walls are welded in…
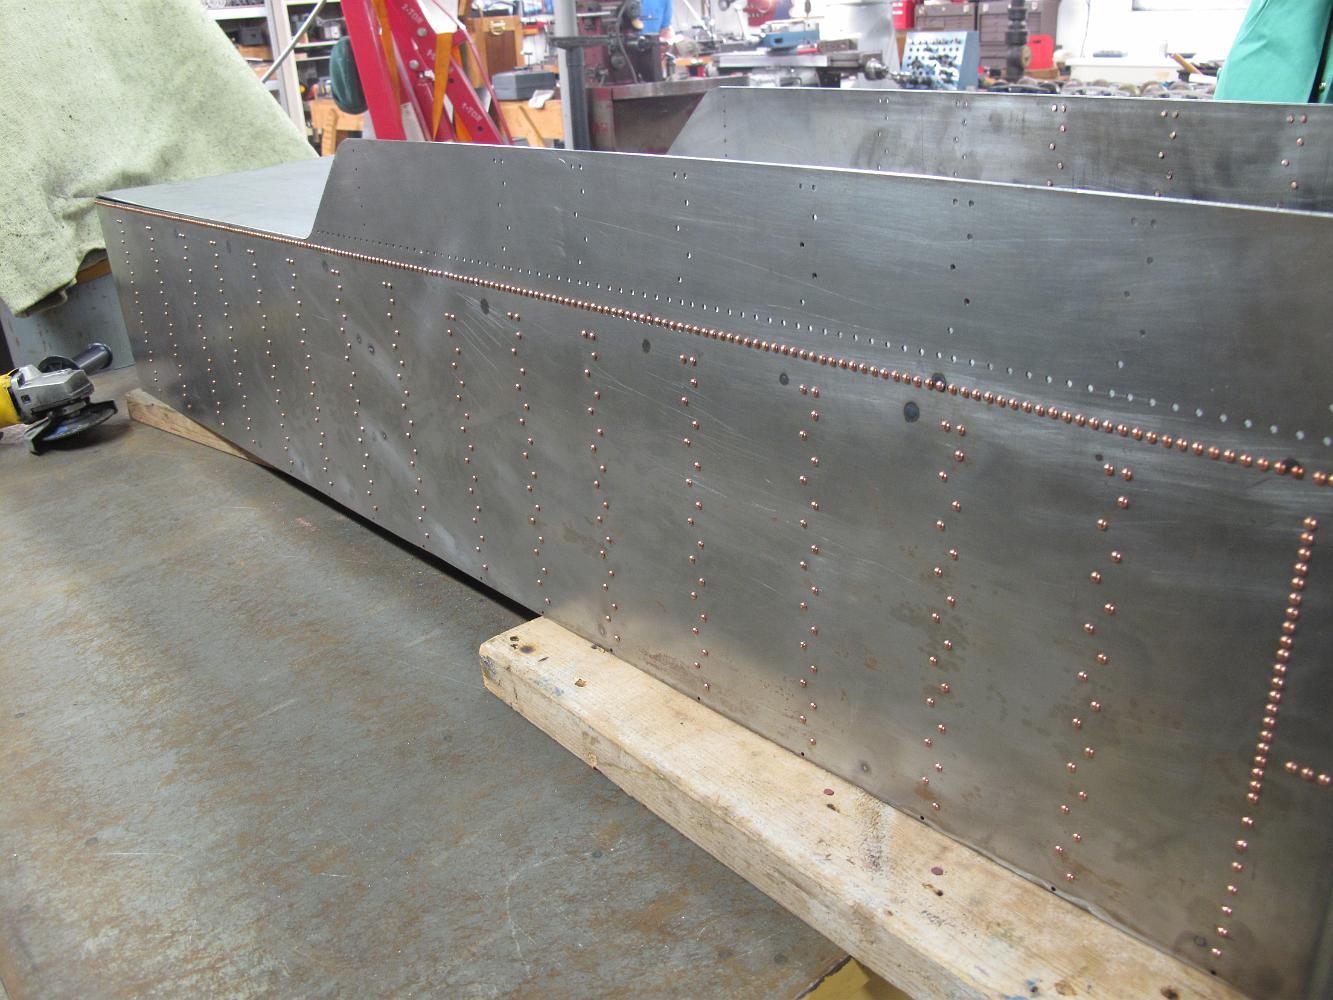
5-July-2013 Oh my aching back and arms! I have made much progress putting the rivets in, but it is a tiring process.
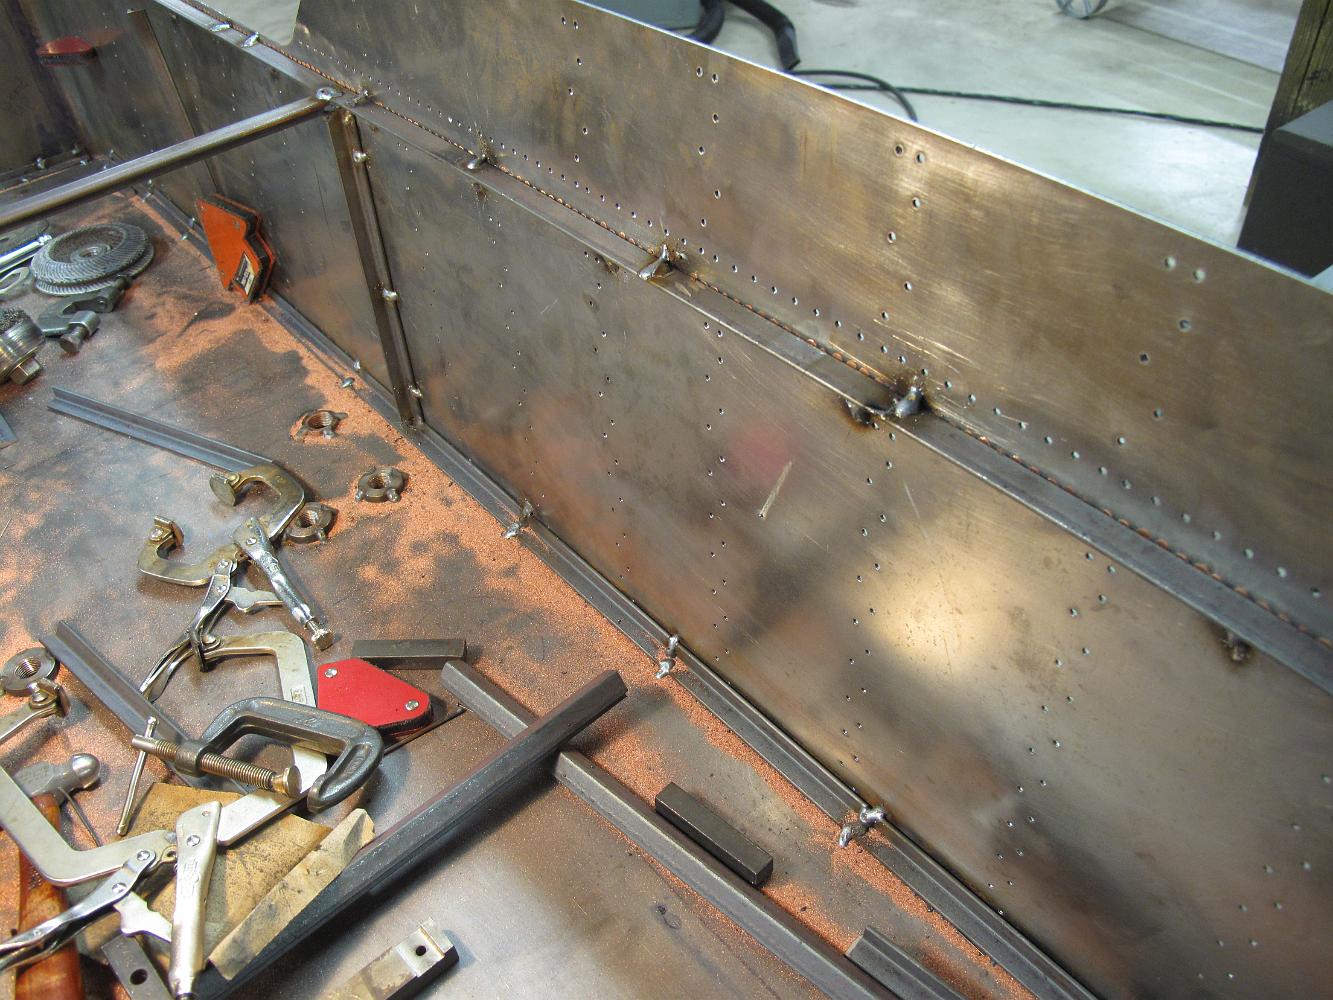
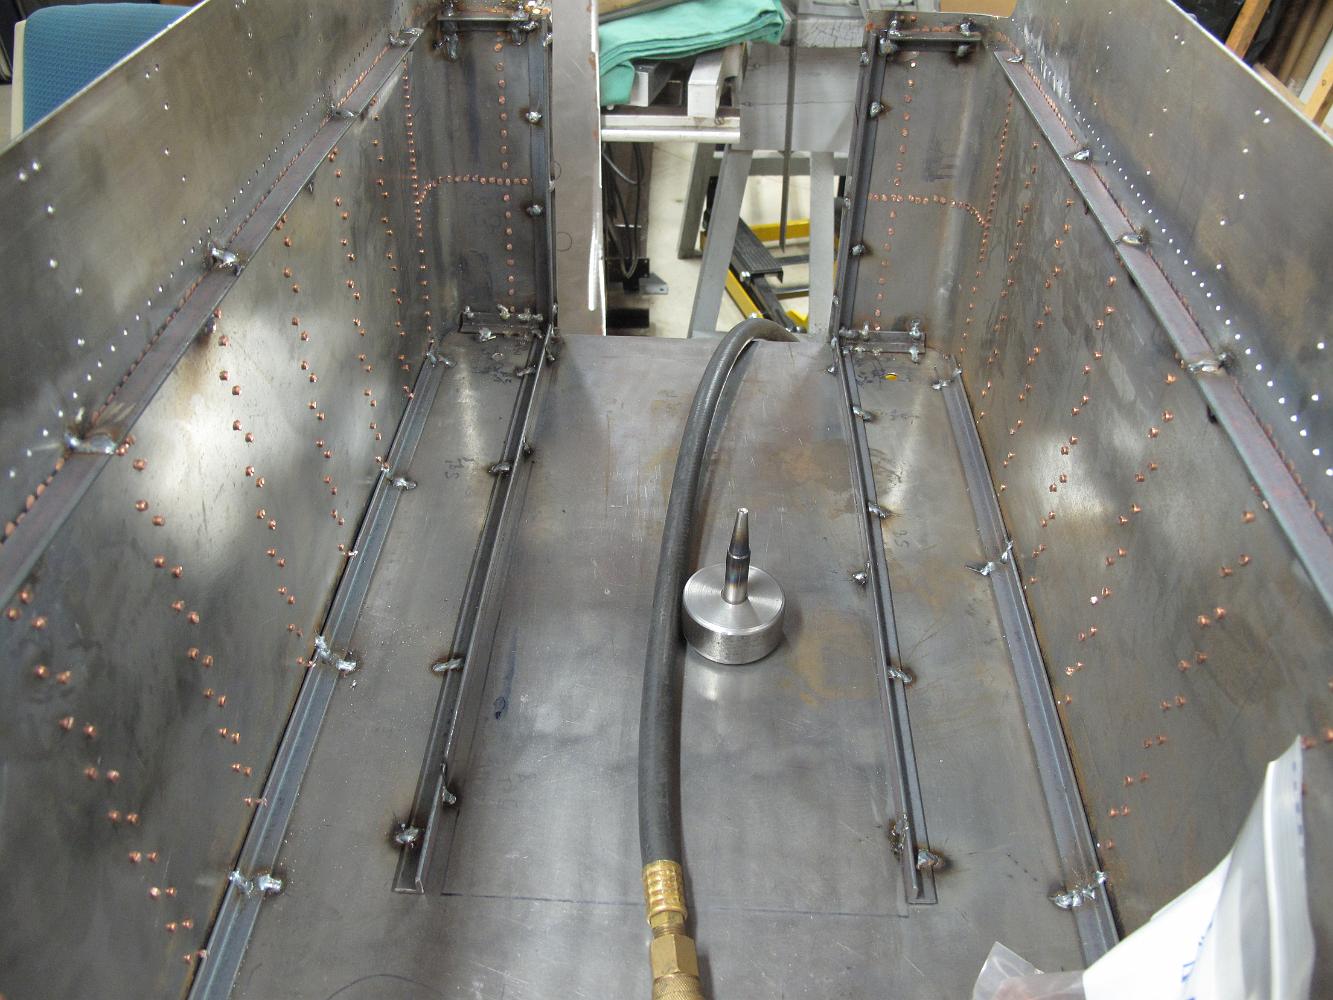
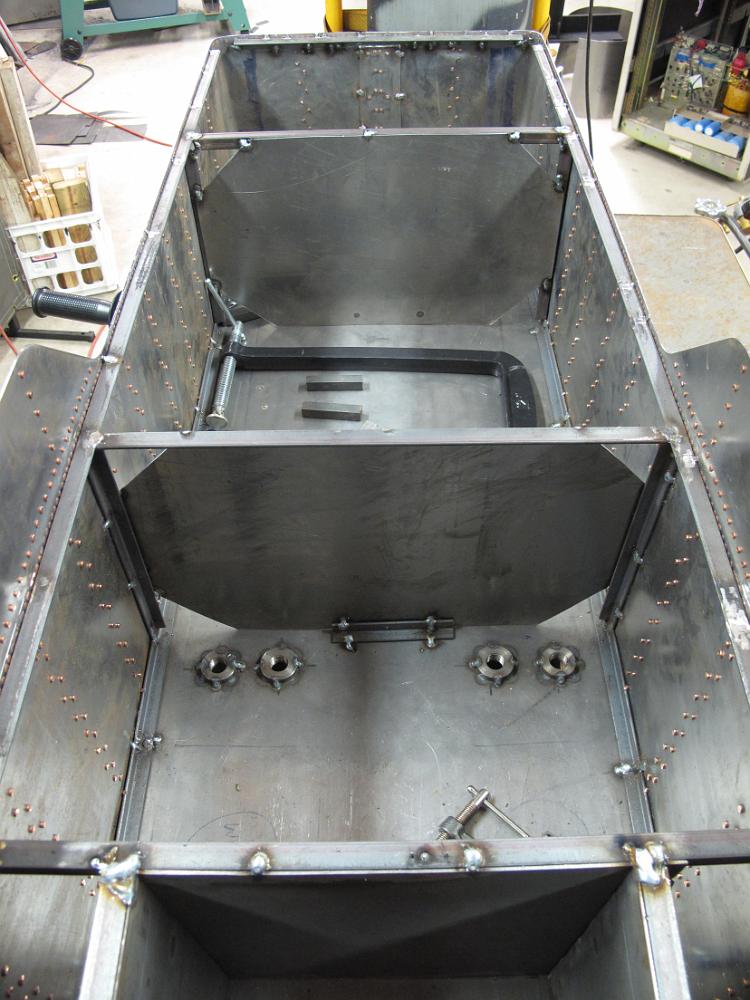
5-July-2013 View of the interior water legs with brackets welded in place. Unlike a traditional water tank, I will leave the floor solid across the fuel area…
8-July-2013 A few more rivets on the sail area, and to test fitting and adjustments for the tender top, including enlarging the holes for the water valve…
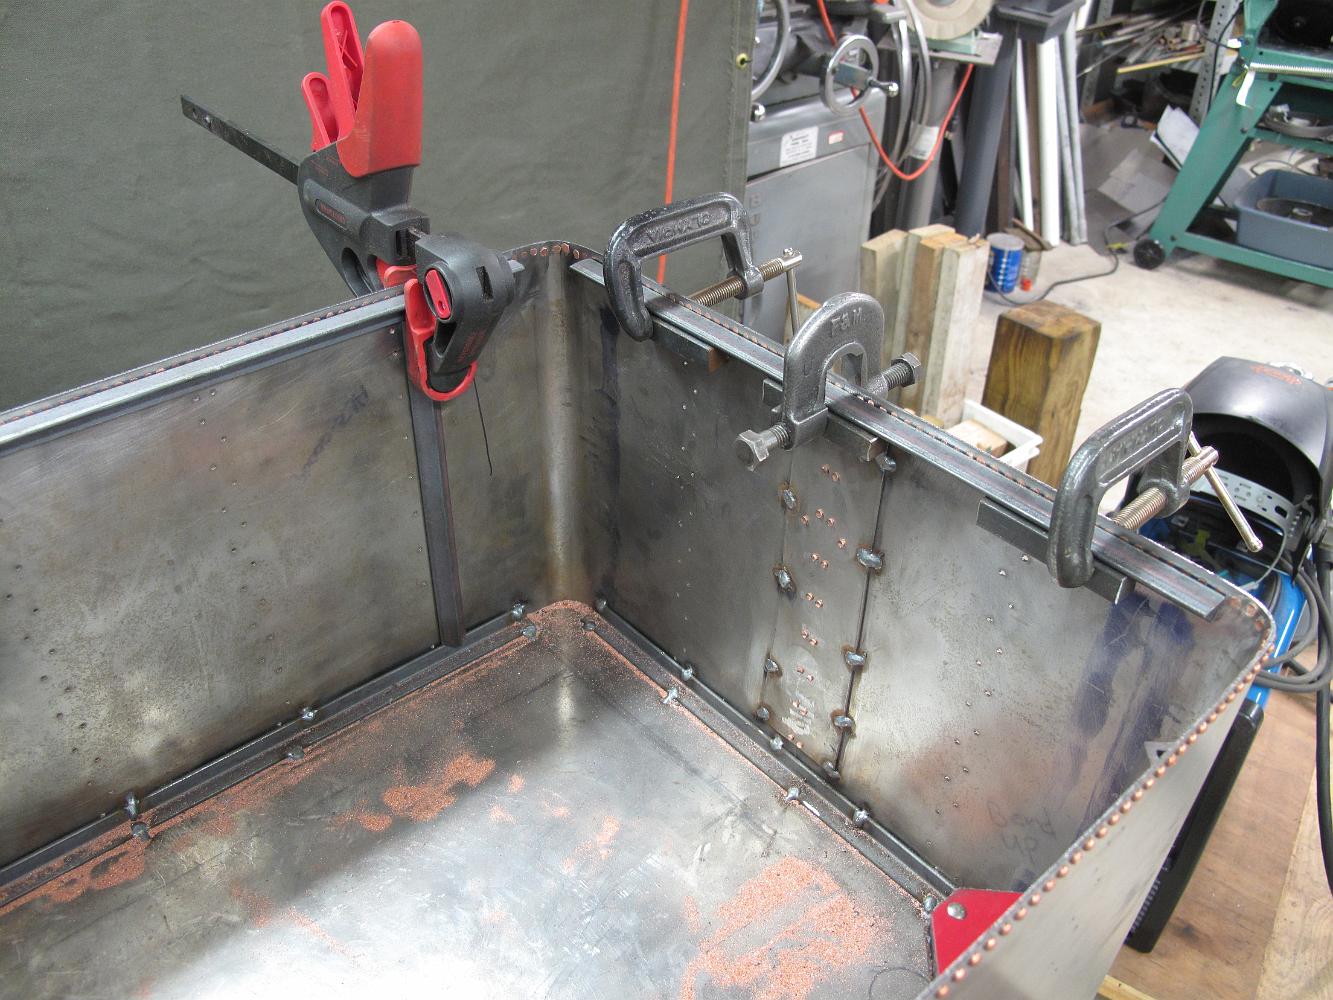
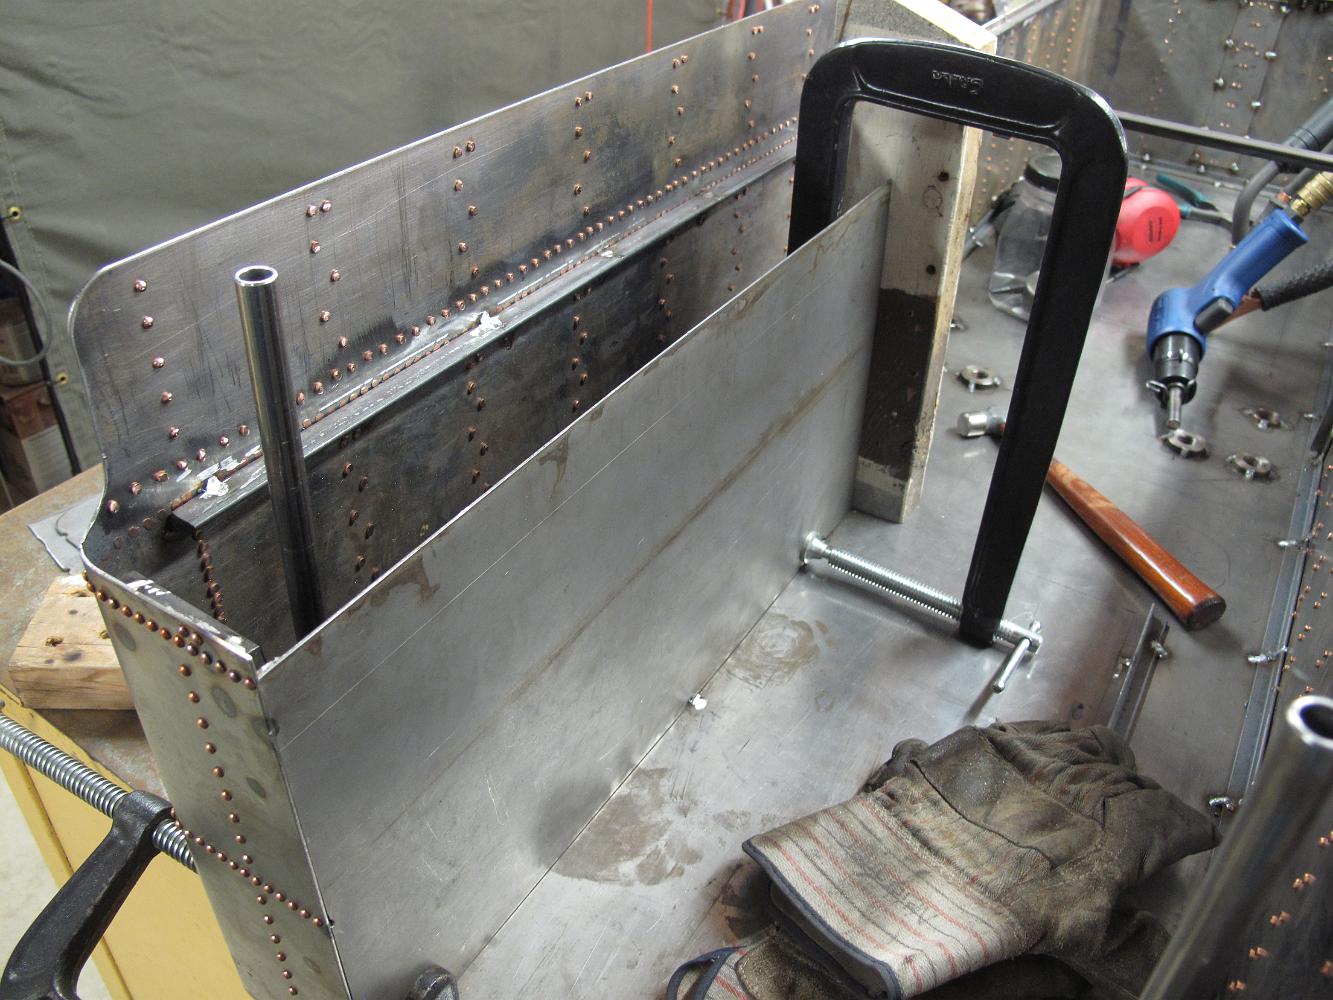
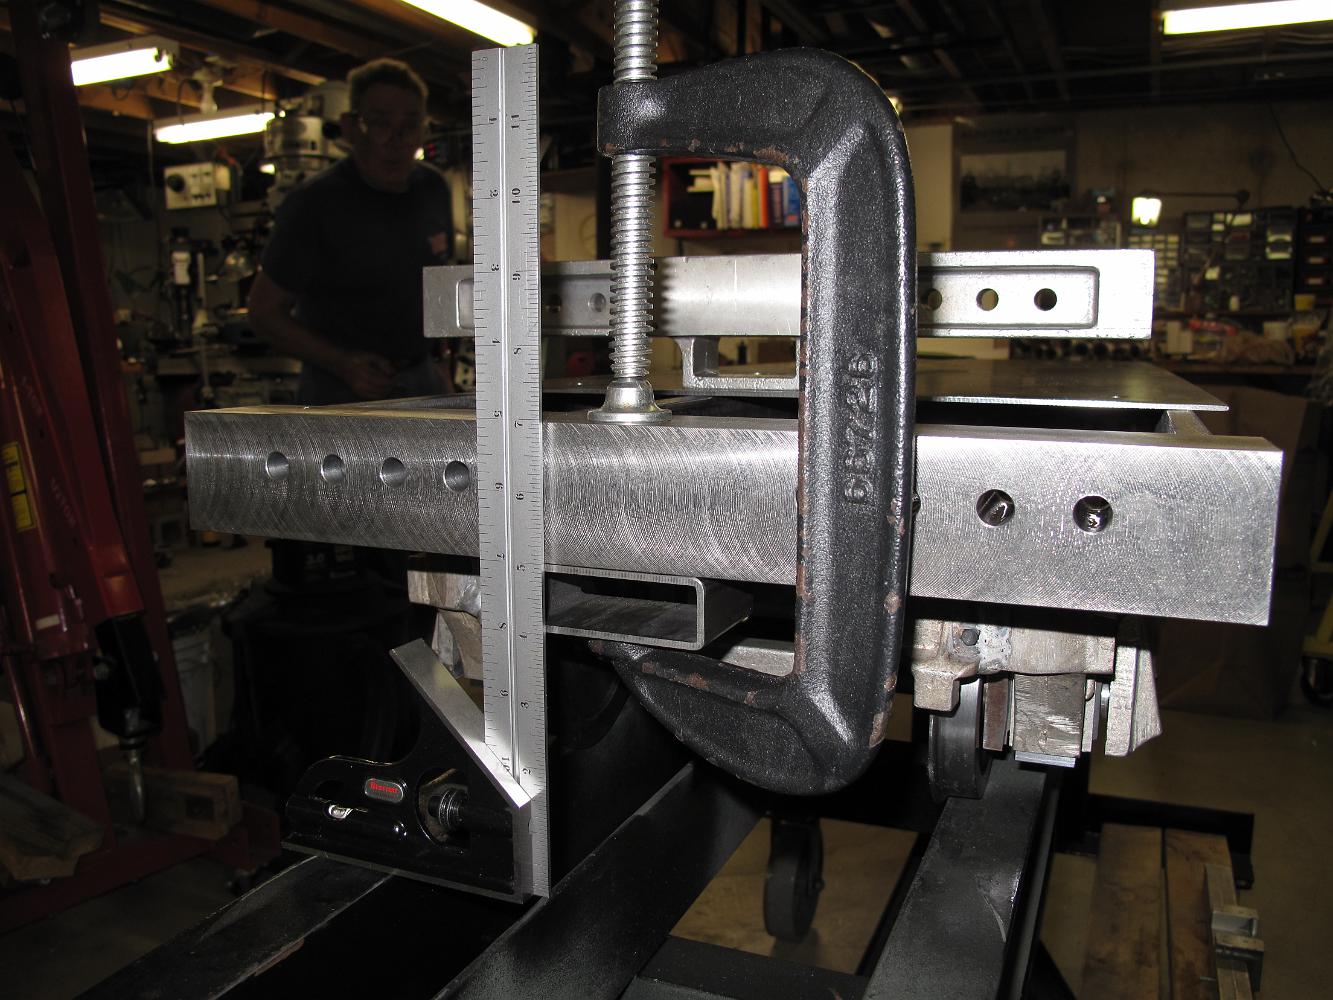
15-July-2013 I use the deep reach clamp to hold the sides of the fuel bunker against the braces for welding.
4-Aug-2013 Water baffles installed. This completes the major work on the tender tank body. Next is tender frame and tank top.
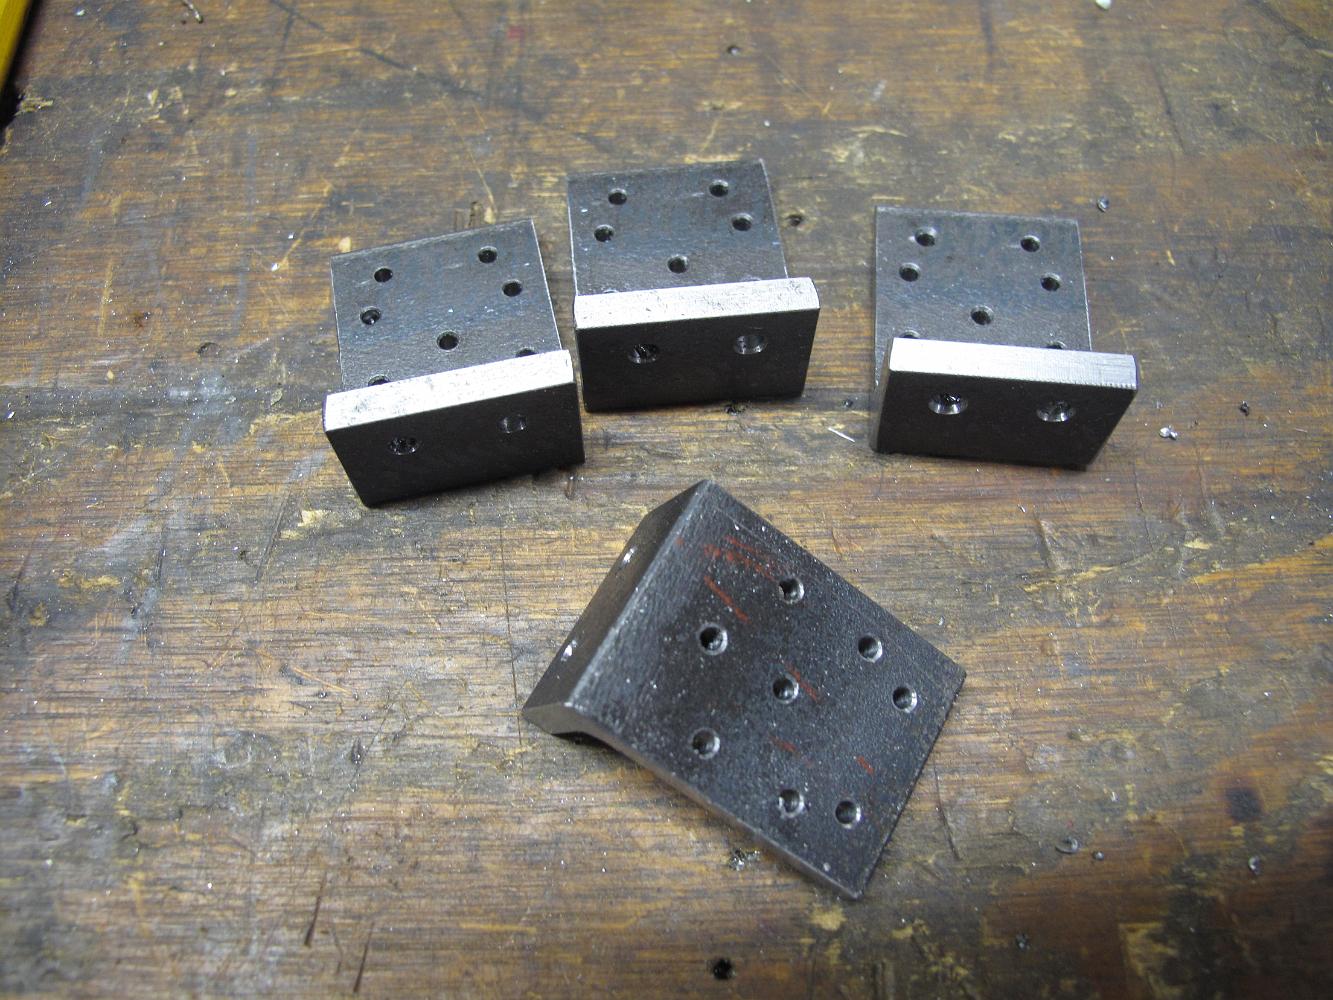
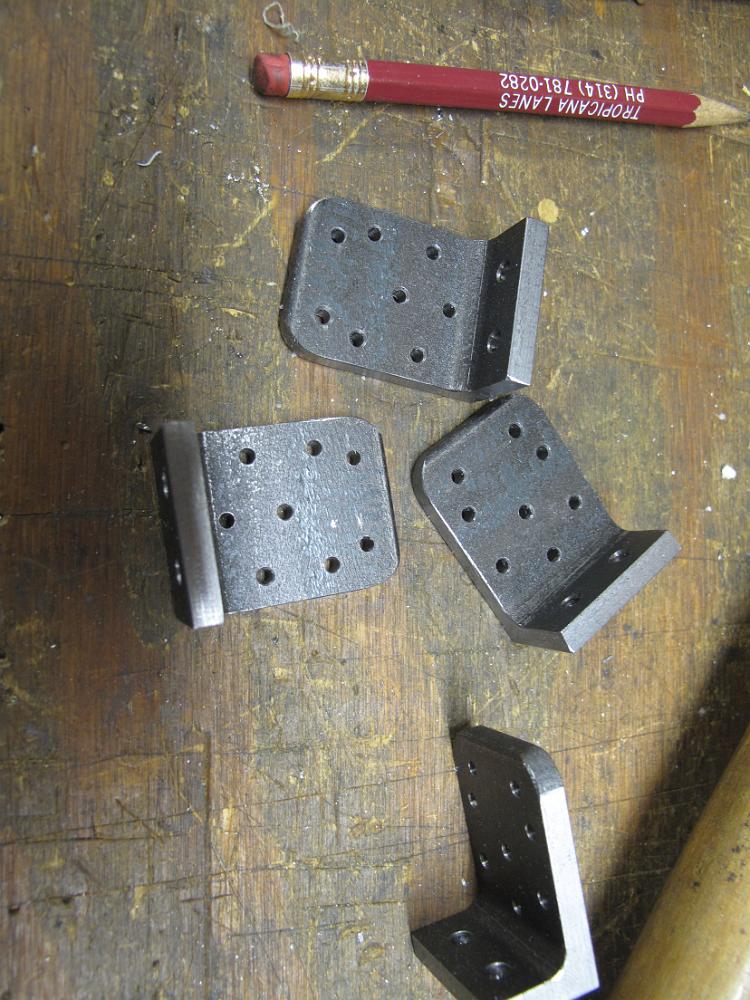
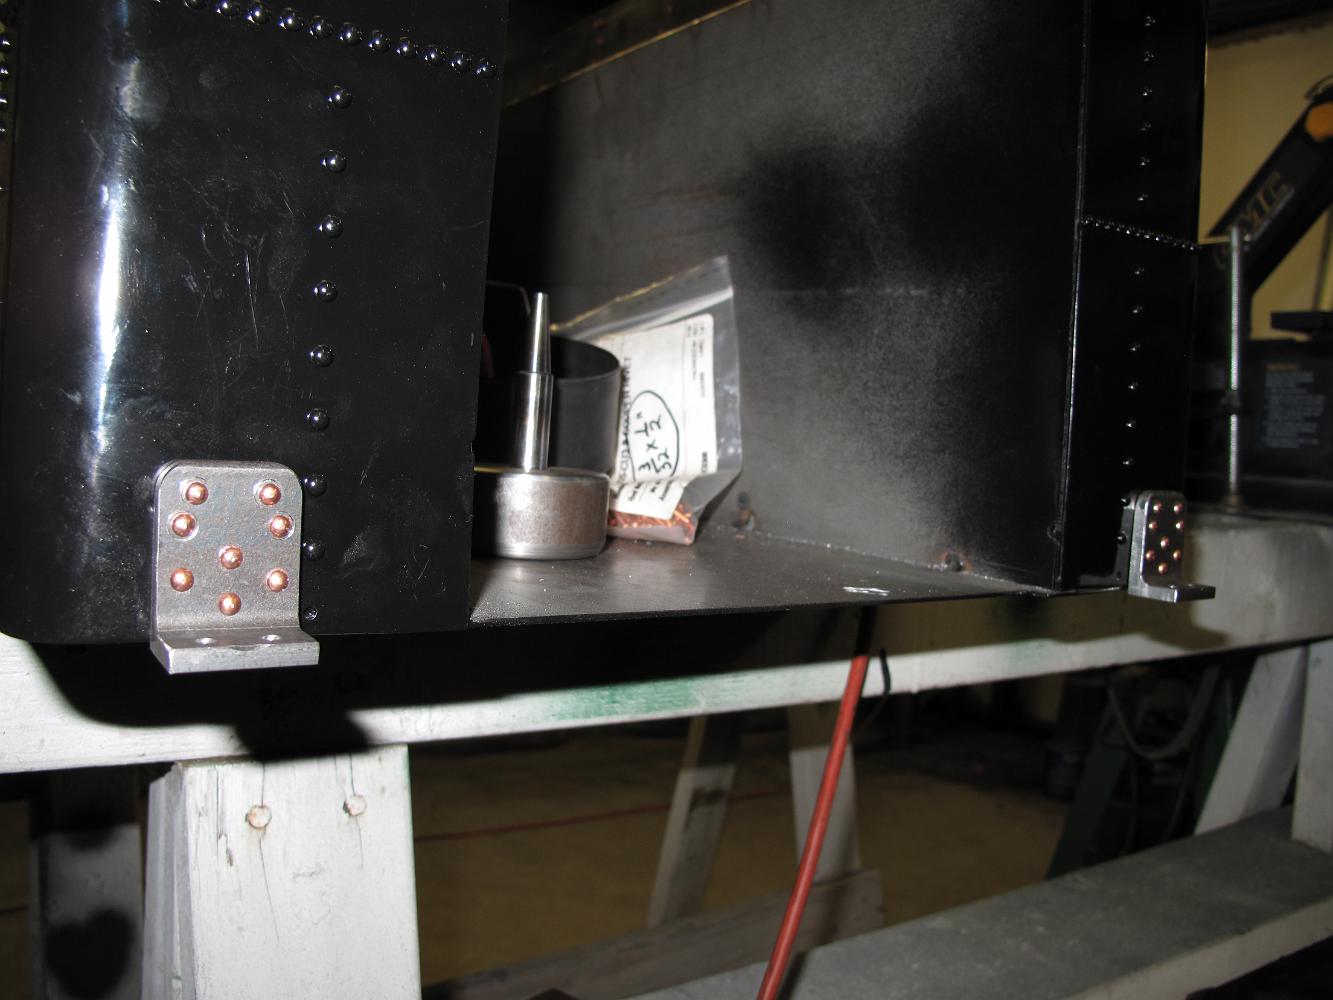
12-Aug-2013 Finished tender tank brackets ready for installation. Frisco only used four brackets on their tanks, not the six called for in the USRA plans.
30-Sept-2013 With the tender upside down, we drill and rivet the rear tender mounts to the tank. Next I begin laying out the tender frame for sizing and…
14-Oct-2013 Drilling holes in tender deck for water lines and drains. Spent some time adjusting where actual holes ended up on finished tender compared to…
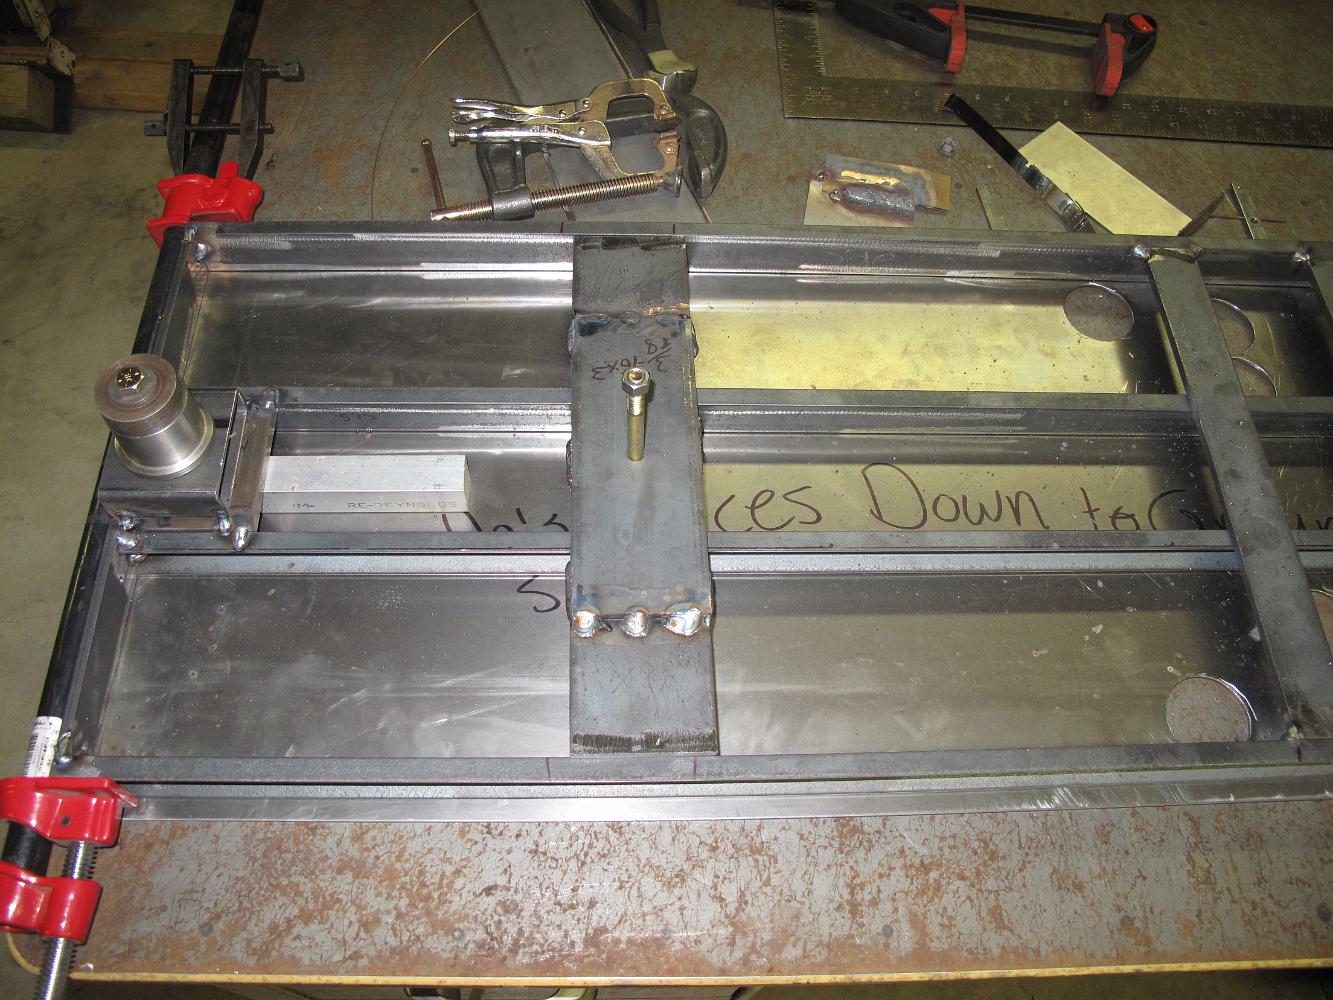
28-Oct-2013 Tender frame tack welded together, but not to the tender deck. I want to make sure the tender trucks sit under the frame properly before attaching…
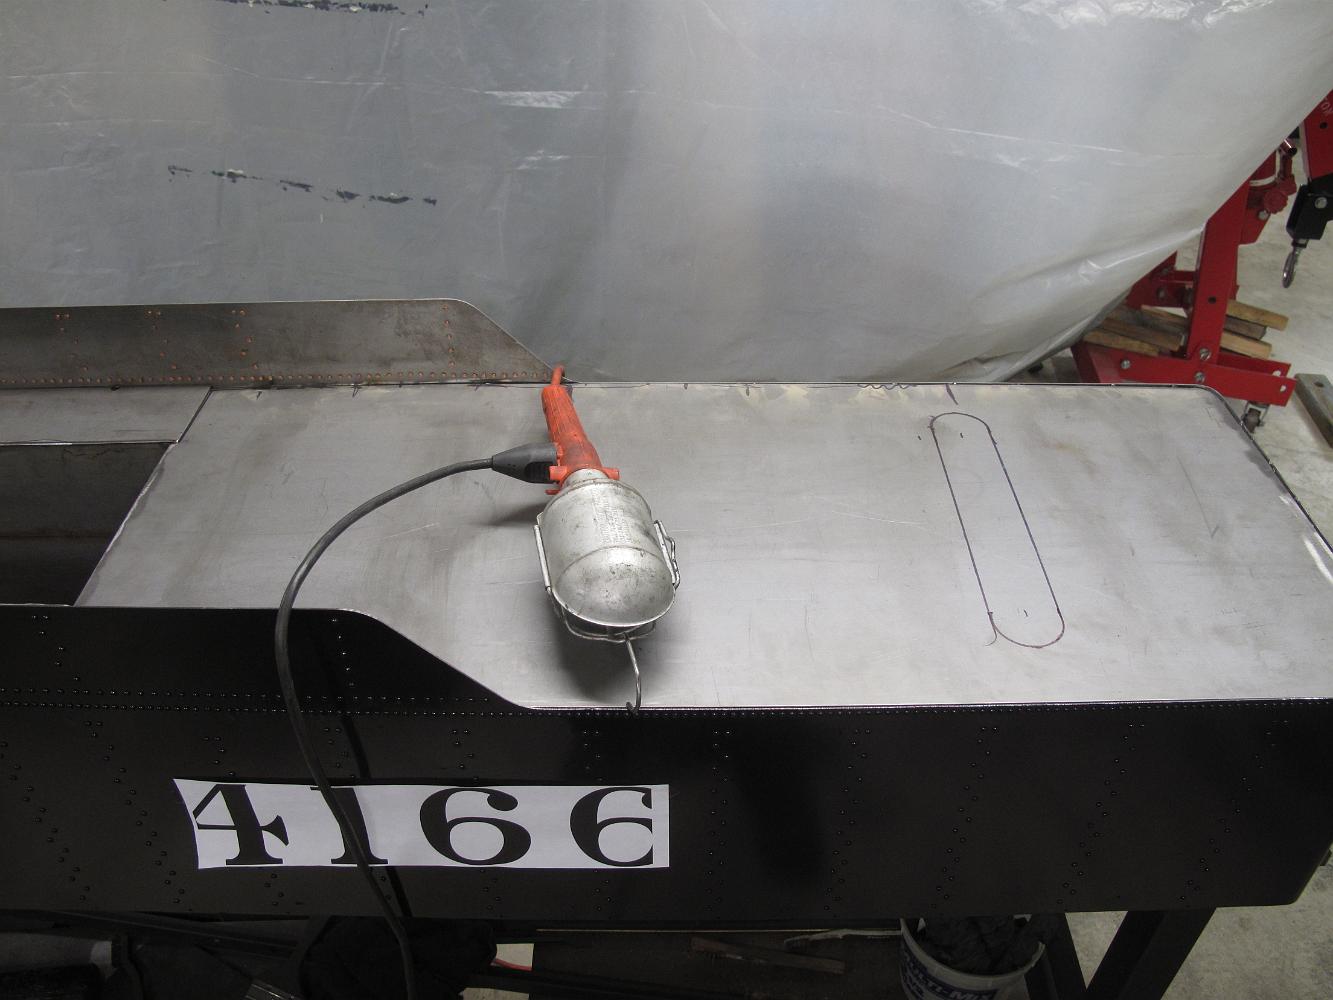
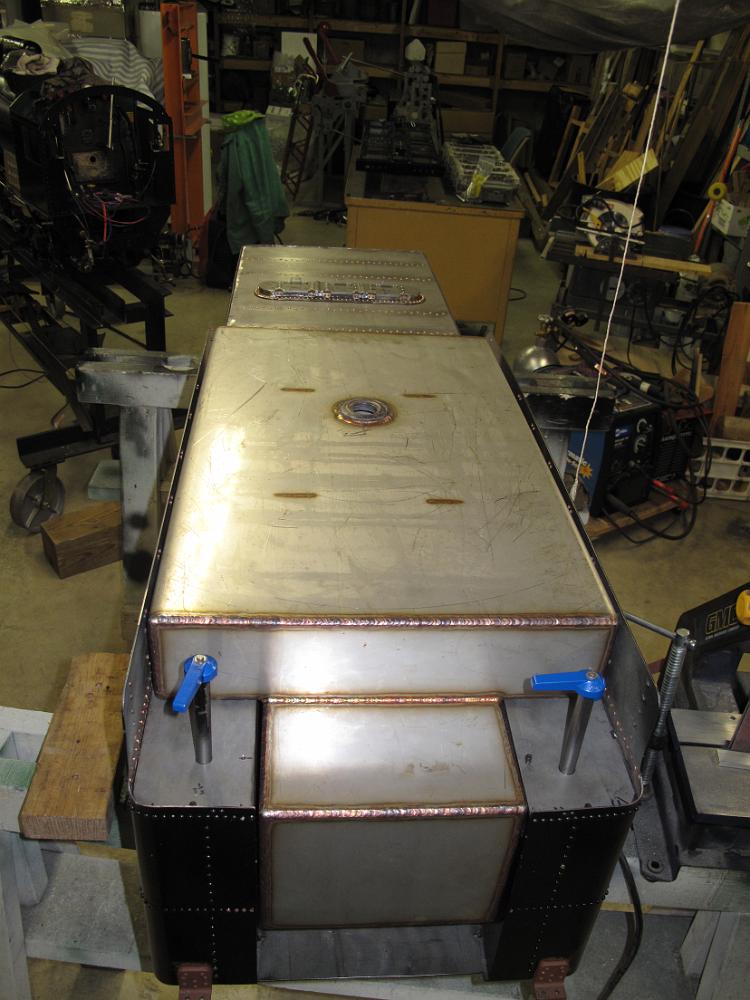
11-Nov-2013 Tender tank right-side up, fitting tank lid. Also seeing how the numbers will look before ordering a paint mask from Connie Miracle Graphics.
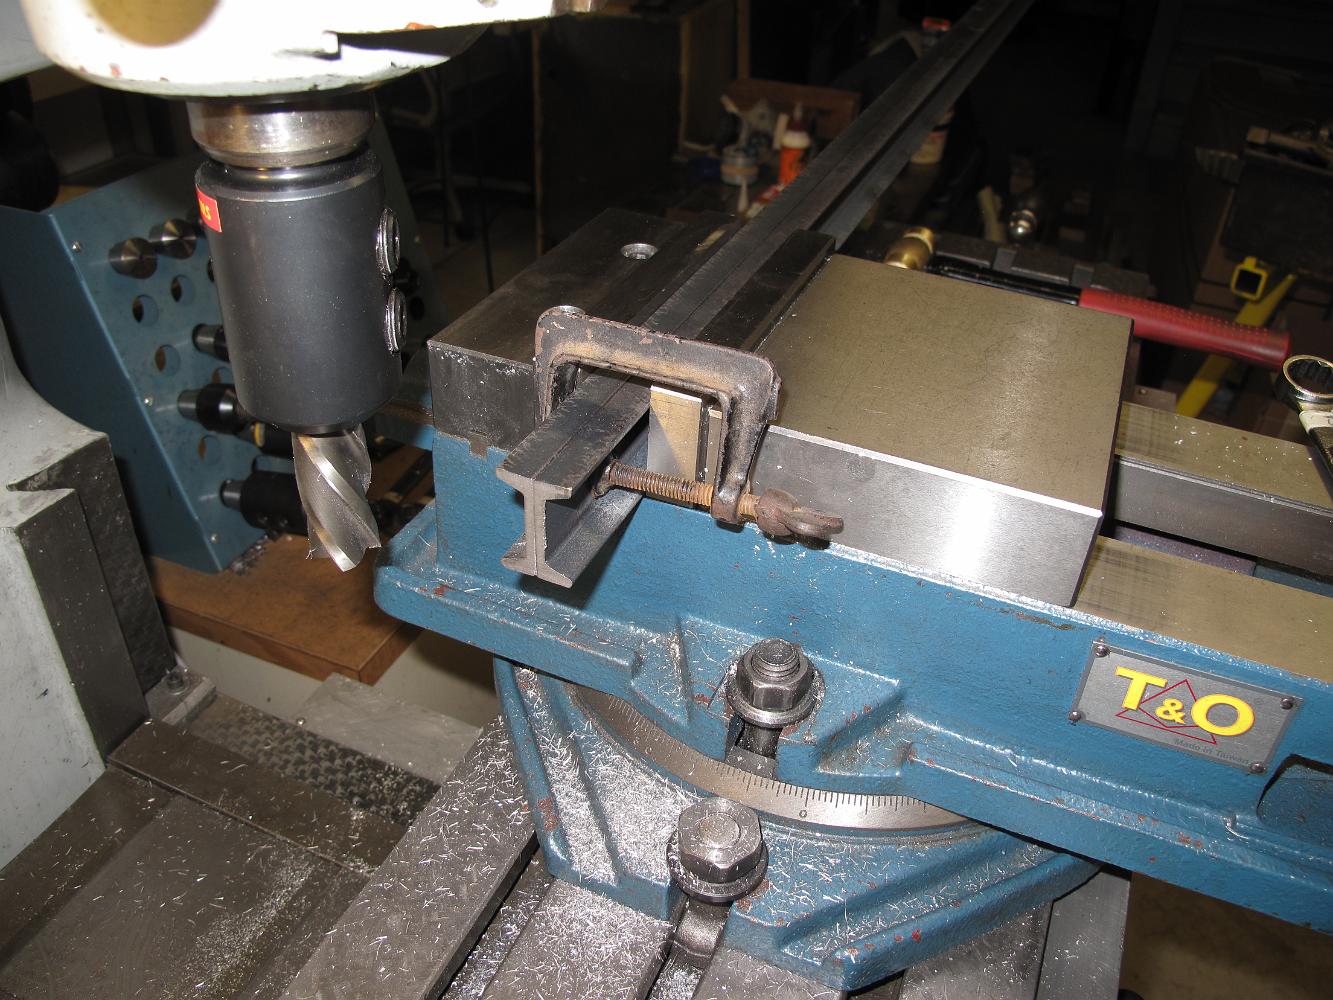
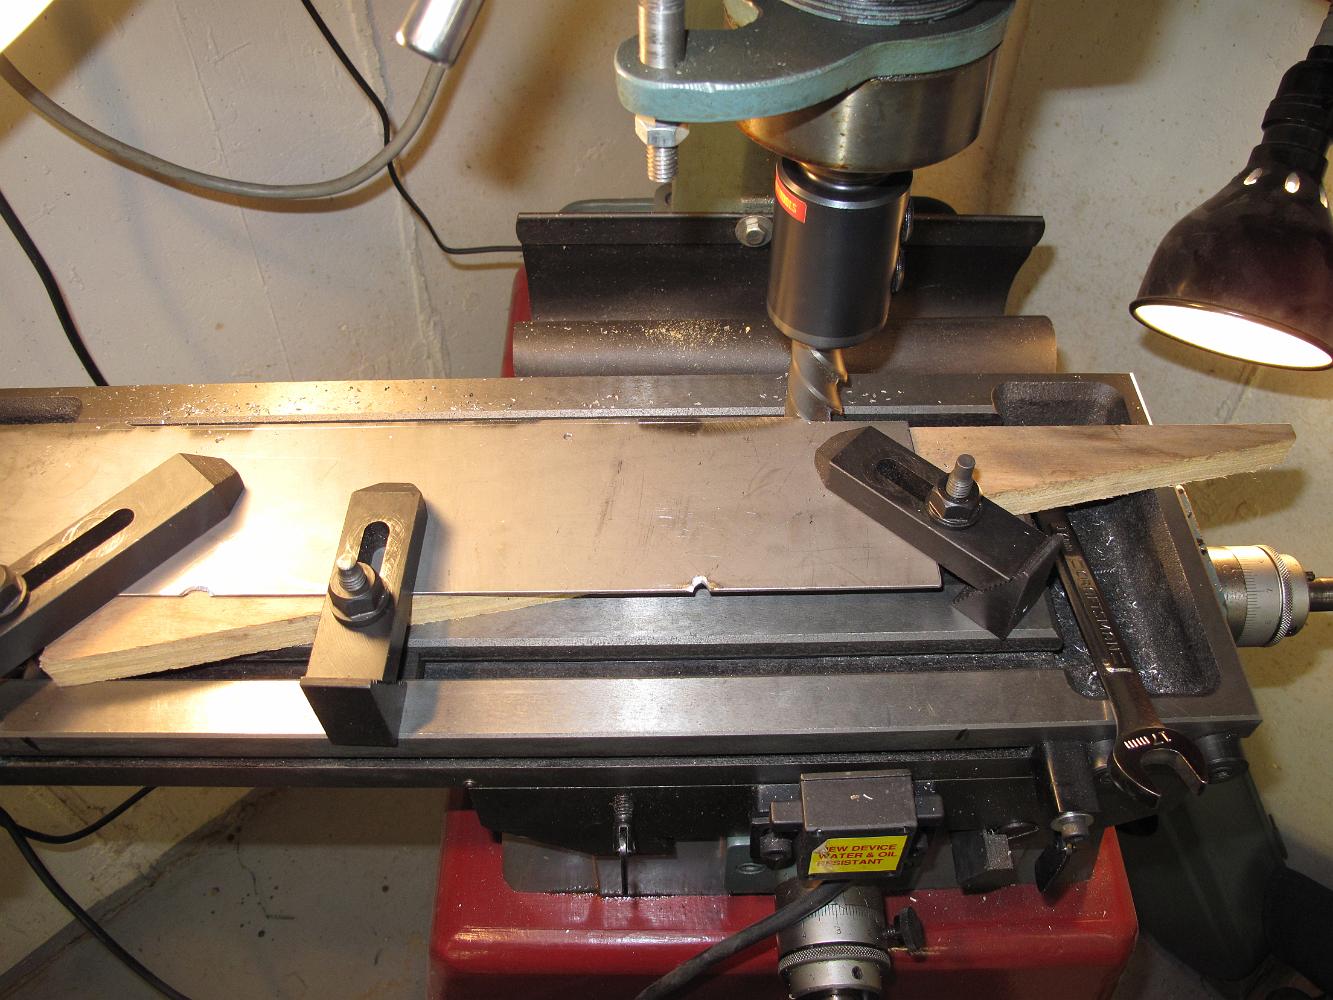
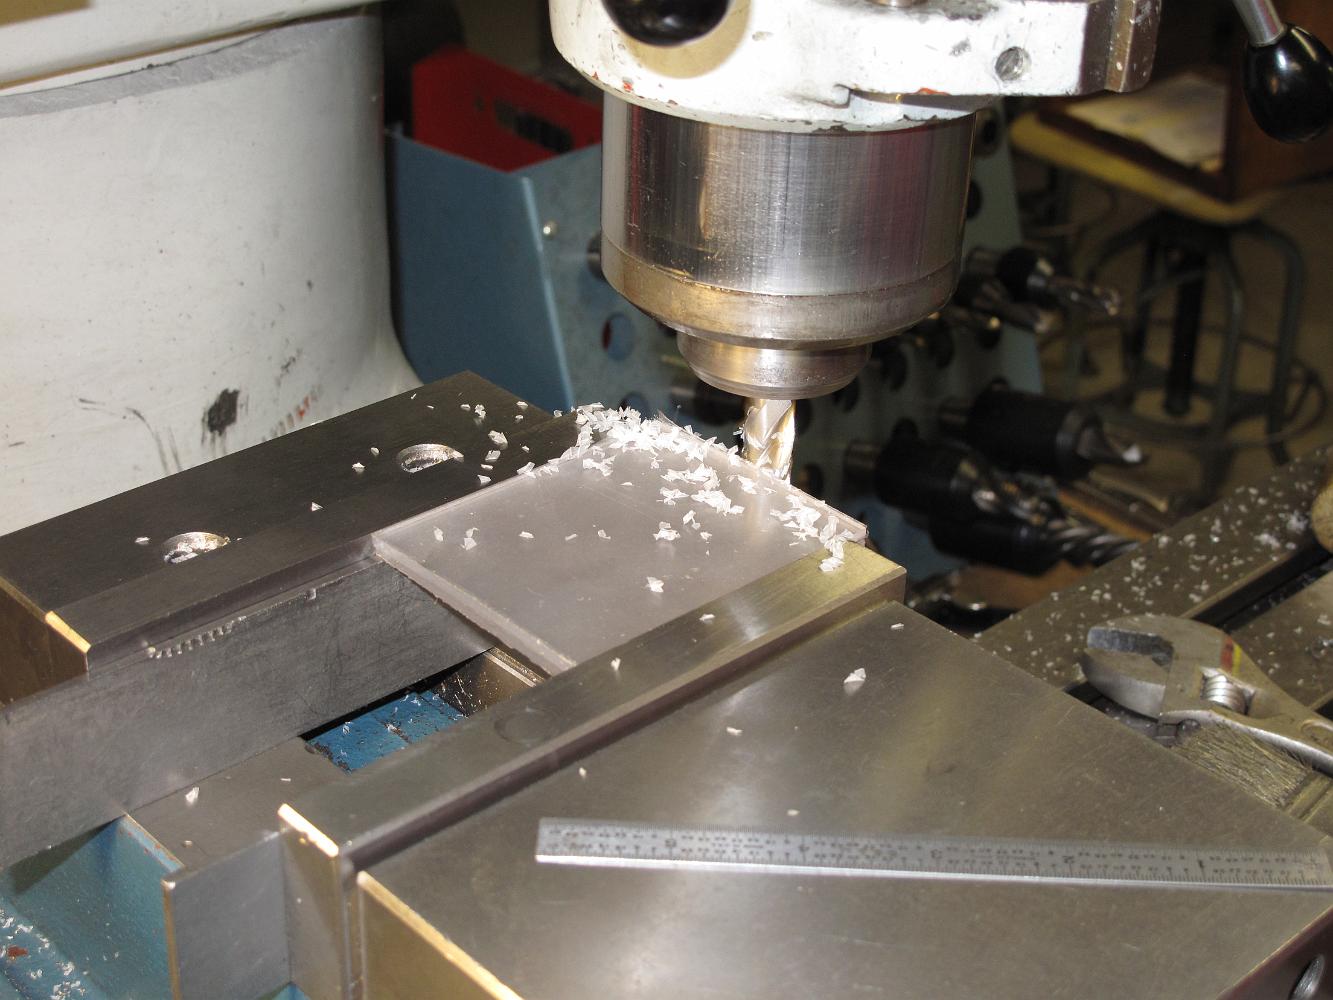
16-Dec-2013 Trimming the water leg covers to width in the mill-drill with a reverse spiral mill. This works so much better than a convention bit which pulls the…
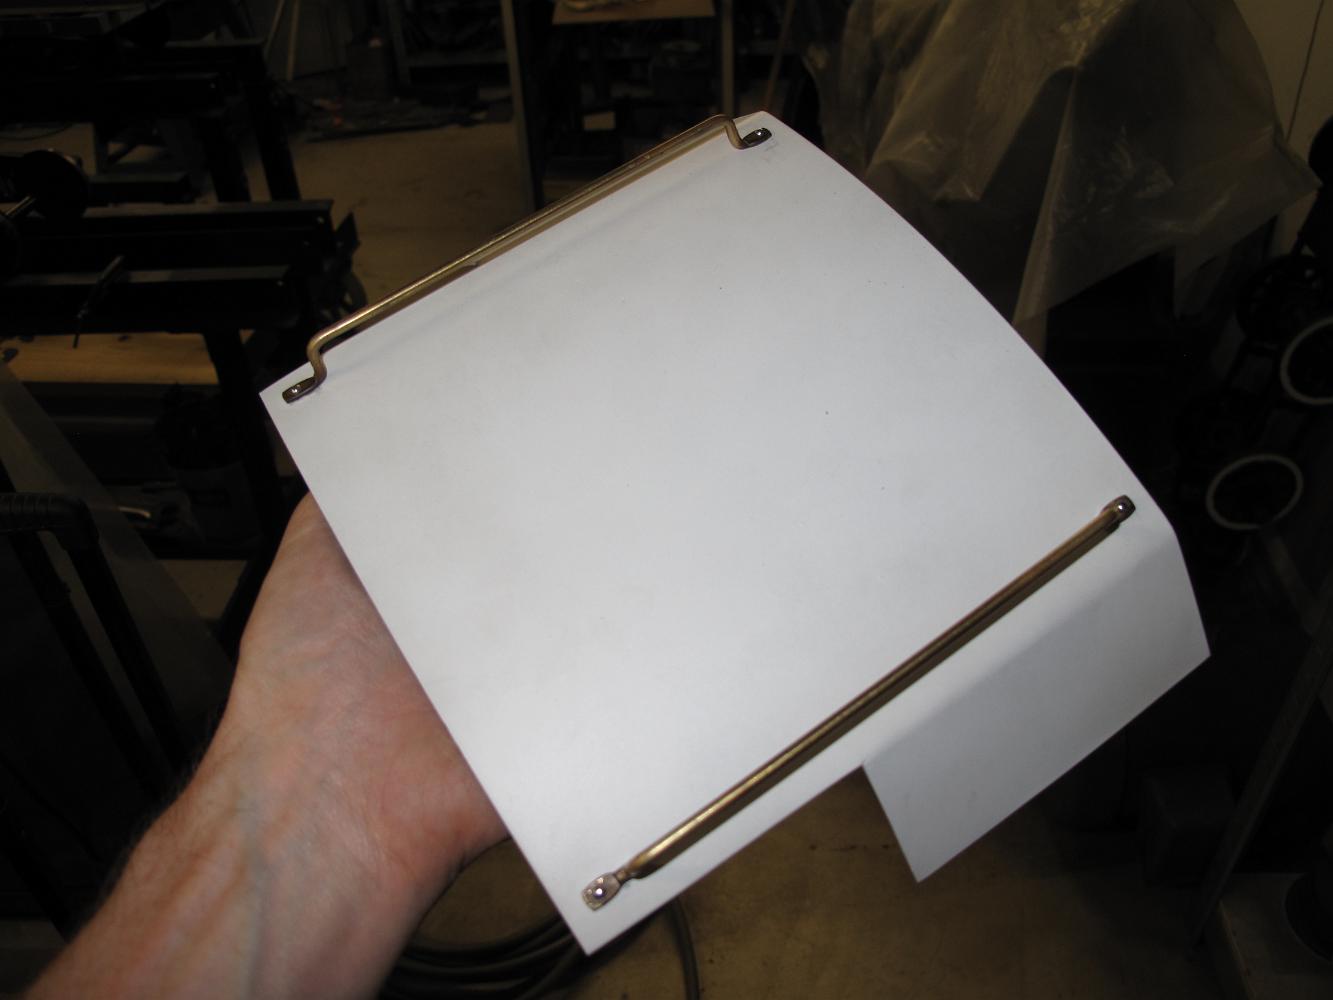
16-Dec-2013 Using a piece of the tender which I had cut off as a drill template for the decorative rivets.
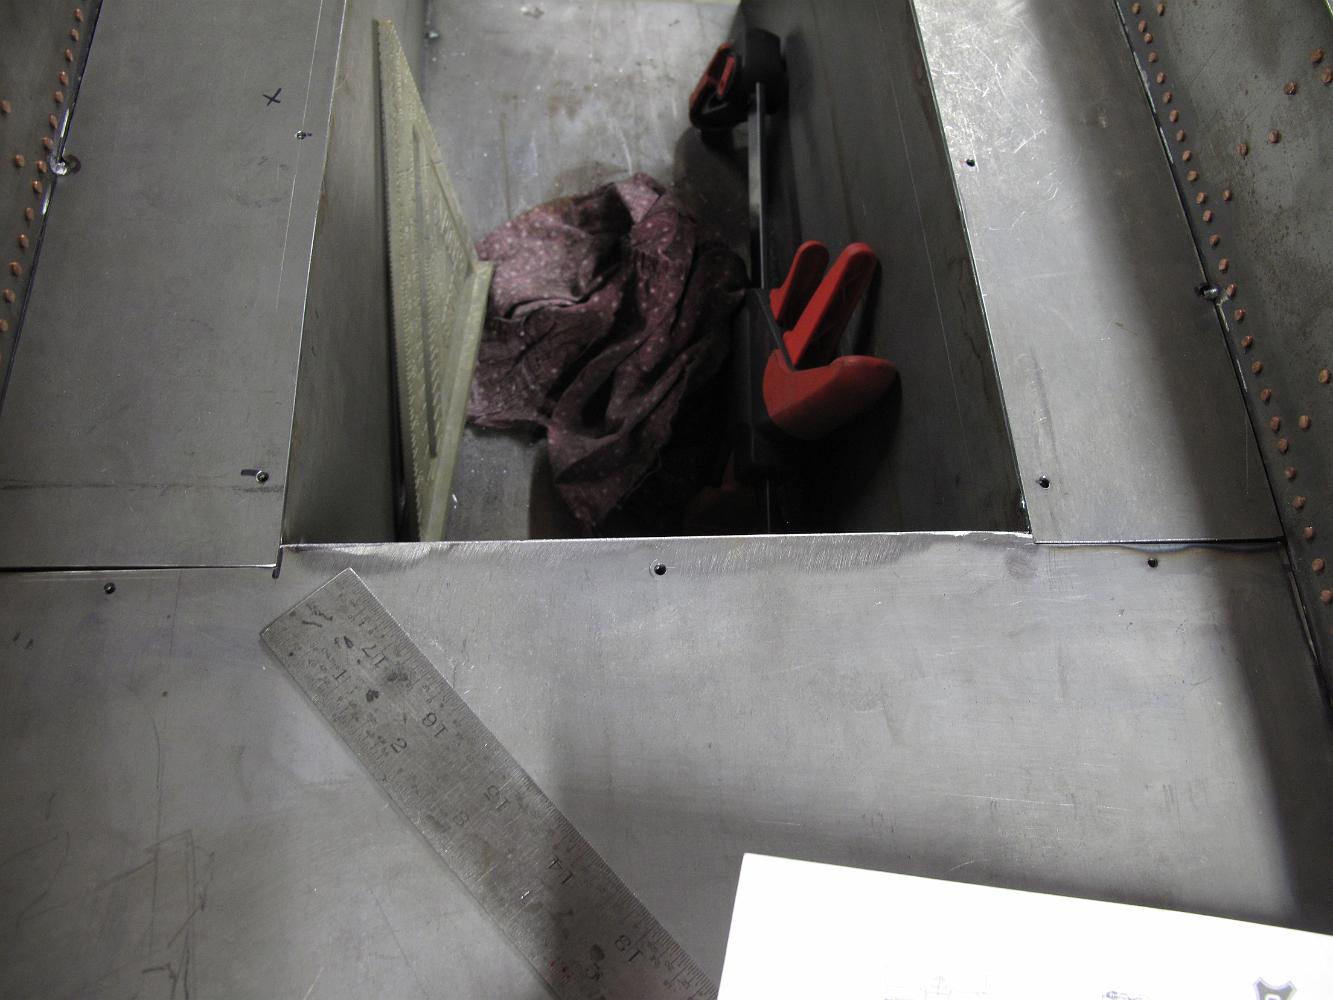
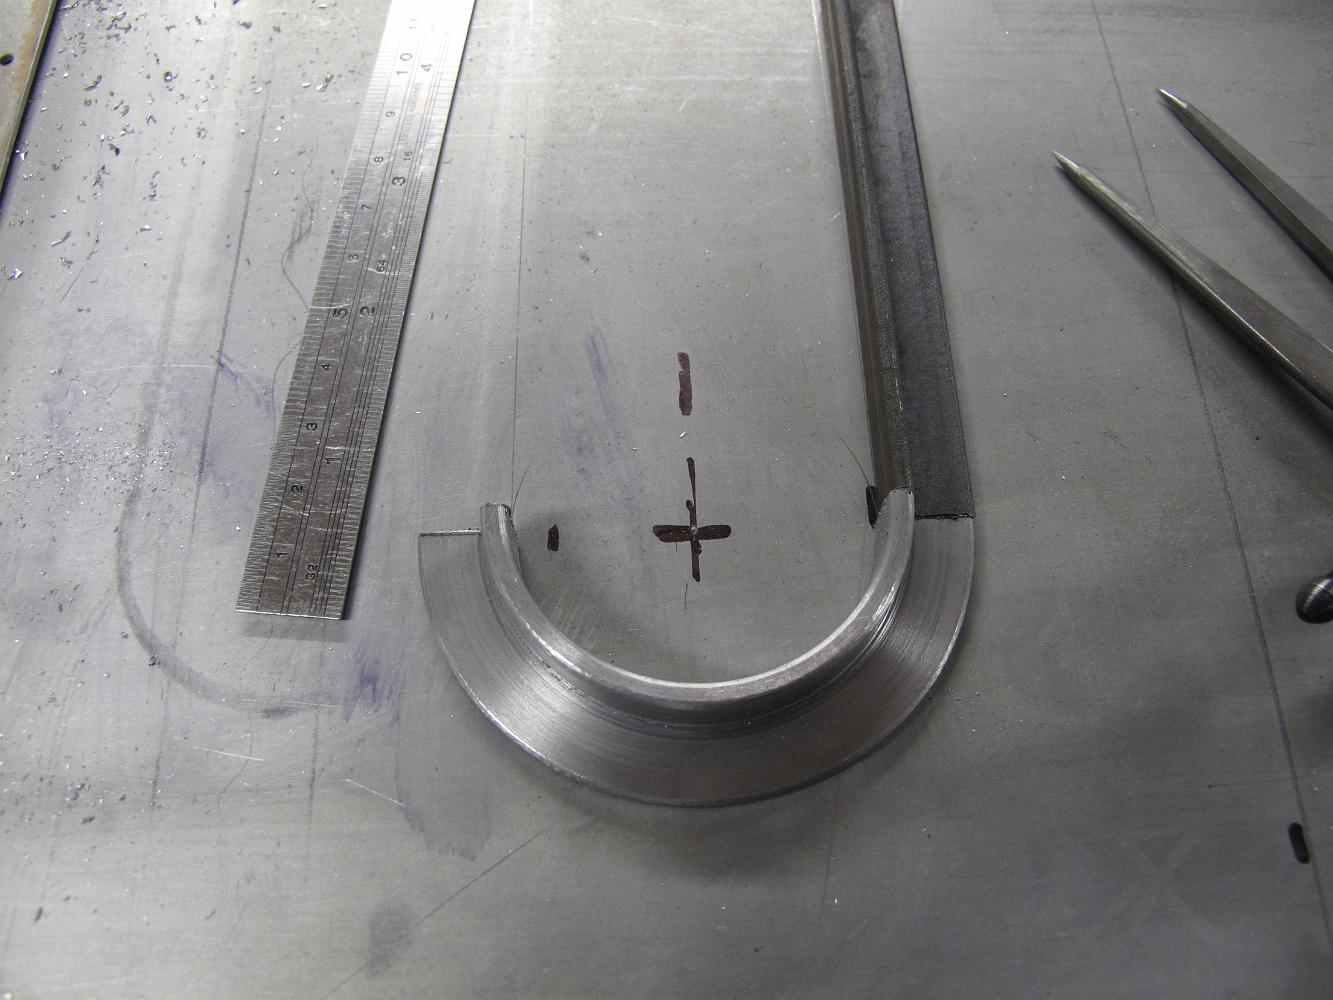
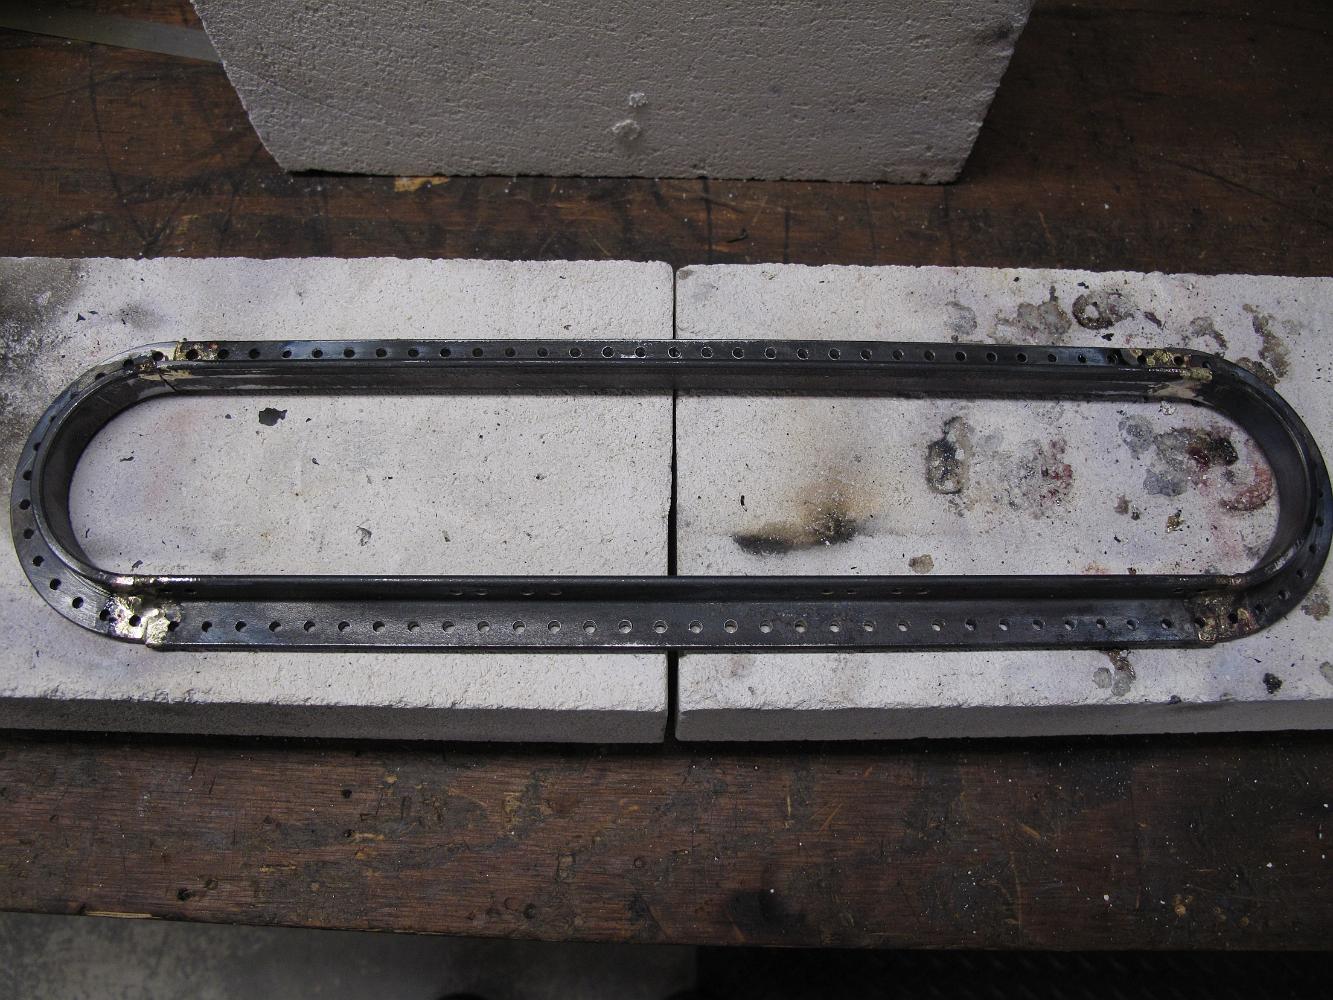
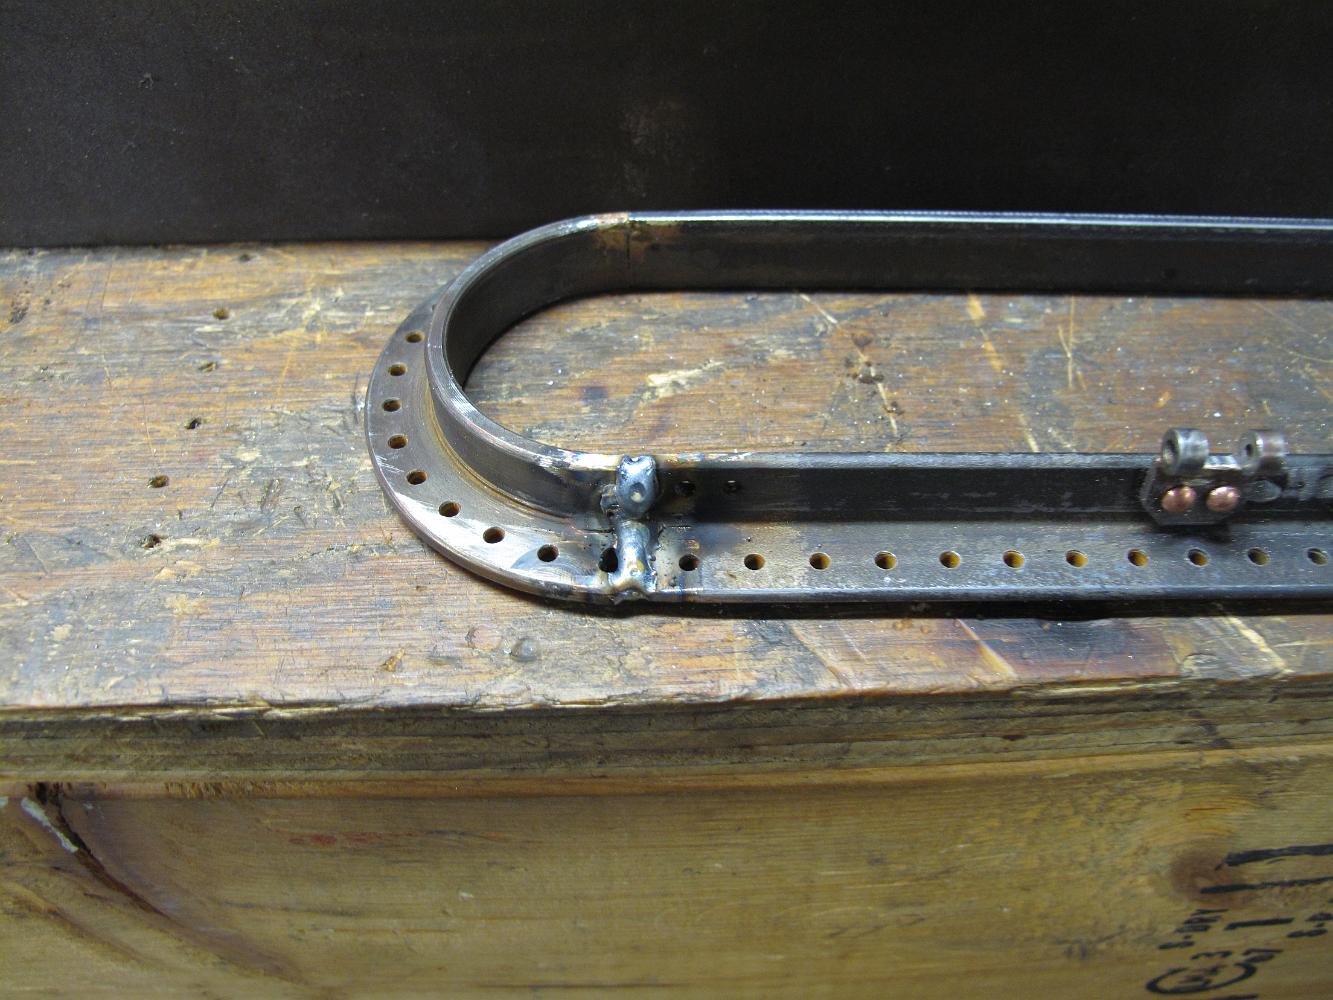
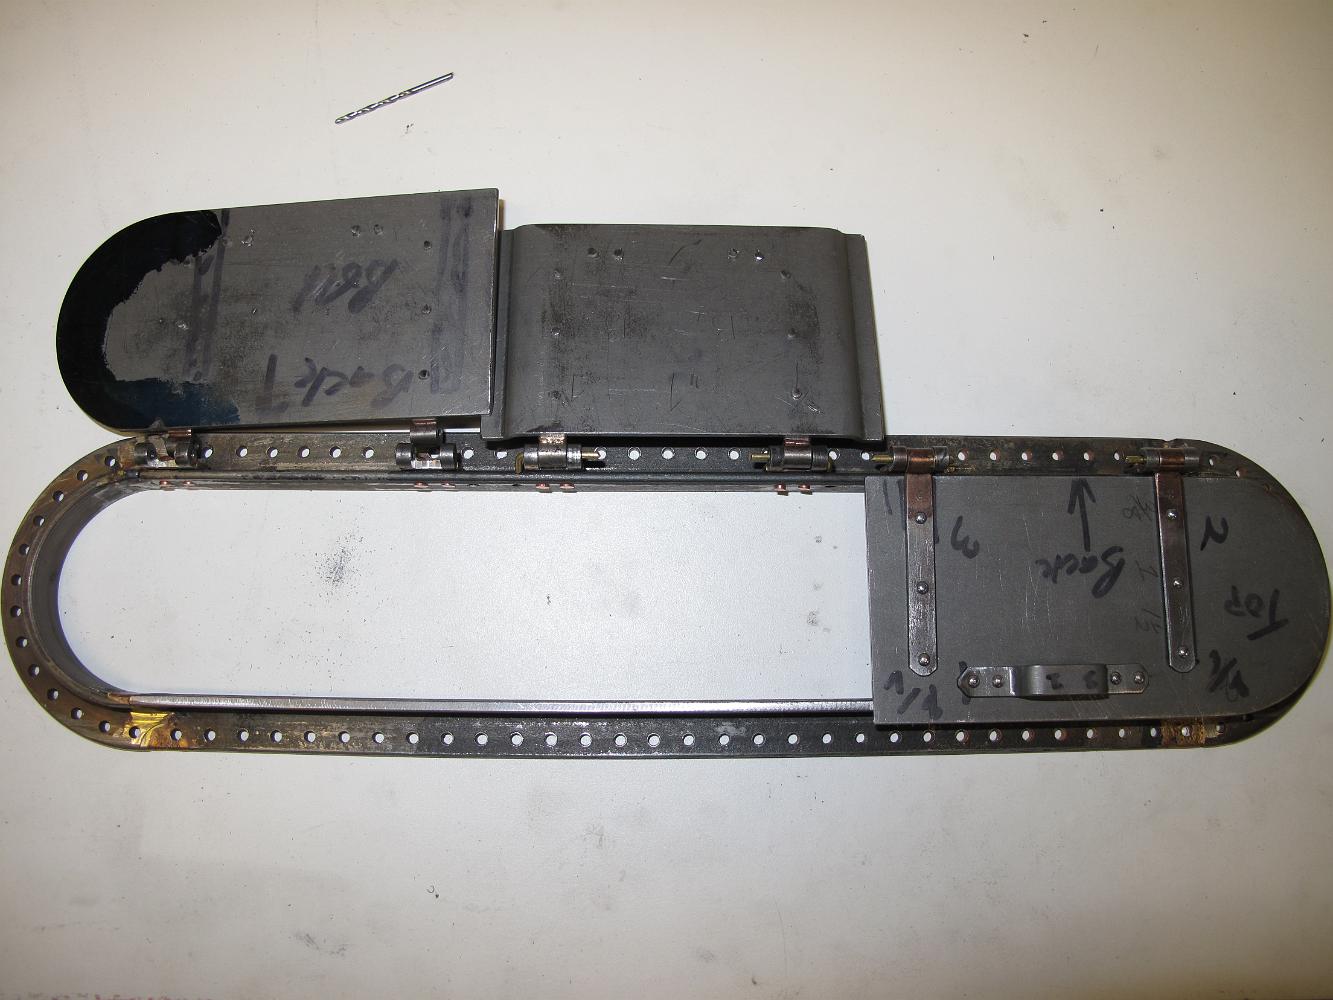
30-Dec-3013 I begin work on the tender water hatch. I will use 1/4"x1/4" angle iron for the hatch frame. Unable to heat and bend the angle iron in a semi circle…
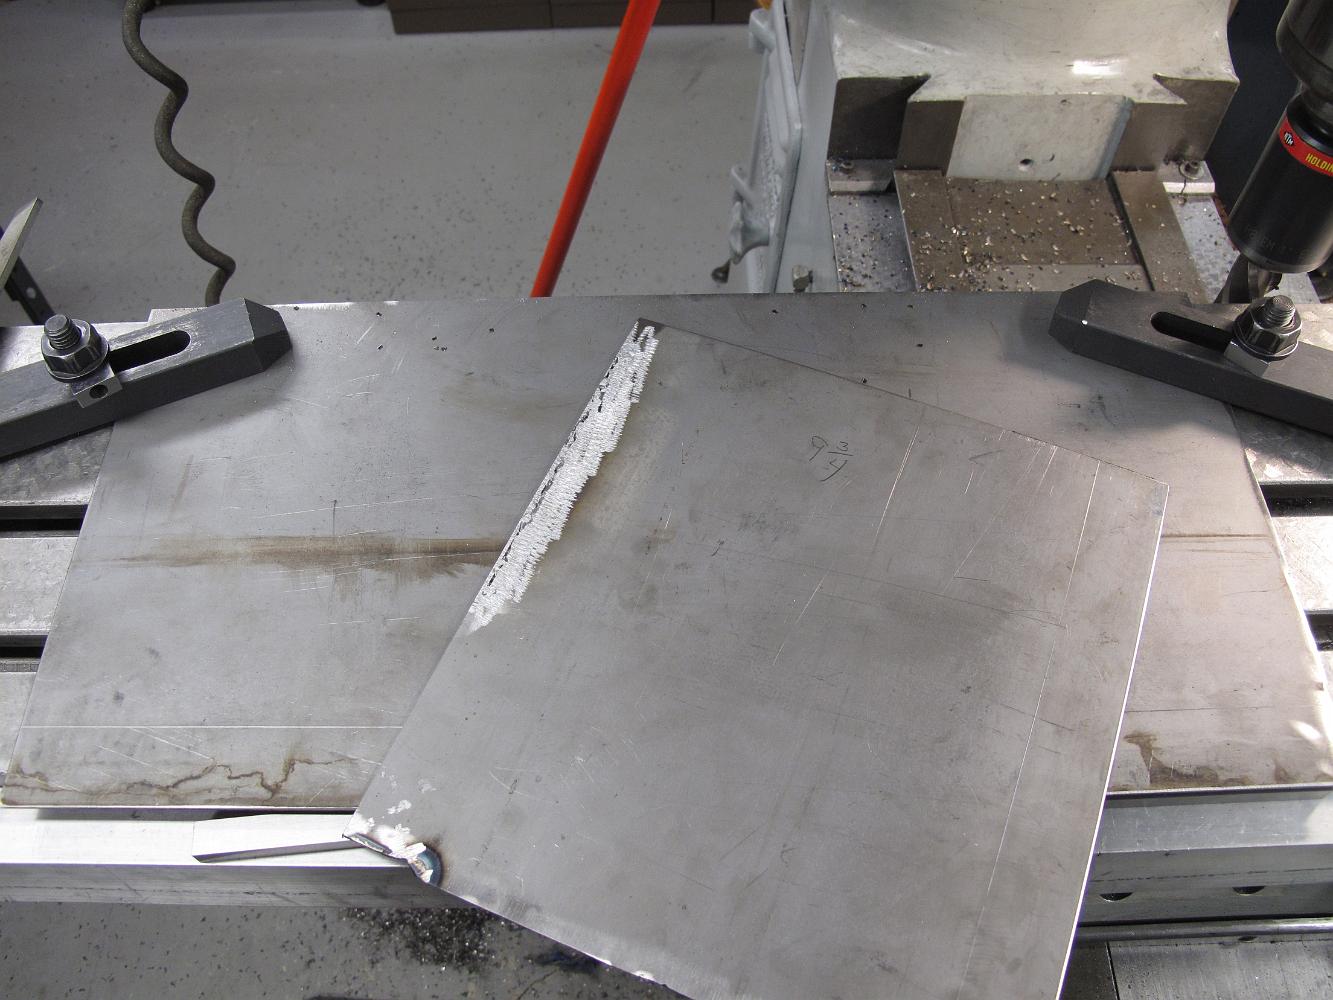
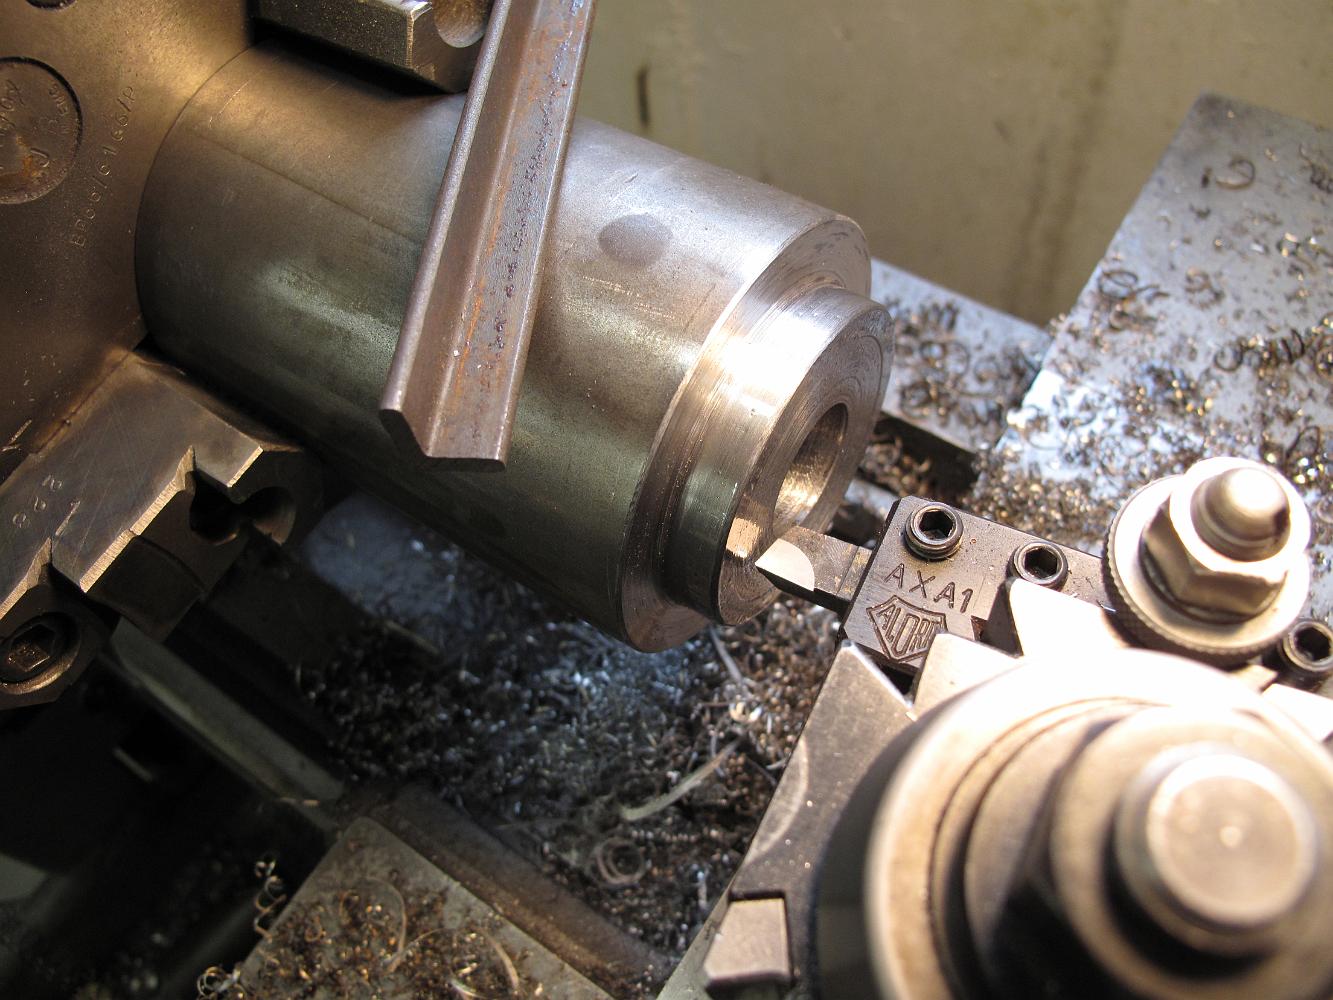
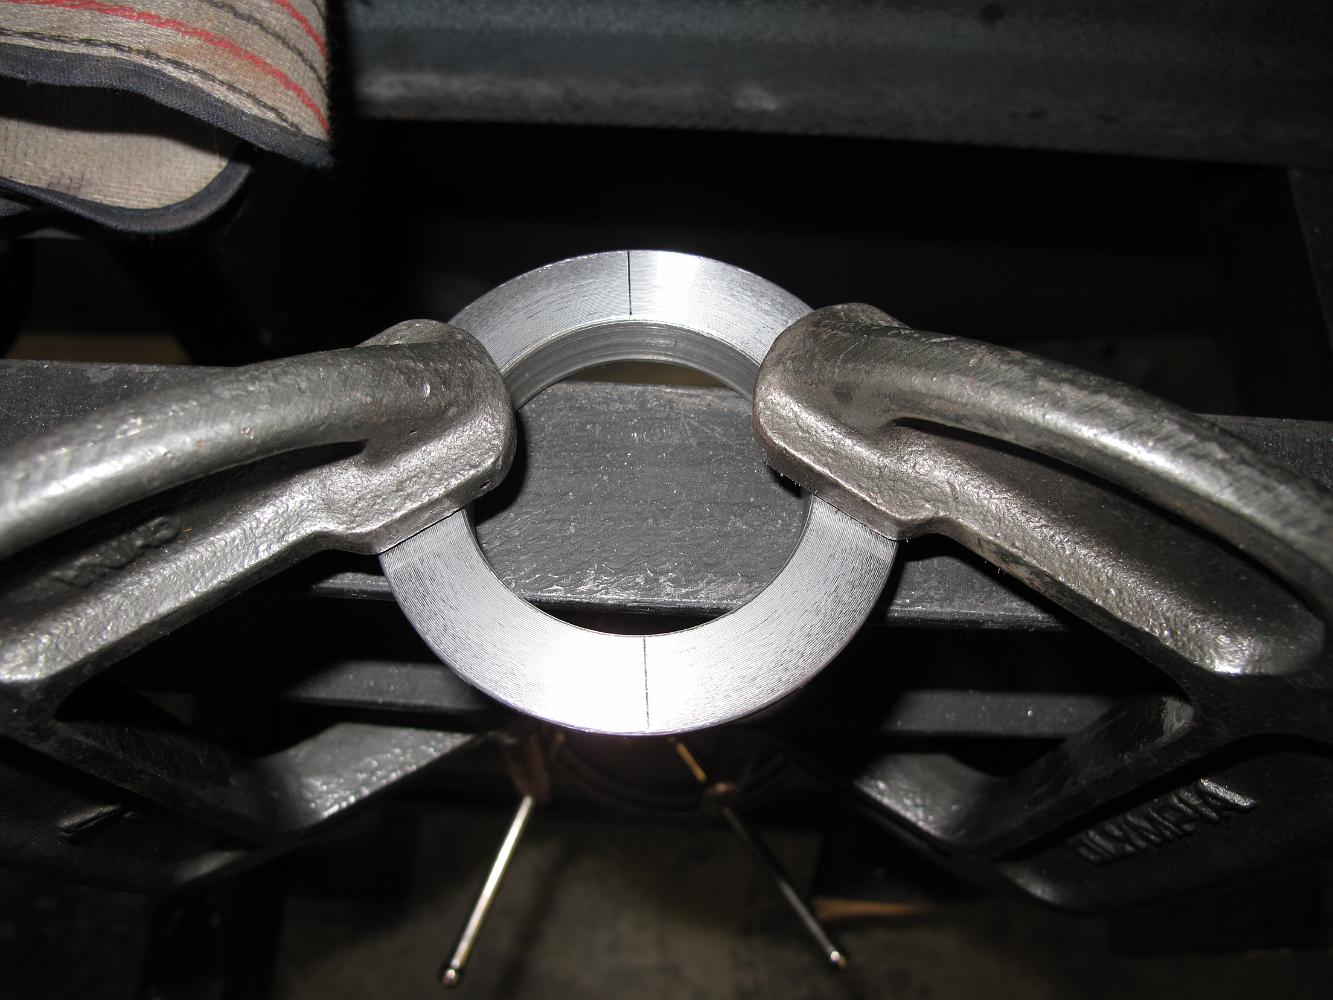
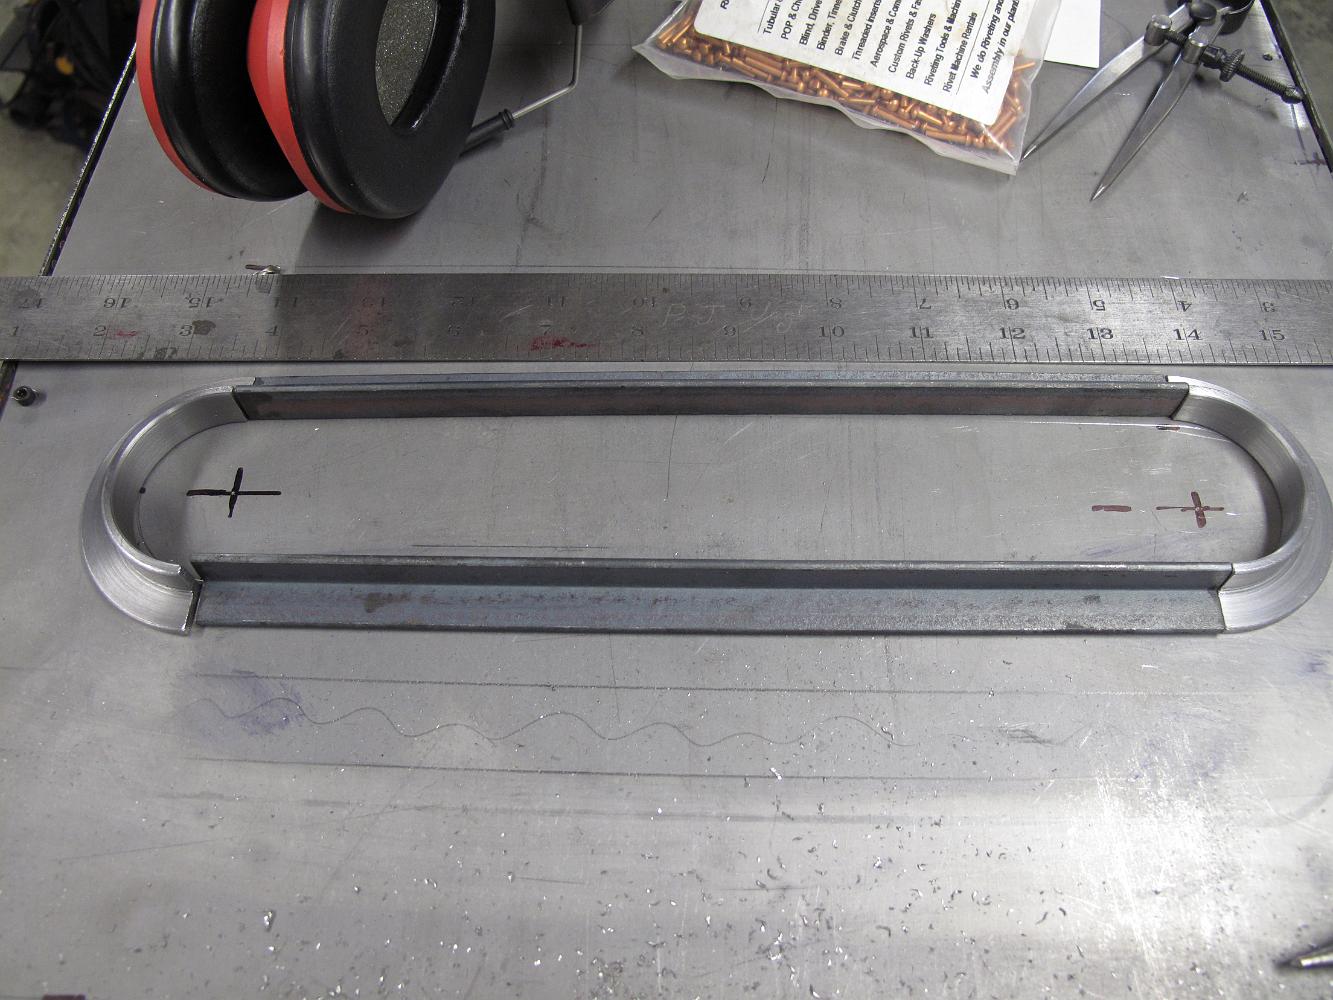
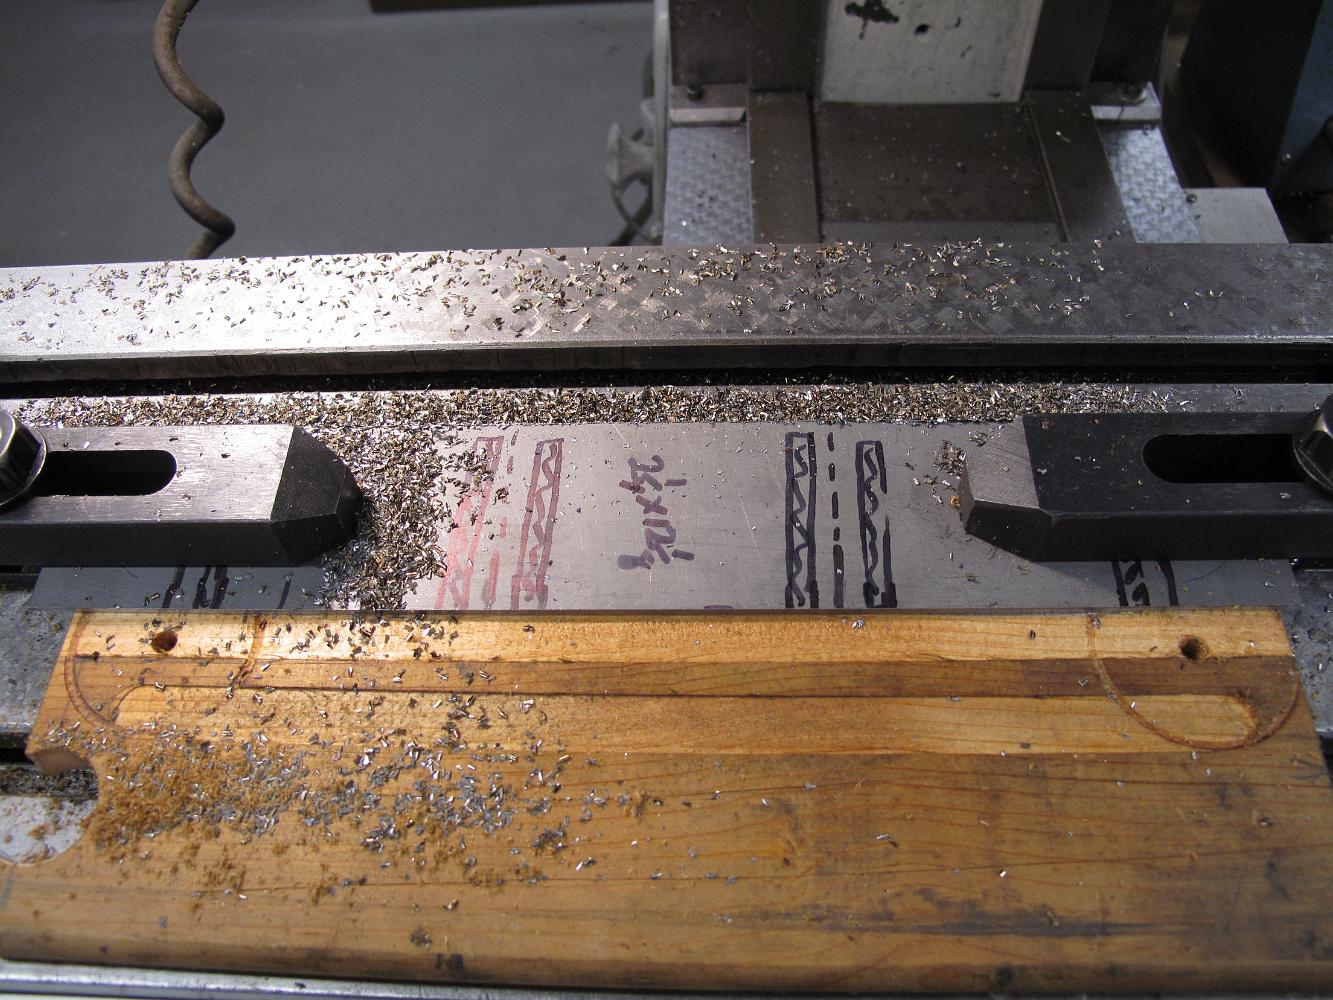
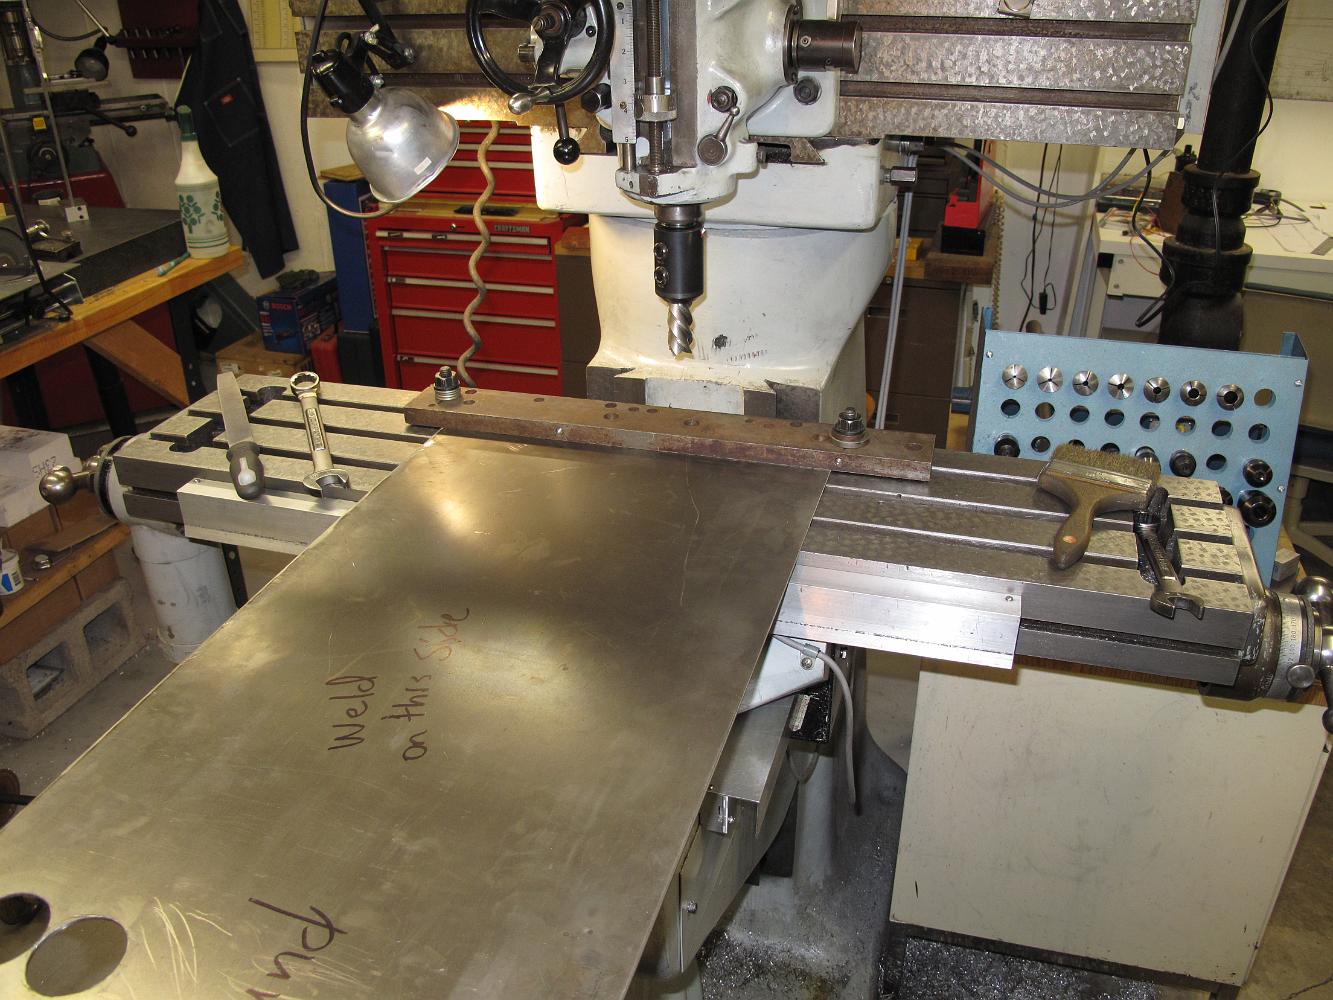
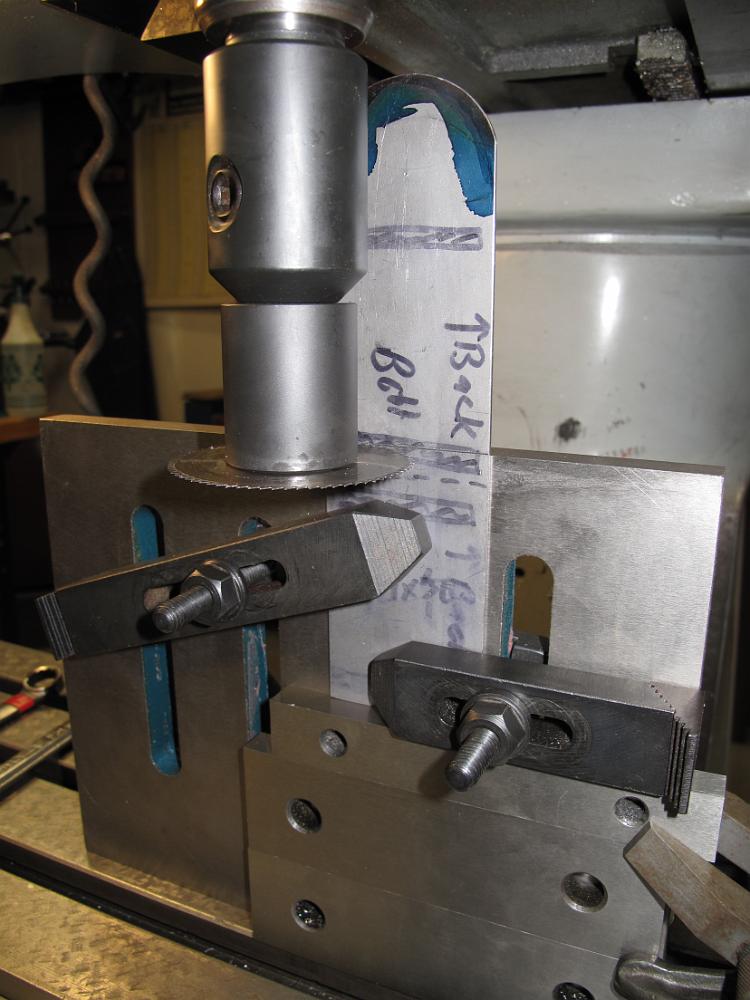
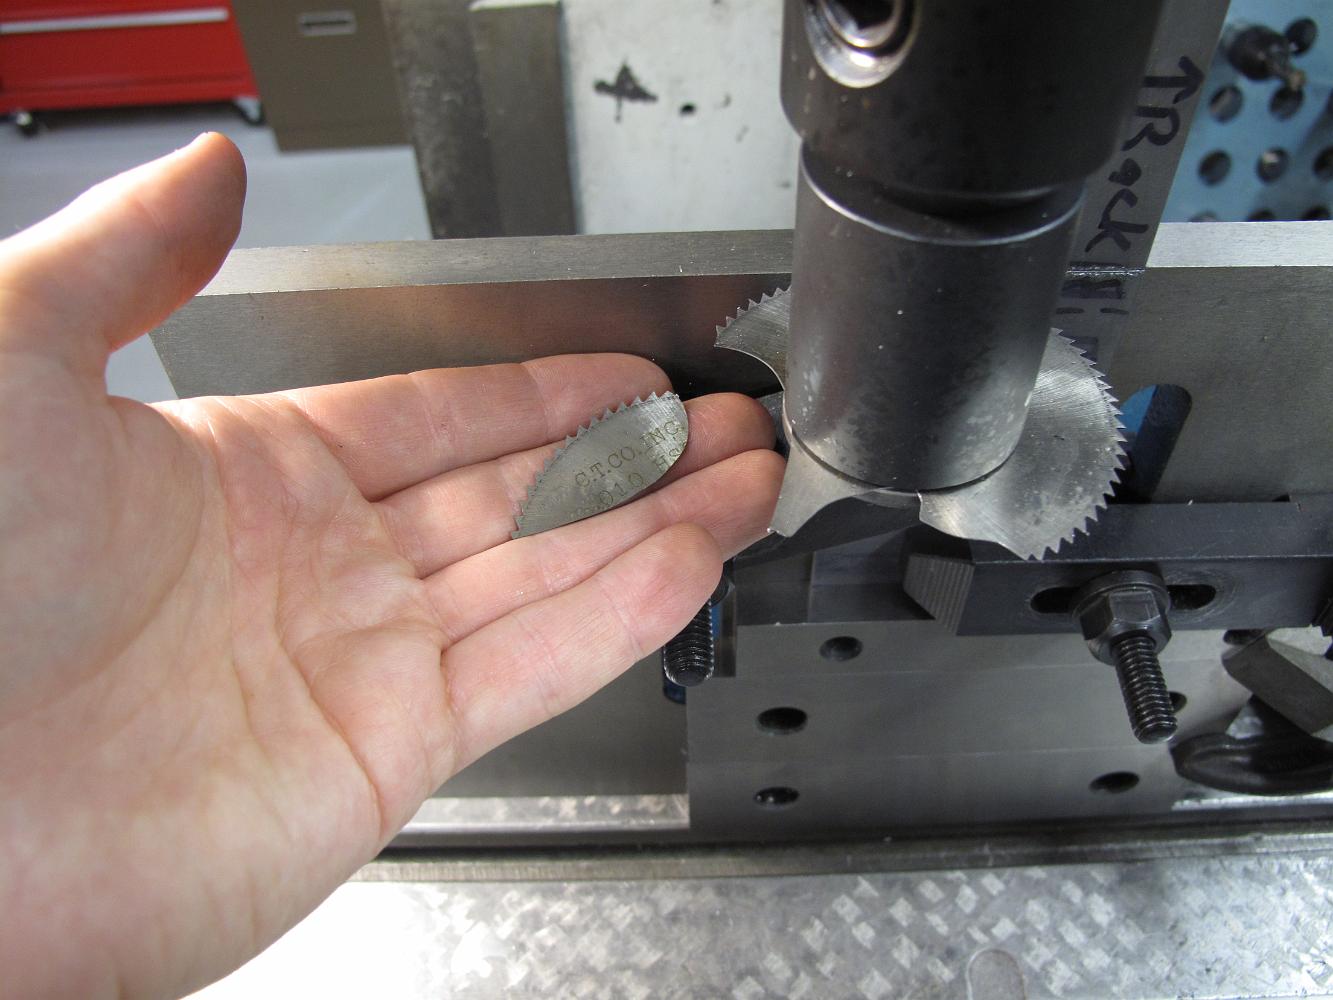
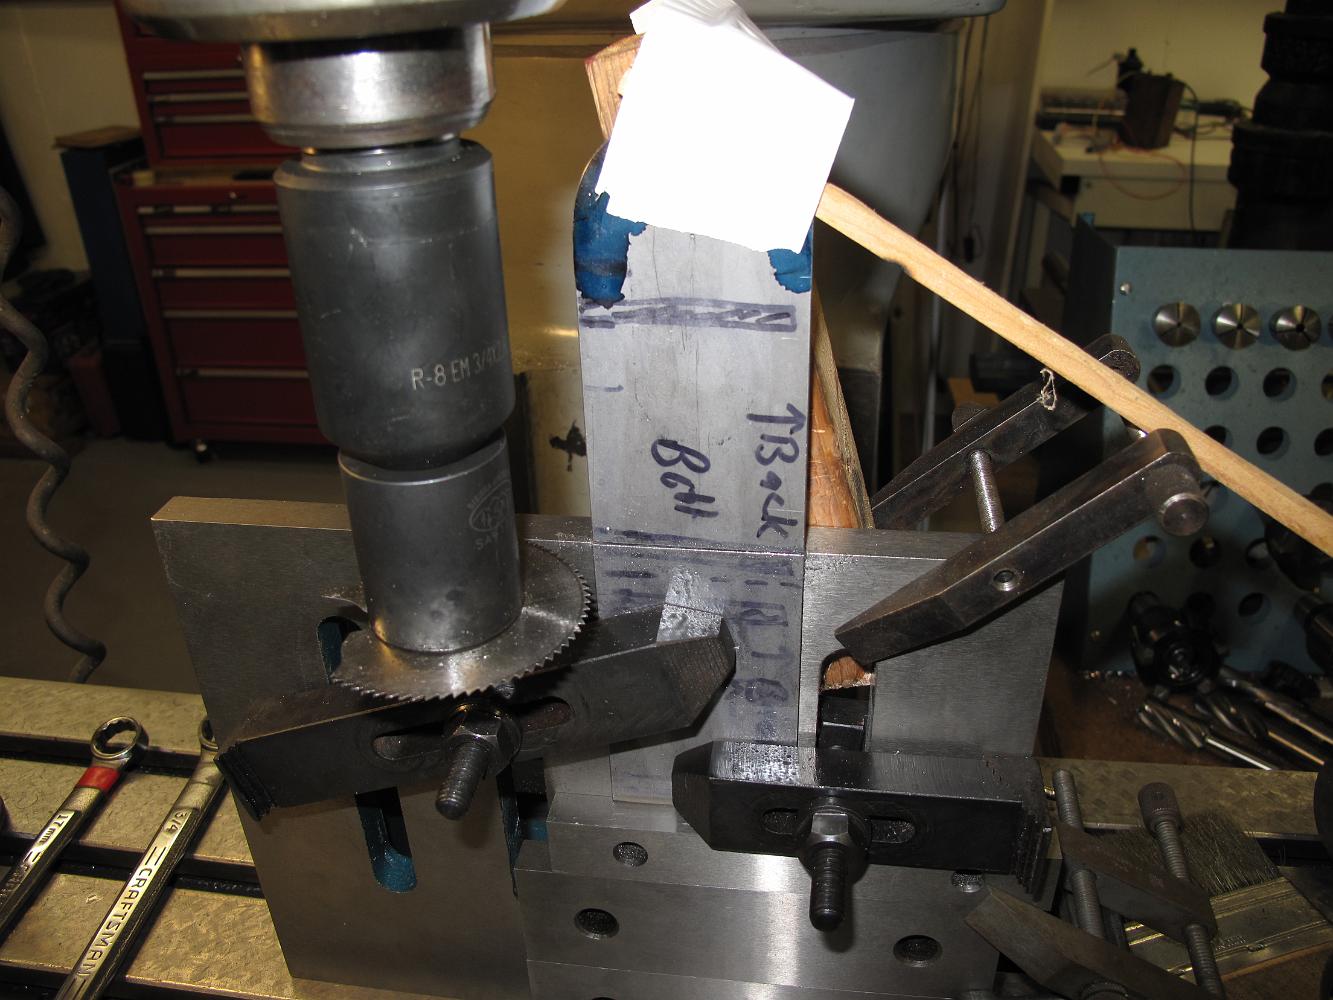
30-Dec-2013 Trying to skip the complications of setting up the angle plate and slitting saw to cut the part in half, I decide to clamp it to the bench and use a…
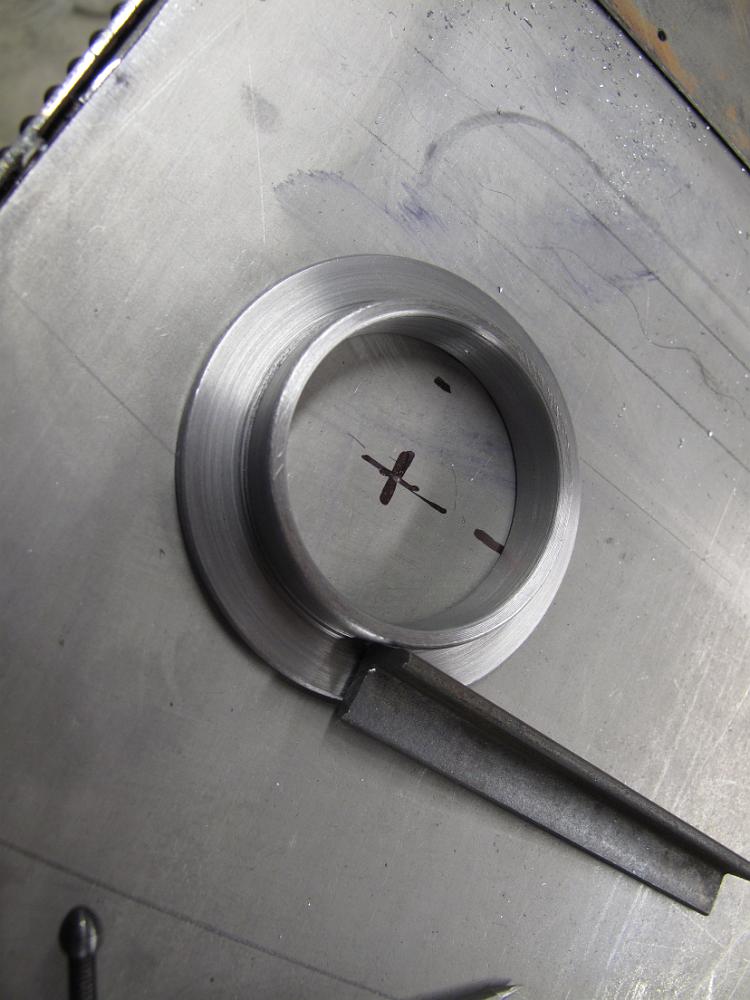
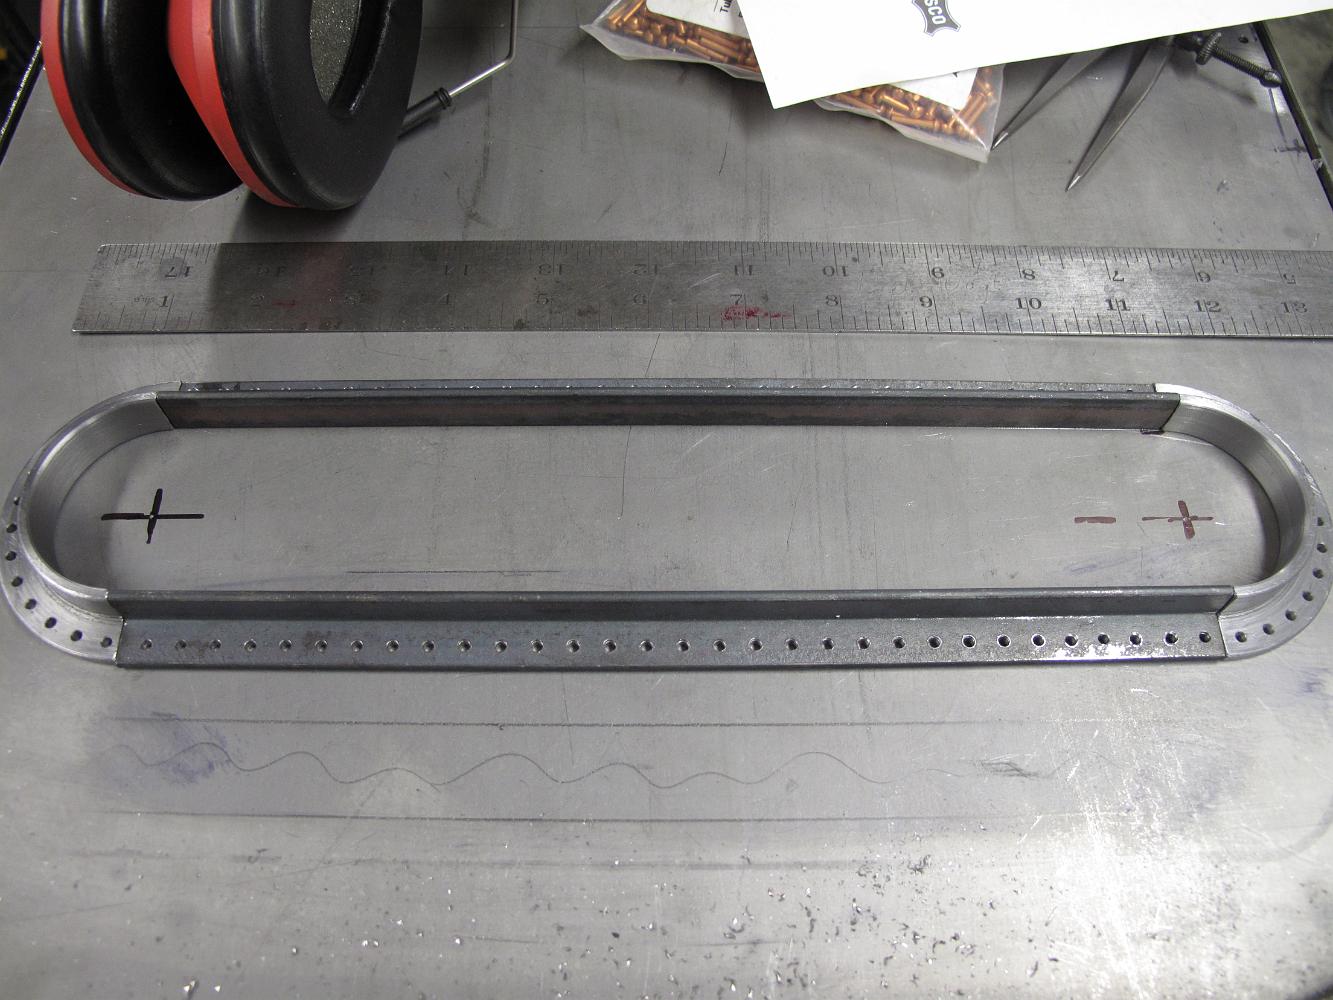
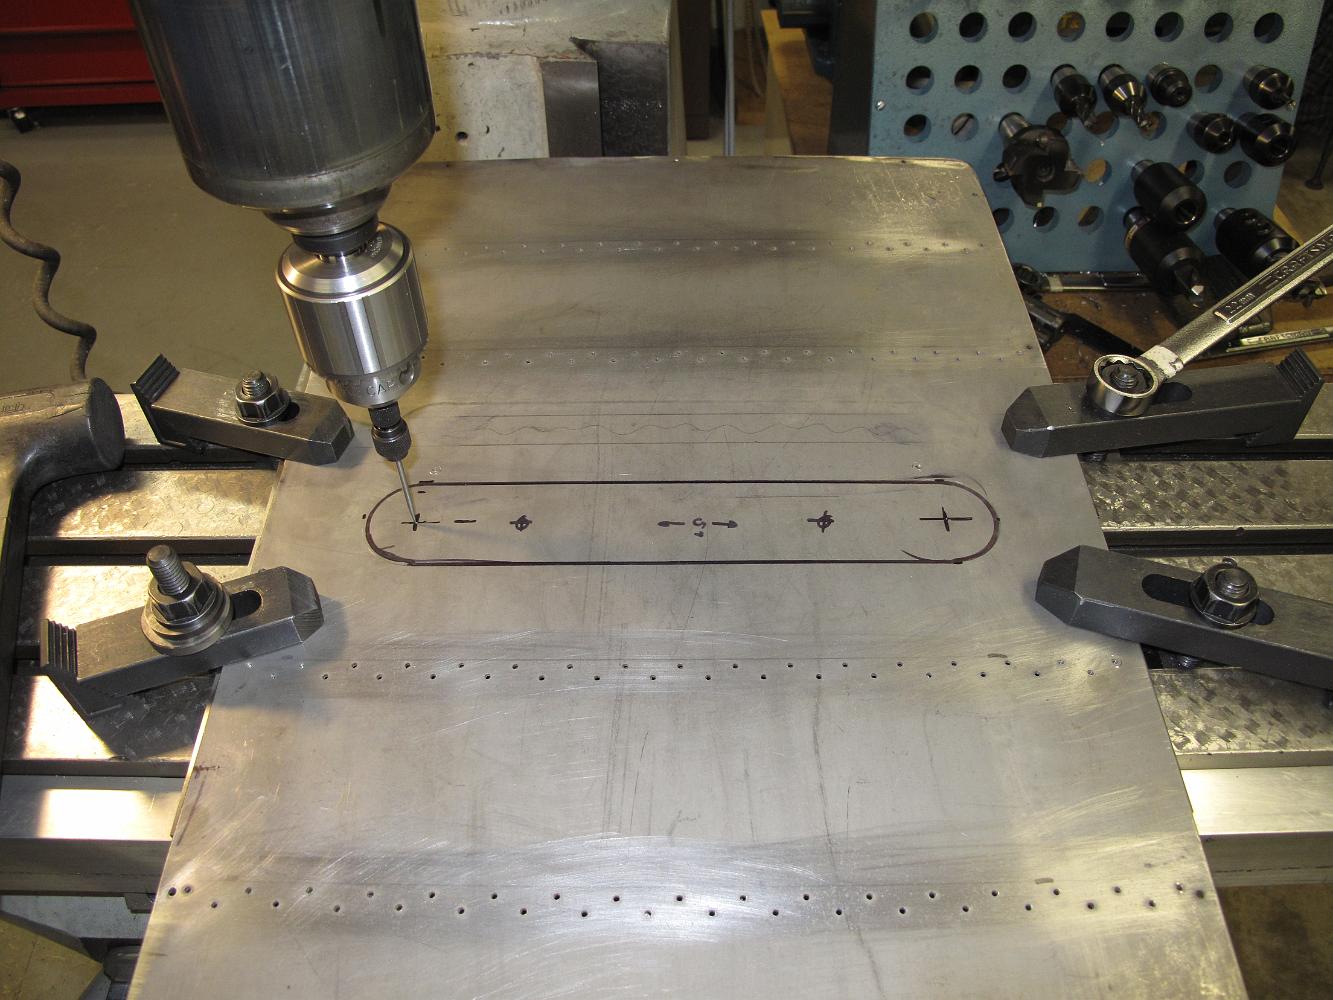
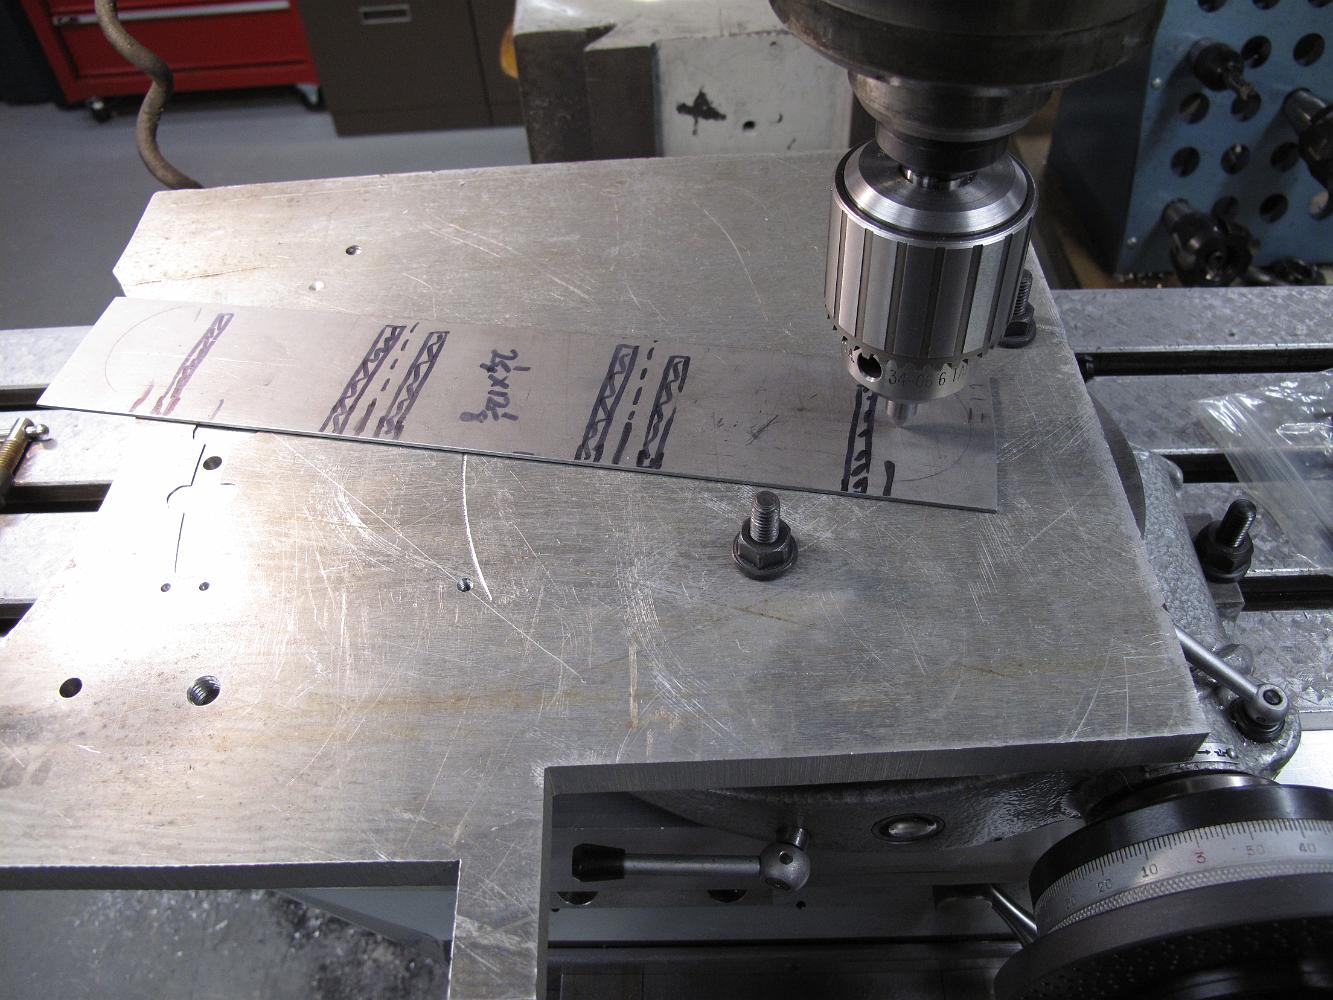
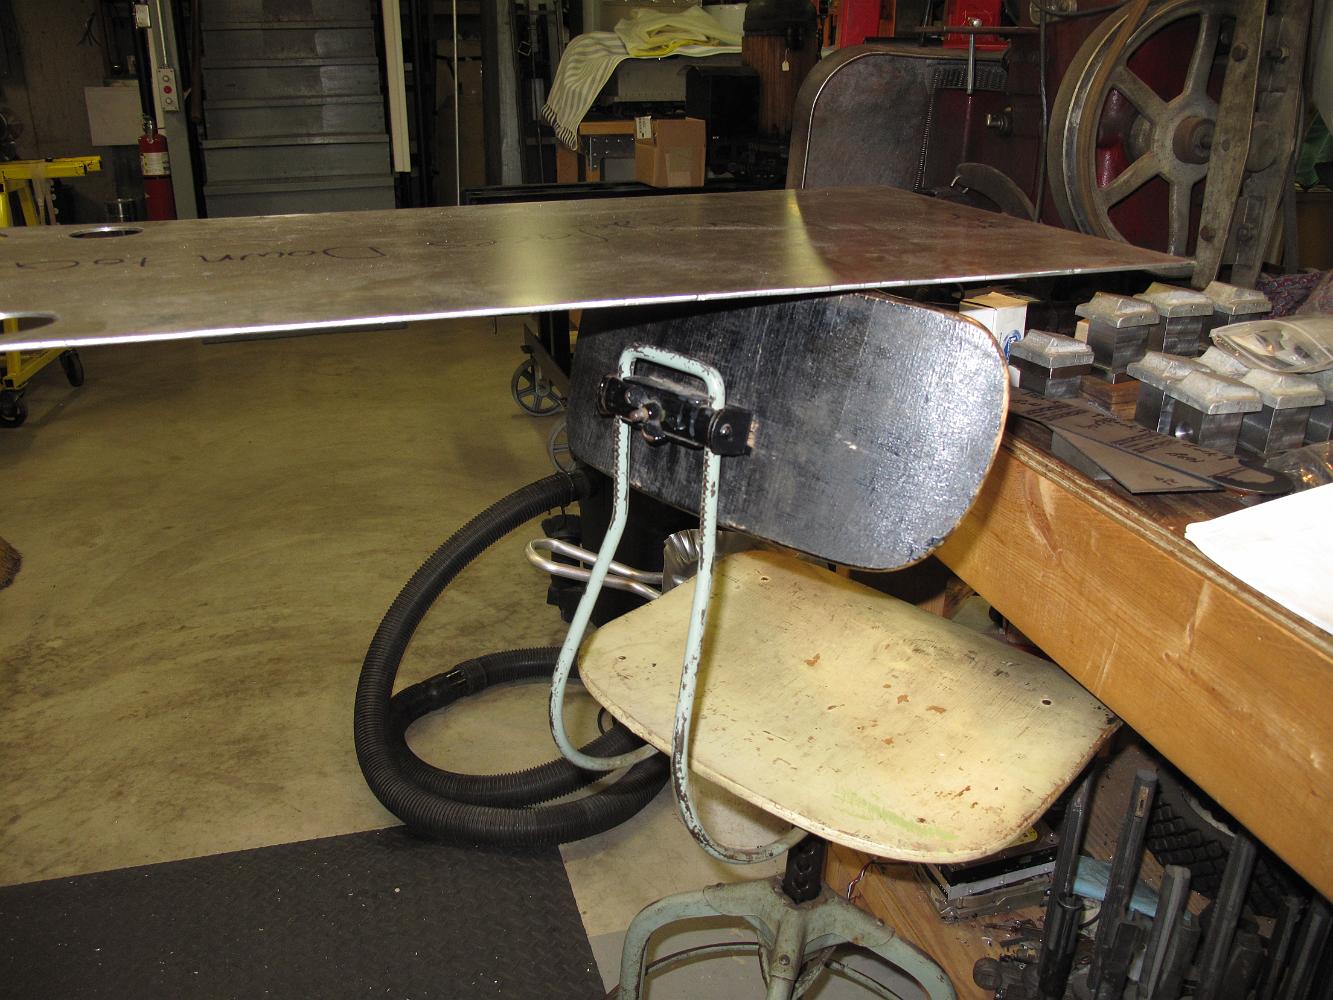
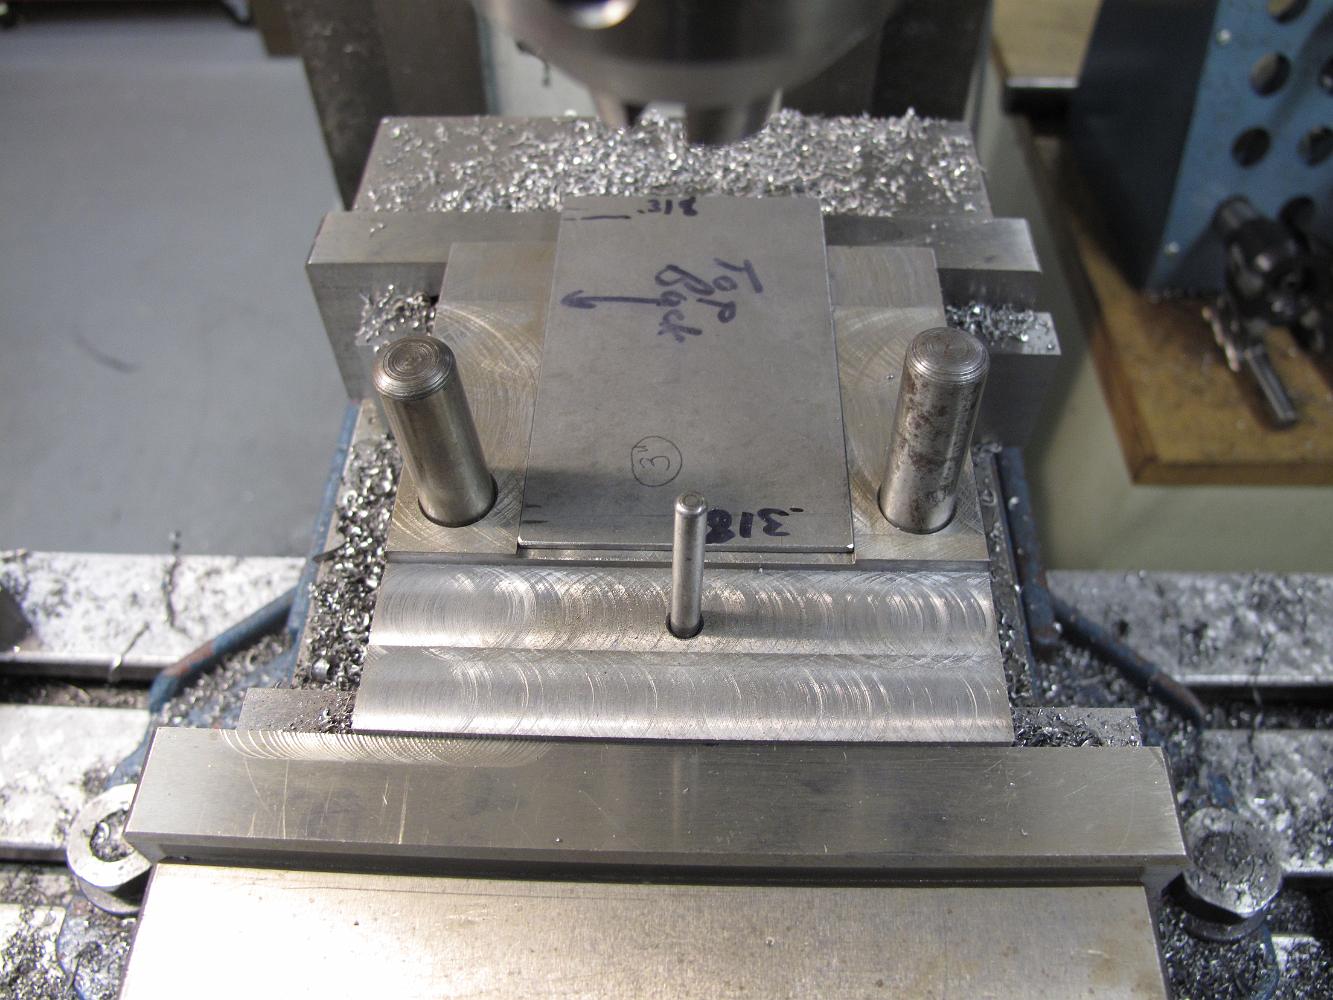
4-Jan-2014 Next puzzle to solve: now that I have cut the part into two pieces, how am I going to put the rivet holes into the bottom? Clamped to a board and…
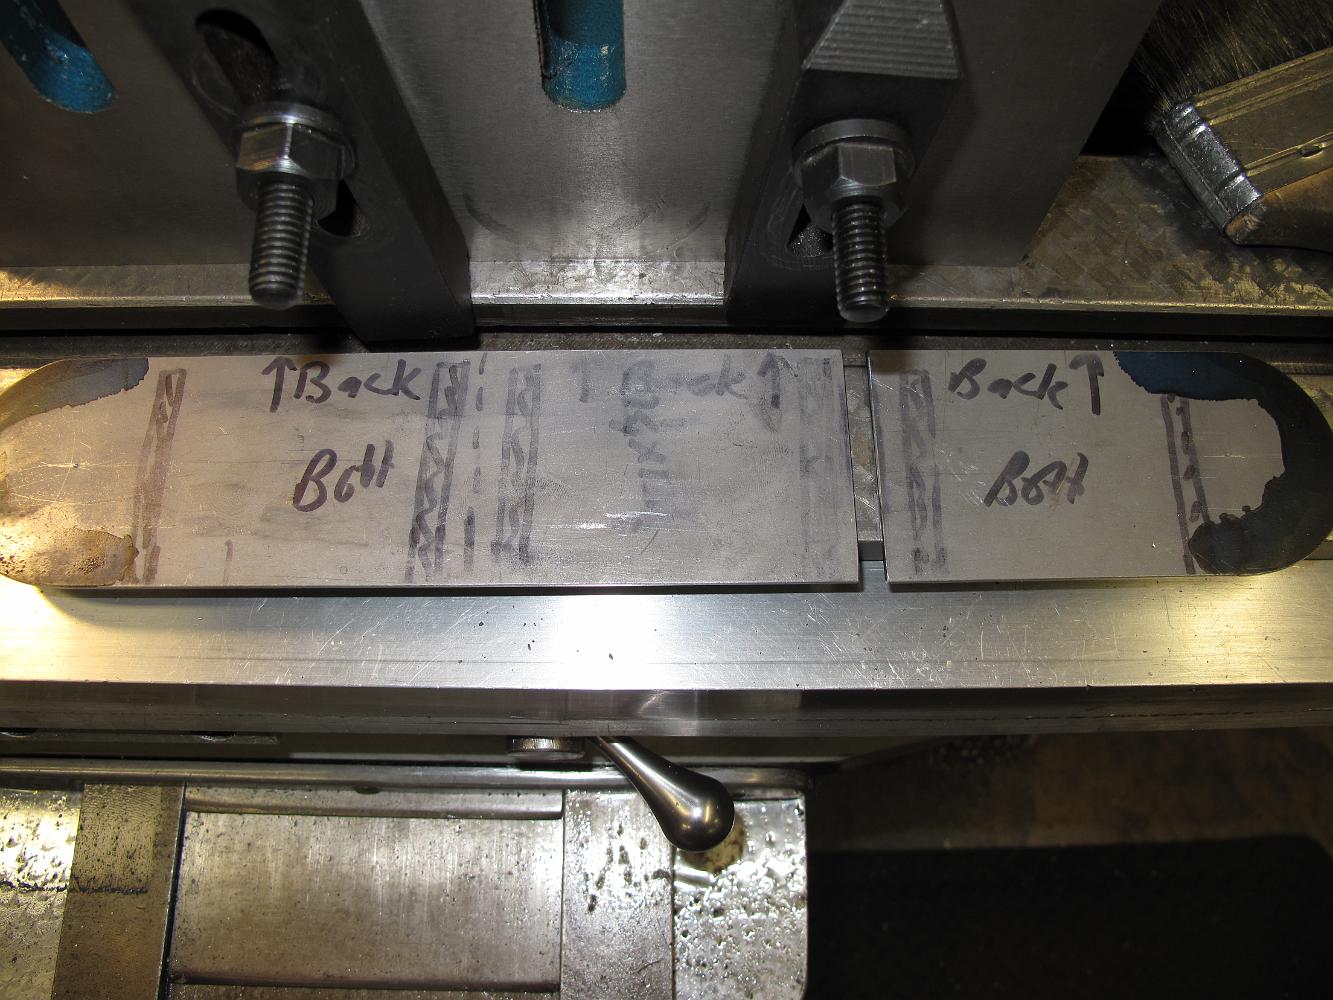
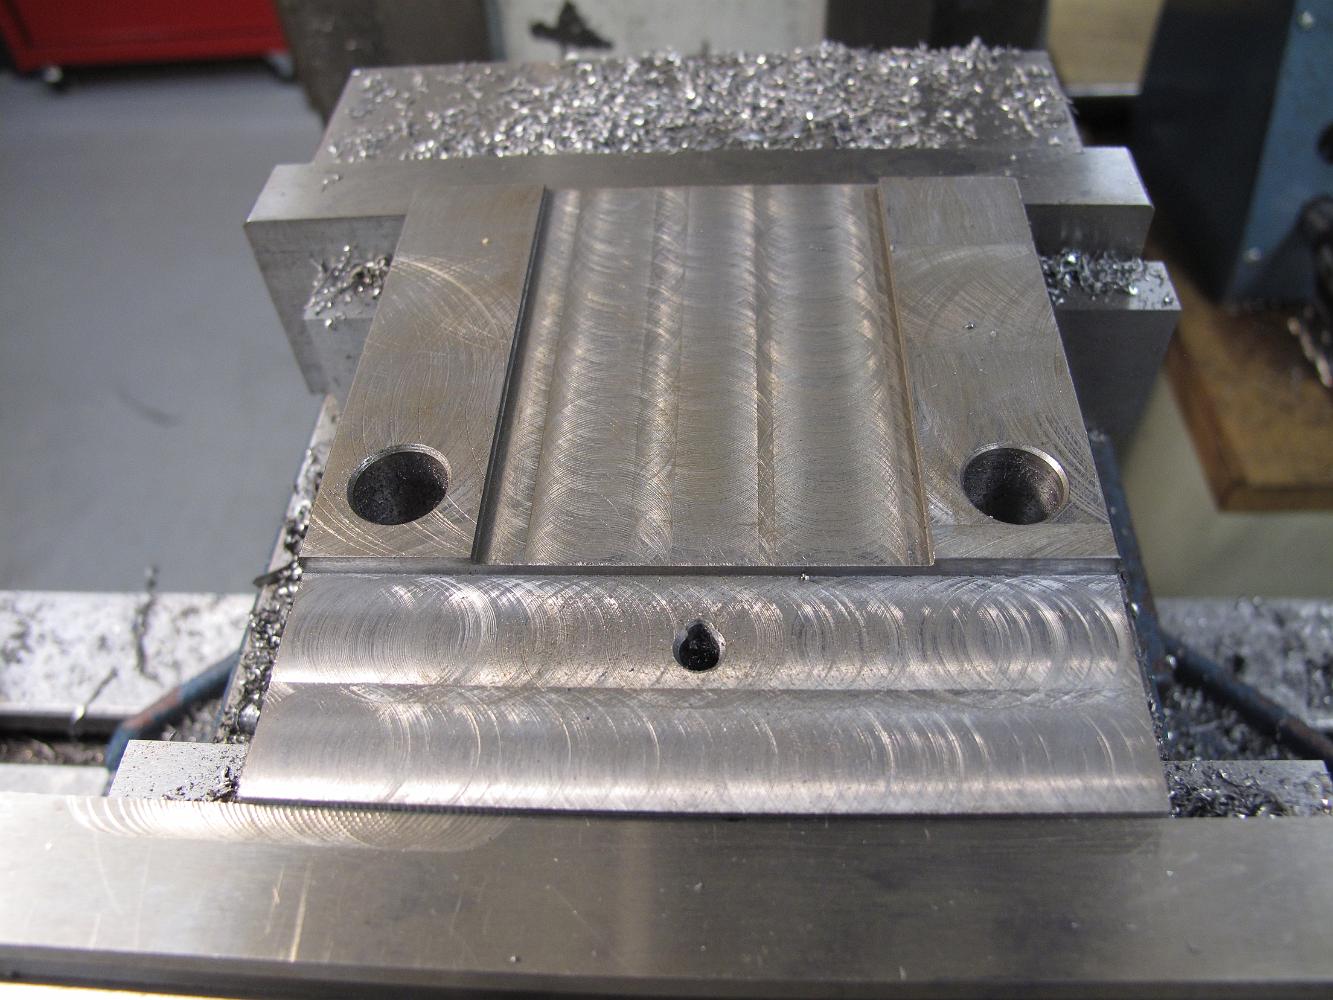
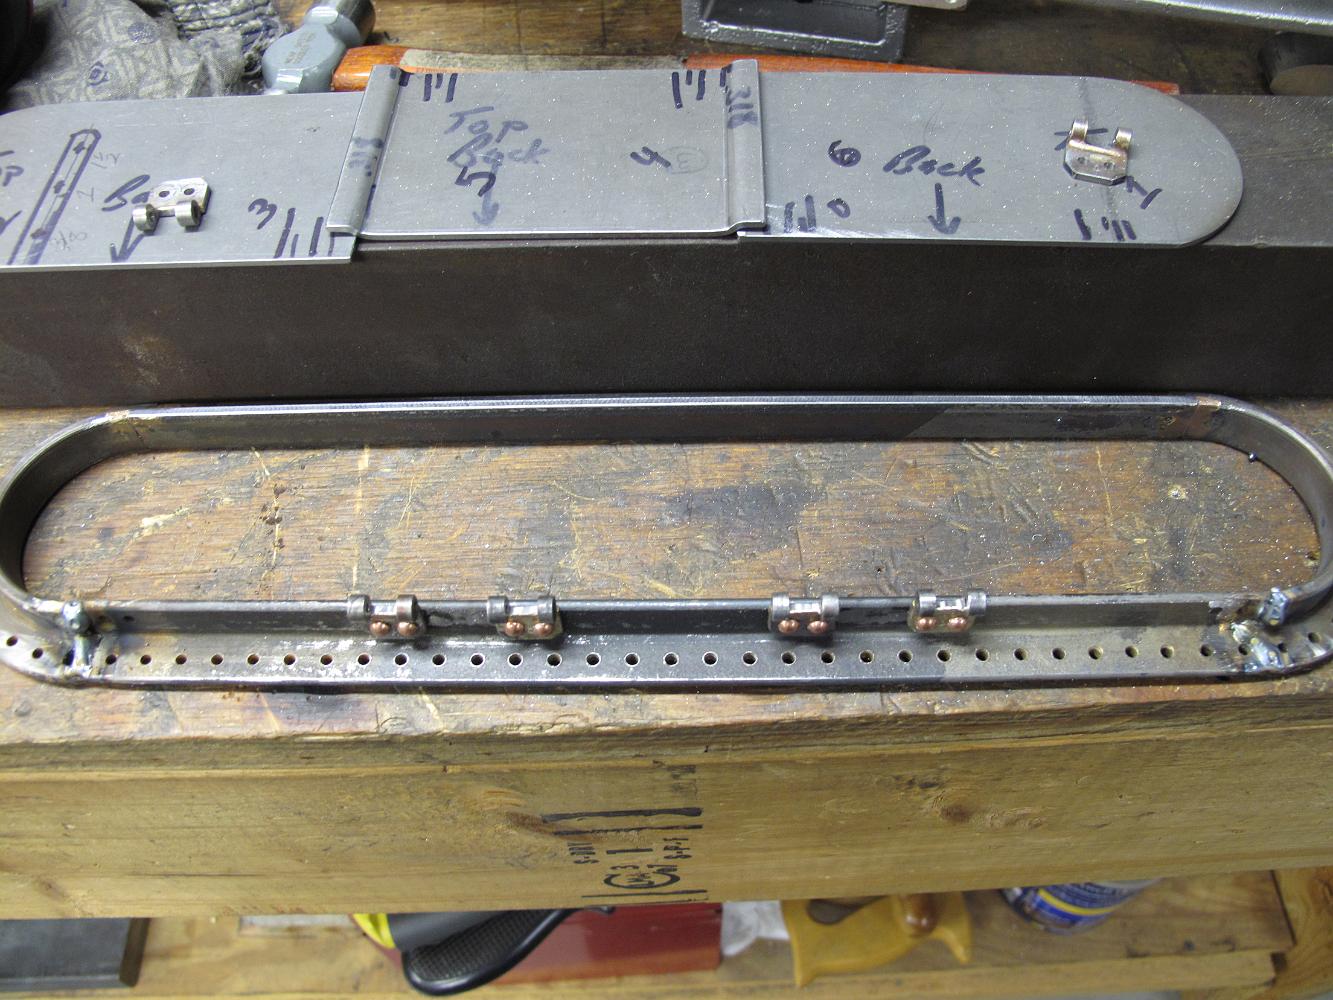
4-Jan-2013 The hatch frame with drilled rivet holes. You can also see the marker layout lines and where I have moved the hatch to avoid putting the hatch over a…
6-Jan-2014 I encountered problems in the past trying the TIG weld a different part, the air tank mounts, and did not think I could make a small bead with the…
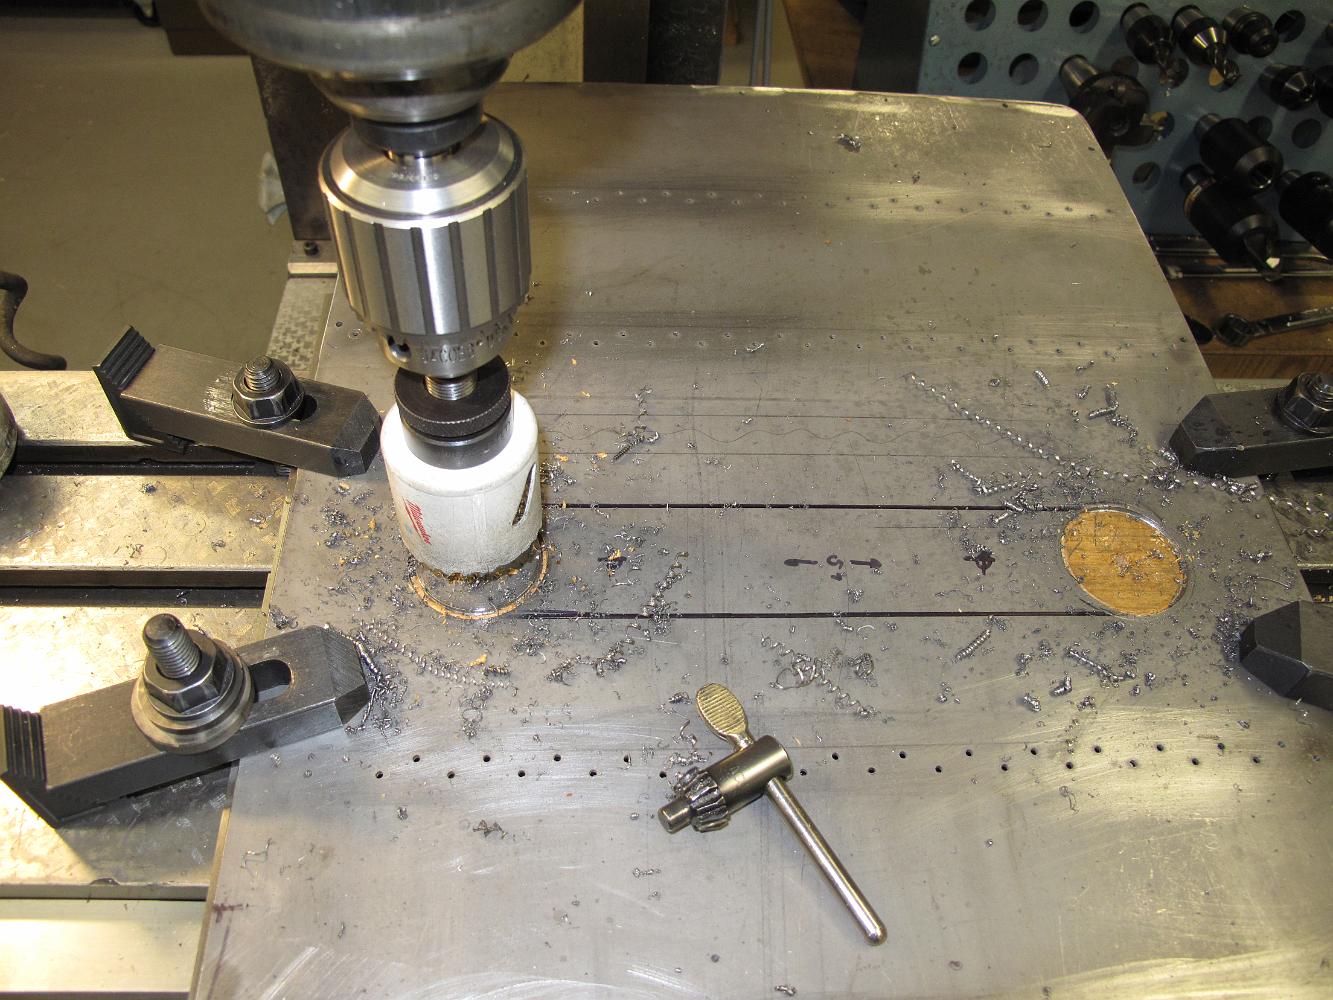
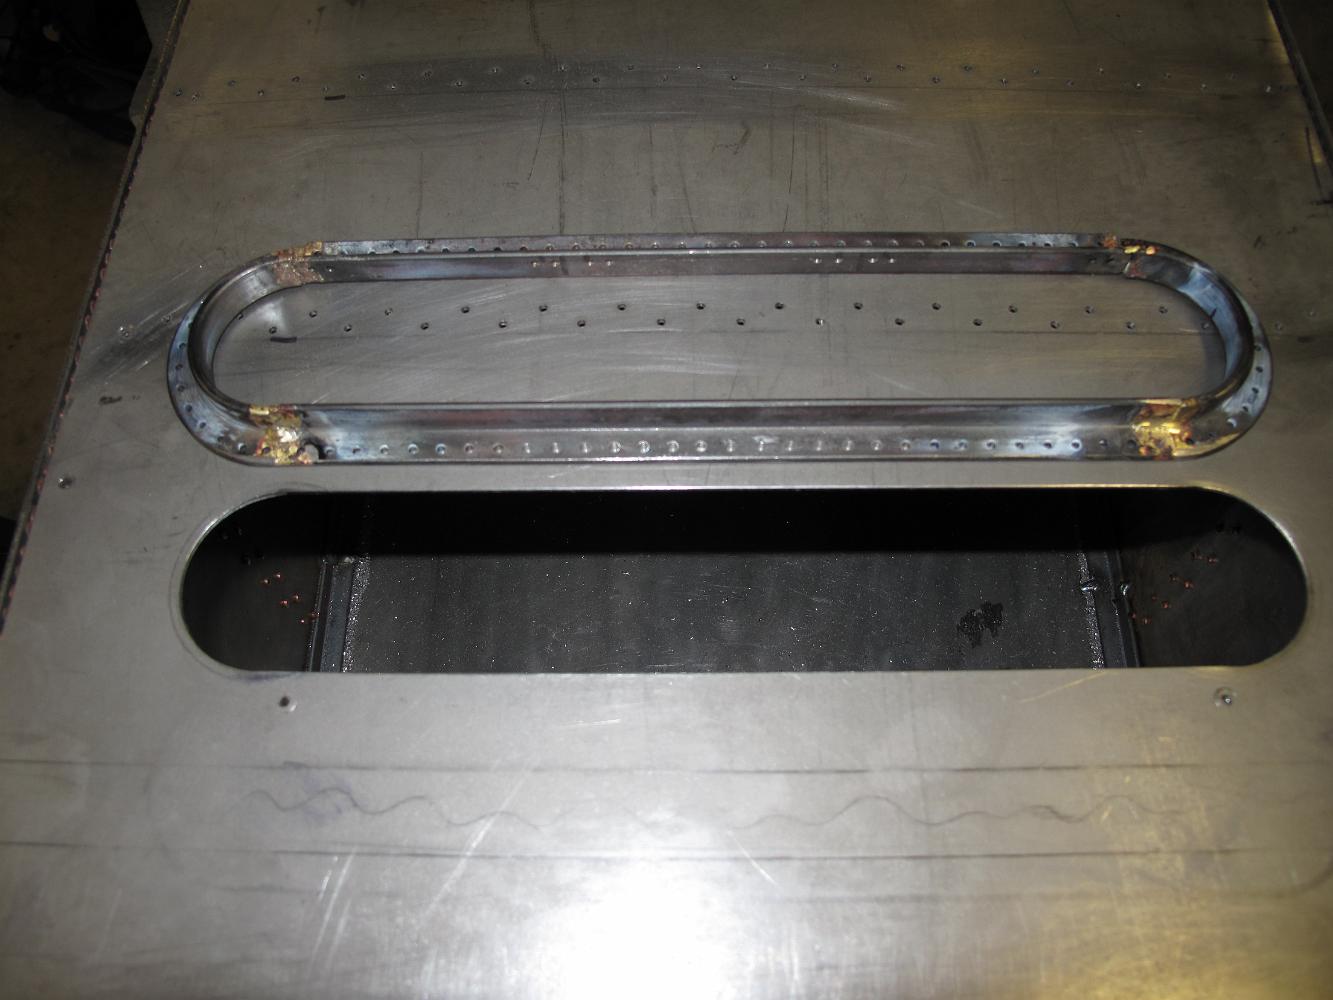
11-Jan-2014 Time to put the hatch hole into the deck. Let's see, maybe I'll put the deck on the table this way....except I can't clamp it down and the table…
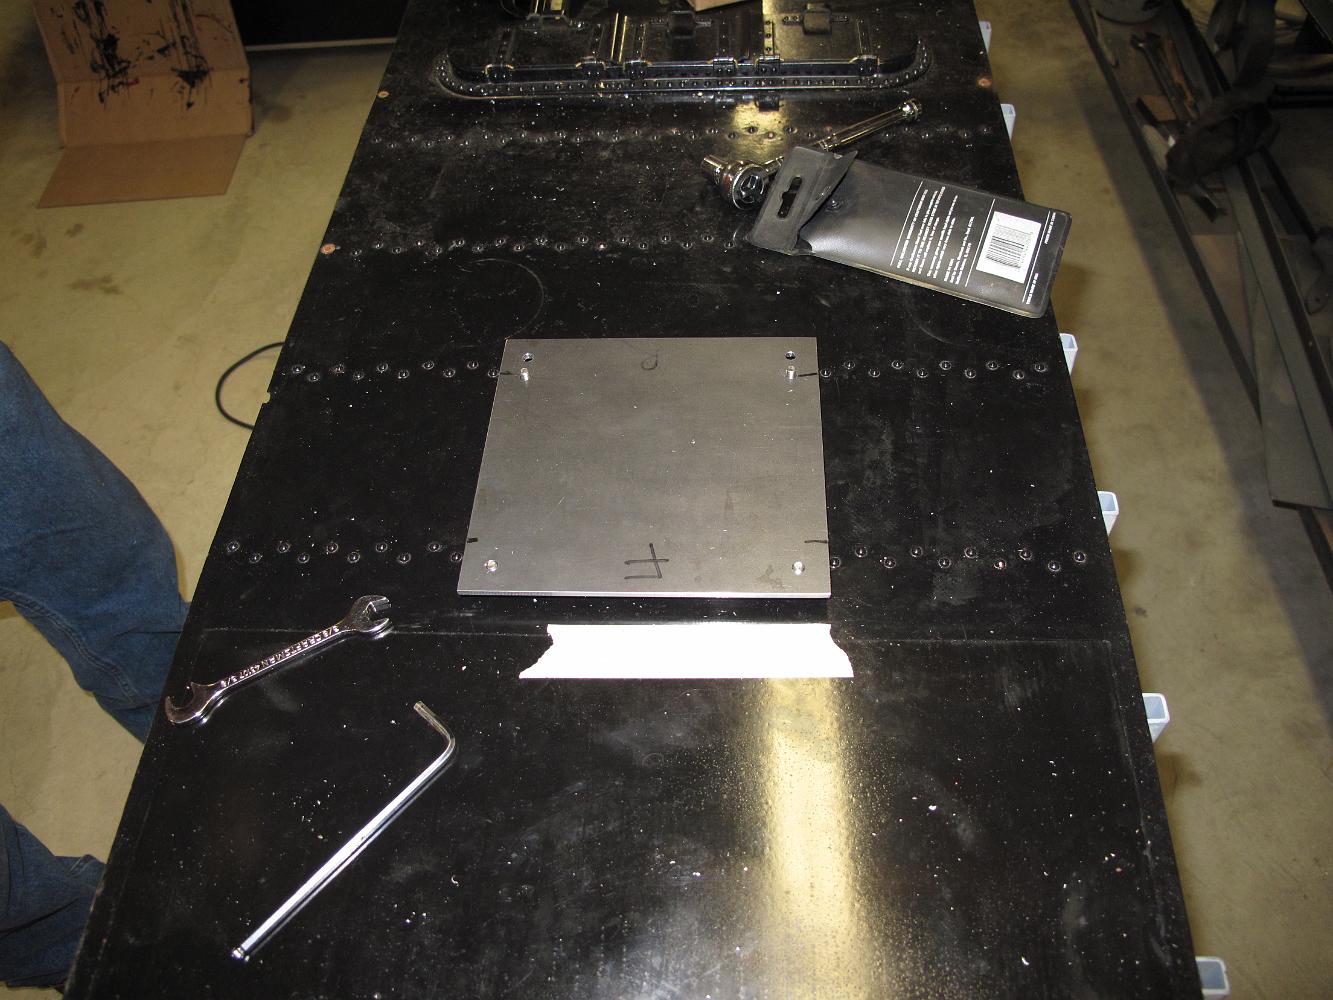
11-Jan-2014 Tender deck bolted down to the mill table to cut the hatch opening. The ram is nearly extended the full length out and the table is at the stops to…
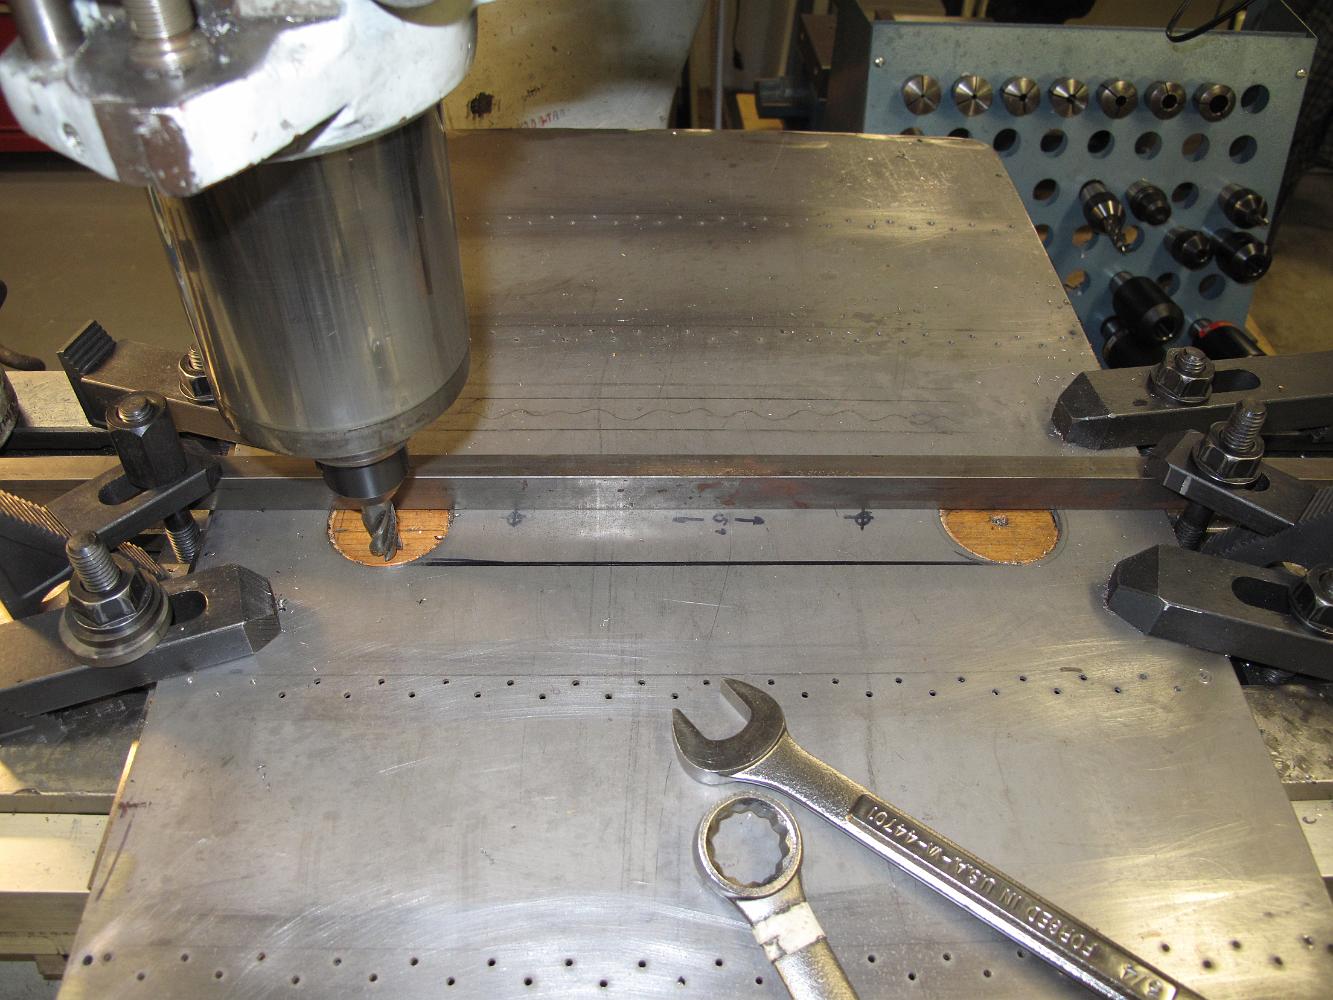
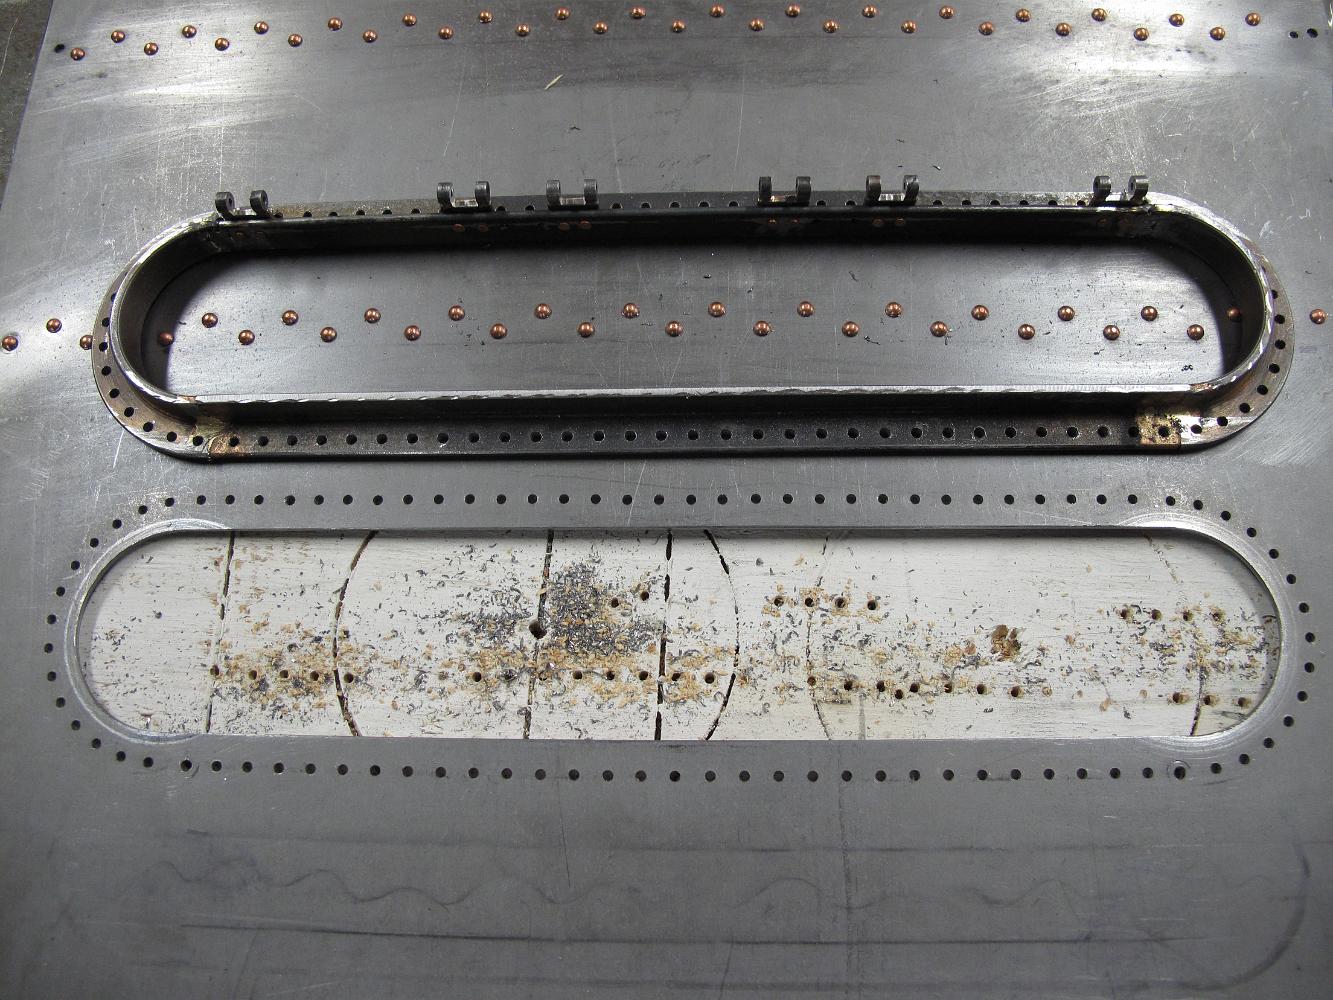
11-Jan-2014 With an additional bar clamped across the back to reduce the amount of sheet metal lift/chatter, I use an end cutting mill to cut the hatch opening.
13-Jan-2014 Cutting the hatch cover out of sheet metal after some sketching and marker design sessions.
13-Jan-2014 I decide to use the rotary table to round the ends of the hatch cover. I spend the better part of one evening trying to figure out the setup for…
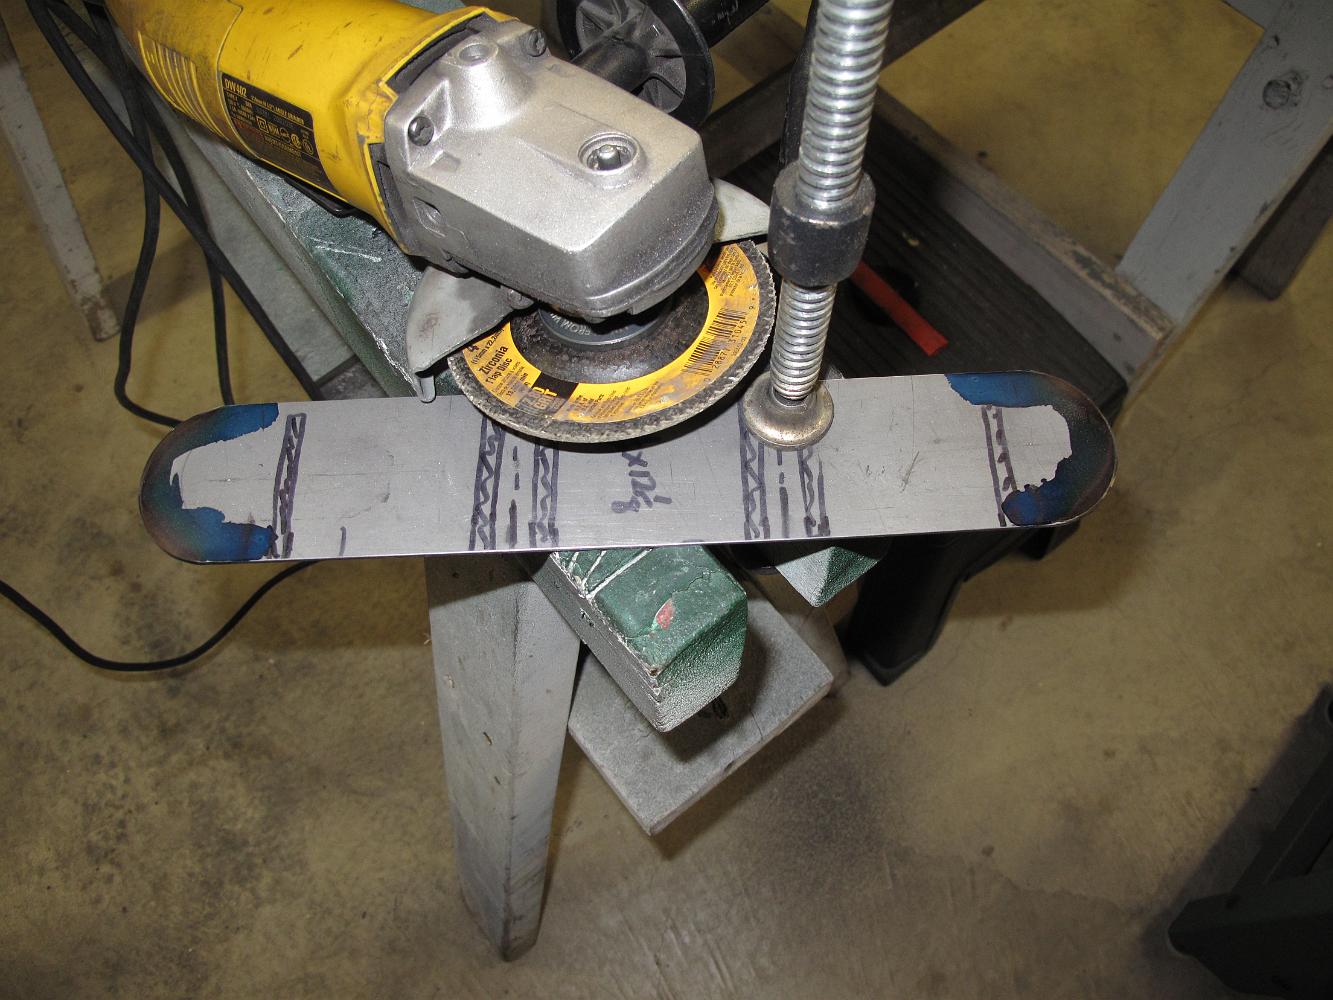
13-Jan-2014 Giving up on the rotary table to round the ends of the hatch, I go low tech and clamp the part to a sawhorse and use the sanding wheel on the angle…
20-Jan-2014 Having failed to make enough allowances for saw cuts in the hatch cover, I use the thinnest blade I am comfortable with to cut the left, right and…
20-Jan-2014 The thin 0.040 saw made a Bang! Crunch! noise and faster than I could react half the saw broke apart. I was using cutting oil, small infeeds and a…
20-Jan-2014 I had to add an anti-vibration support to reduce the amount of spring the part had in it from this suspect setup.
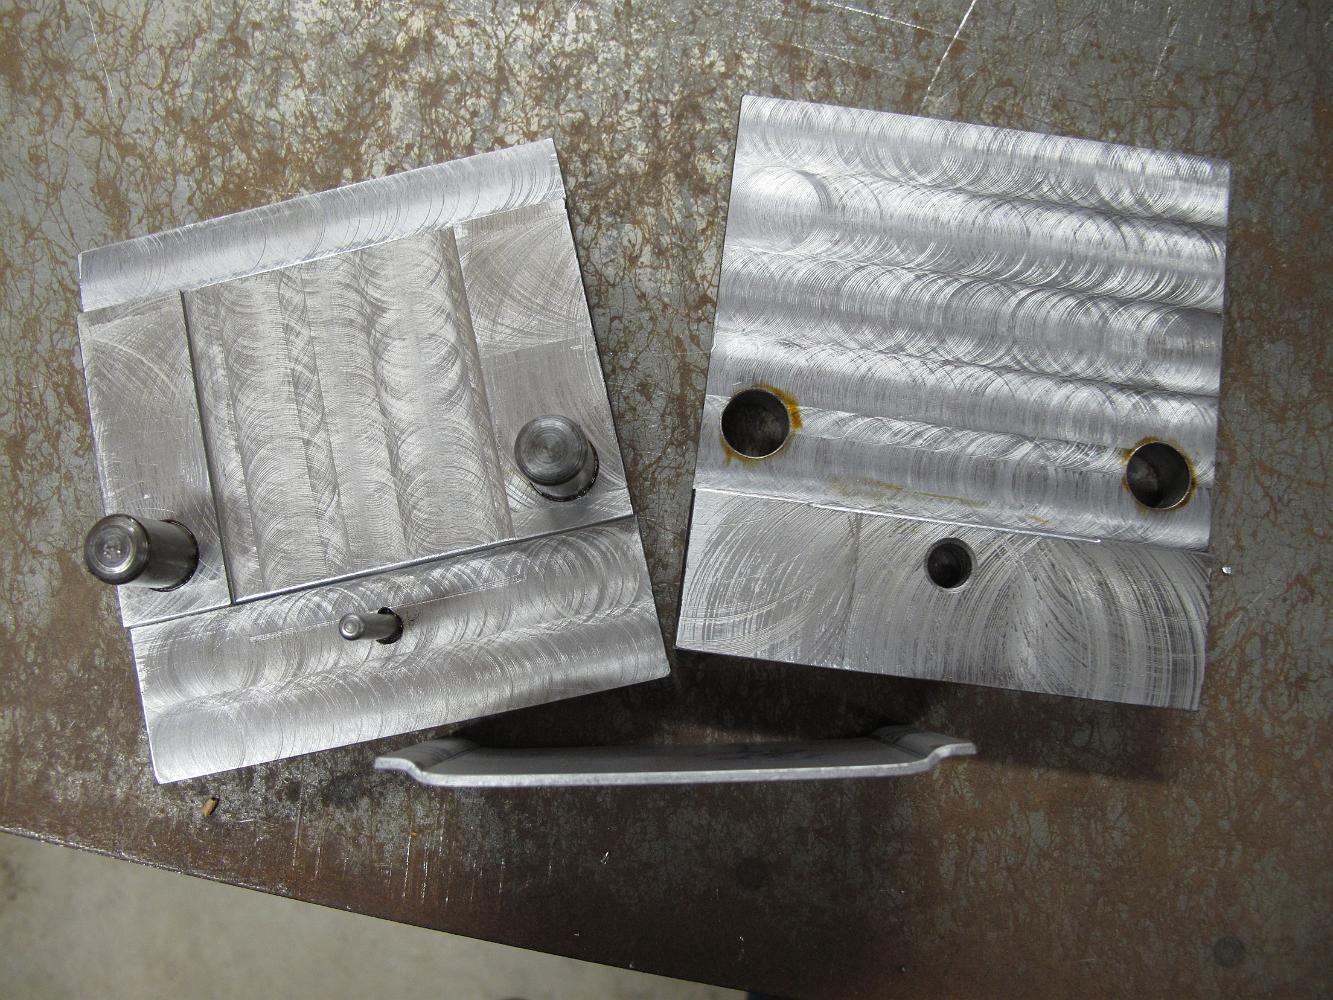
20-Jan-2014 I fabricate a bending die for the center hatch cover which lays over the left and right covers.
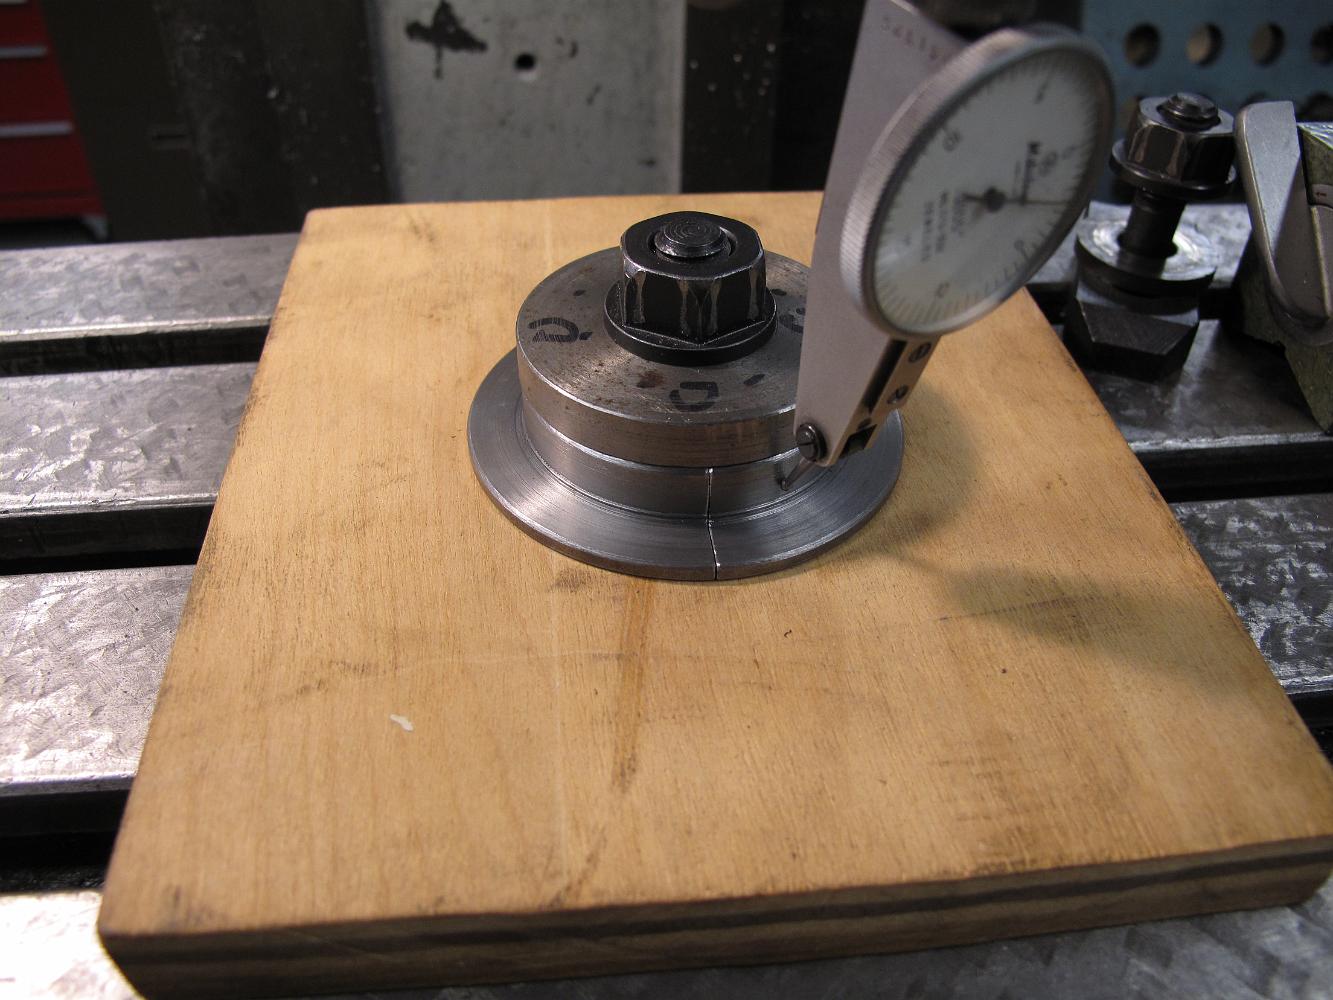
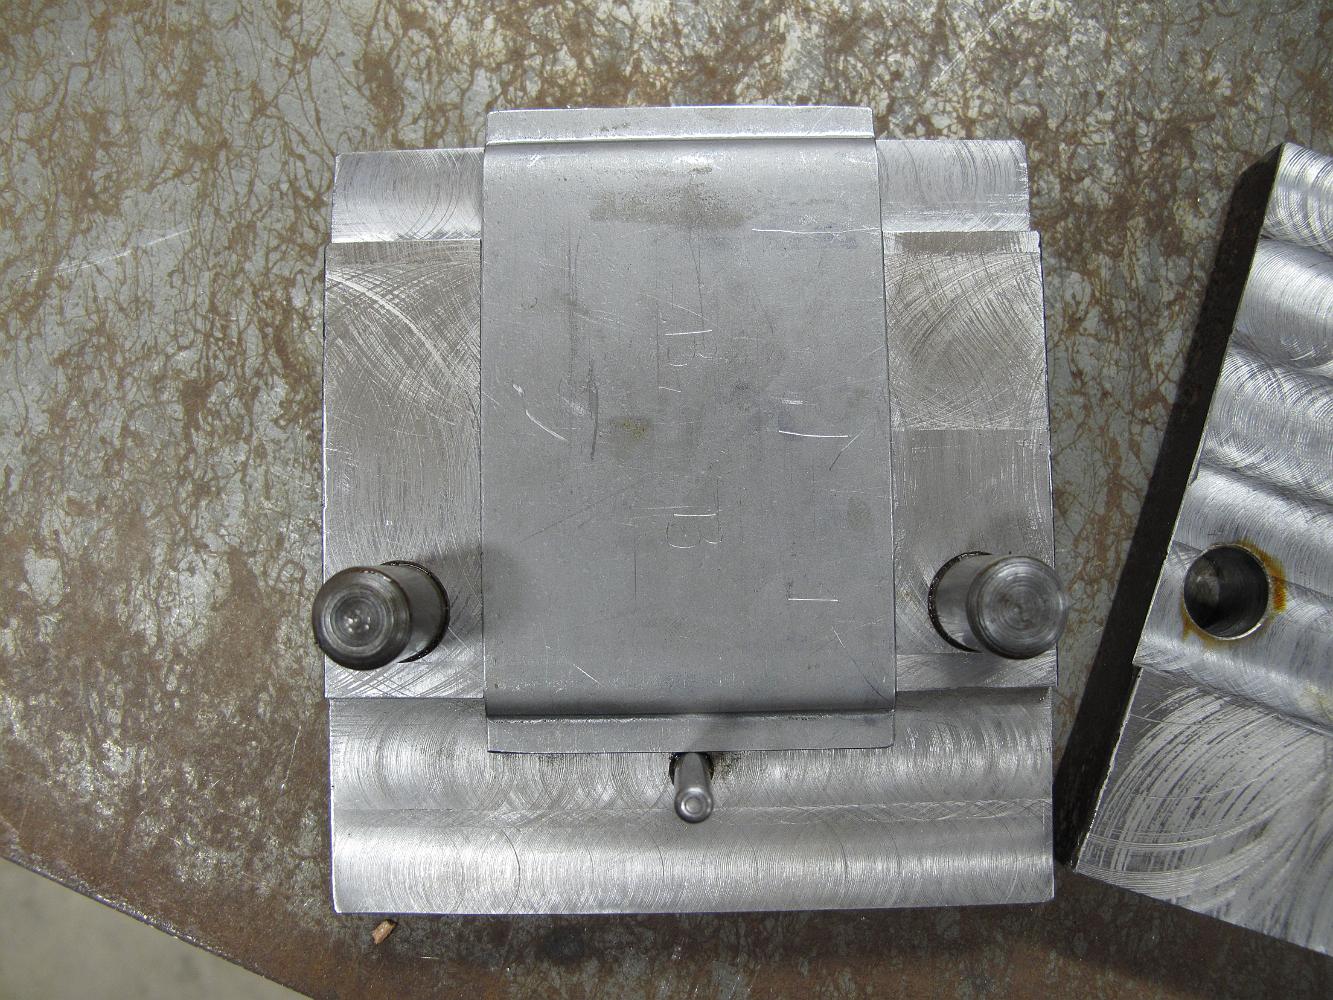
24-Jan-2014 Upper and lower halves of the die completed and dowel pins pushed in with the press. I put the two halves together and they fit - yea!
24-Jan-2014 Second bending try in the hydraulic press and pump the jack handle until it won't go anymore and the results are better.
25-Jan-2014 Finished center hatch lid in the die. Note the relief cut in the bottom die to allow the first bend clearance.
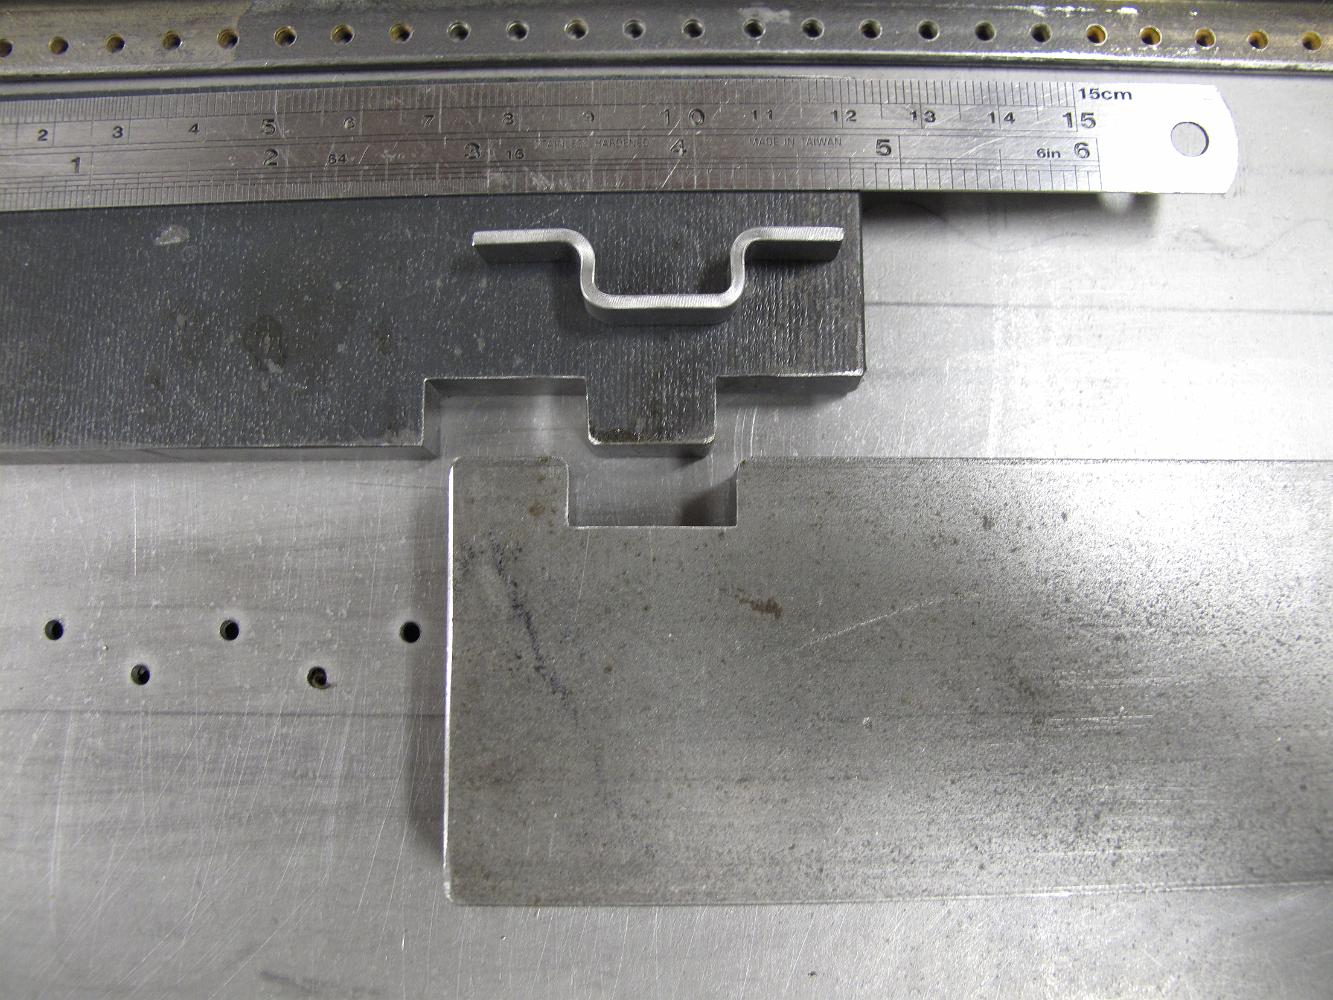
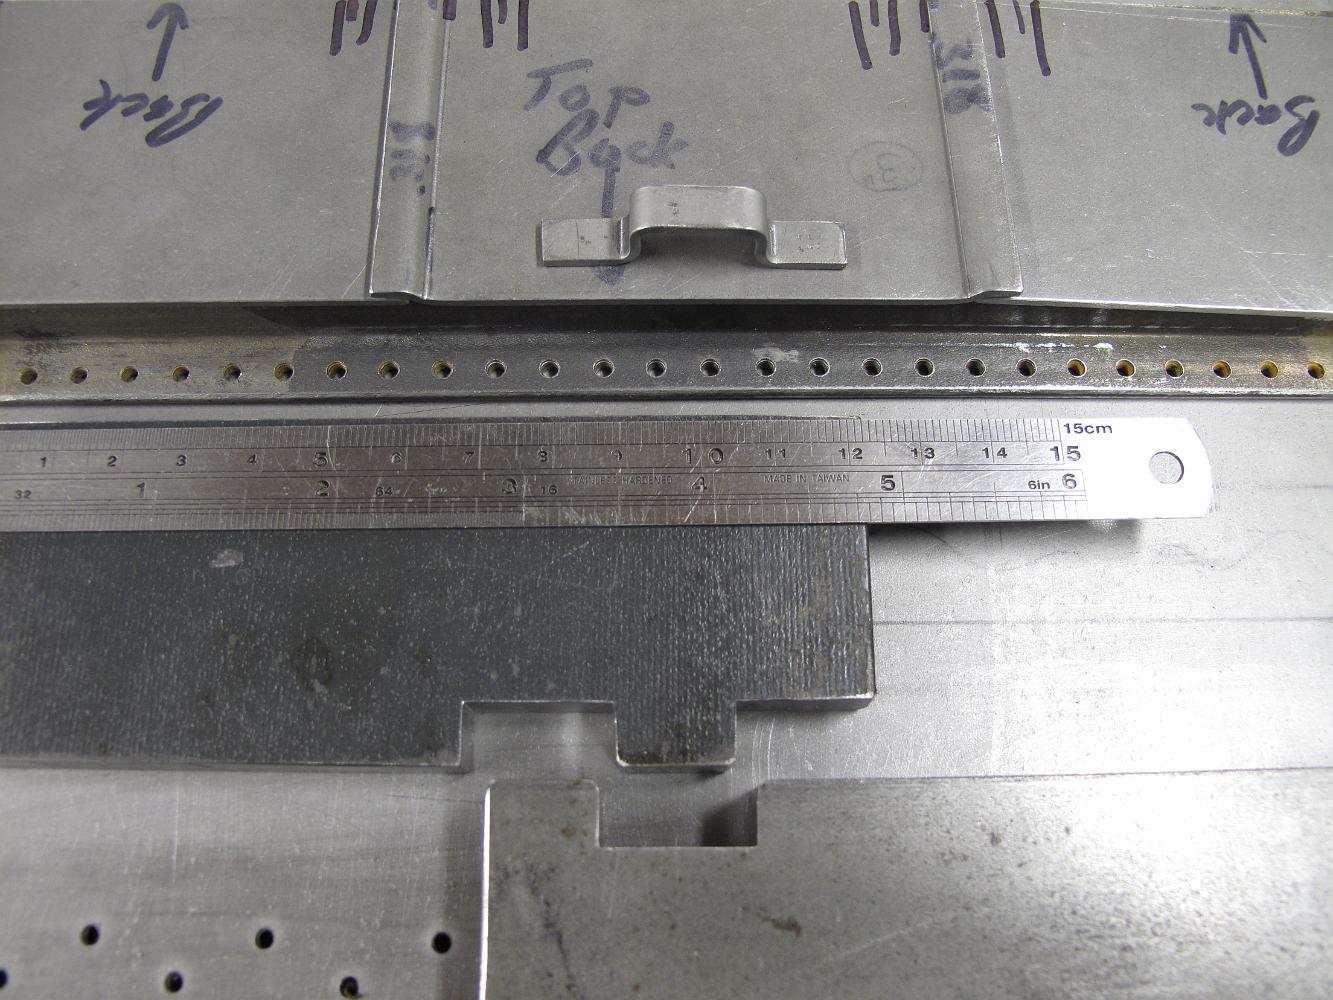
27-Jan-2014 Hatch handles are bend in the die. One side is extra long to give me something to hand onto for the later drilling operations.
1-Feb-2014 Contemplating how I am going to make the strap hinges, using the Frisco 1522 tender hatch picture as a guide.
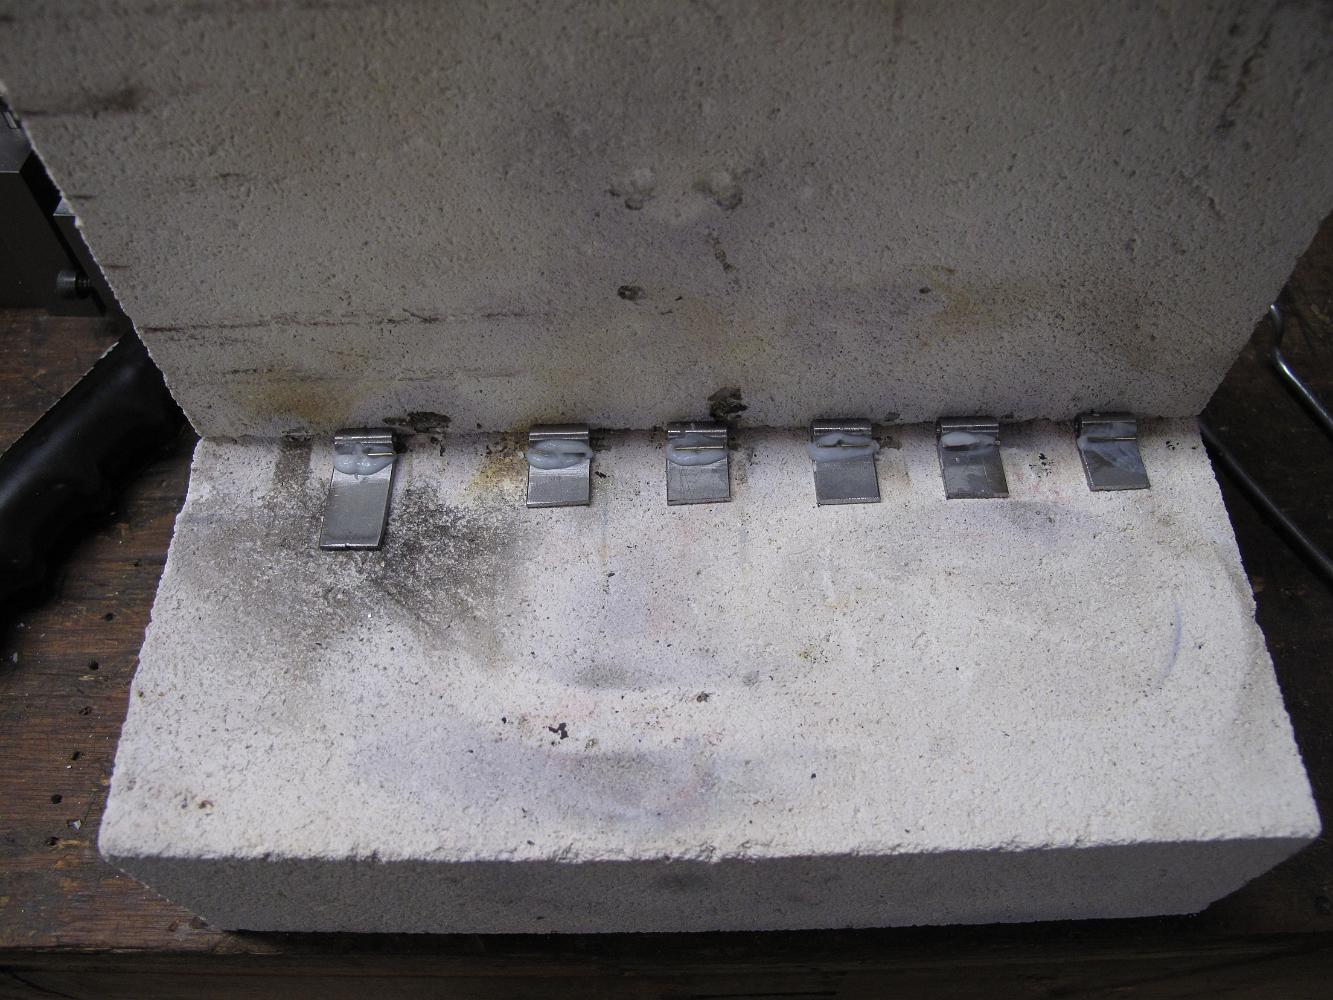
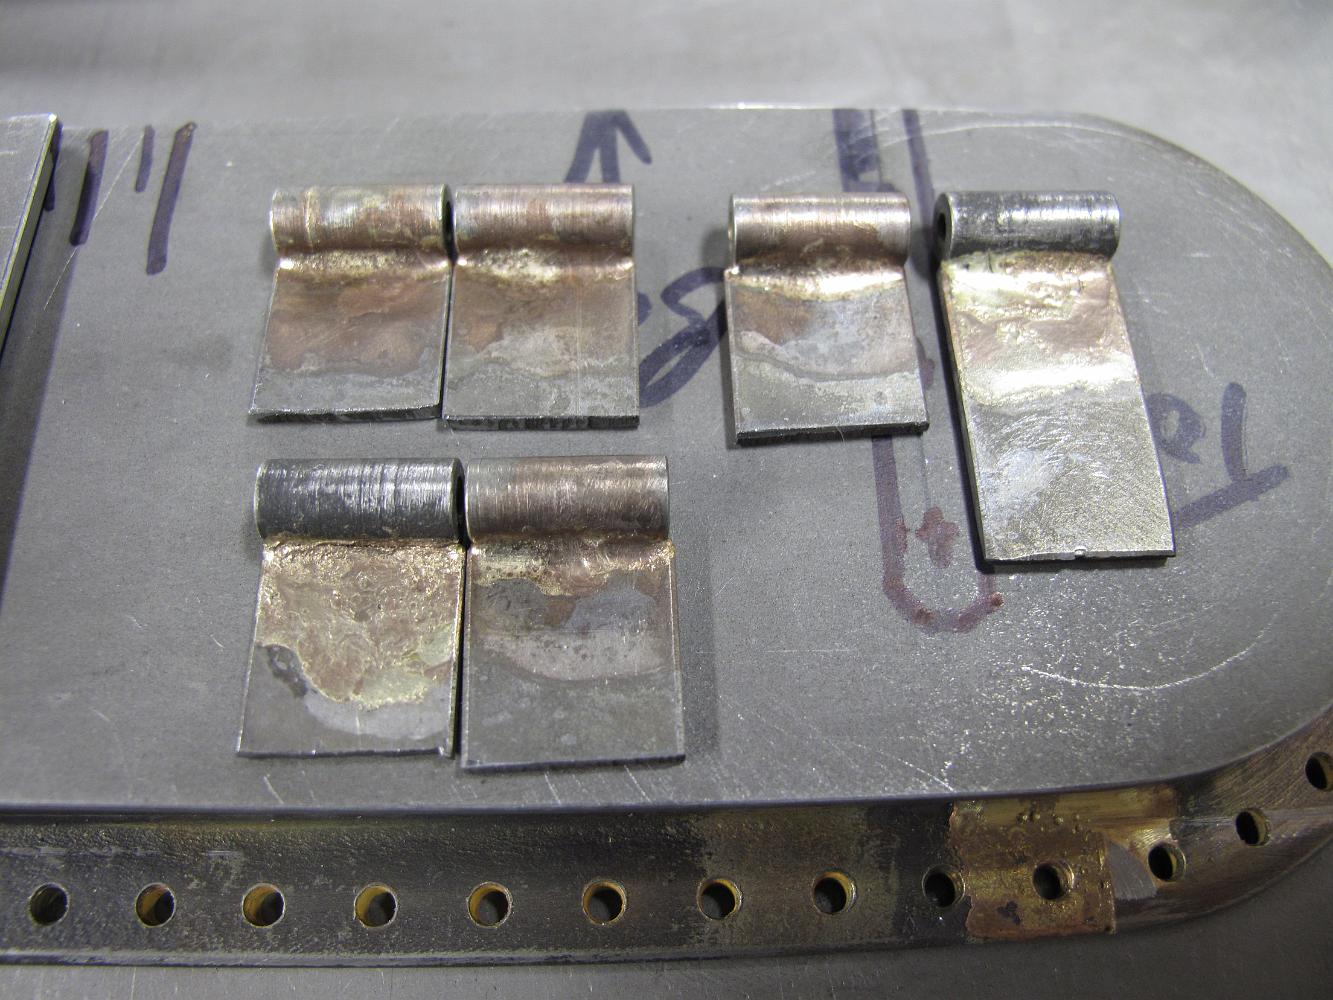
3-Feb-2014 Taking a tip from master builder Kozo Hiraoka, I fabricate the butt side of the hinges with a silver solder operation.
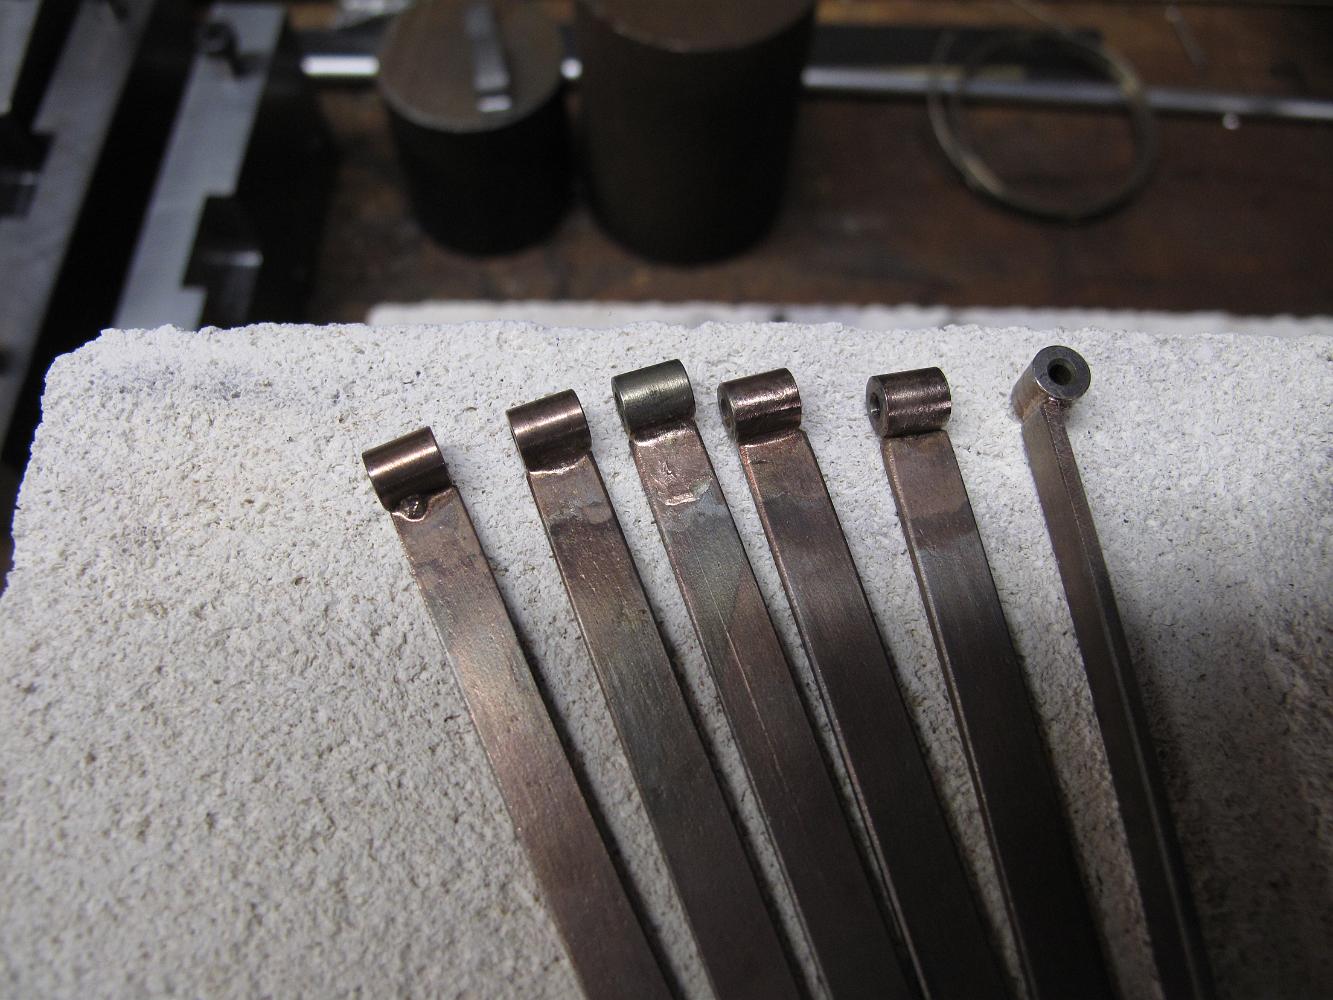
3-Feb-2014 The silver soldered portion of the strap hinges - a length of flat stock and turned stock each.
3-Feb-2014 Hinges after silver soldering. Close examination shows more practice is required to make a professional looking joint.
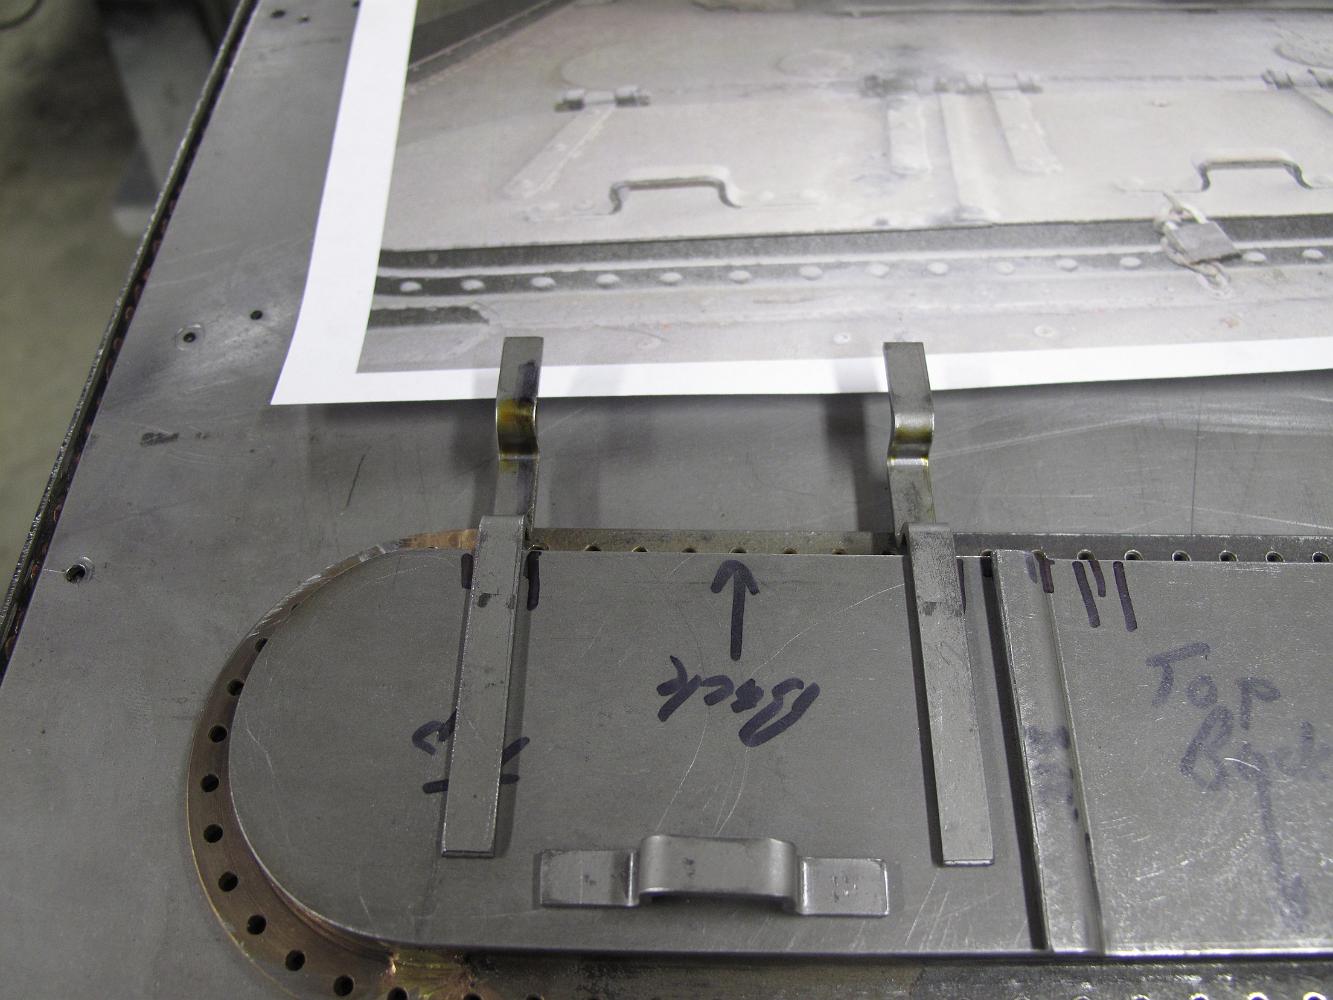
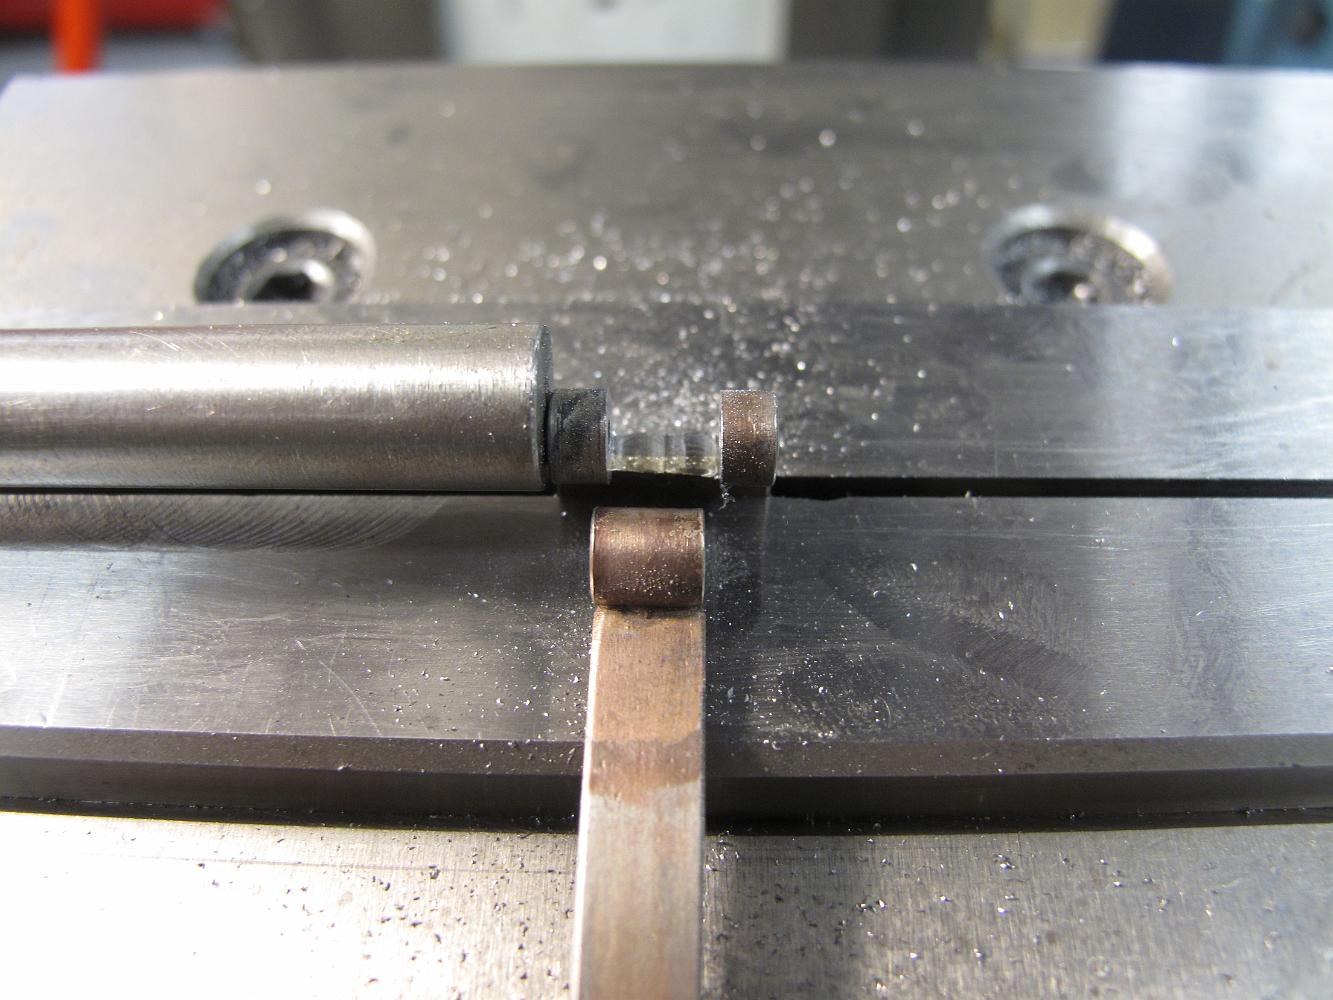
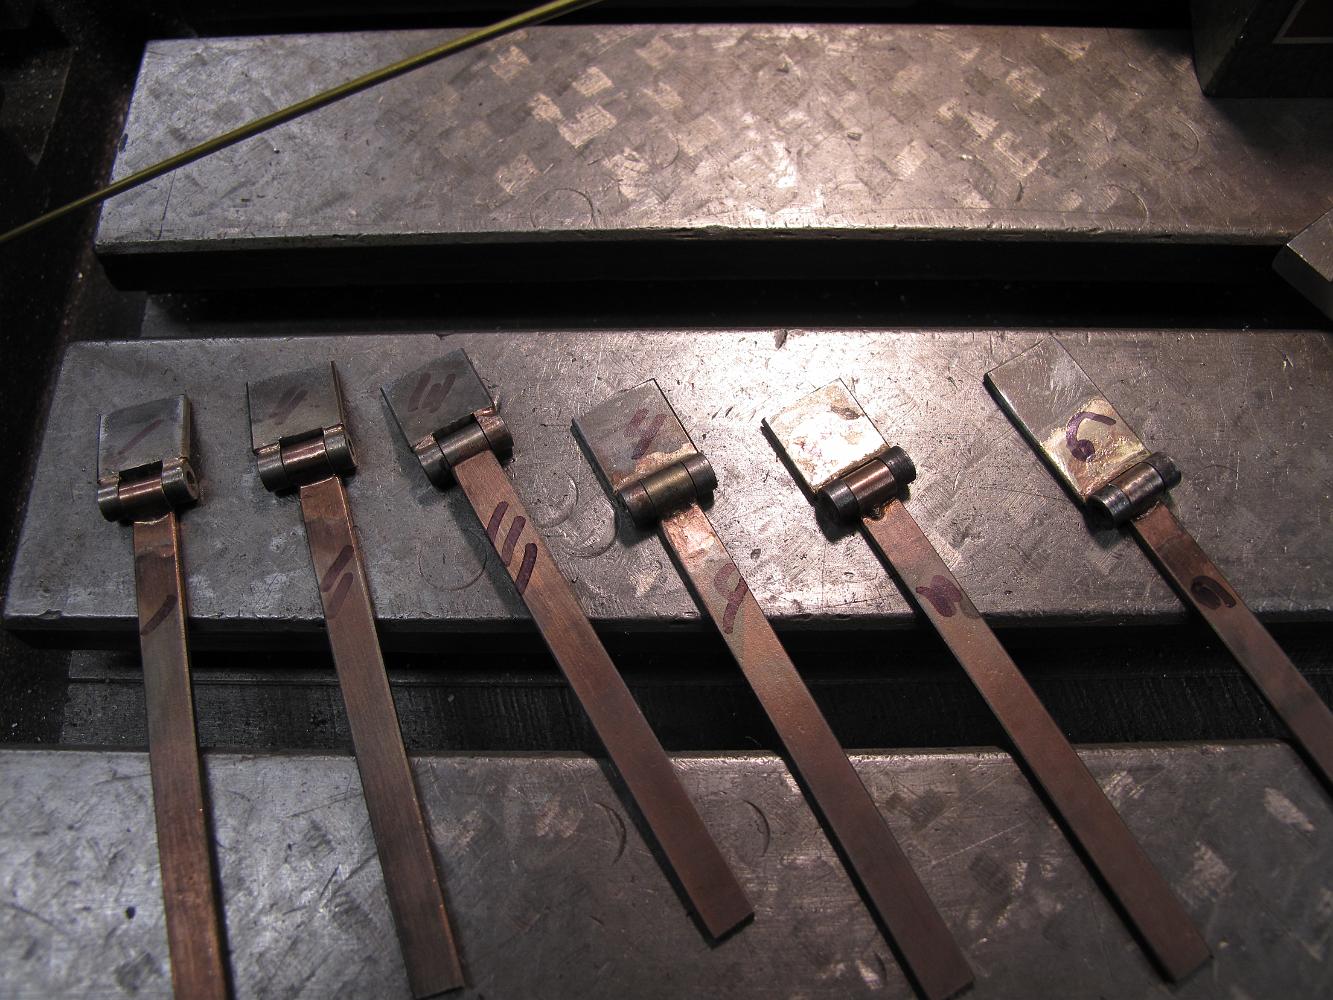
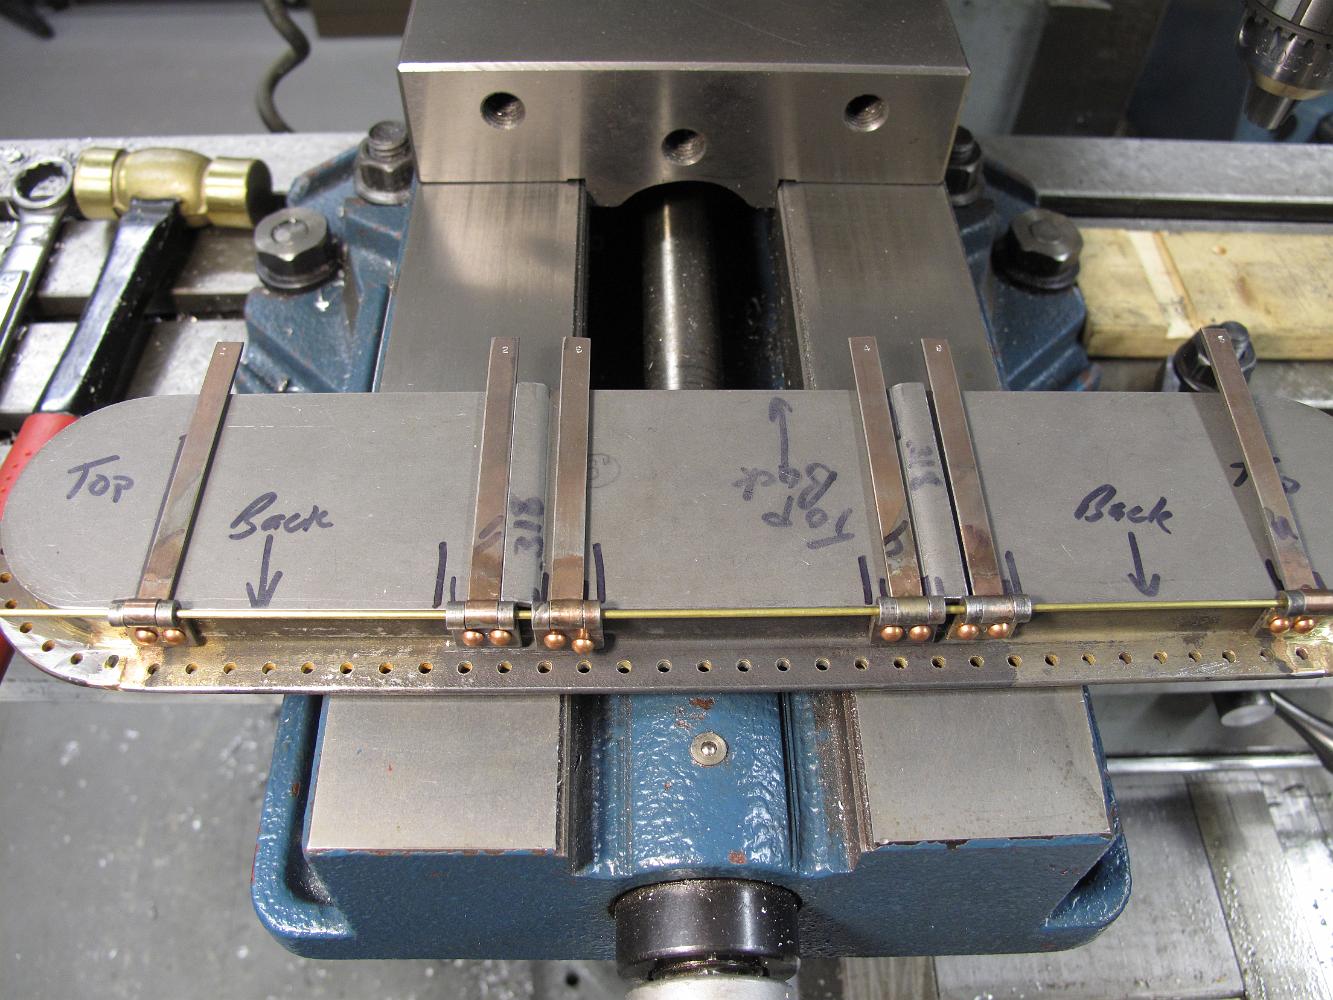
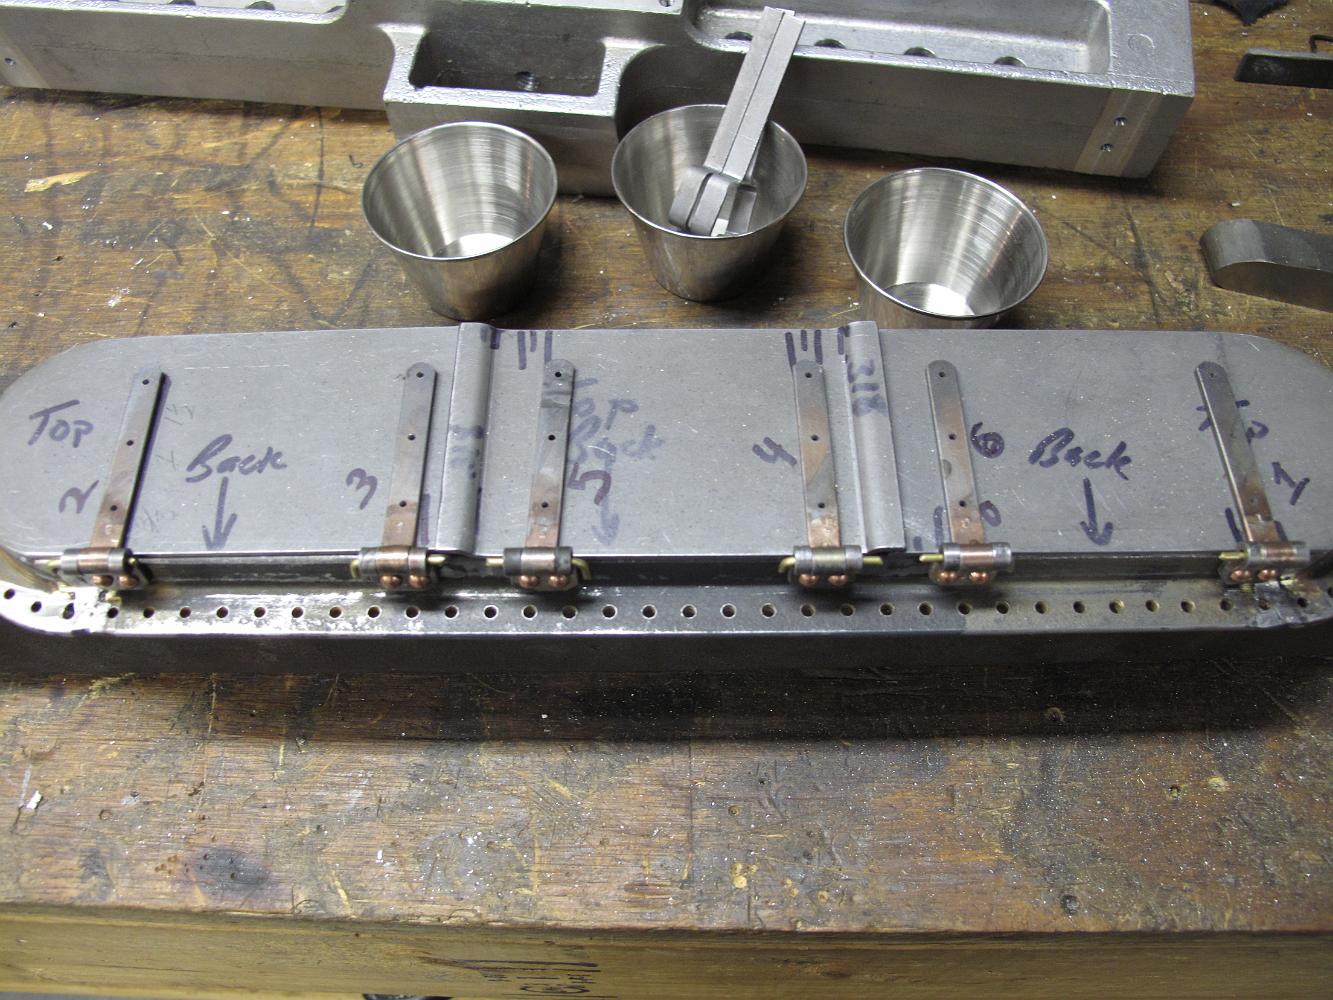
4-Feb-2014 The setup to produce six interchangeable hinges: vise stop for location, and a parallel with a down pin (I had to use a drill bit) to set the height.
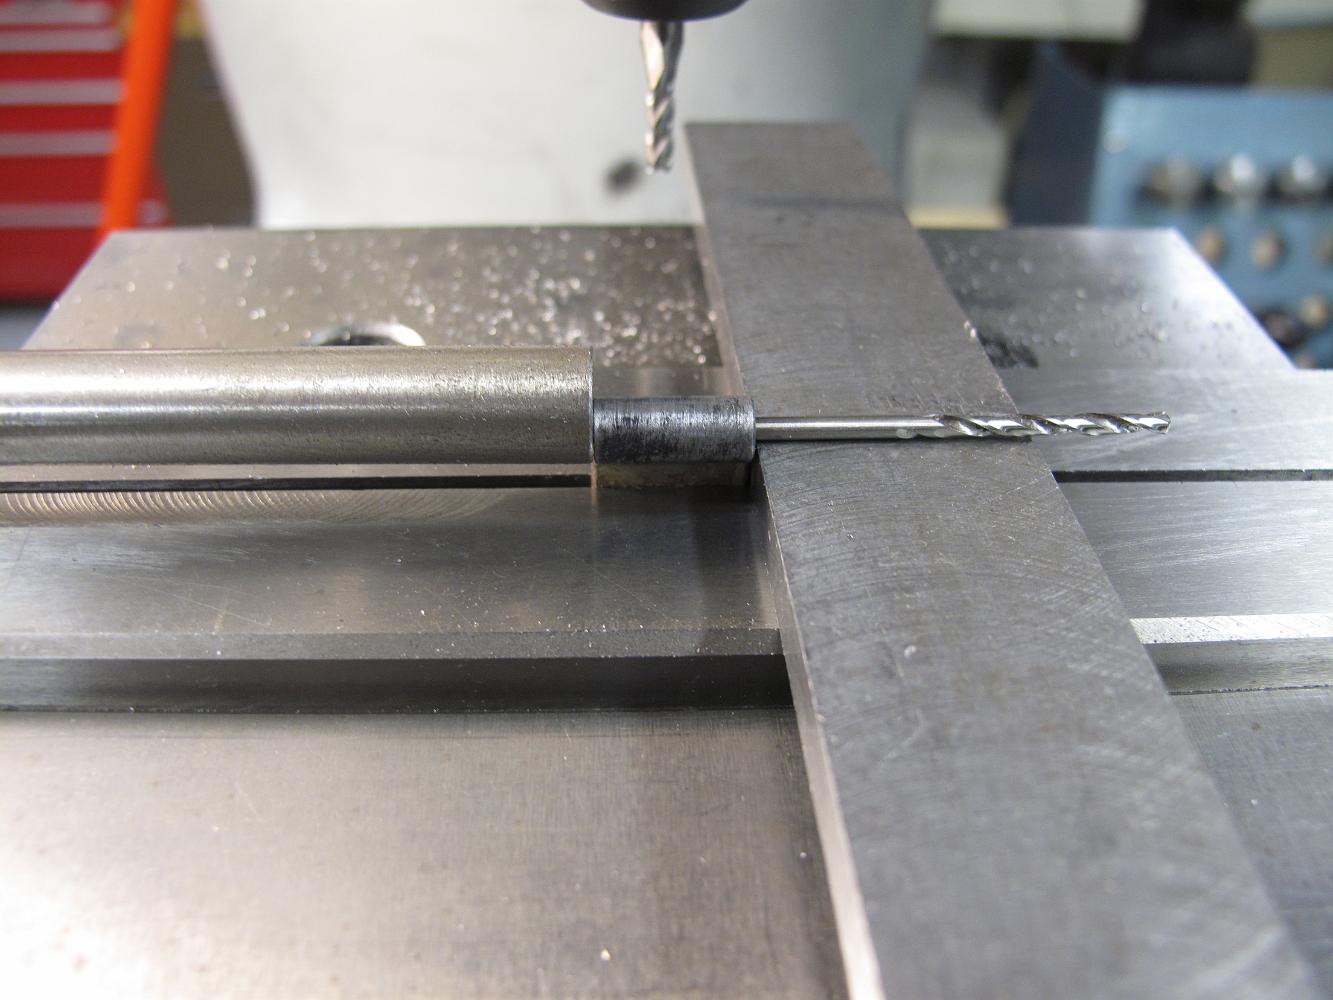
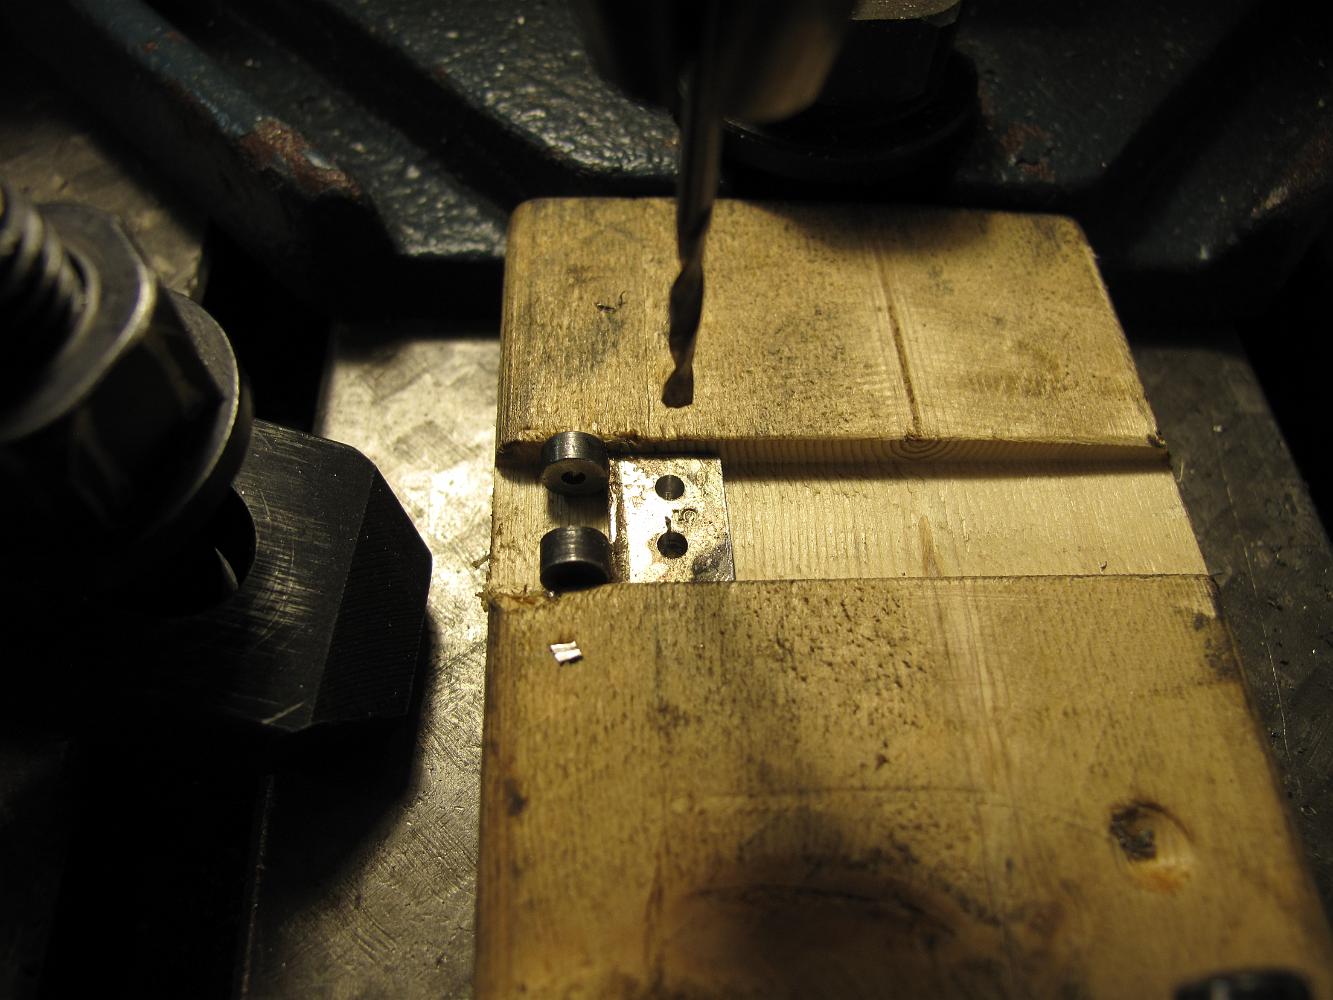
10-Feb-2014 Drilling the rivet hole in the butt part of the hinge, using a piece of wood with a close fitting slot to hold the parts.
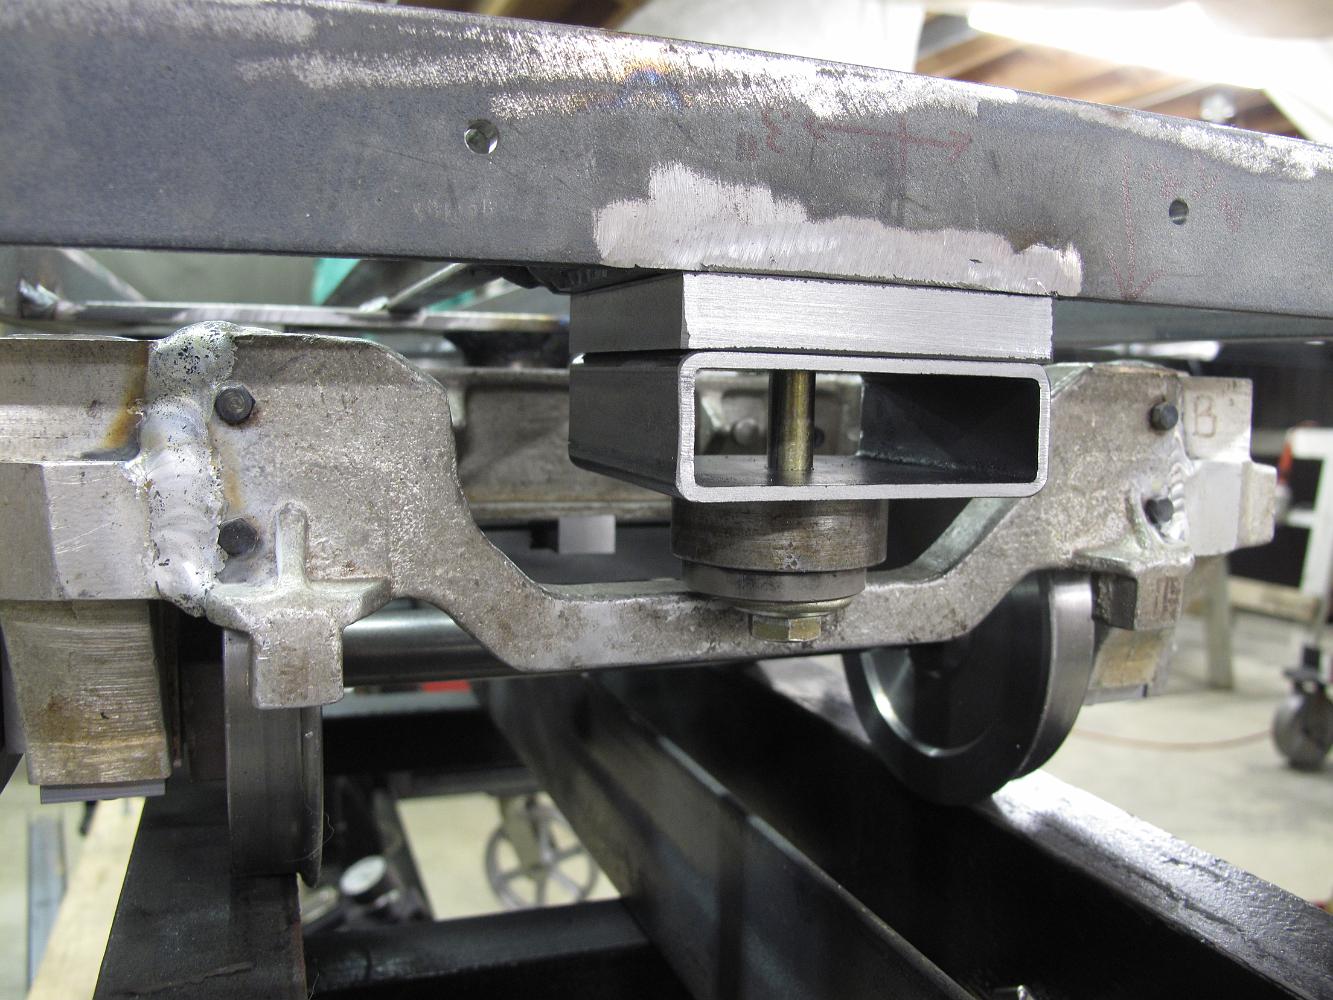
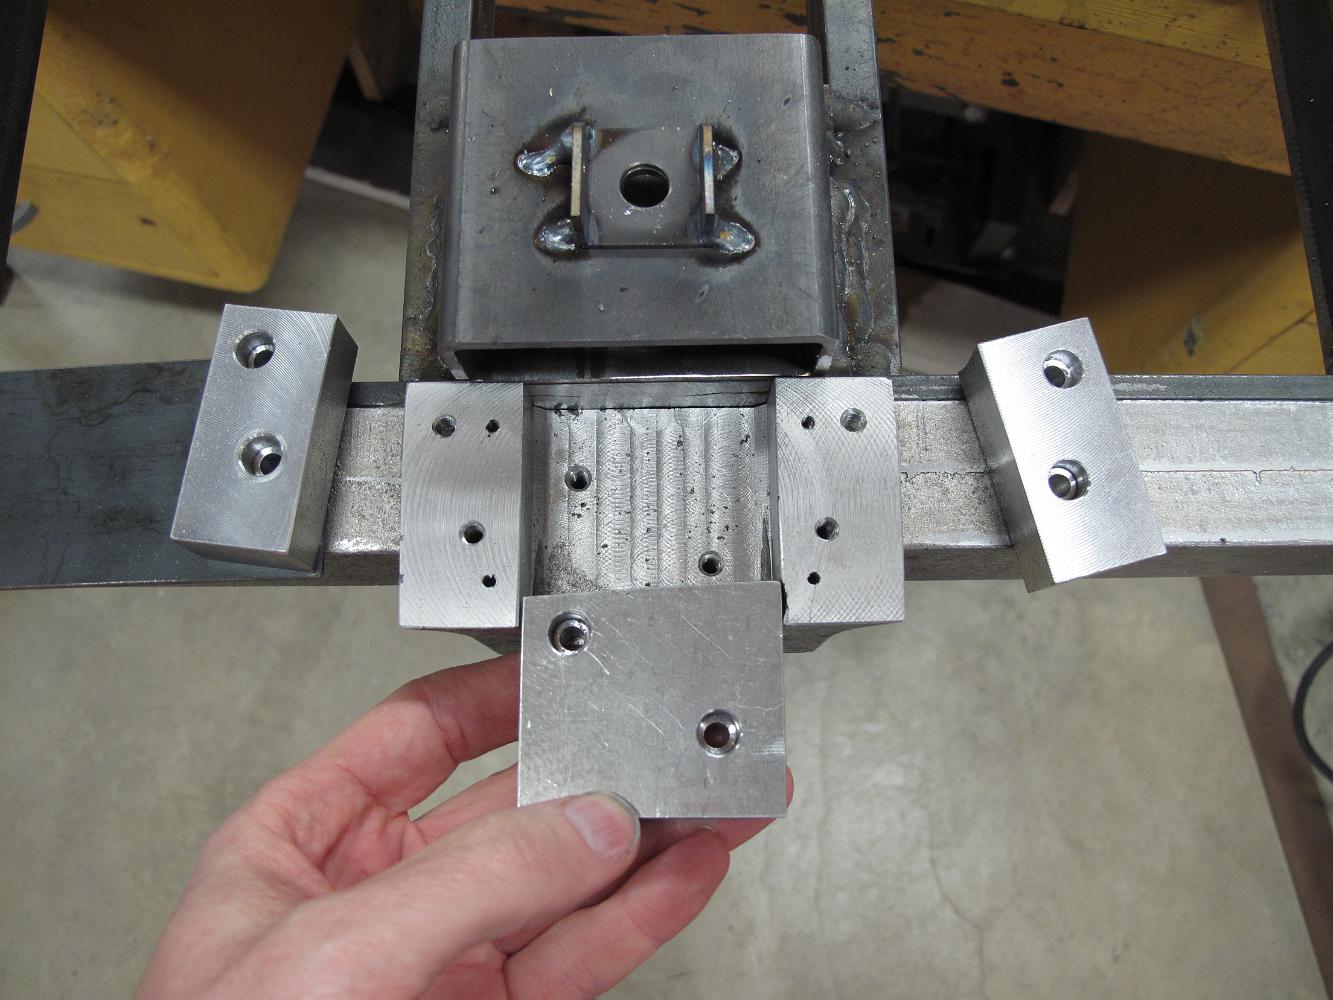
15-Feb-2014 The tender trucks have progressed to the point that we see the bolster mount design called for by the blueprints will not work for us. I work on…
17-Feb-2014 My second attempt to braze this joint also failed, so a bit of weld from the MIG welder is applied. I will have to machine the extra away.
17-Feb-2014 Riveting the hinge butts to the frame broke the poor braze weld joints, so I weld them with the MIG wire feed welder.
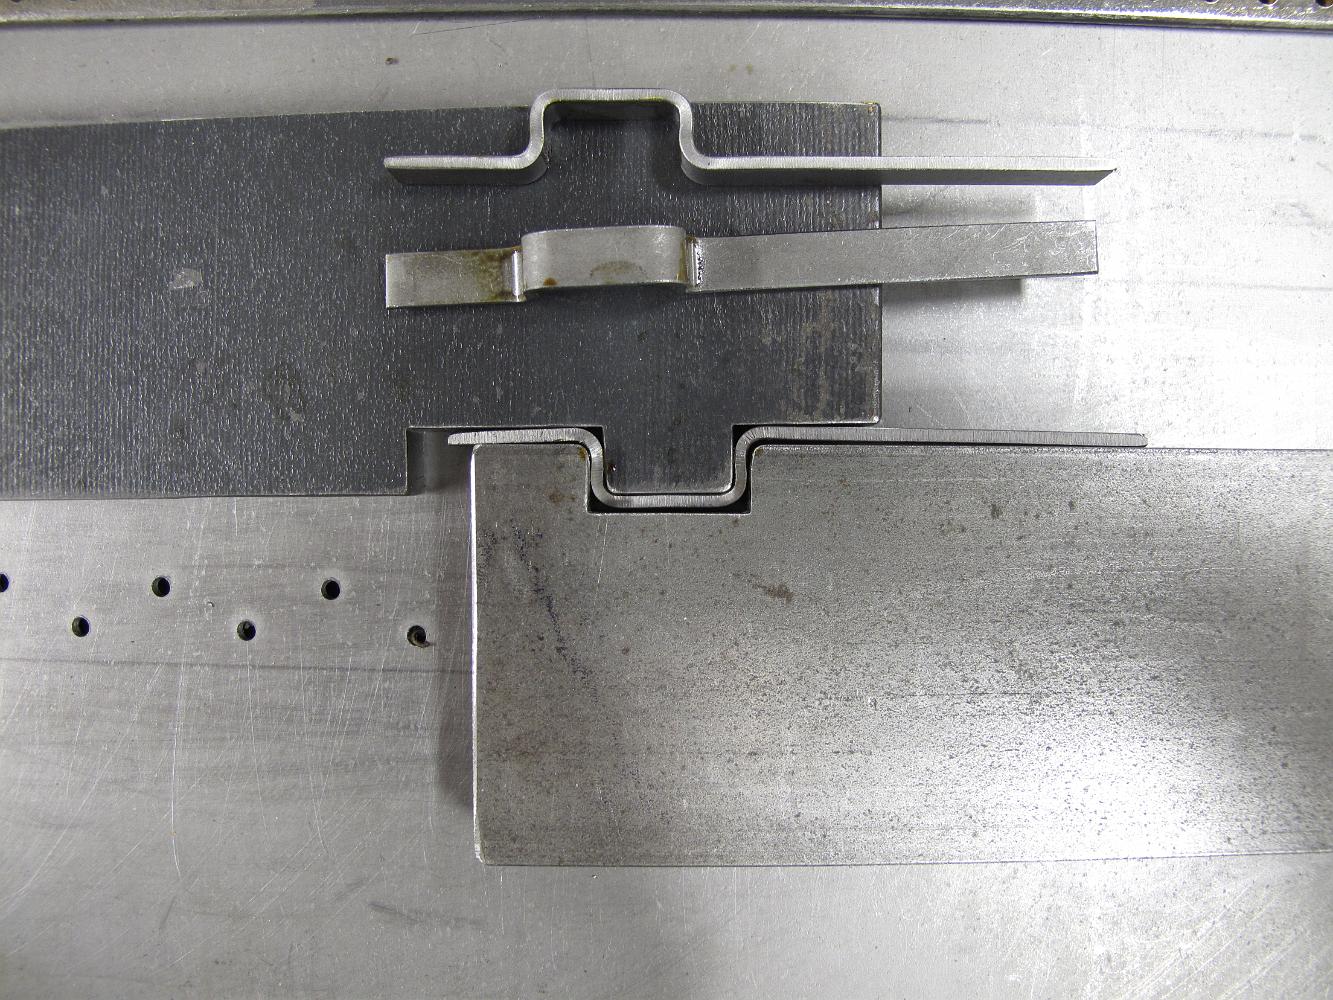
17-Feb-2014 With the trucks under the tender, we discover the coupler pocket is too high and does not meet IBLS standards. We will modify the coupler pocket to…
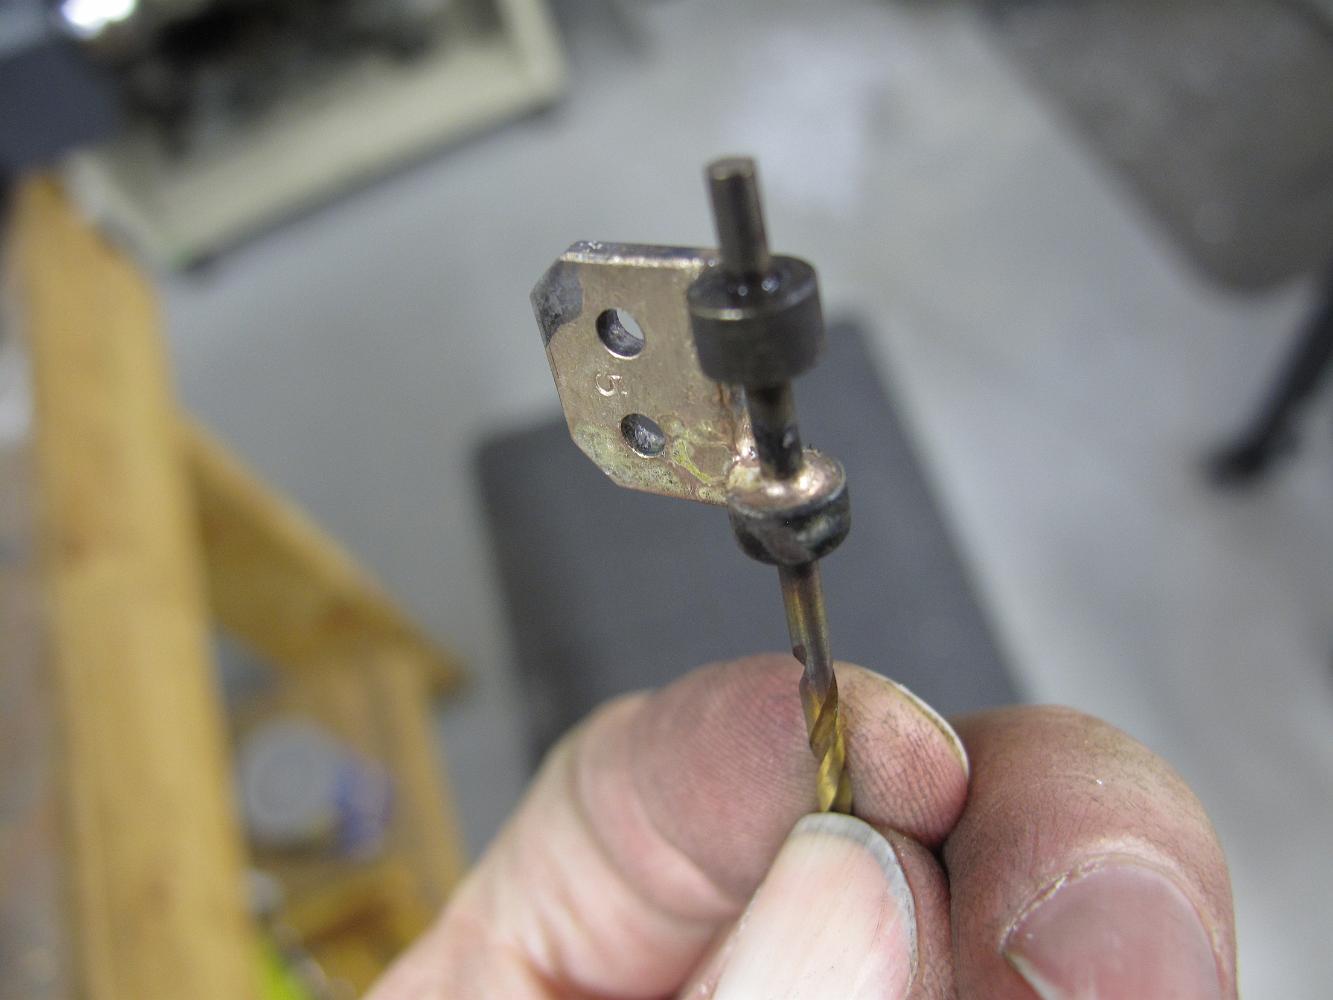
17-Feb-2014 During the riveting process, one of the ears of the hinge came off, so I silver soldered it back together and used the end of a drill to help…
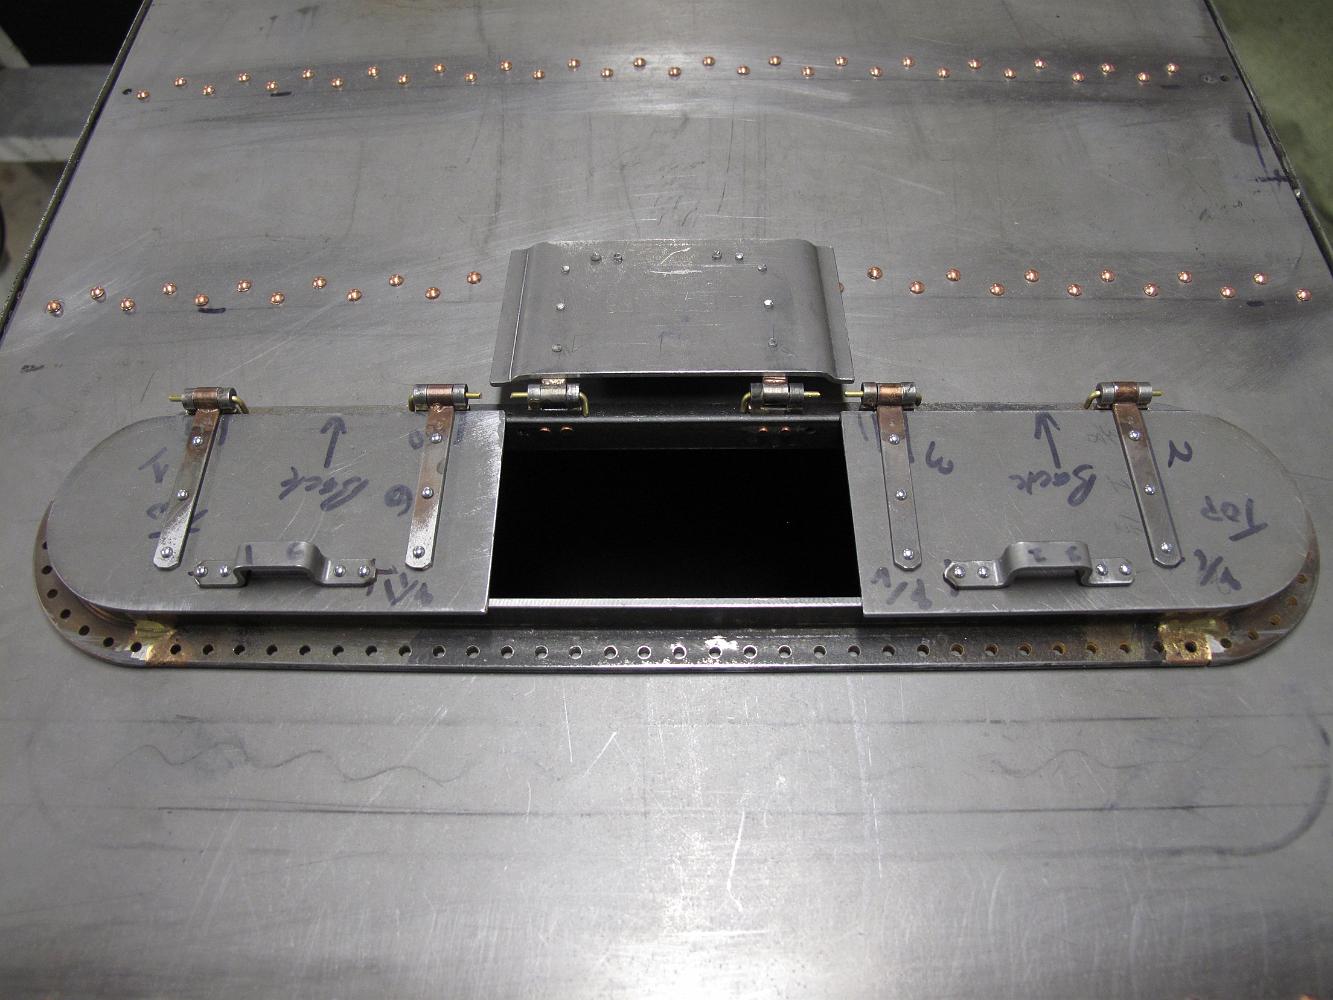
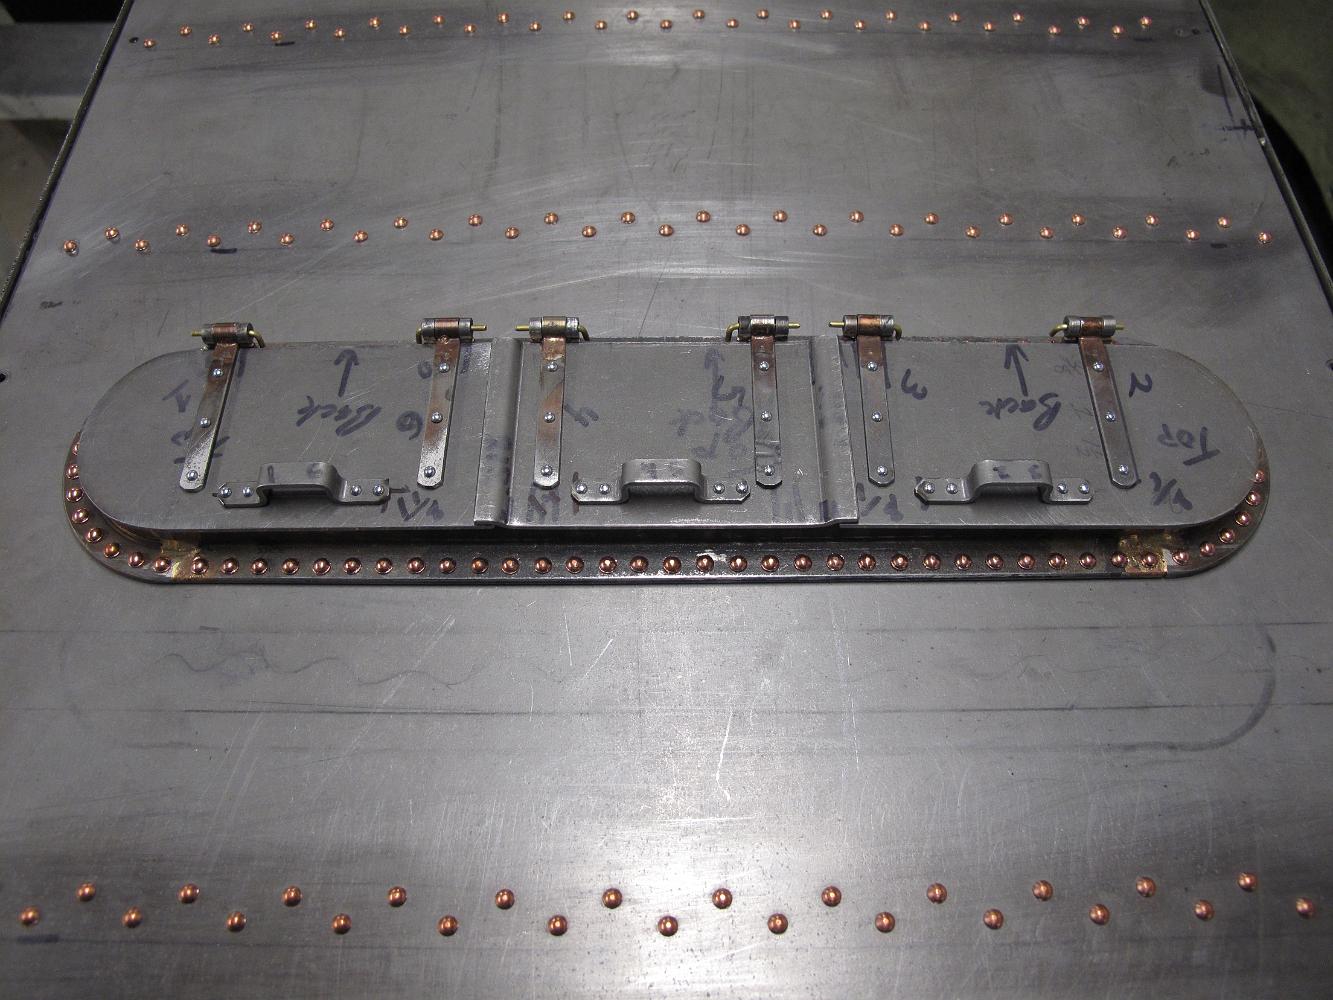
17-Feb-2014 More progress, the hinge butt have been riveted to the hatch frame, and the straps drilled for the rivets.
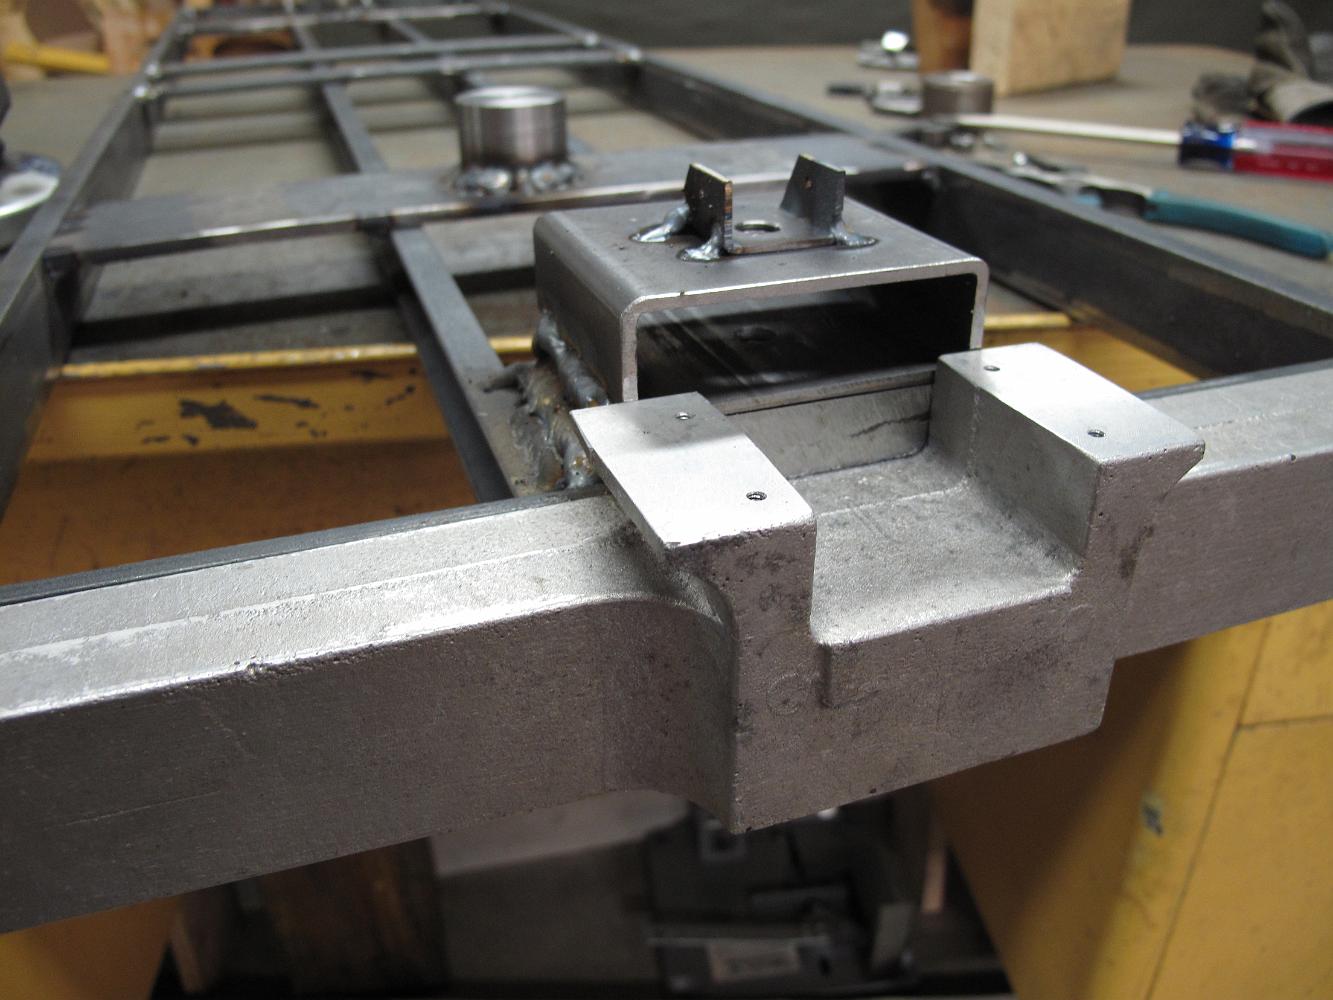
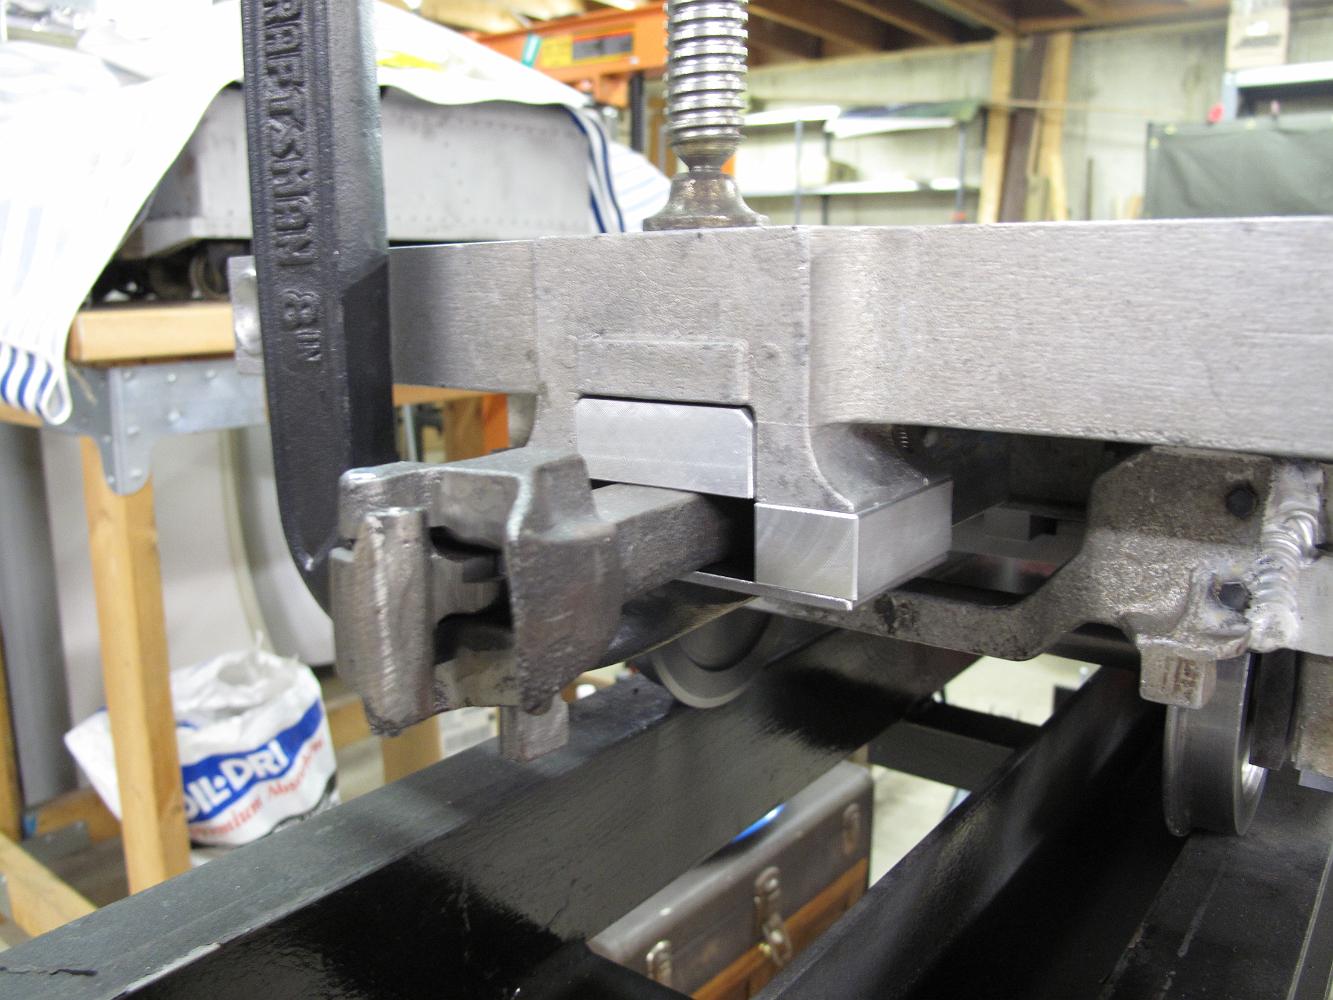
22-Feb-2014 Height check of the drawbar pocket with the new front bumper beam. We do not have a way to weld aluminum and do not trust mechanical fasteners for…
24-Feb-2014 I finish putting the rivets in tender deck. I am able to do two lines each day before I get tired out and stop.
1-Mar-2014 Now that the frame is finished and front and rear bumpers installed, the front tank hold down brackets can be installed in the correct position.
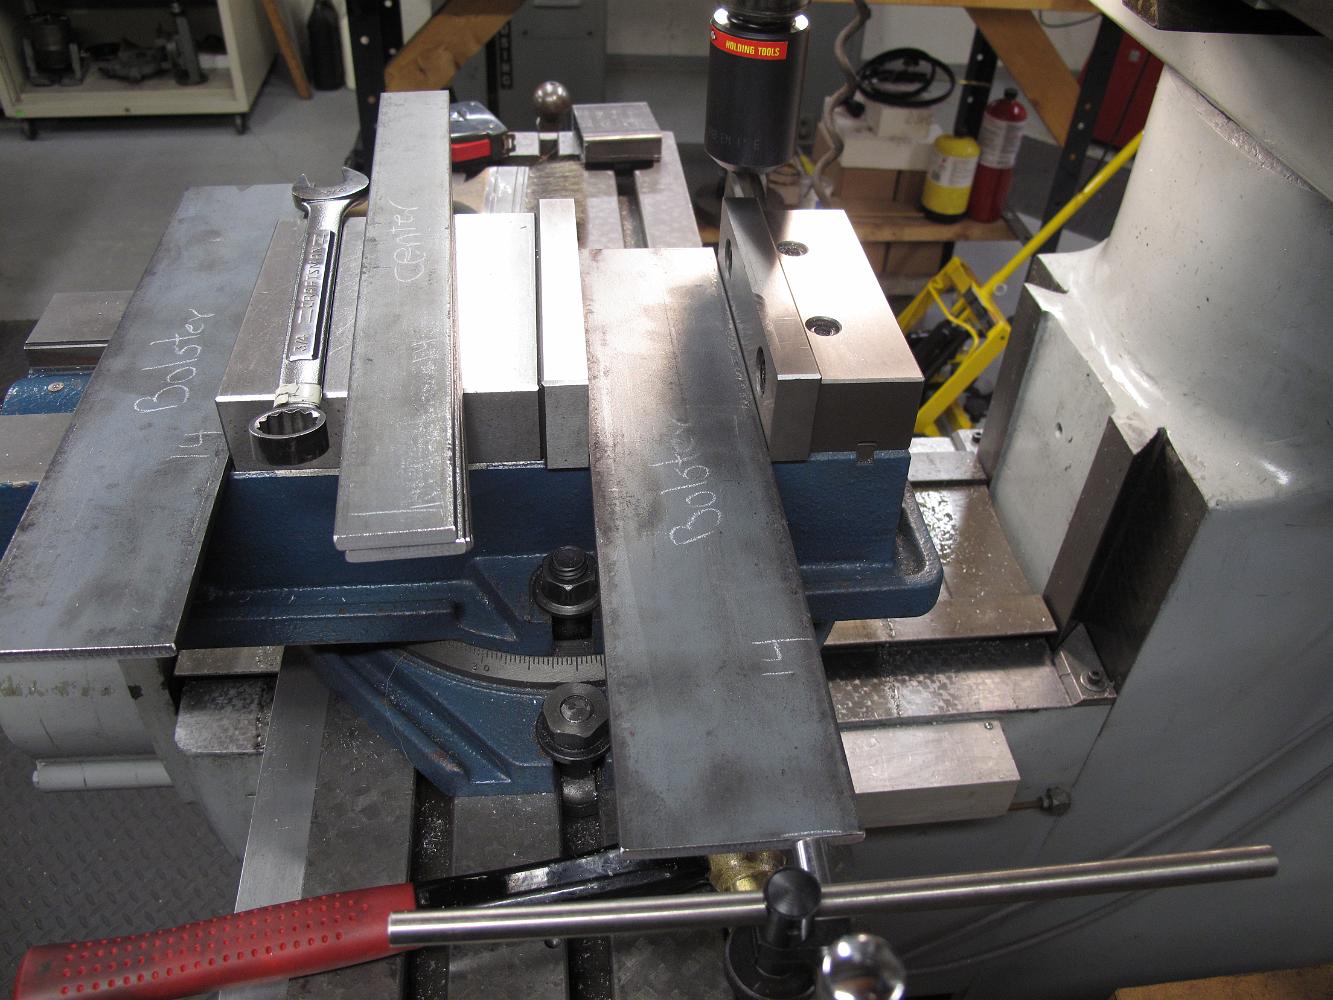
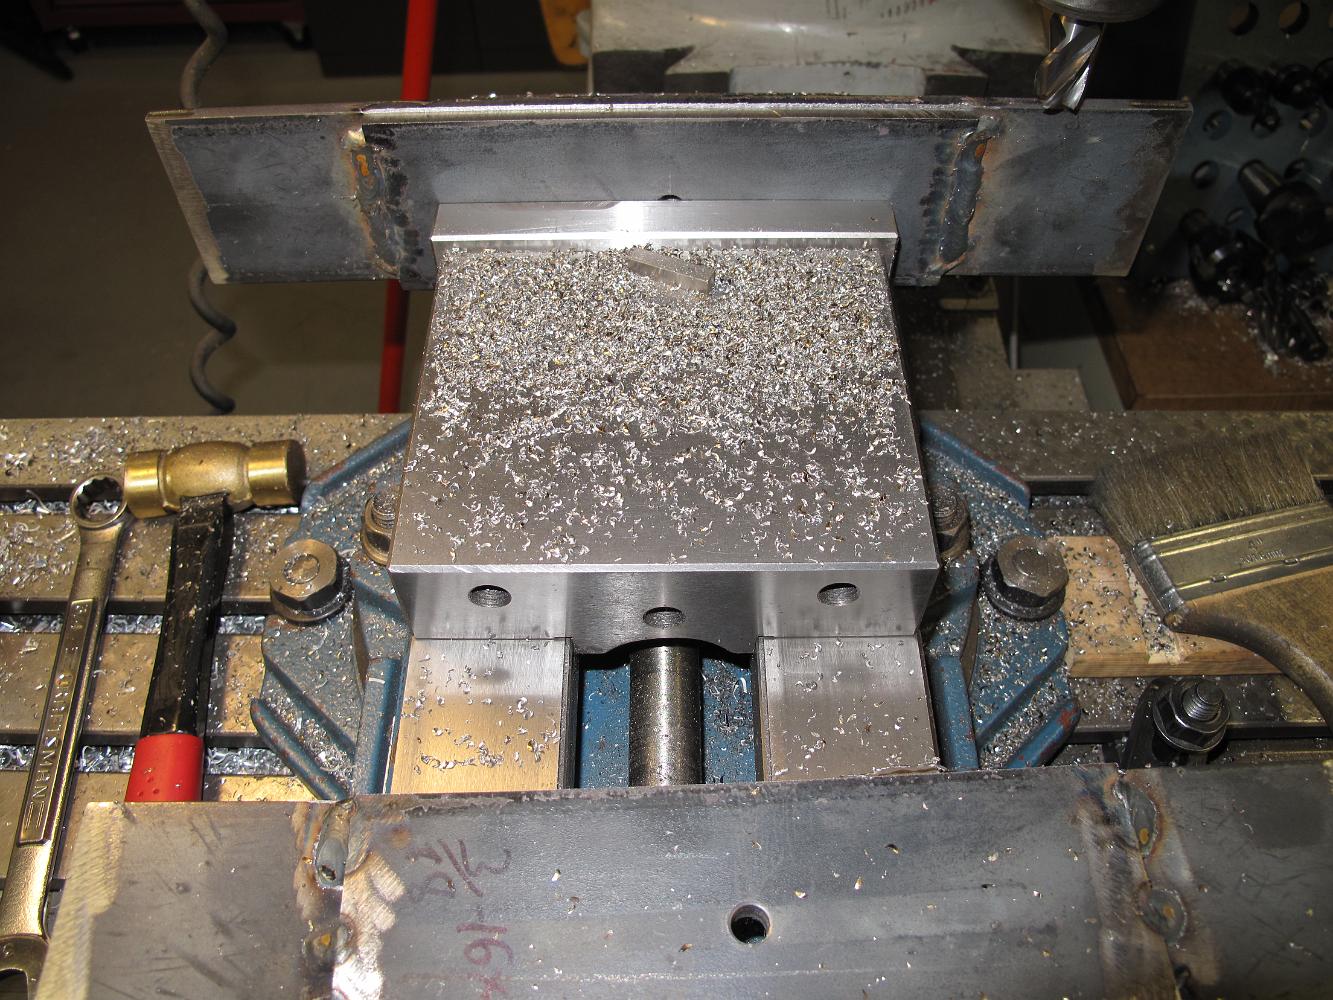
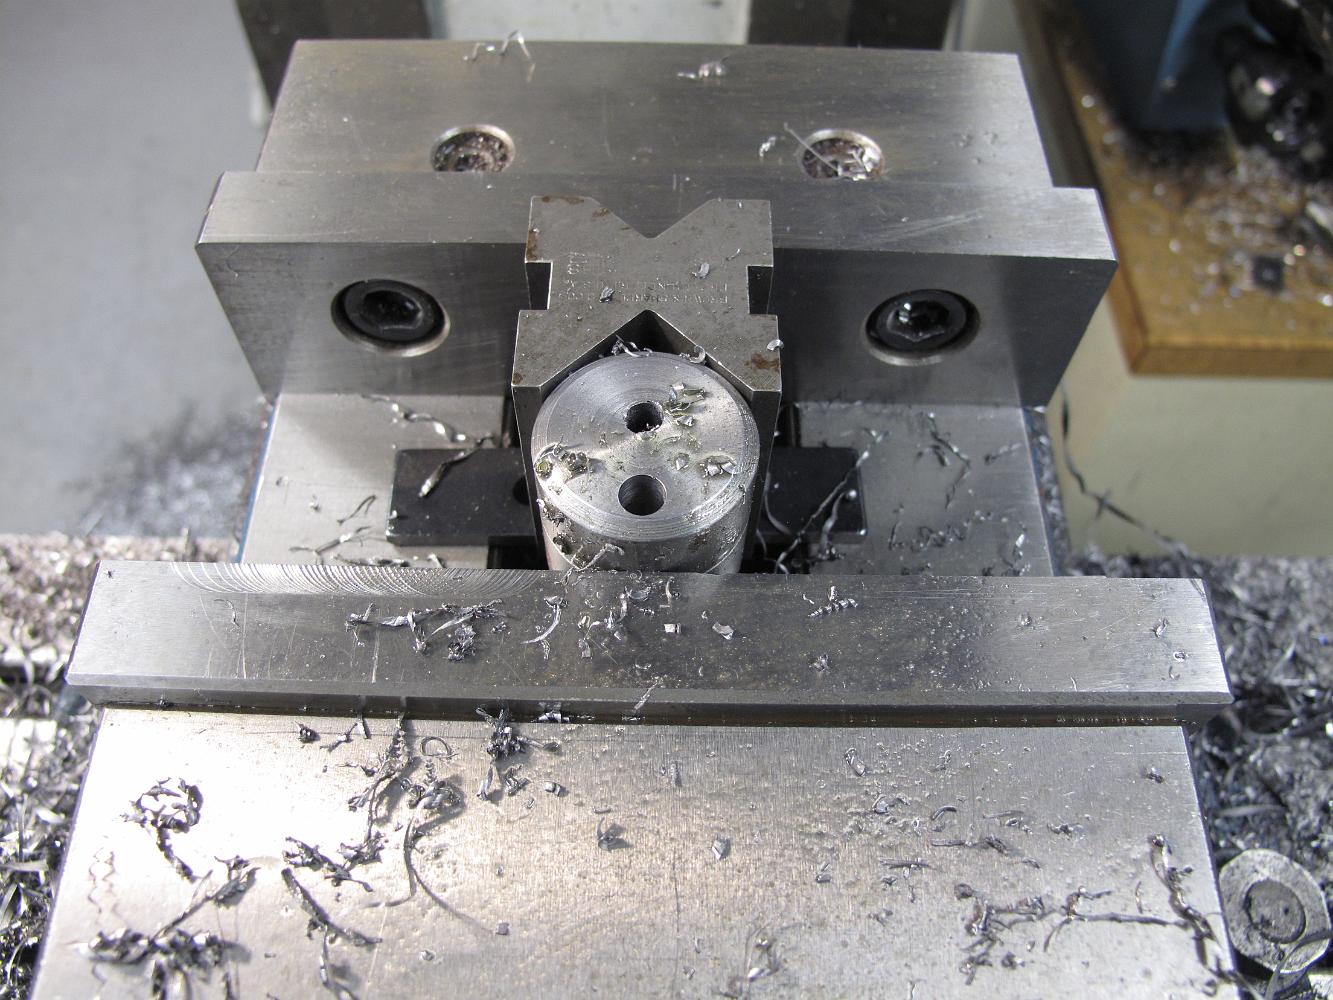
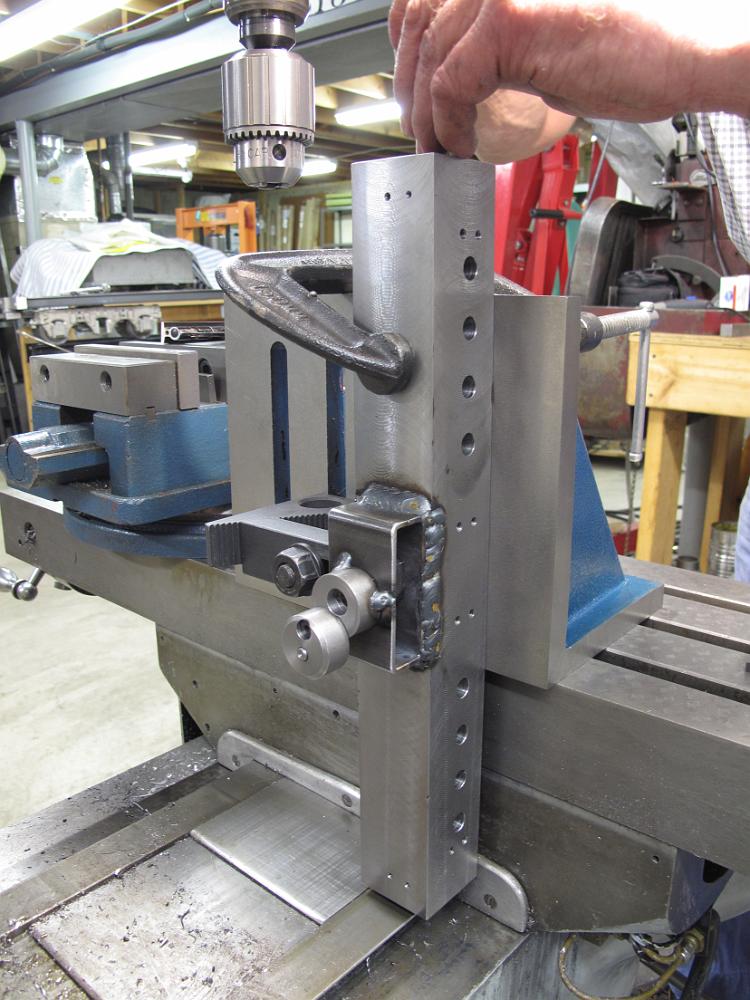
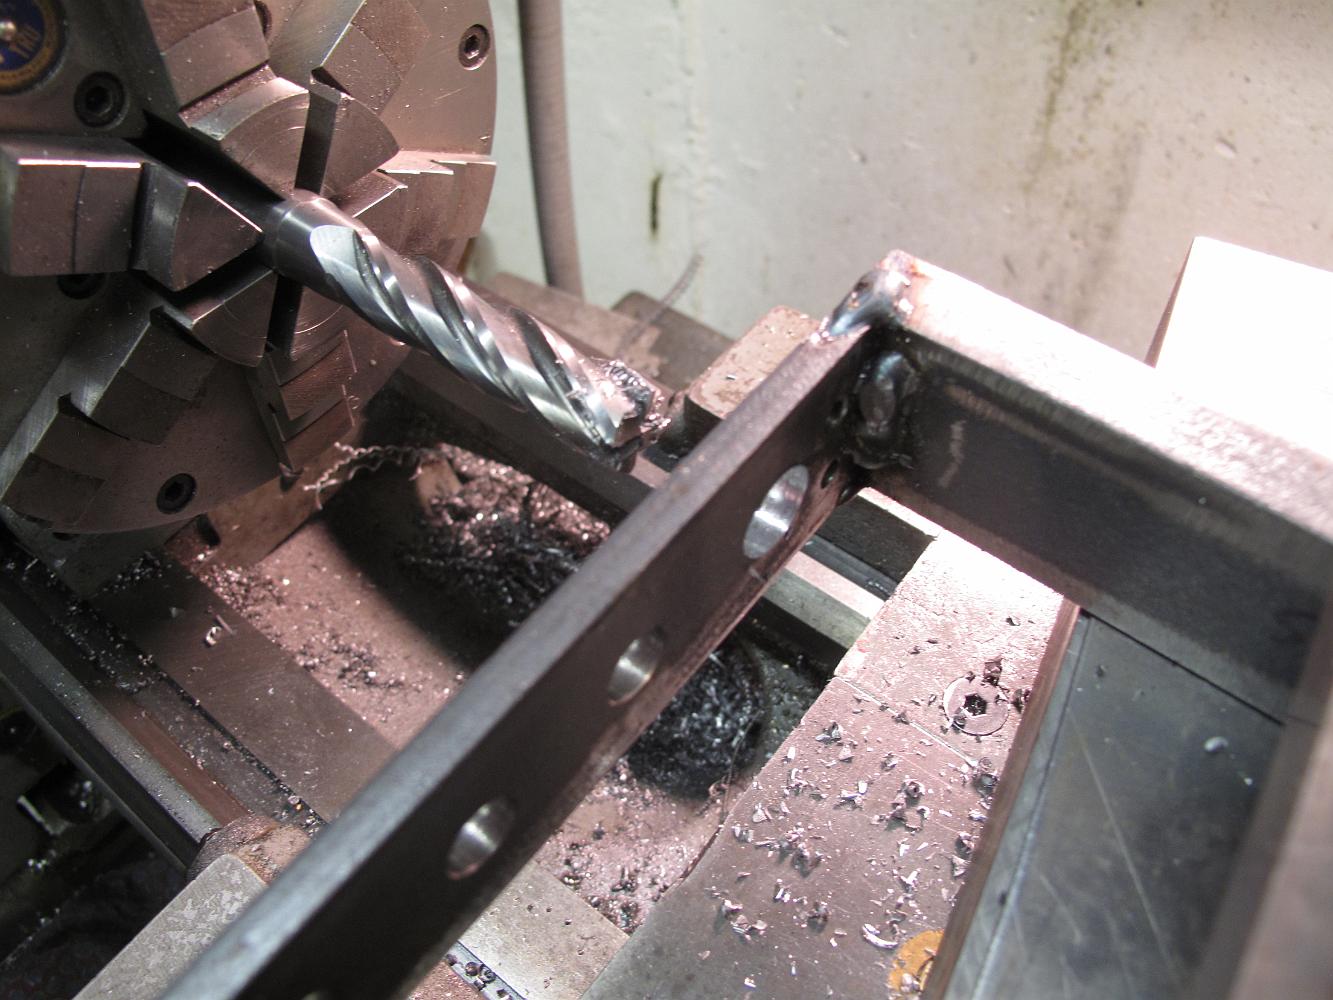
3-Mar-2014 Machine capacity check - how to drill and tap holes in the end of a 16" long bar. We use the angle plate and overhang the part from the table.
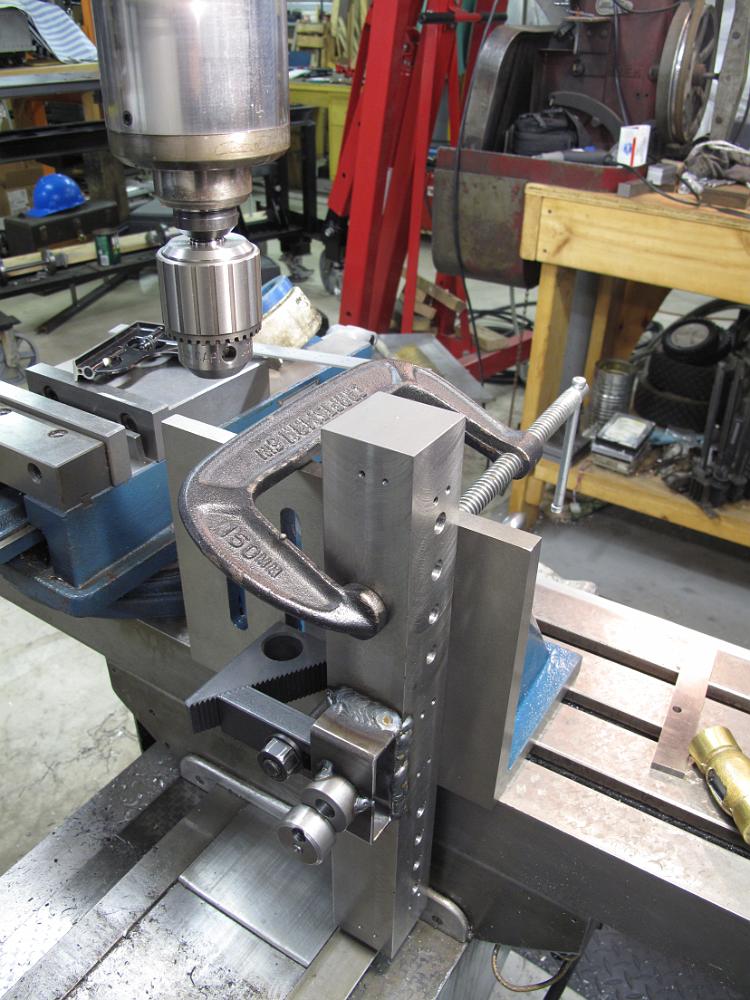
3-Mar-2014 The table is all the way down to give us the height needed to drill and tap a hole in the end of the beam for the footpegs
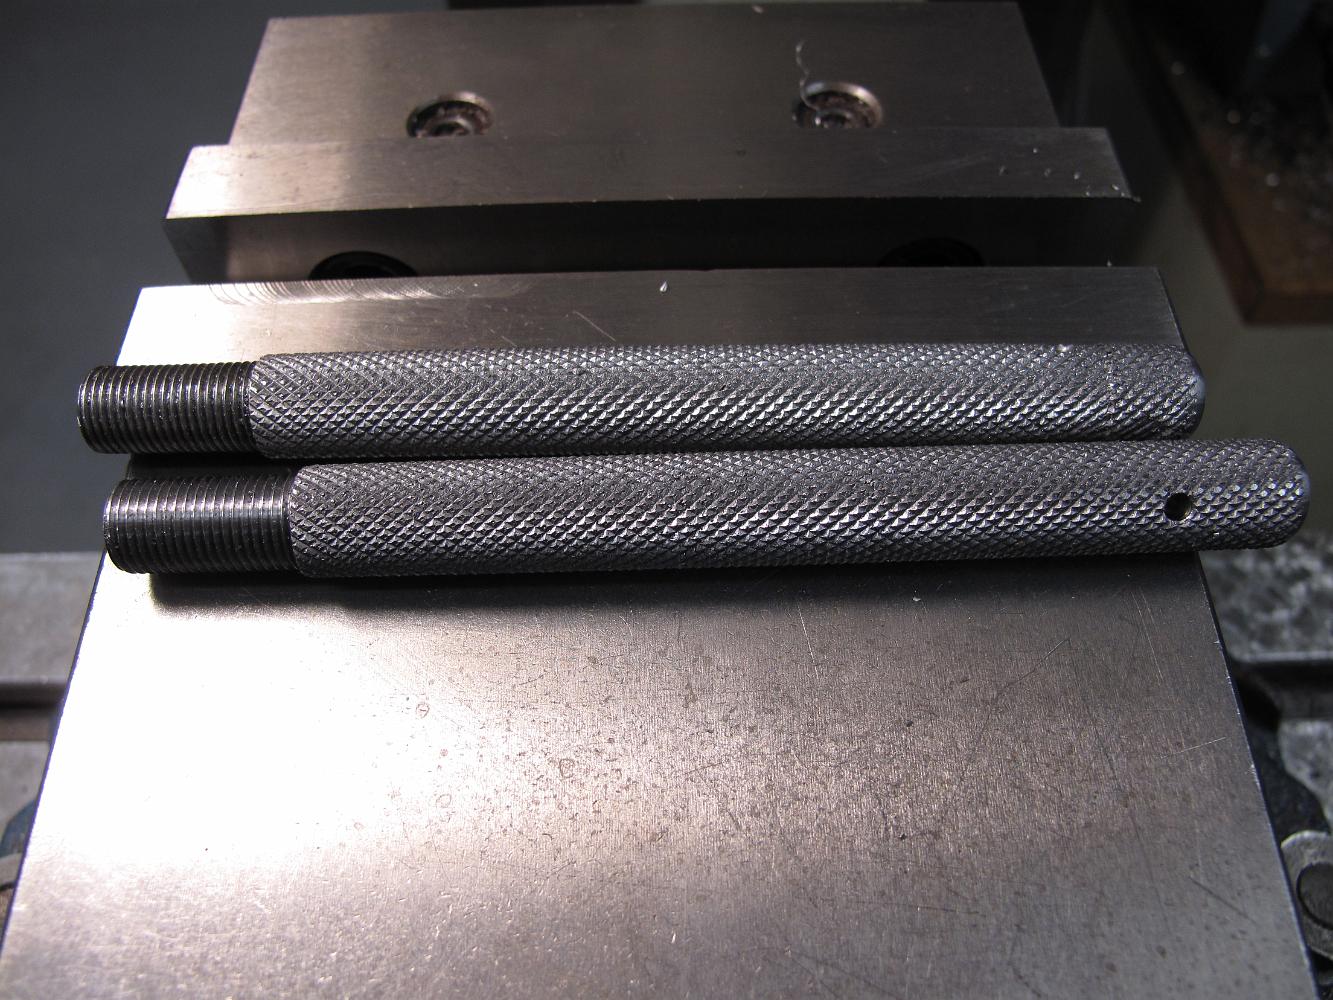
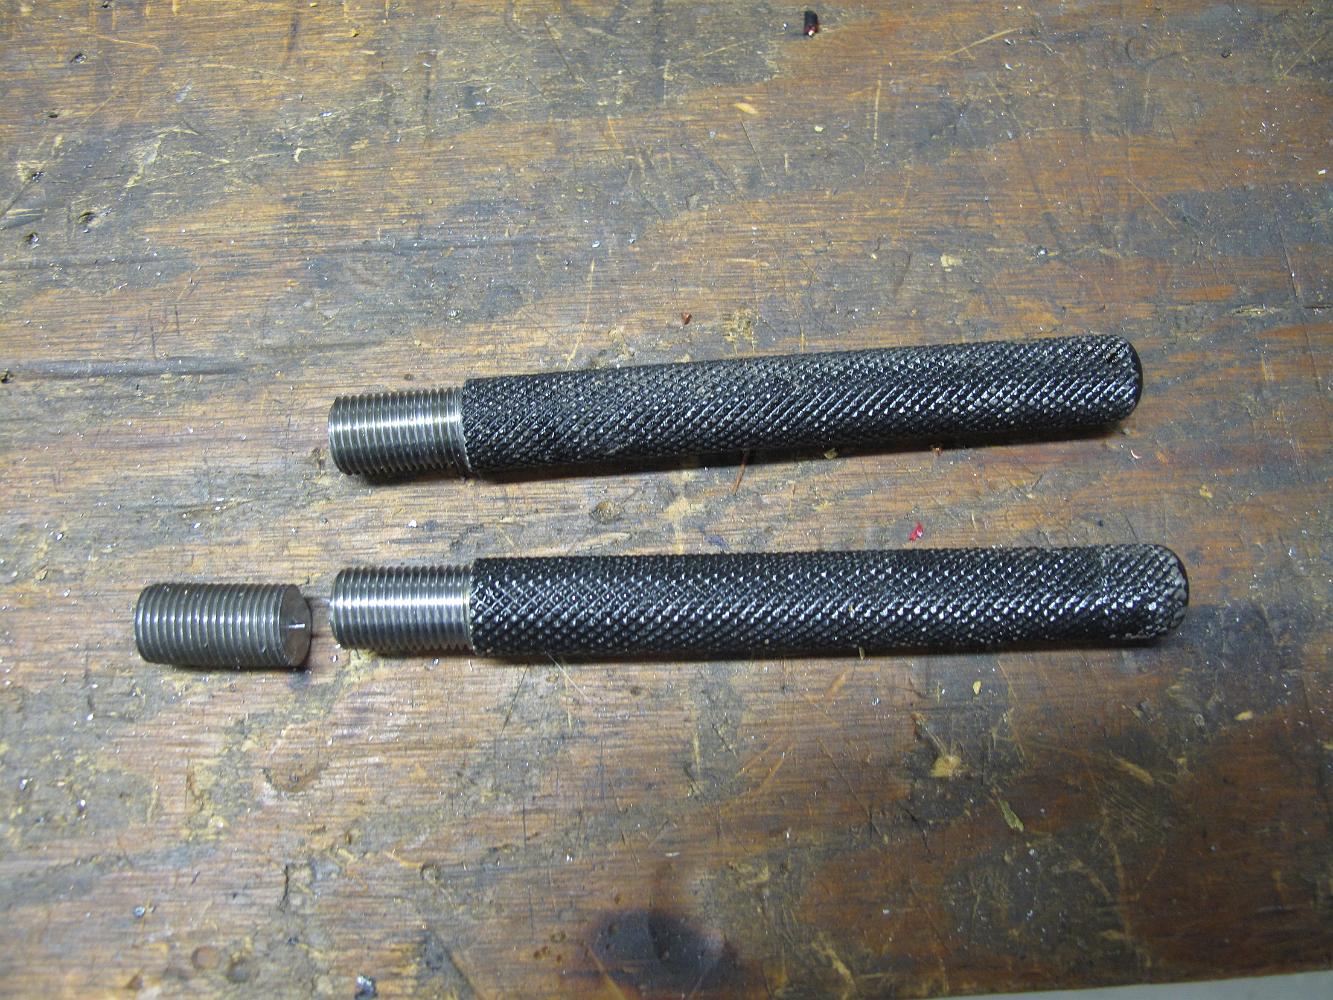
8-Mar-2014 Bill makes a pair of footpegs out of some soft 12L18 leaded mild steel. The knurling tool calls for flood coolent, which I do not have, and one of…
8-Feb-2014 I spend some time with the hand drill and several drill bits to get the tender deck ready for hatch installation.
10-Mar-2014 Adapting the lathe to be a horizontal mill. We clamped the tender frame to the carriage, shimmed up with blocks and spacers to the correct height,…
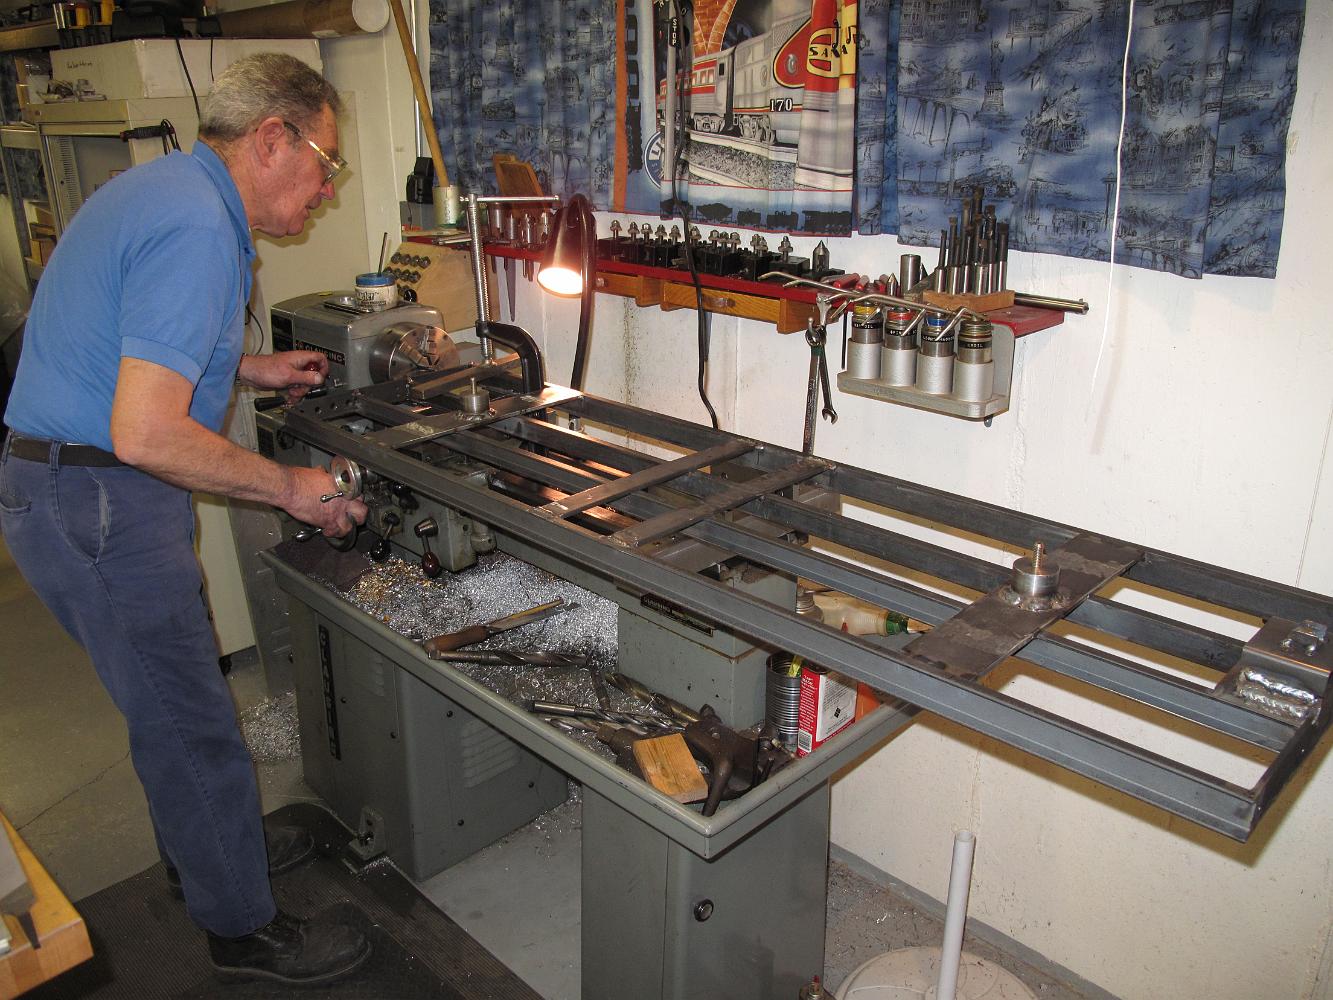
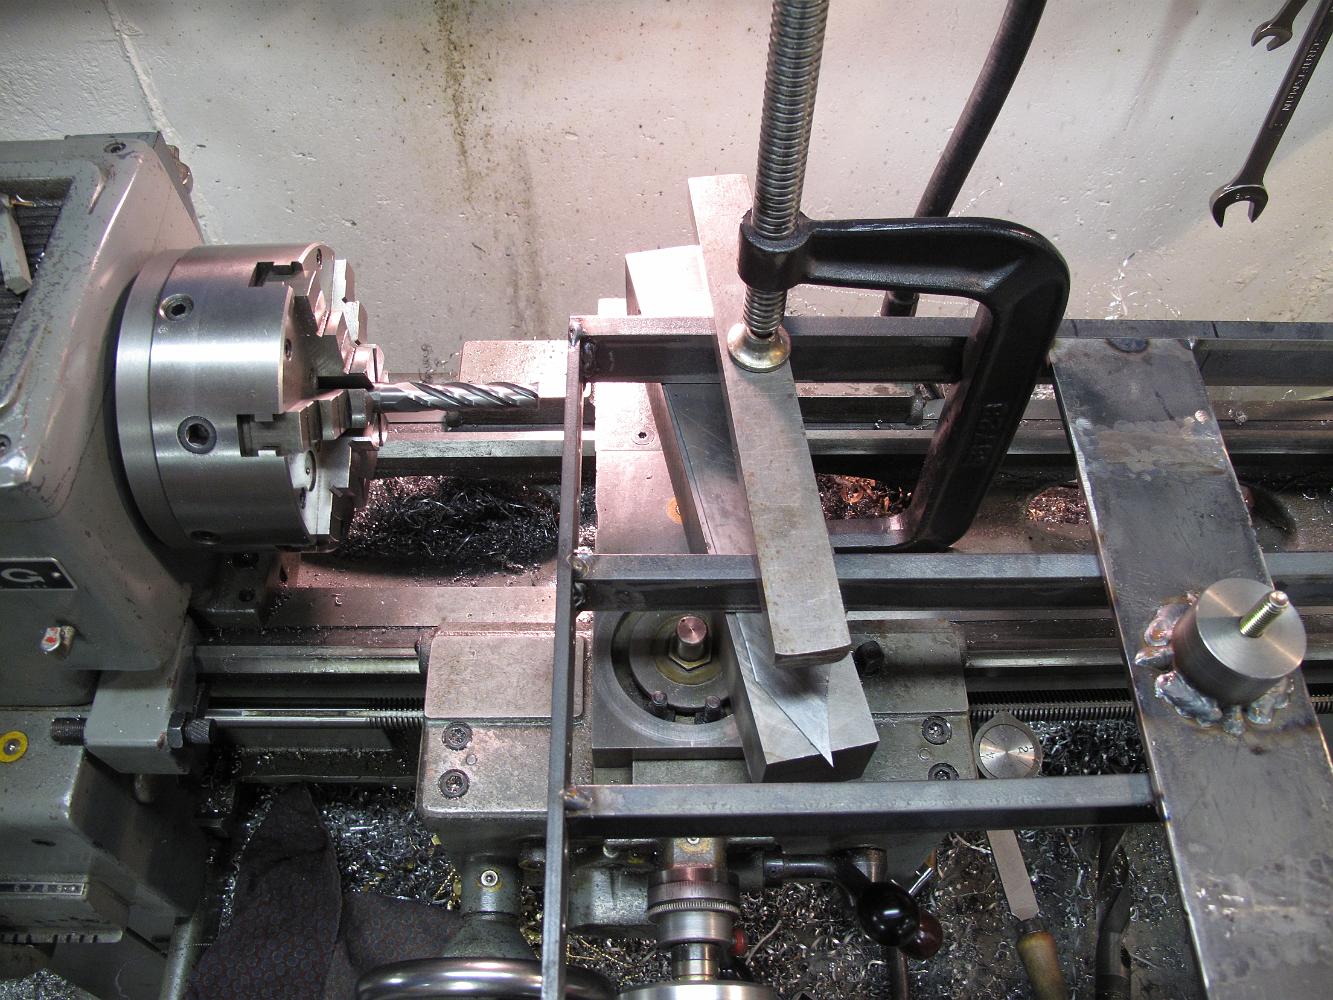
10-Mar-2014 Milling larger holes in the tender frame to accommodate the water valve fittings. We did not have a way to hold the frame on end - the Mill…
10-Mar-2014 The enlarged hole for the water valve plumbing. We had to move the hole over, closer to the outside frame.
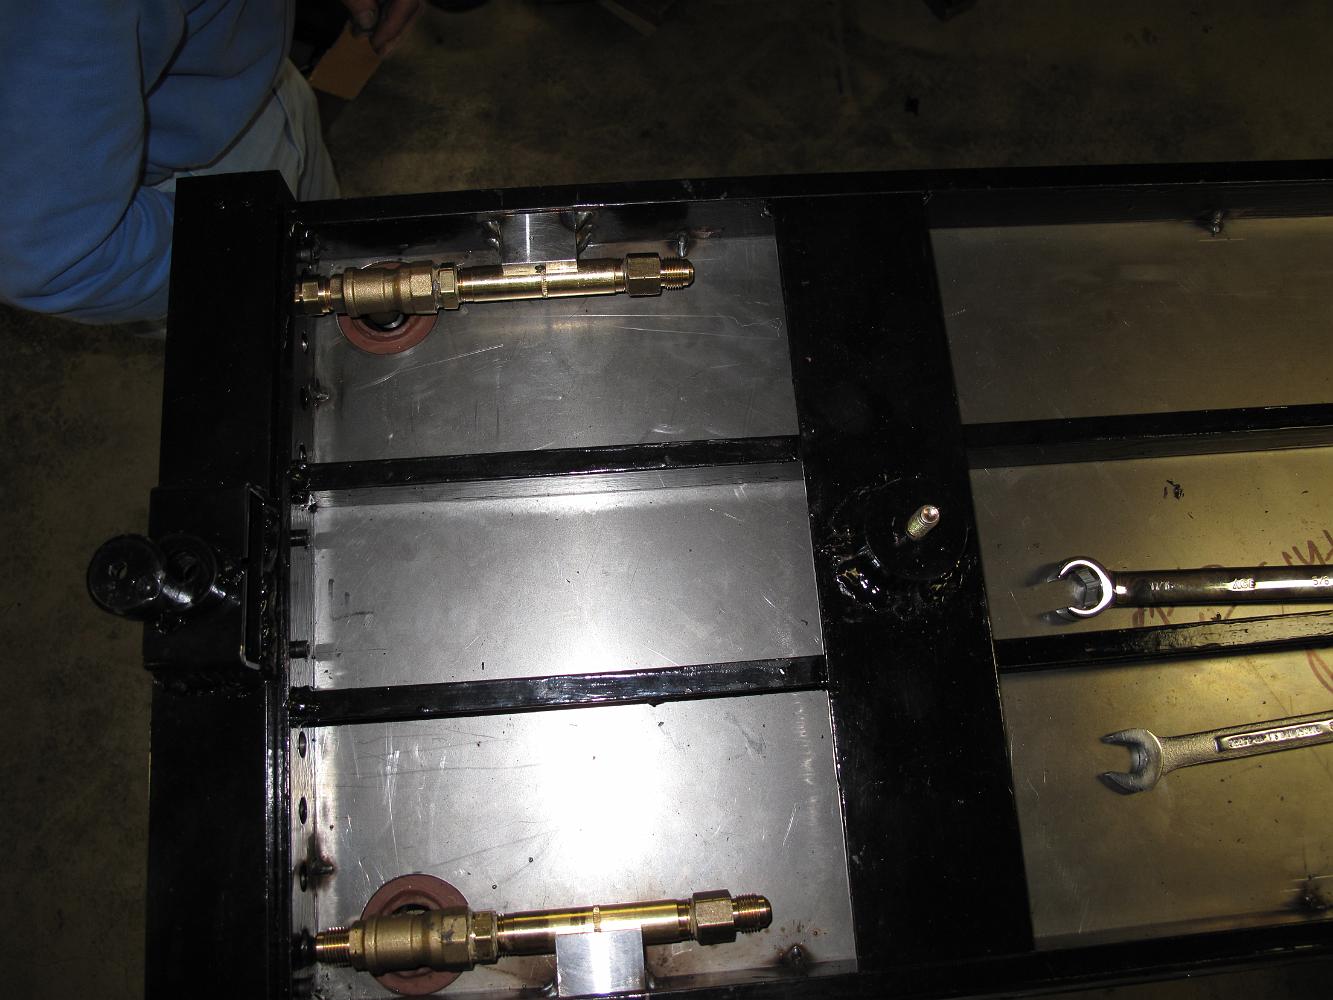
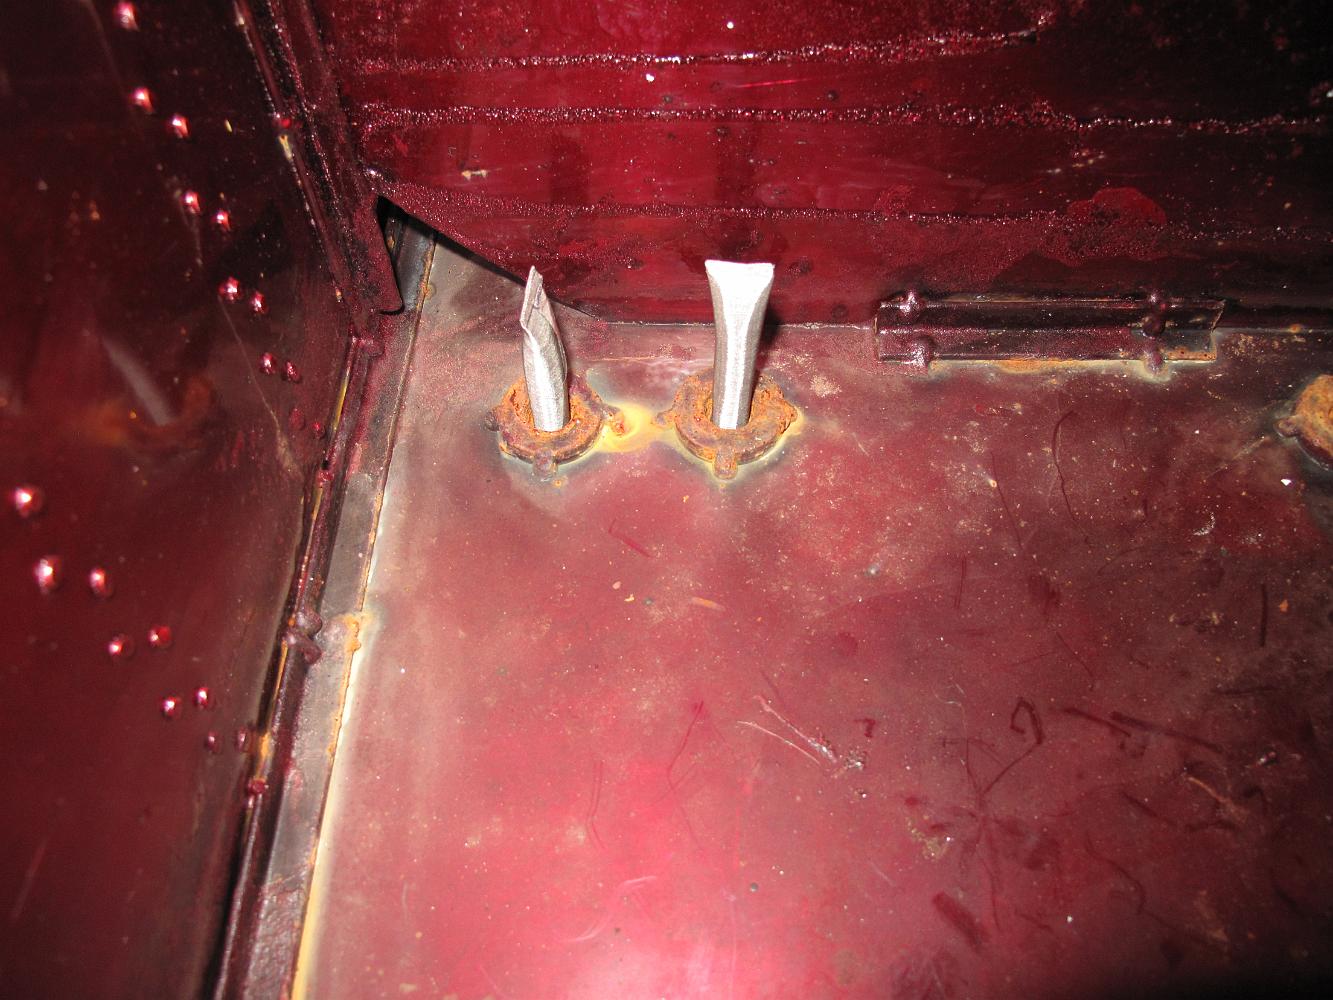
15-Mar-2014 Having discovered the bonnet on the ball valves will have to stick up into the tender, I am force to modify the tender bottom. I remove the valve…
17-Mar-2014 New 1" black pipe welded to the tender bottom. The pipe ID is large enough to allow the valve bonnets to stick up inside the pipe.
24-Mar-2014 Once again, the mill table is stripped of the vise and the Tender deck is bolted down for modification - in this case, enlargement of the water…
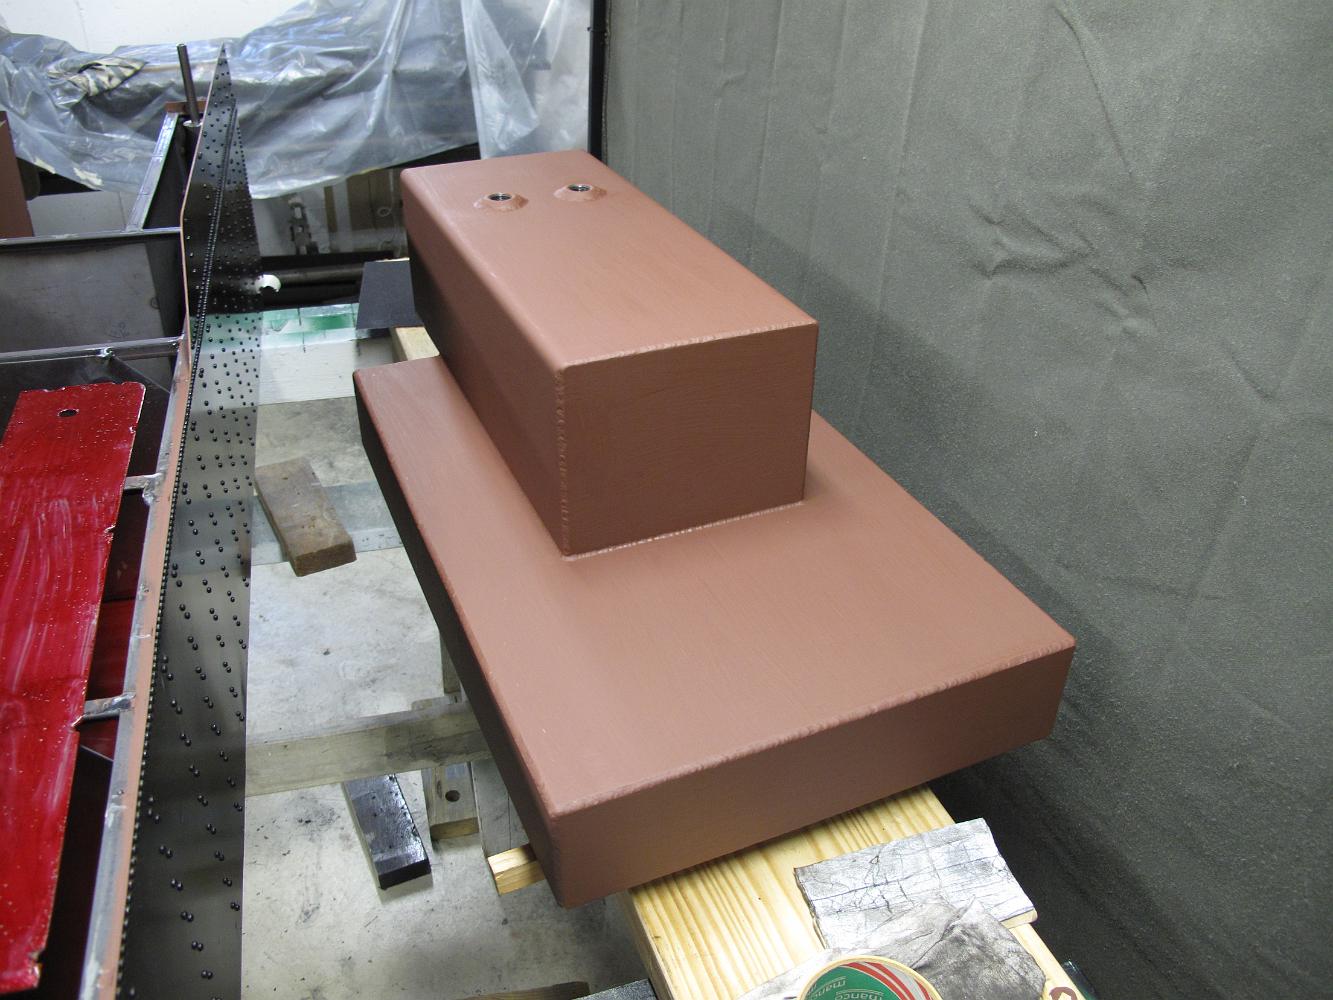
5-Apr-2014 Look what arrived! The fabricated fuel tank. All stainless steel construction, 9 gallon capacity.
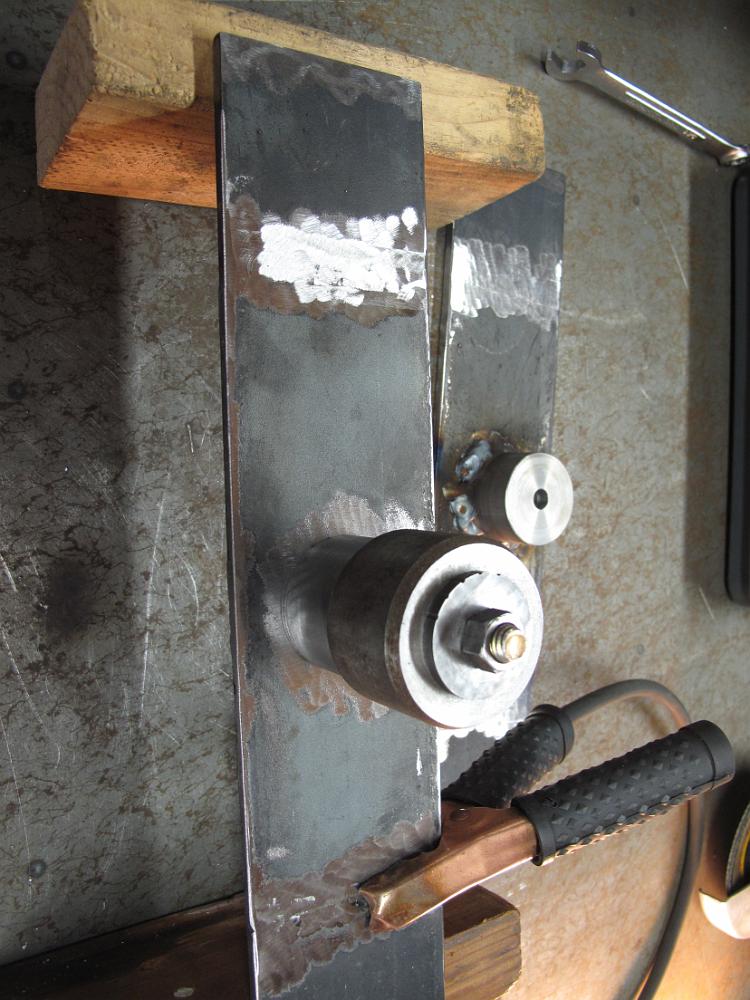
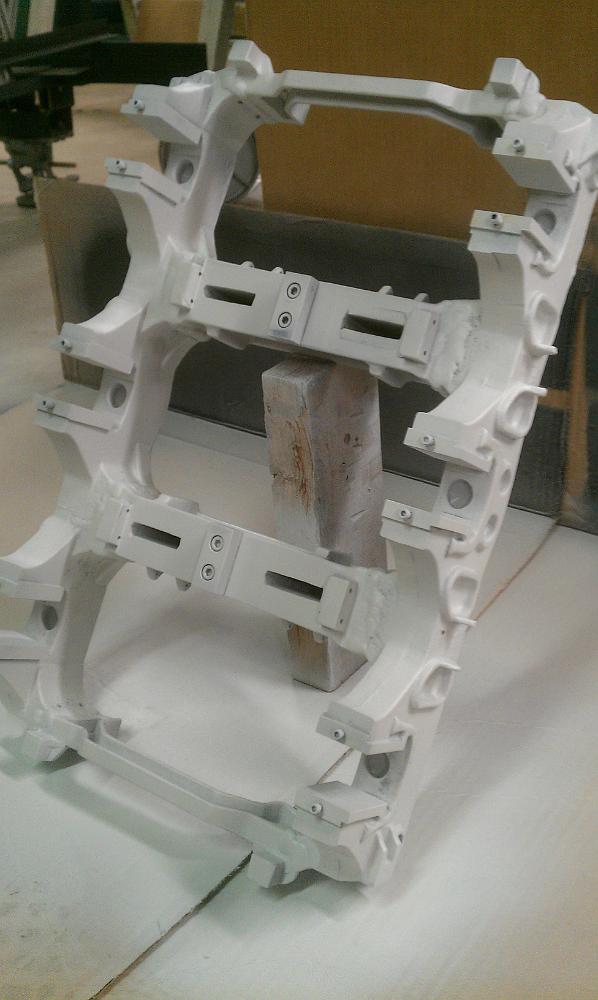
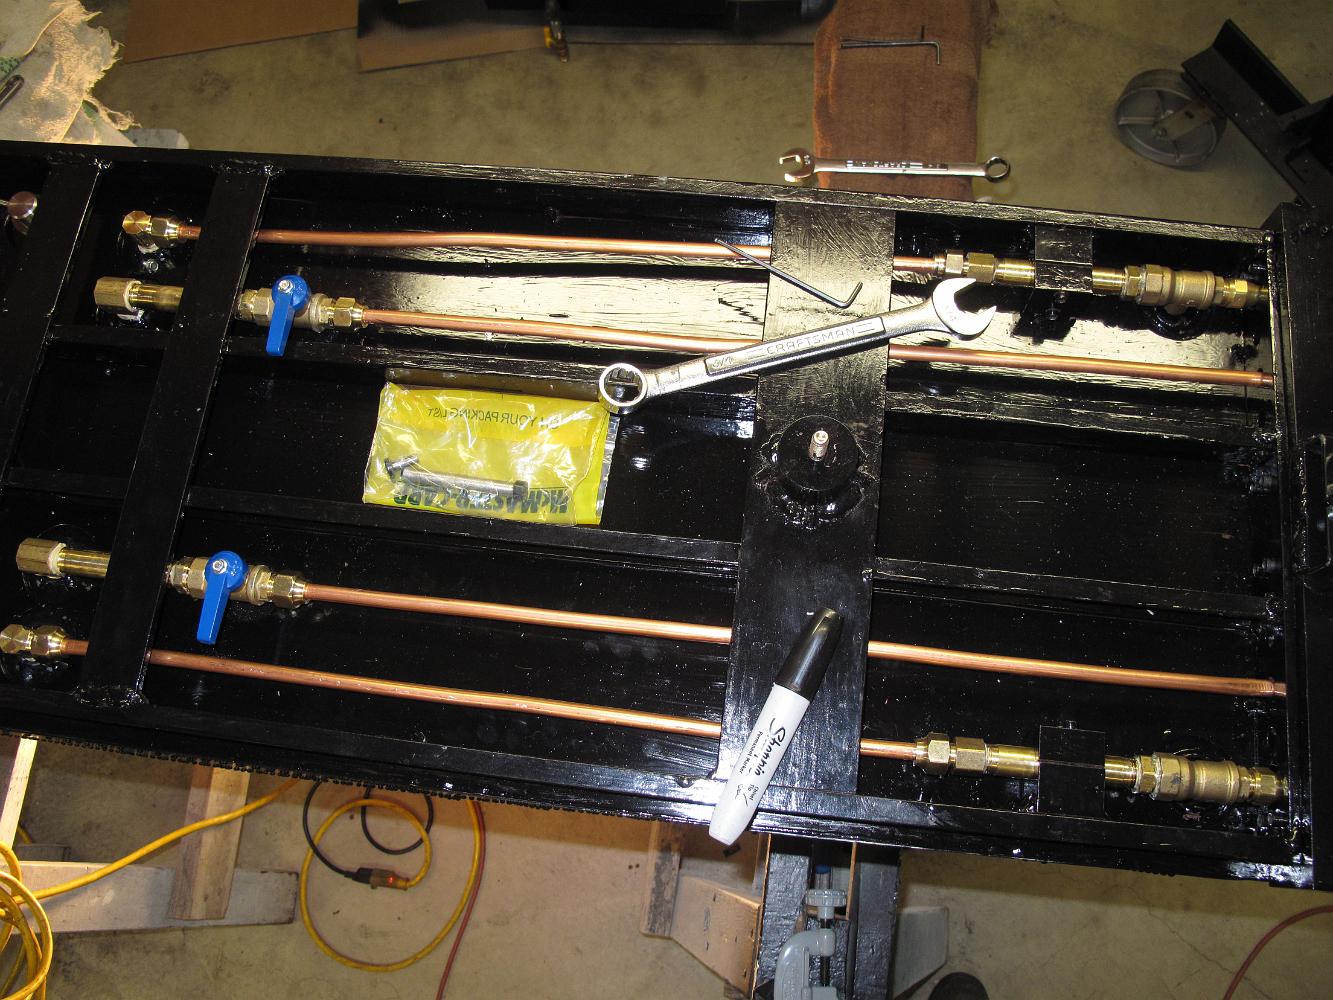
7-Apr-2014 The painted tender frame upside down on the bottom of the tender to locate the brackets which will hold the hard piping and valves in place. I weld…
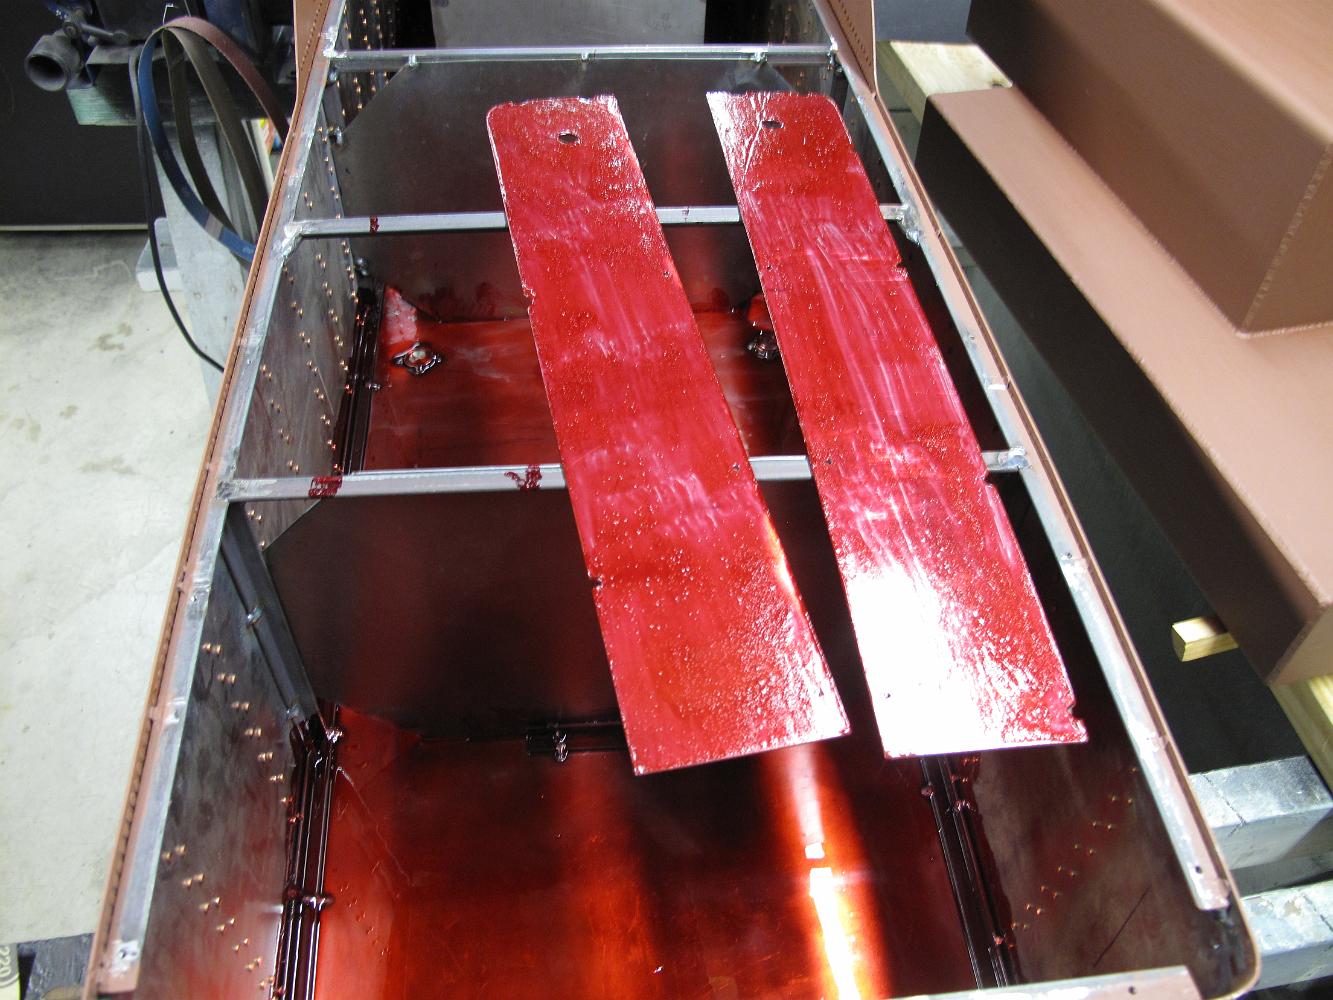
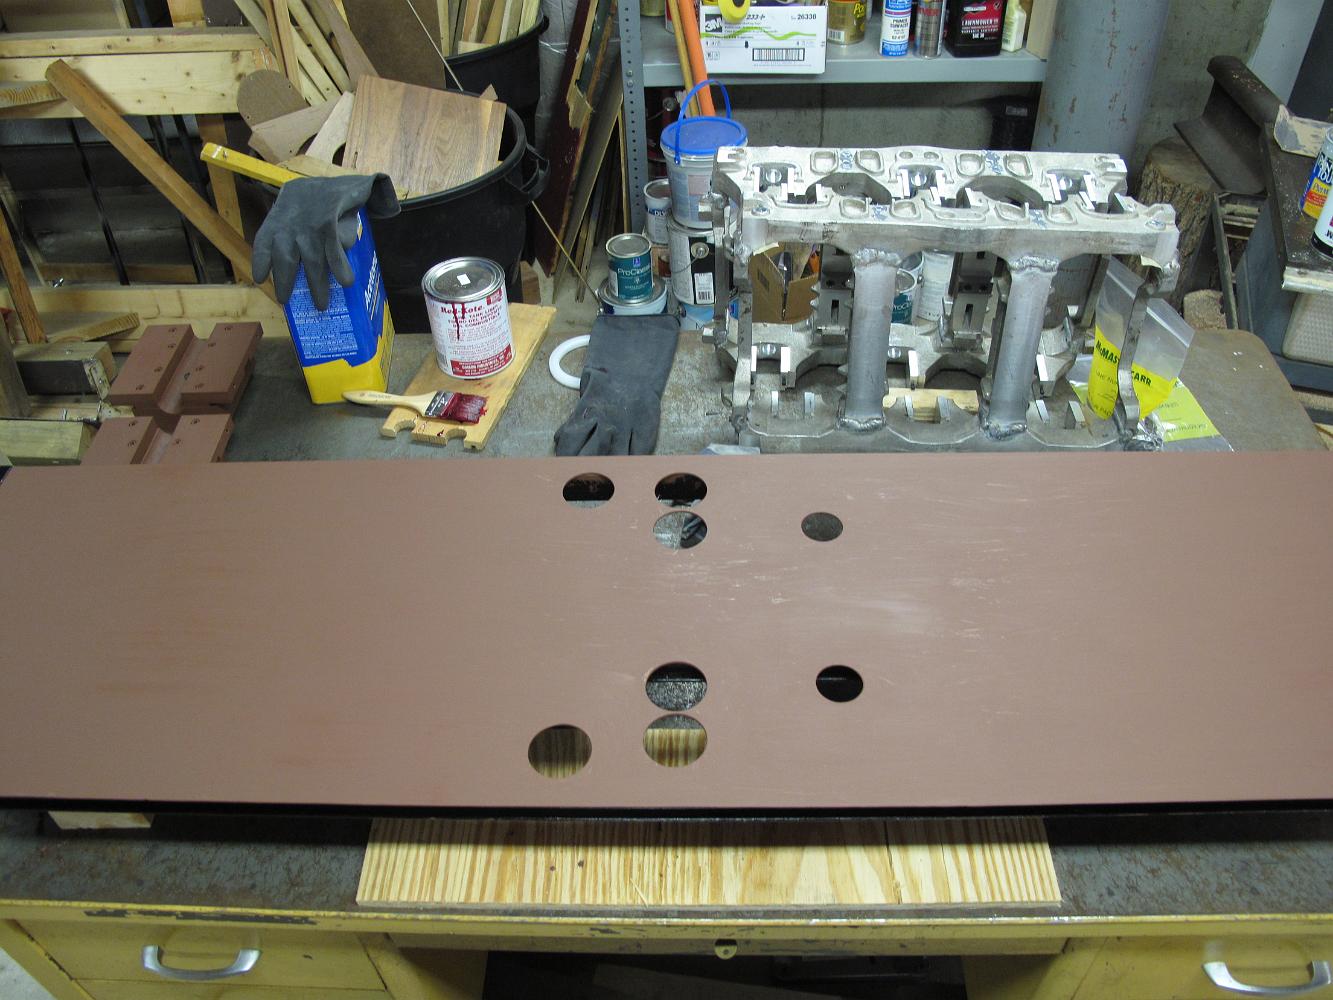
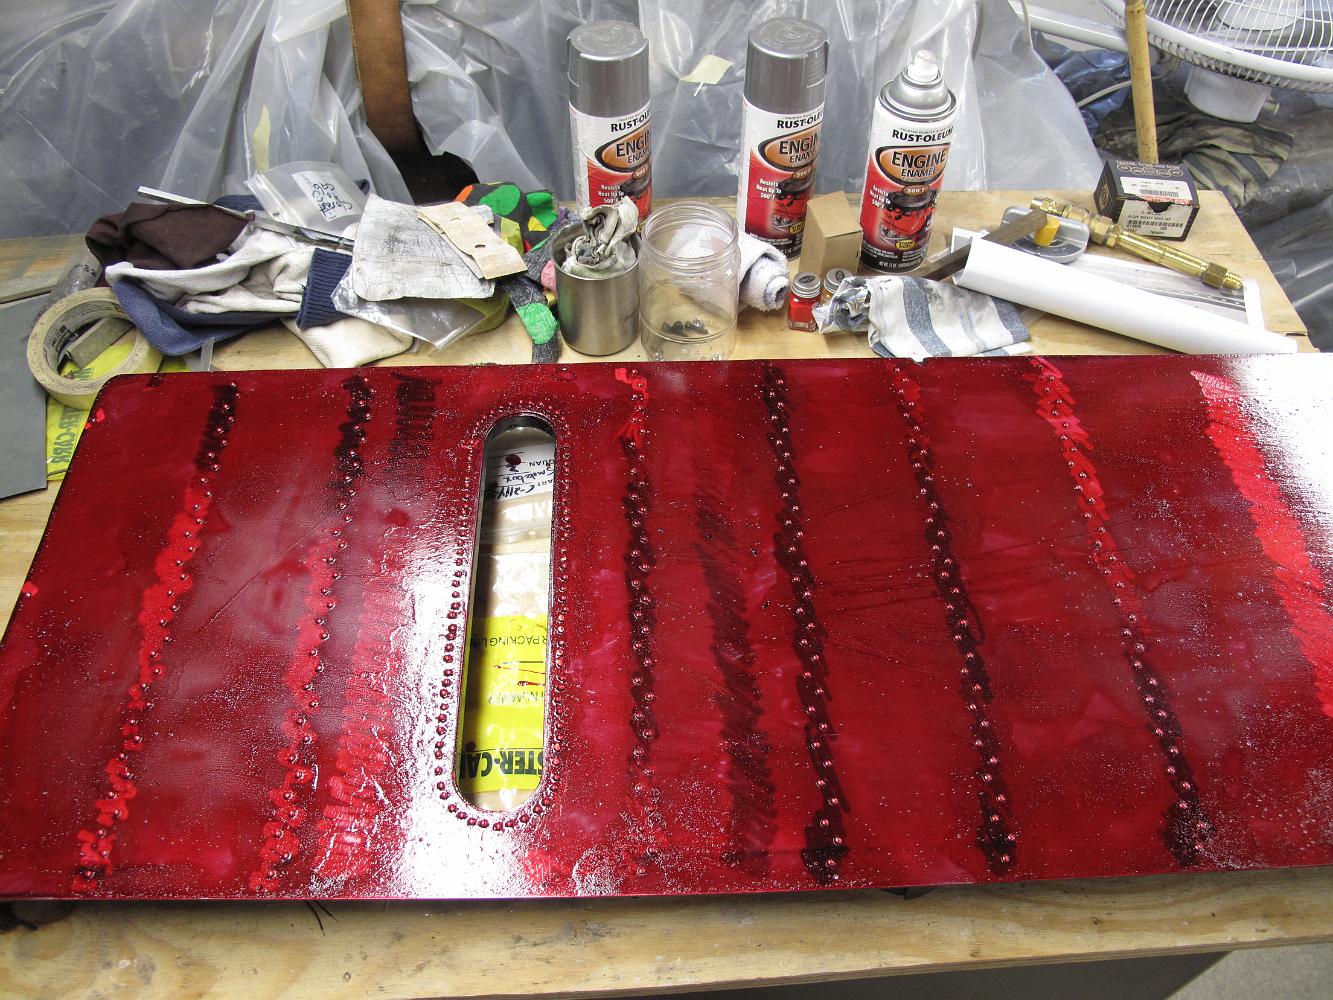
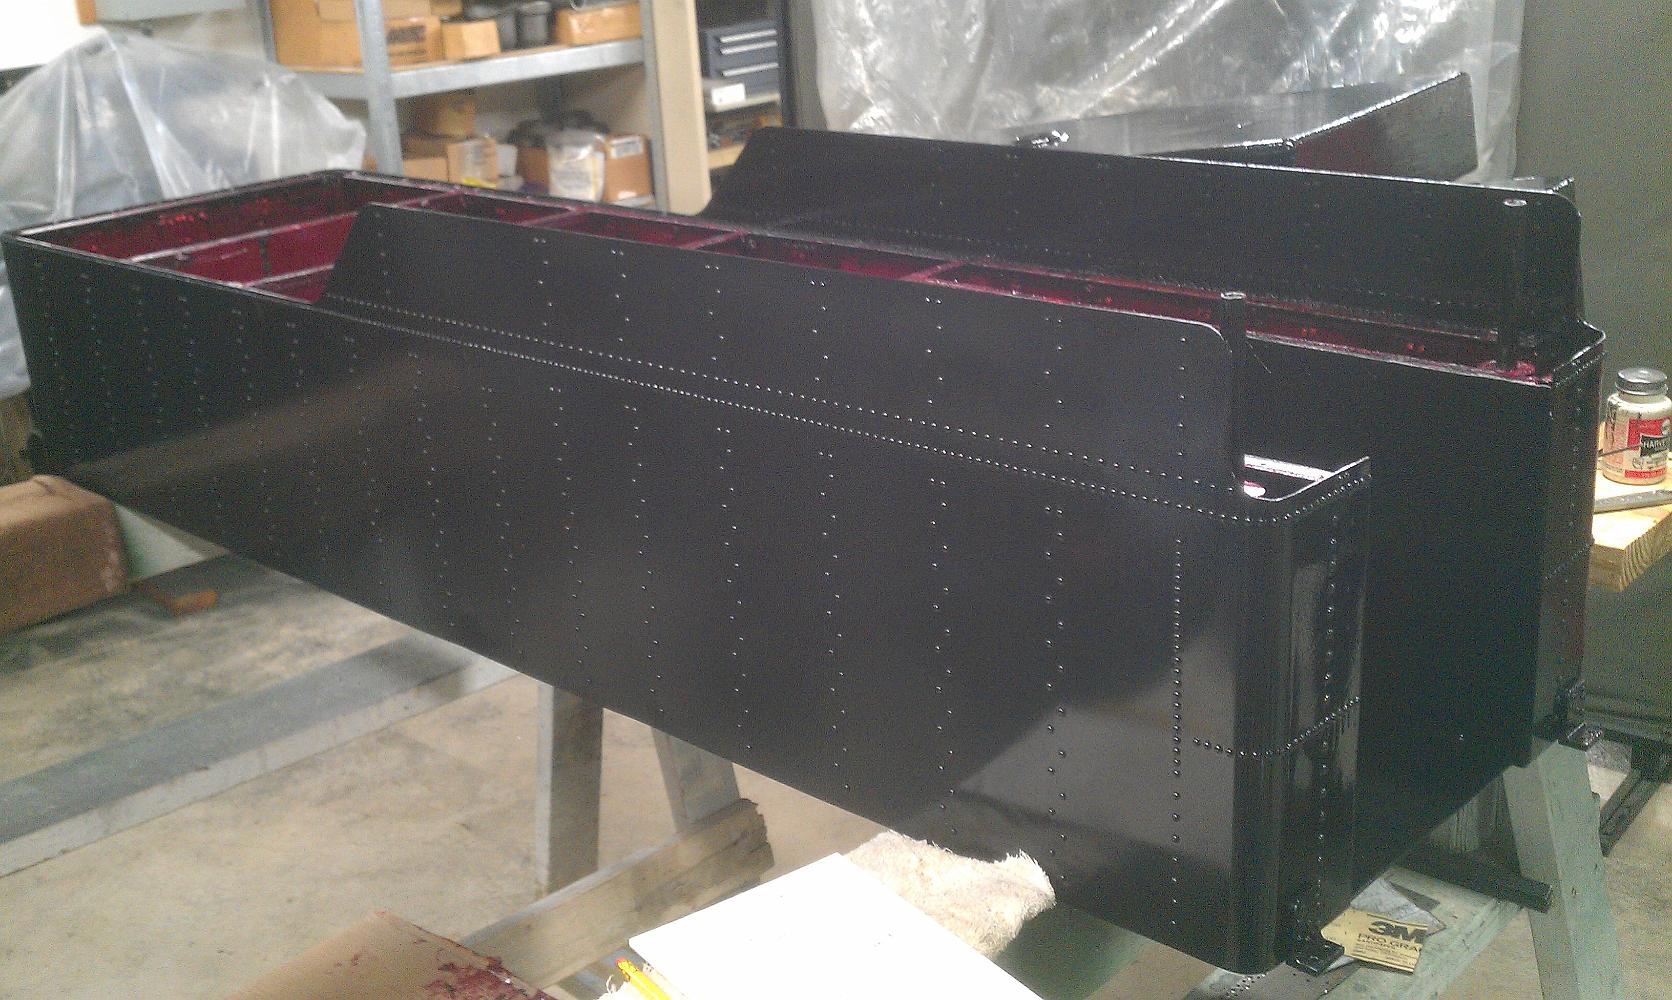
12-Apr-2014 Time to waterproof the tender. I am using gas tank liner brand "Red-Kote", which seems to be a form of rubber cement. My friend Tim has used this…
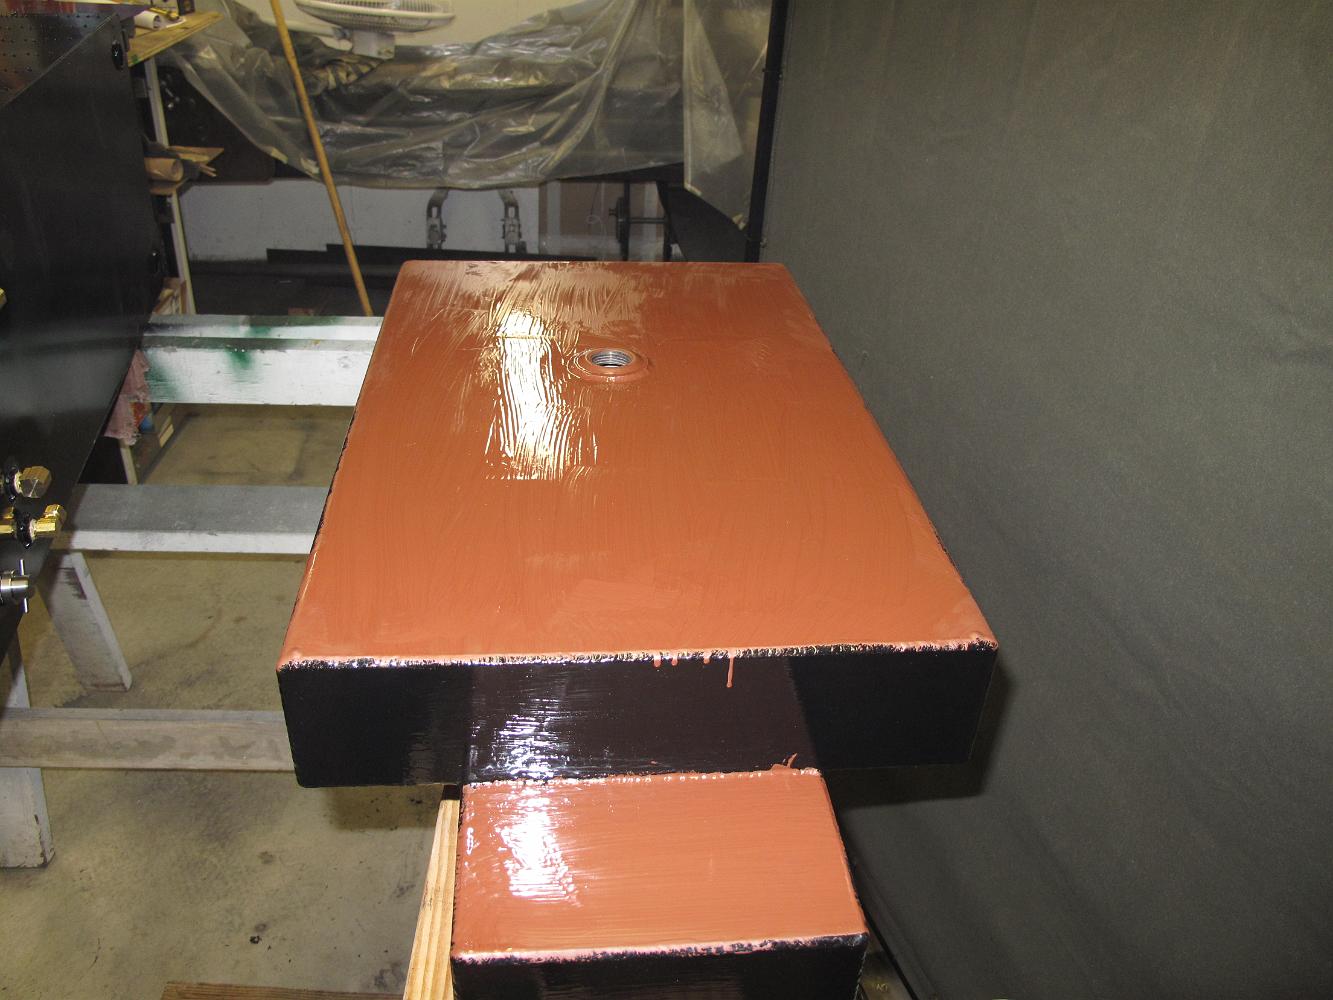
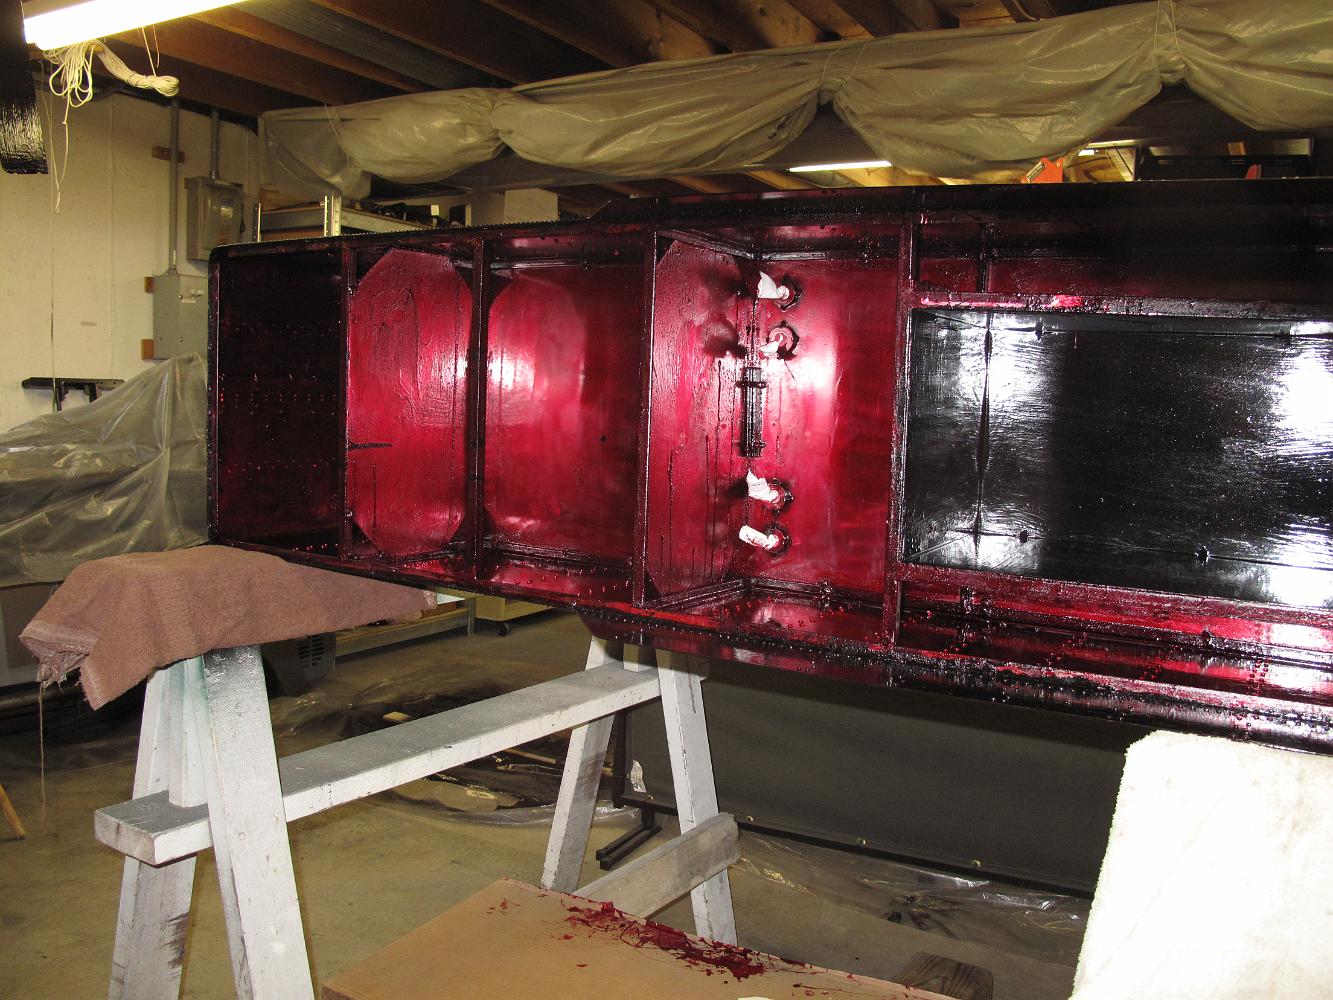
13-Apr-2014 Coating the sides of the tender to make them waterproof. I found it easiest to work with gravity and put the tender on its side to apply the…
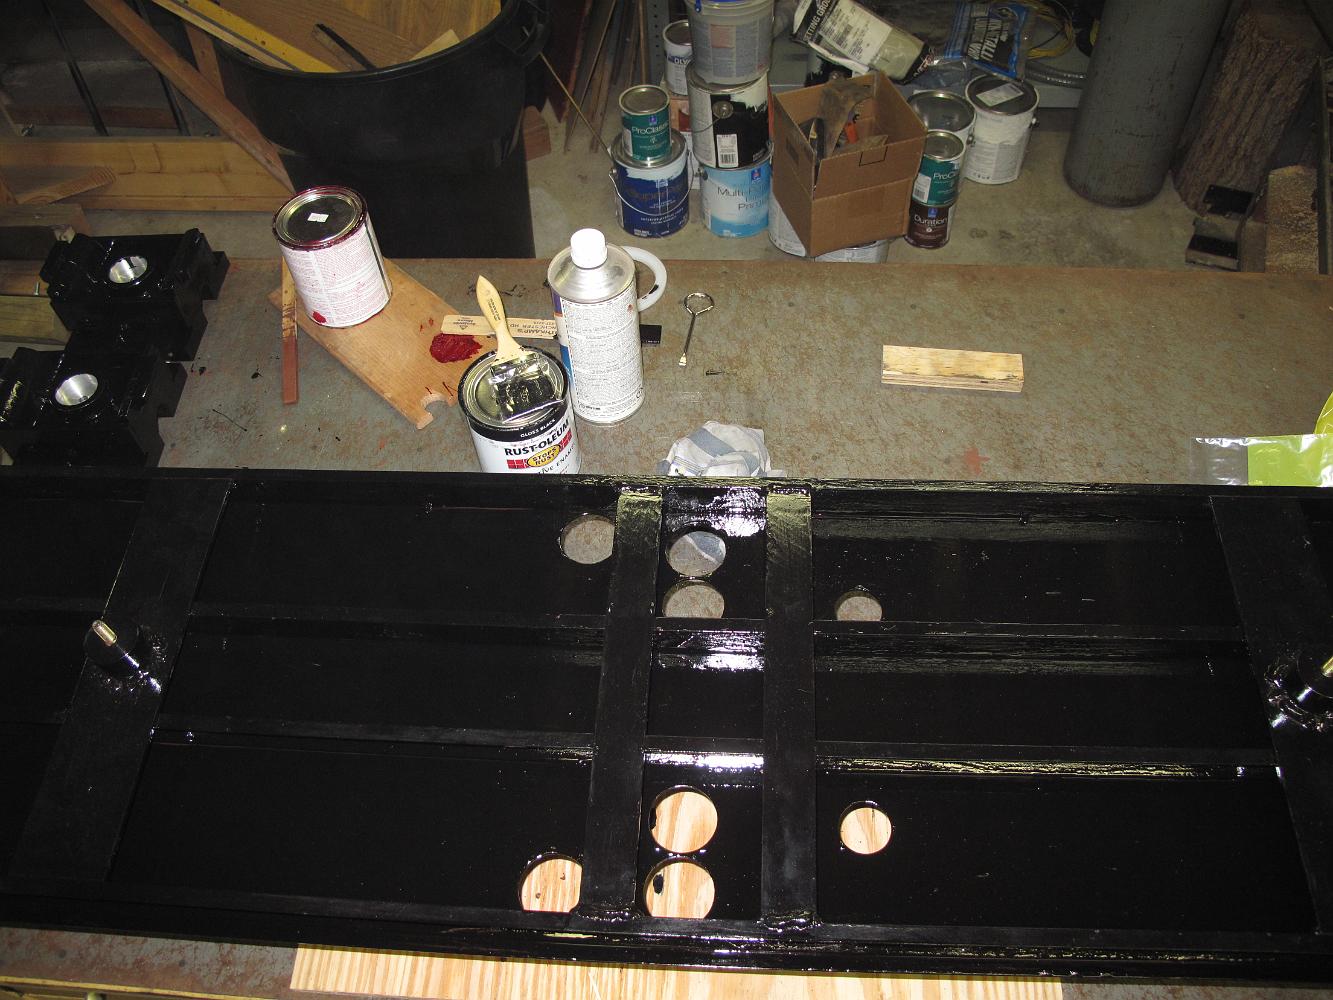
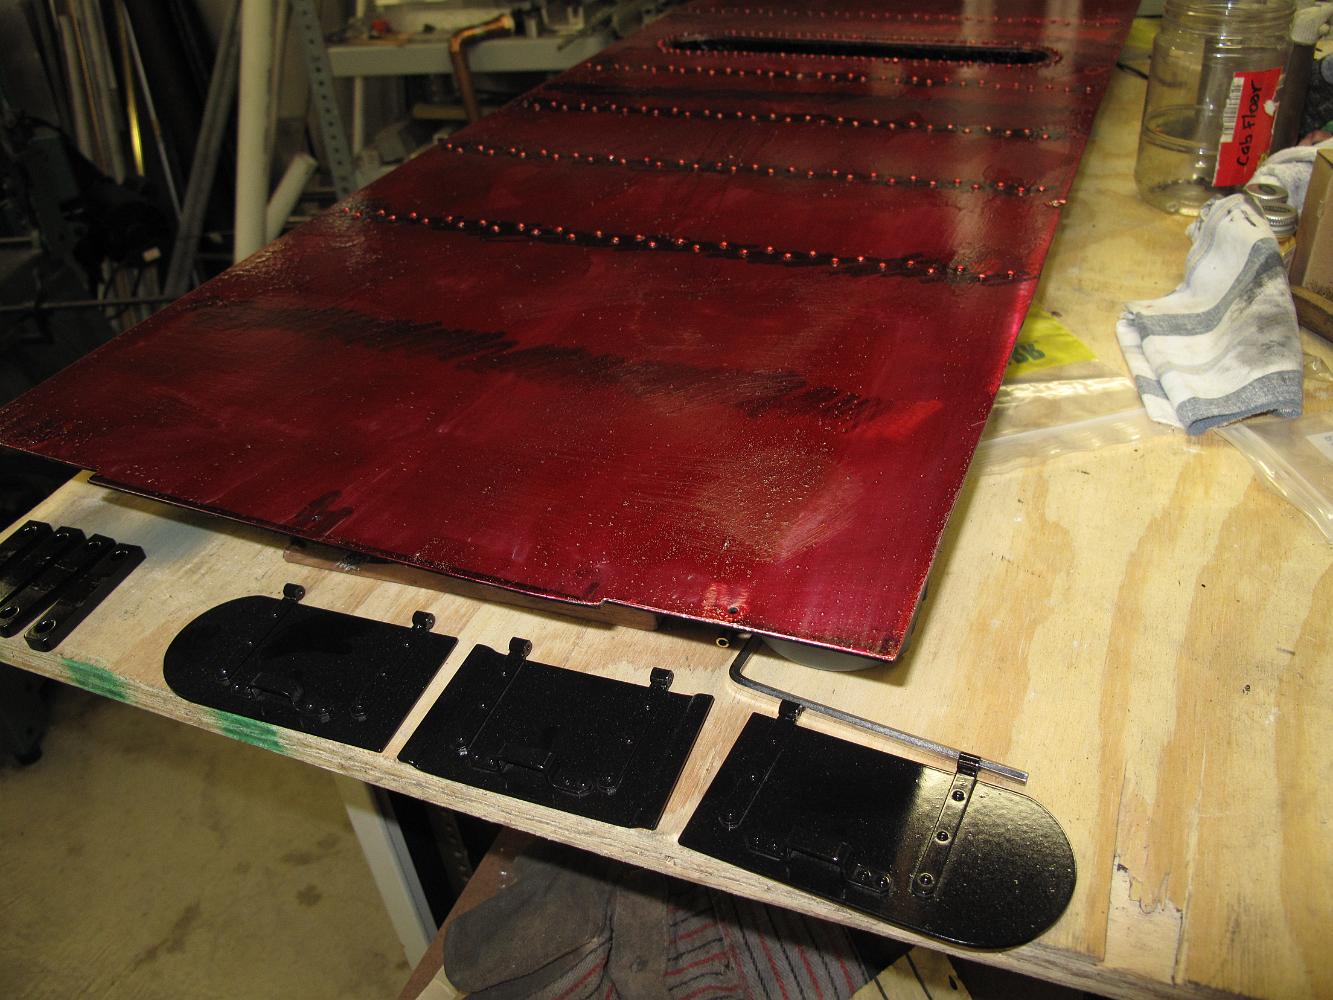
13-Apr-2014 Water proofing the underside of the tender top. I had painted the top side five days and thought the paint was cured enough for me to paint the…
14-Apr-2014 First test fit of the oil tank cap. Bill is hanging onto the stub used to chuck it in the lathe, he has threaded and knurled the cap portion of the…
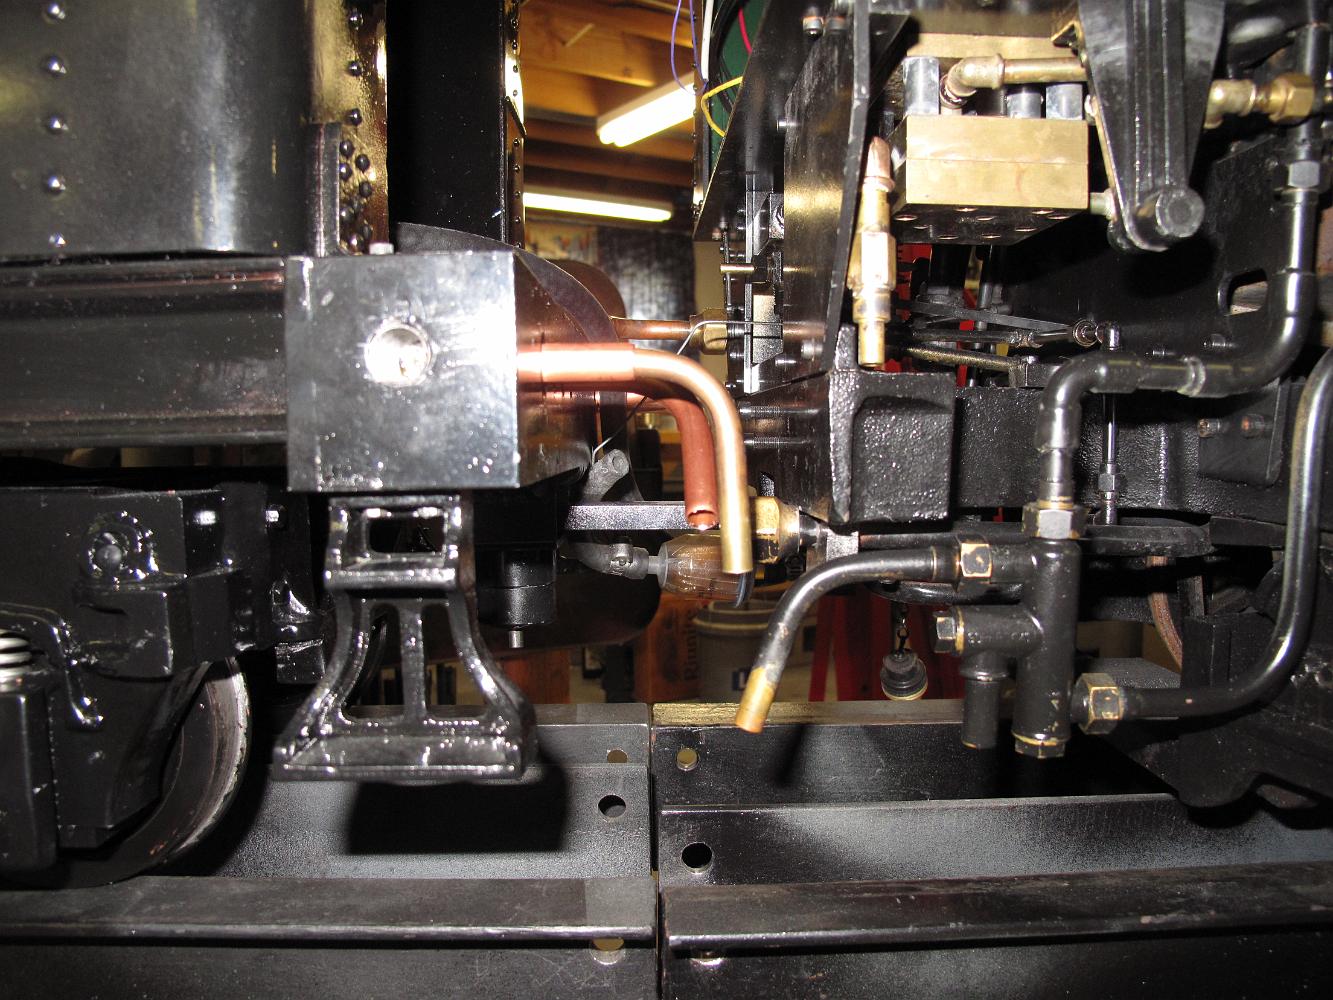
19-Apr-2014 The drawbar is installed and the engine and tender are mated for the first time to route the pipes and hoses.
19-Apr-2014 The drawbar is installed and the engine and tender are mated for the first time to route the pipes and hoses.
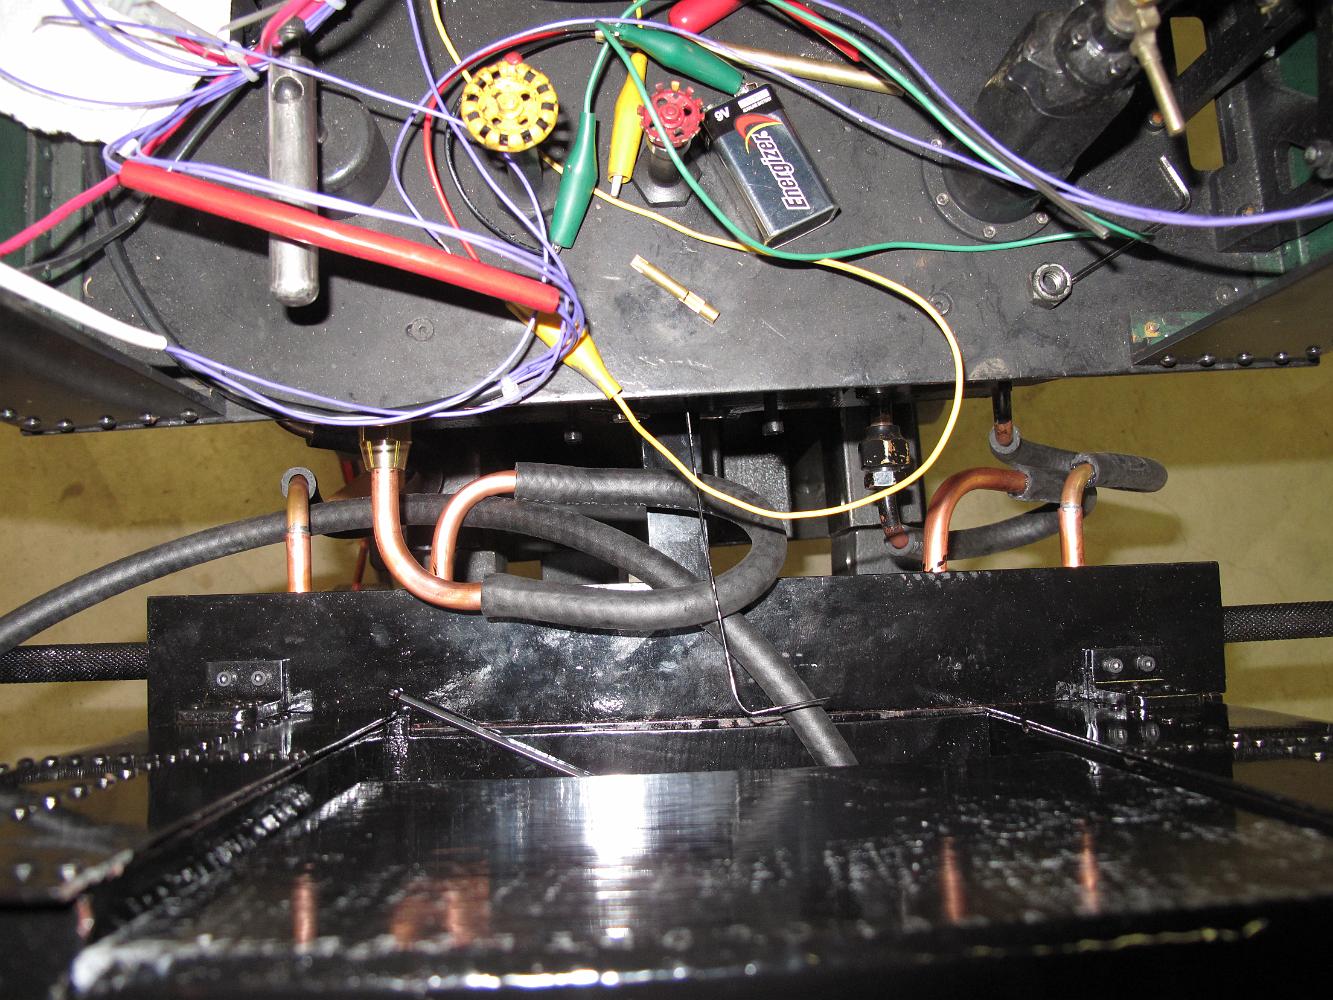
21-Apr-2014 Top view looking down between the engine and tender routing the pipes and hoses to allow movement without kinking or rubbing.
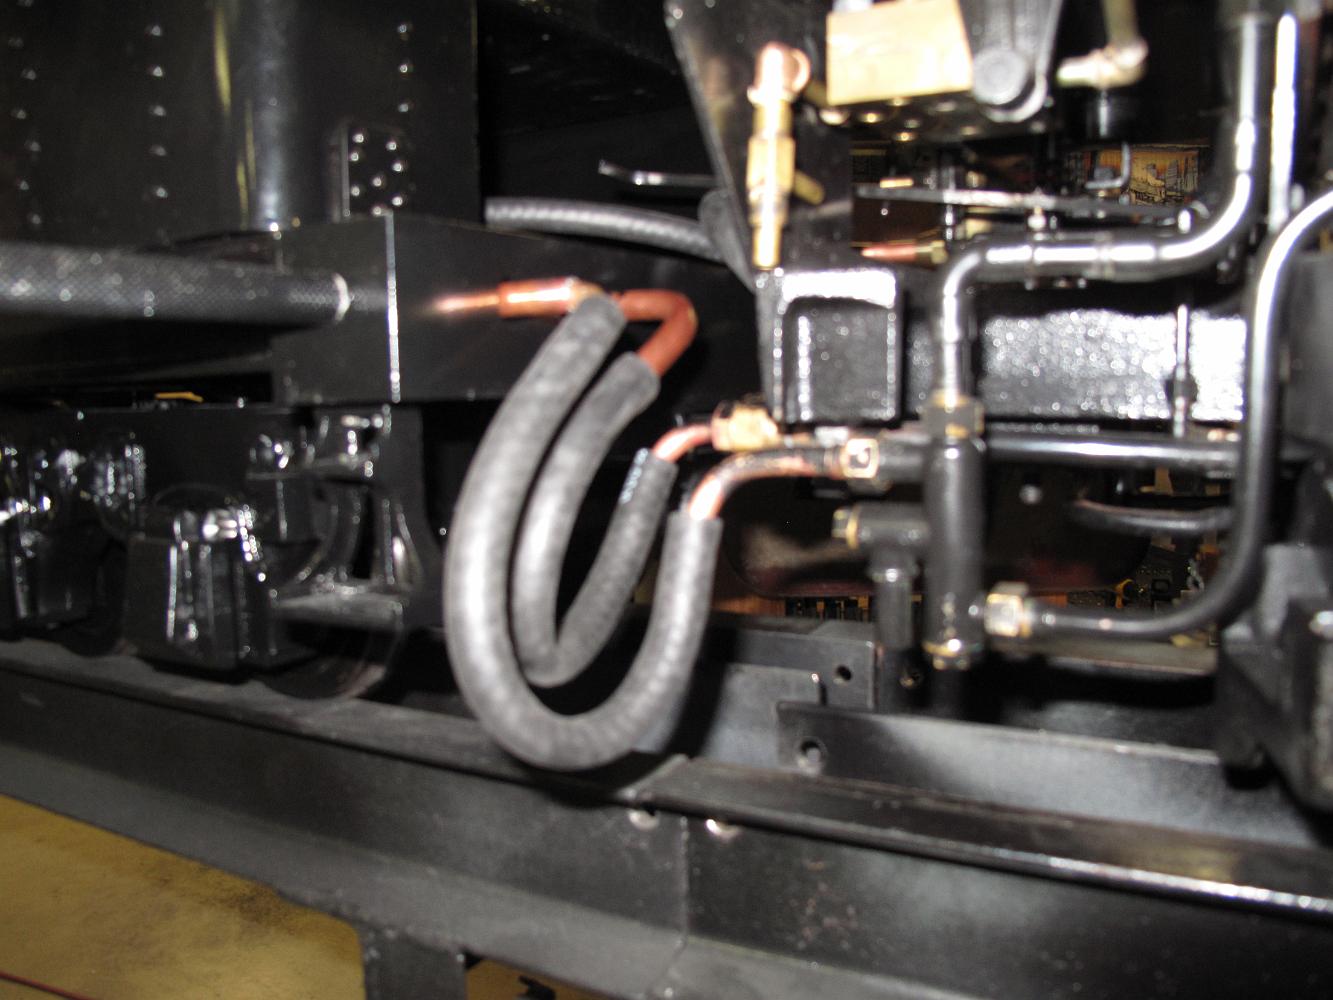
21-Apr-2014 Hose loops to allow for movement without interference, touching the ground, and staying away from our boots on the tender footpeg.
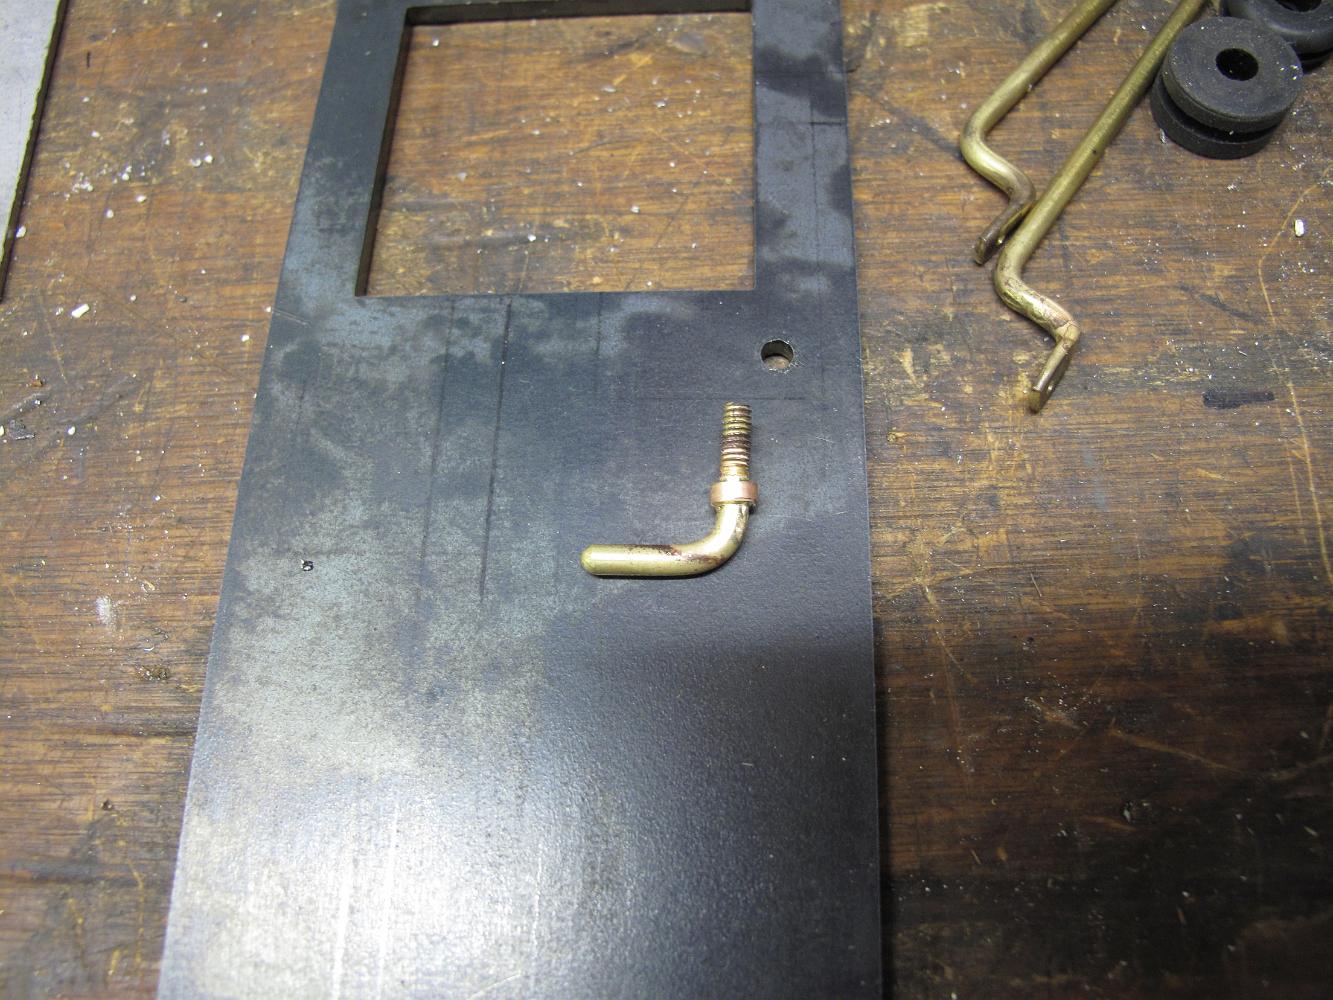
8-Sep-2014 Well, these footpegs did not last long before getting damaged - 4 months. Forgetting to remove them before loading the engine, I crashed them into…
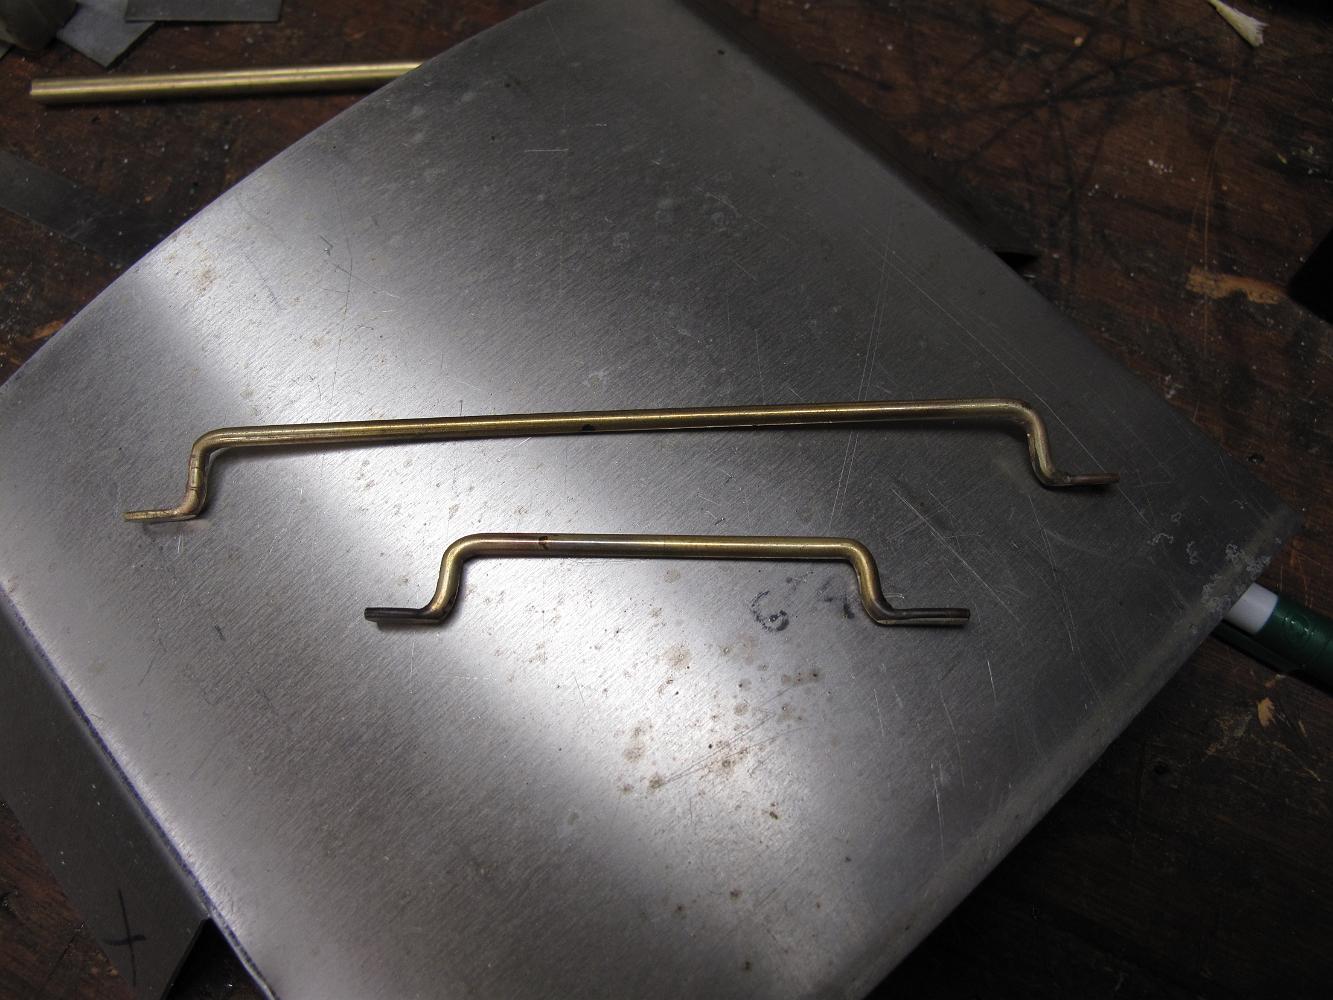
16-May-2015 Fabricated hand rails for the brakeman's shack. There are two handrails on the roof and one by the door.
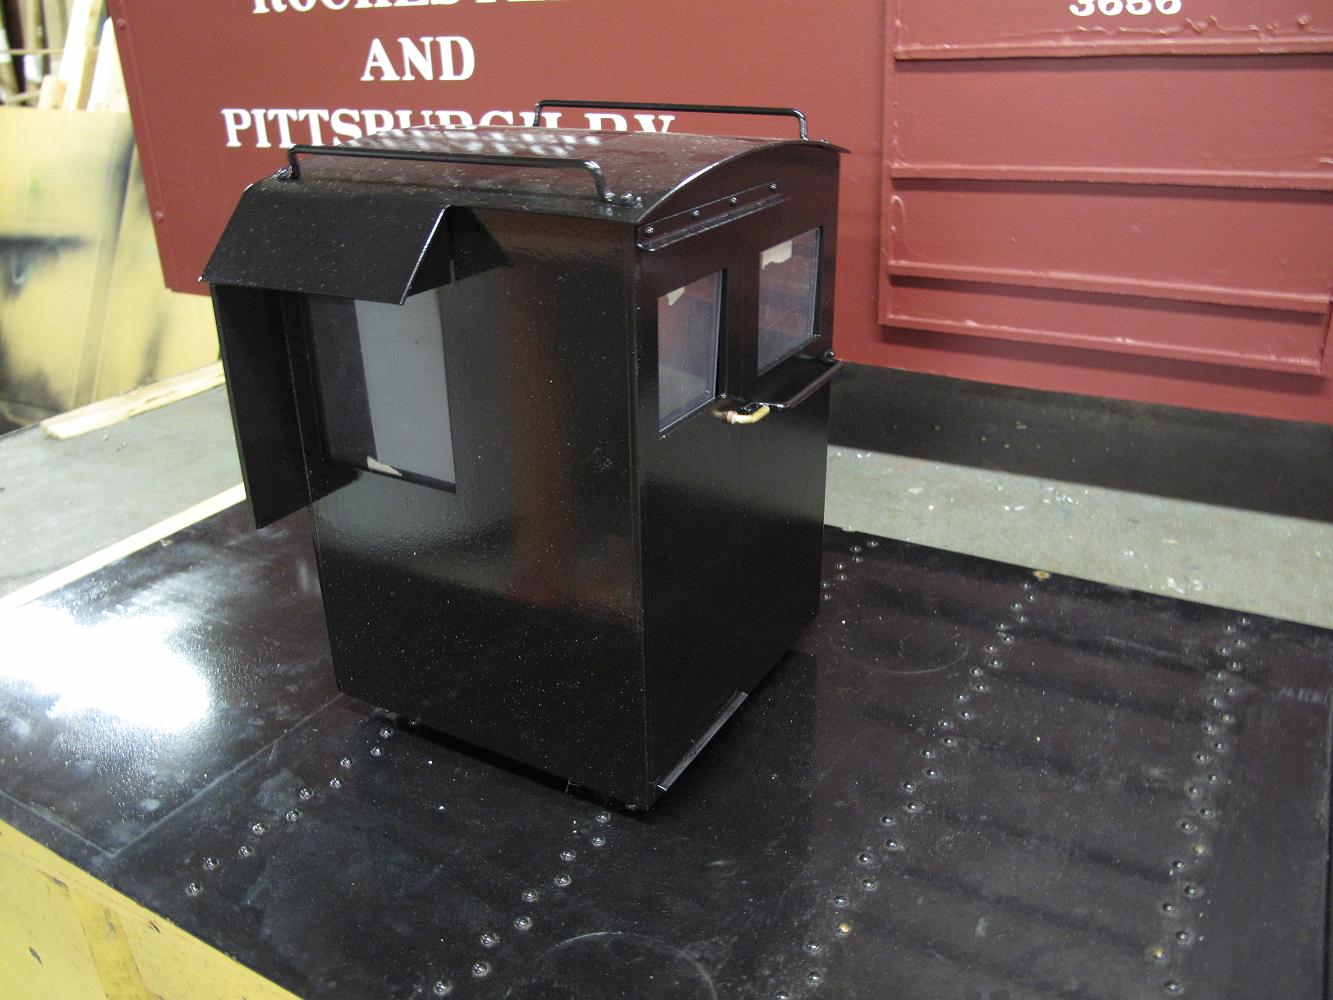
18-May-2015 Fabricated brakeman's shack roof with handrails installed. The aluminum roof has been rolled to match the curve of the sides, awning overhangs bent…
1-June-2015 We match drill holes from the brakeman's shack floor through the tender deck. Using stainless steel #10 screws, installed from the bottom of the…
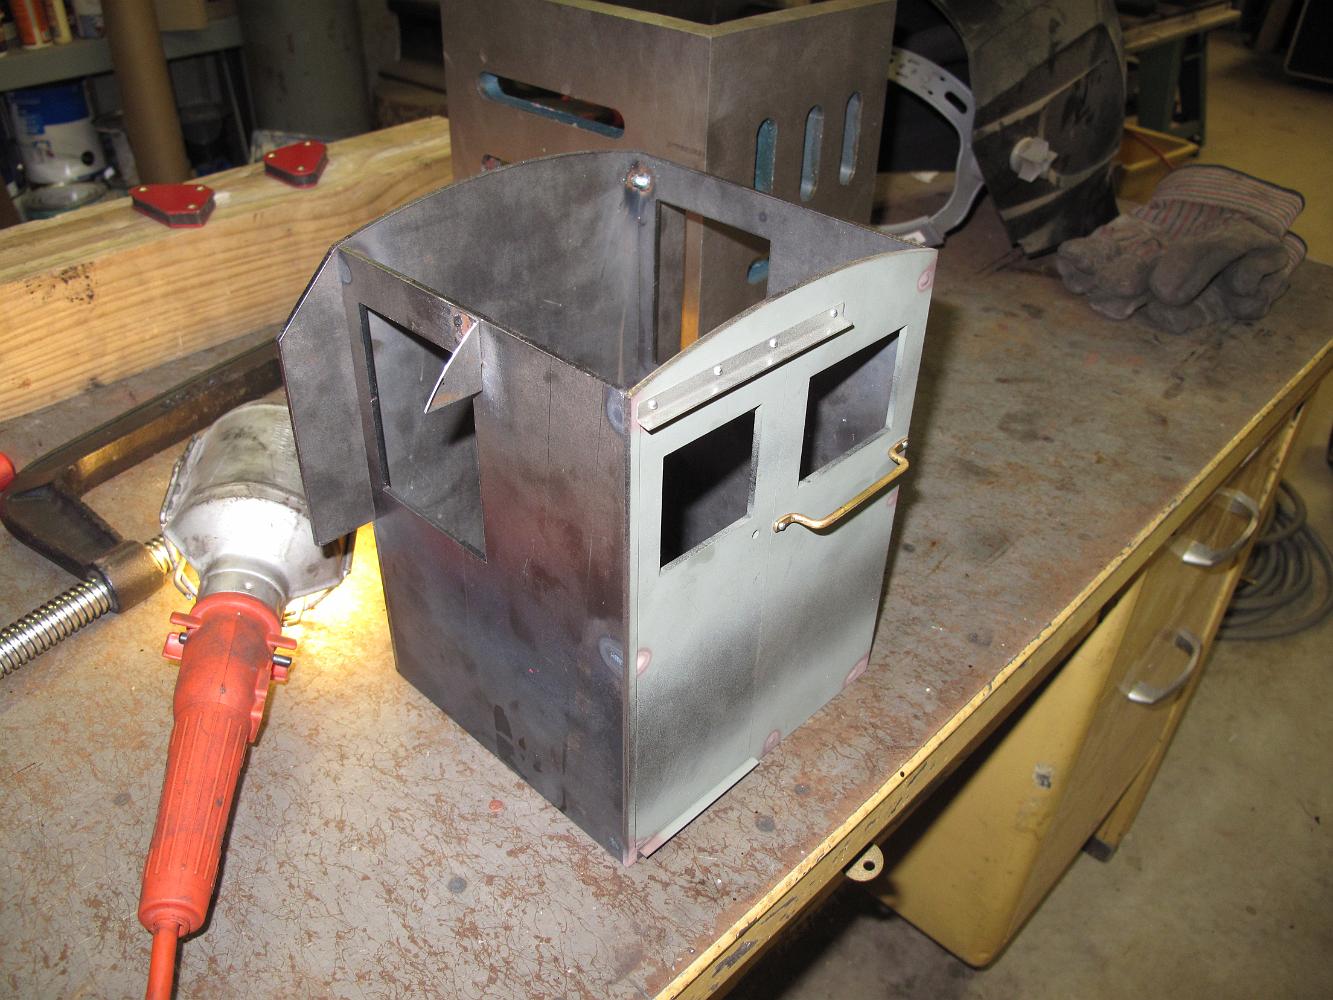
8-June-2015 Interior view of Brakeman's shack showing little welds holding the floor and sides together.
8-June-2015 Woodworking in the metal shop. Milling some 5-ply model aircraft plywood down to size to make a faux window frame for the brakeman's shack.
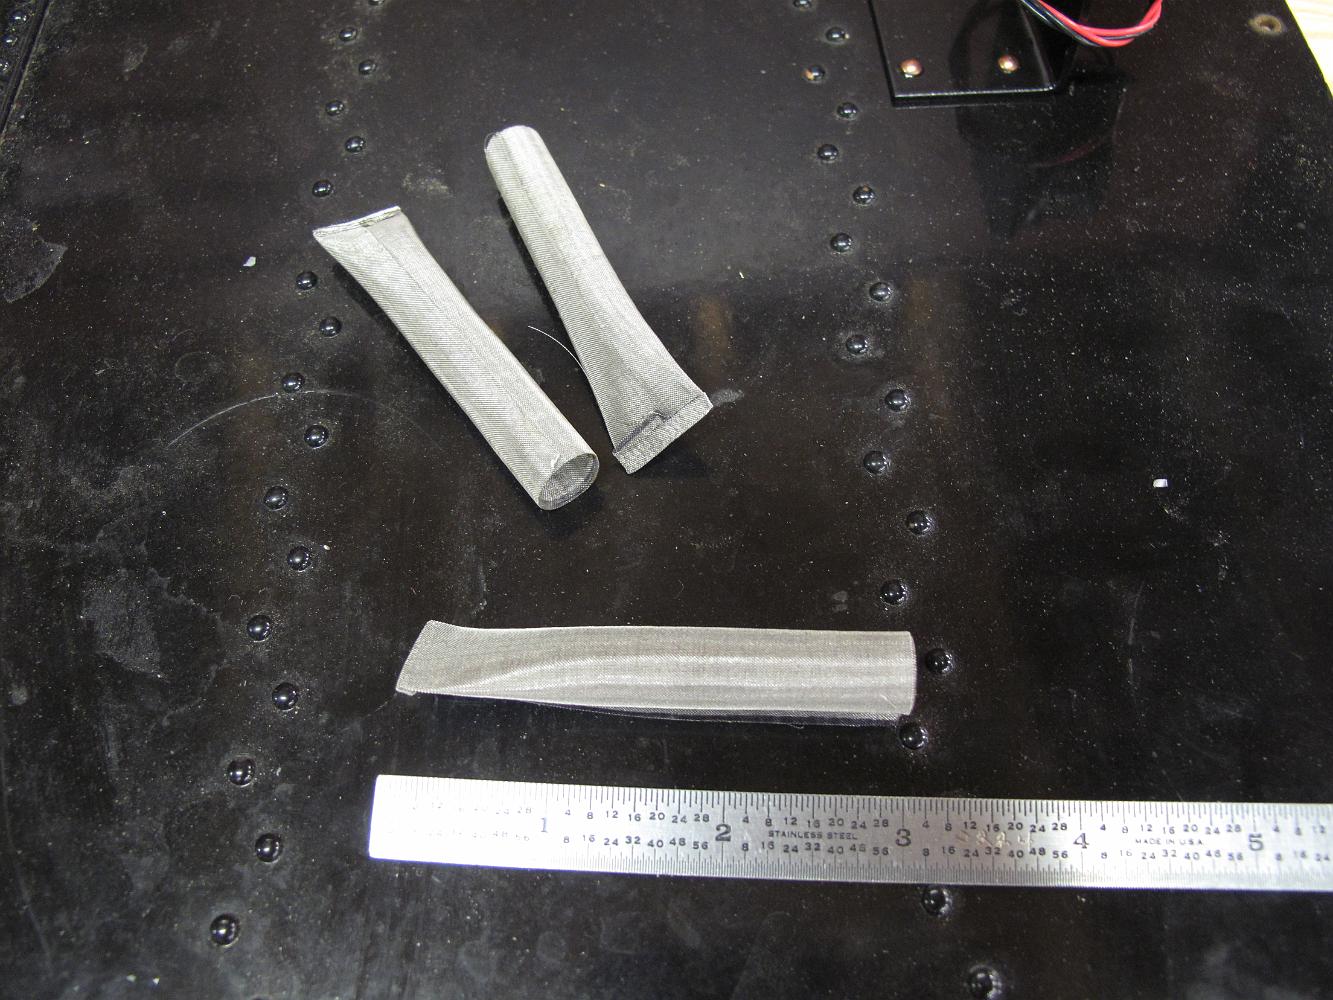
15-June-2015 While we have the tender deck off to install the brakeman's shack and back up light, Bill rolls some "Strainer Grade Wire Cloth, 304 Stainless…
15-June-2015 A unique detail to Frisco - Brakeman's shack on the back of the tender (the "doghouse"). I will use it to hold the battery. Design based on…
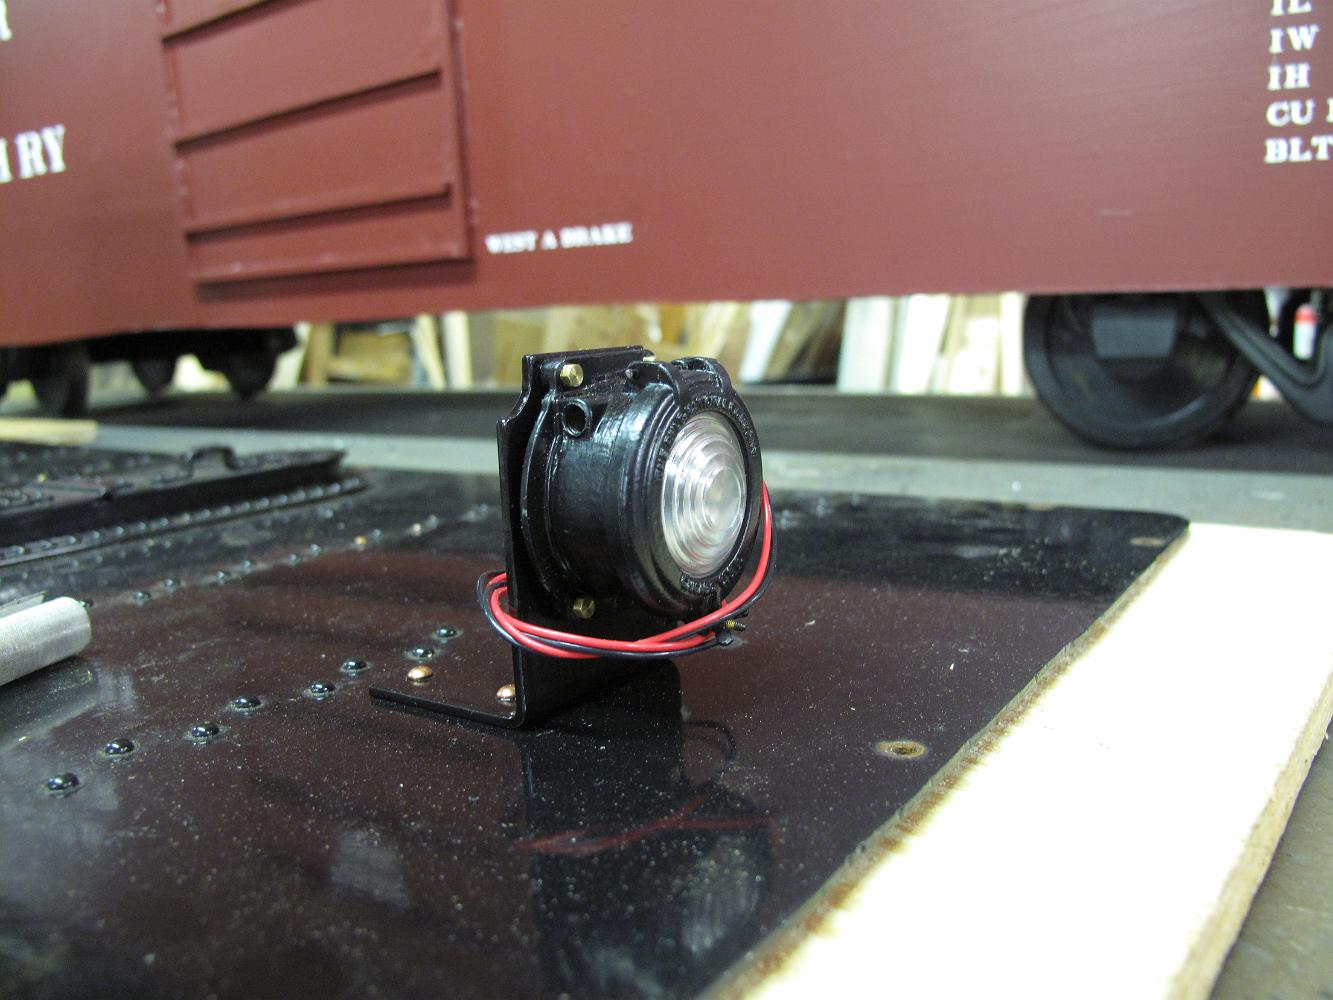
15-June-2015 New bracket riveted to the back of the tender deck and backup lamp from supplier Mercer bolted on.
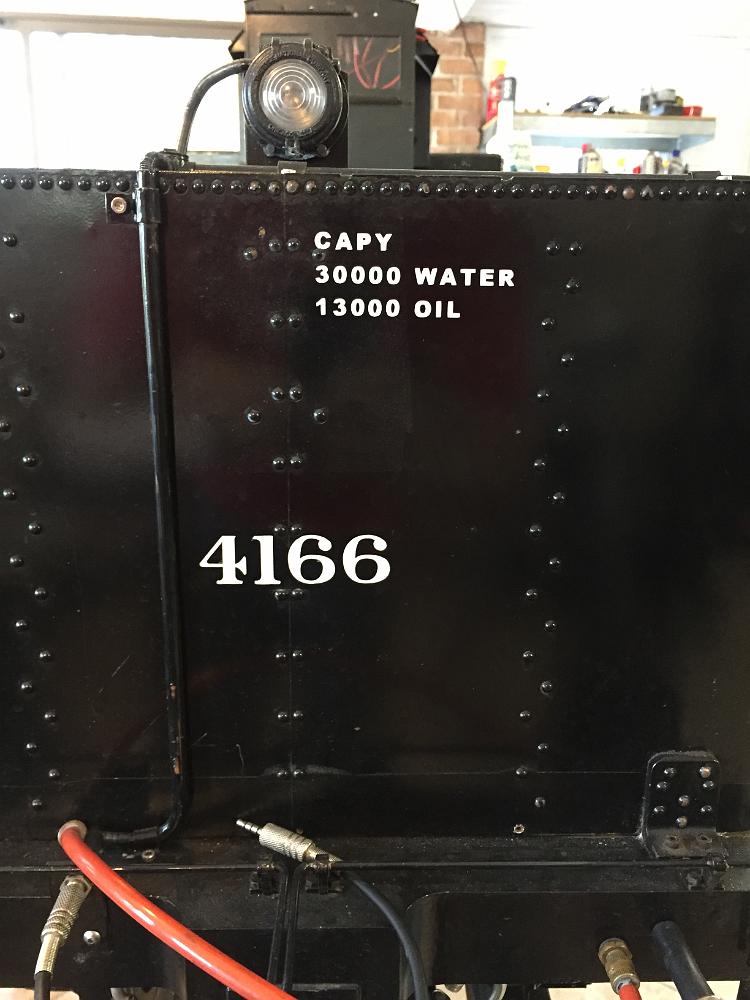
2019-04-06 - I get around to lettering the tender capacity amounts - which are actually 30 gallon for water and 9 gallons oil, not the 30,000 and 13,000…
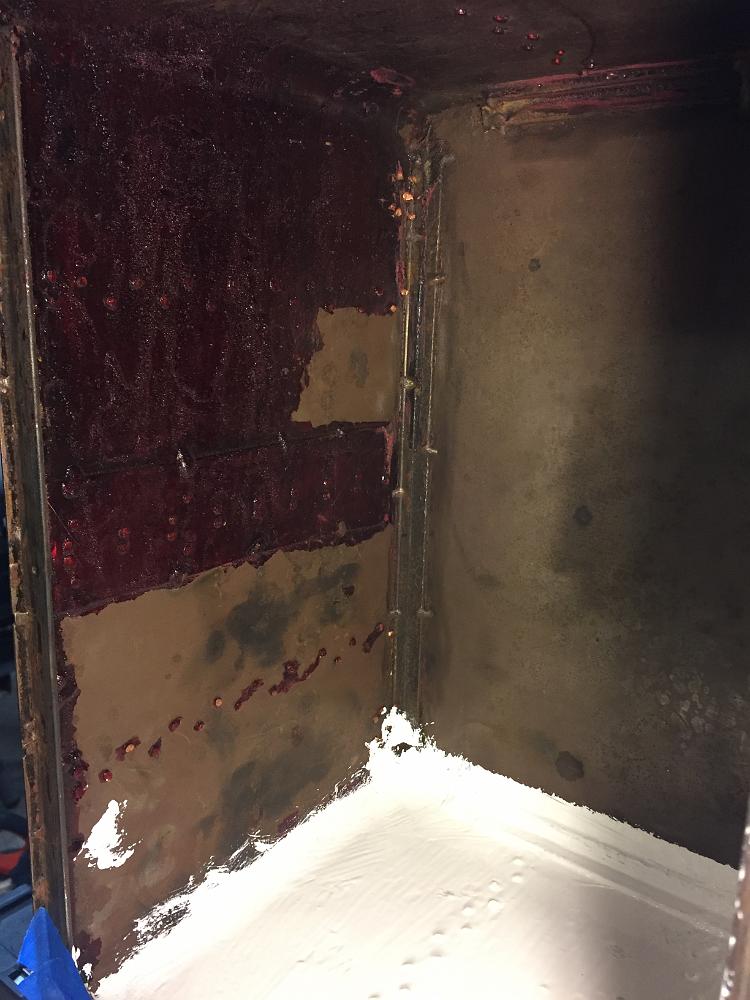
Tender Tank Leak Overhaul
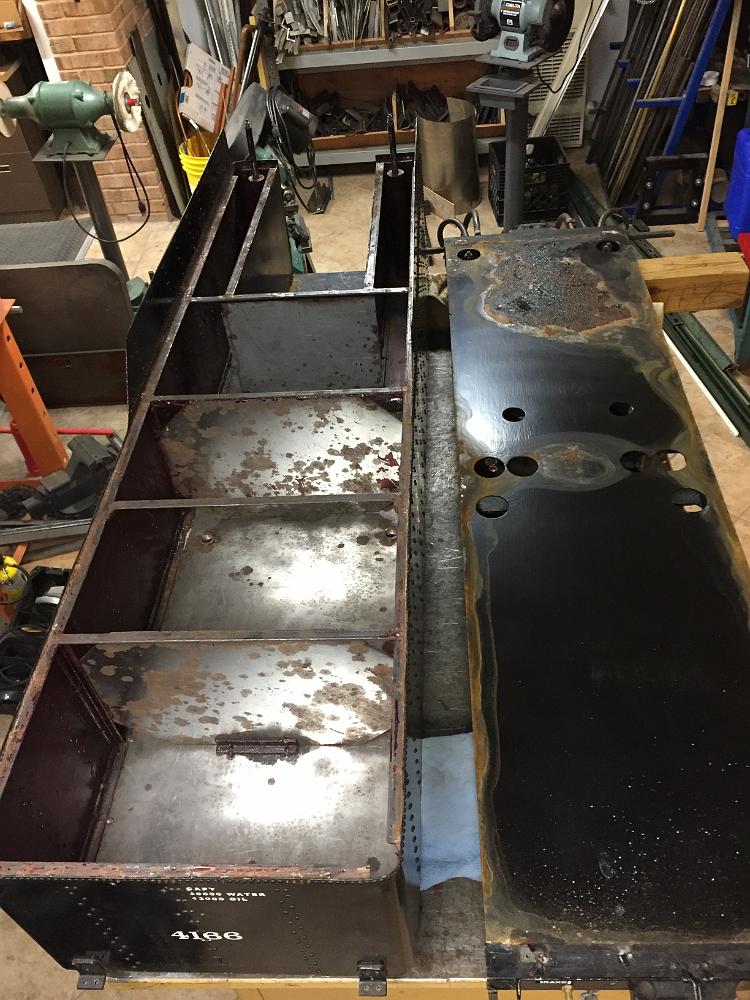
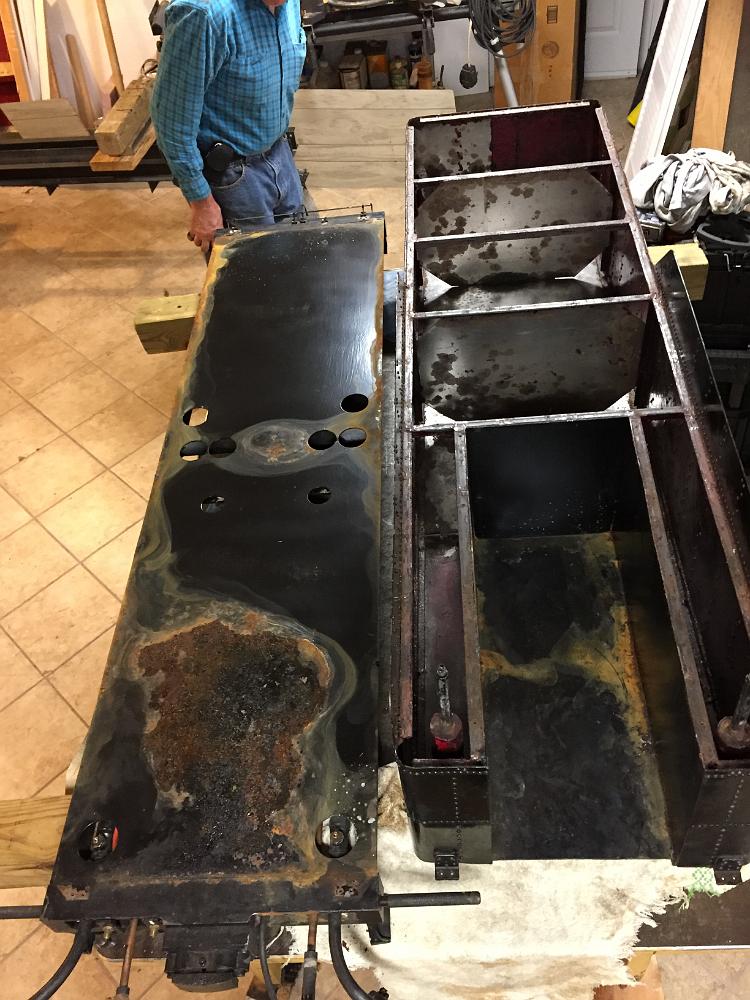
2019-10-28 Tender Tank Overhaul -- The tender has been leaking water. Opening it up revealed a failure of the coating, due to poor application. I begin…
Tender Tank Leak Overhaul
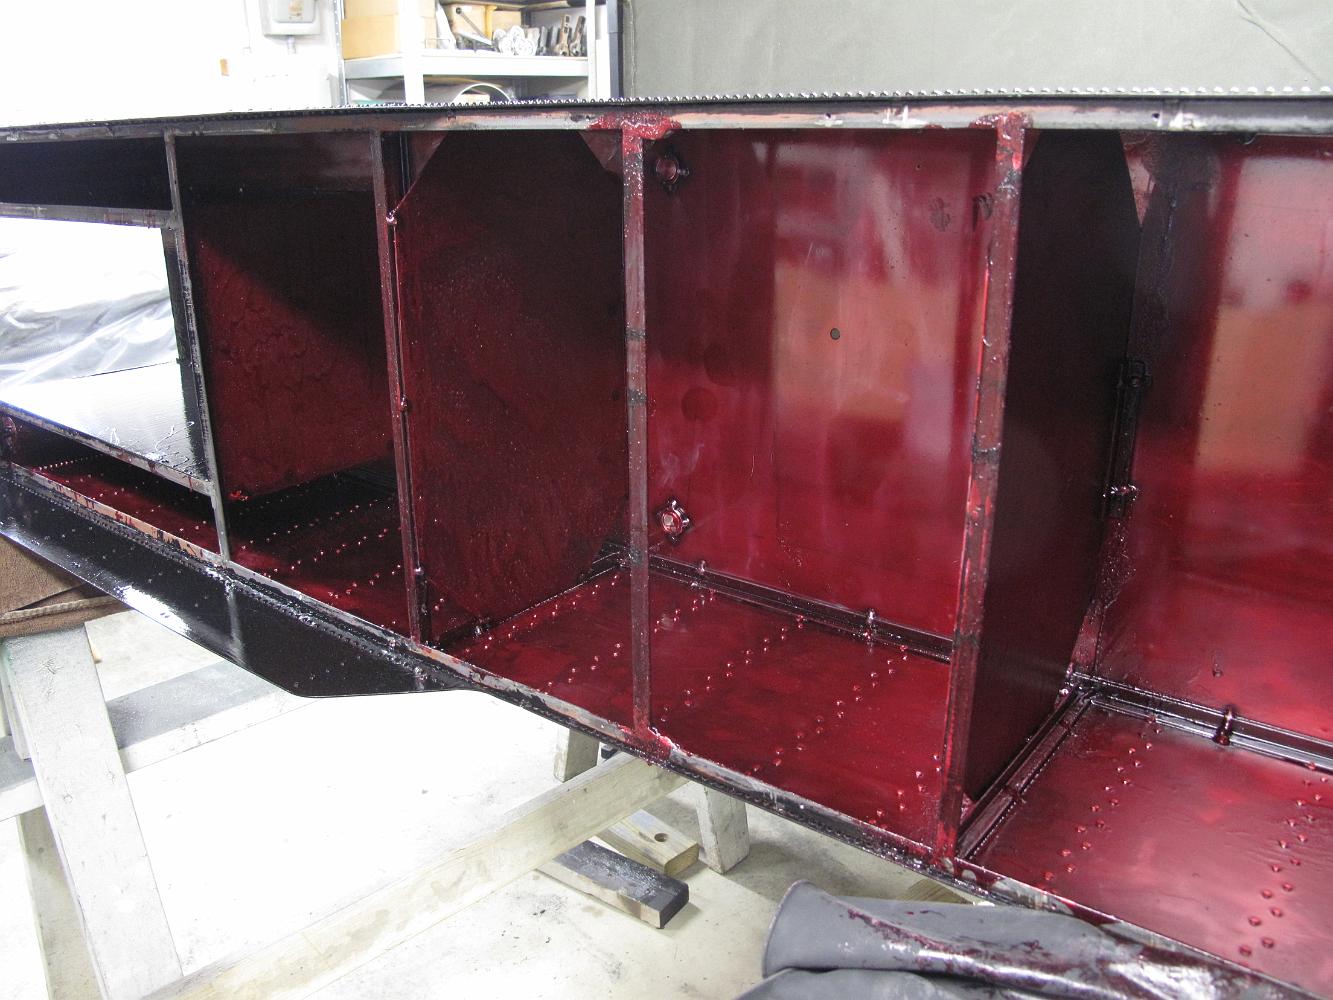
2019-10-28 - Tender Tank Overhaul. The tender has been leaking water. Opening it up revealed a failure of the coating, due to poor application. The water had…
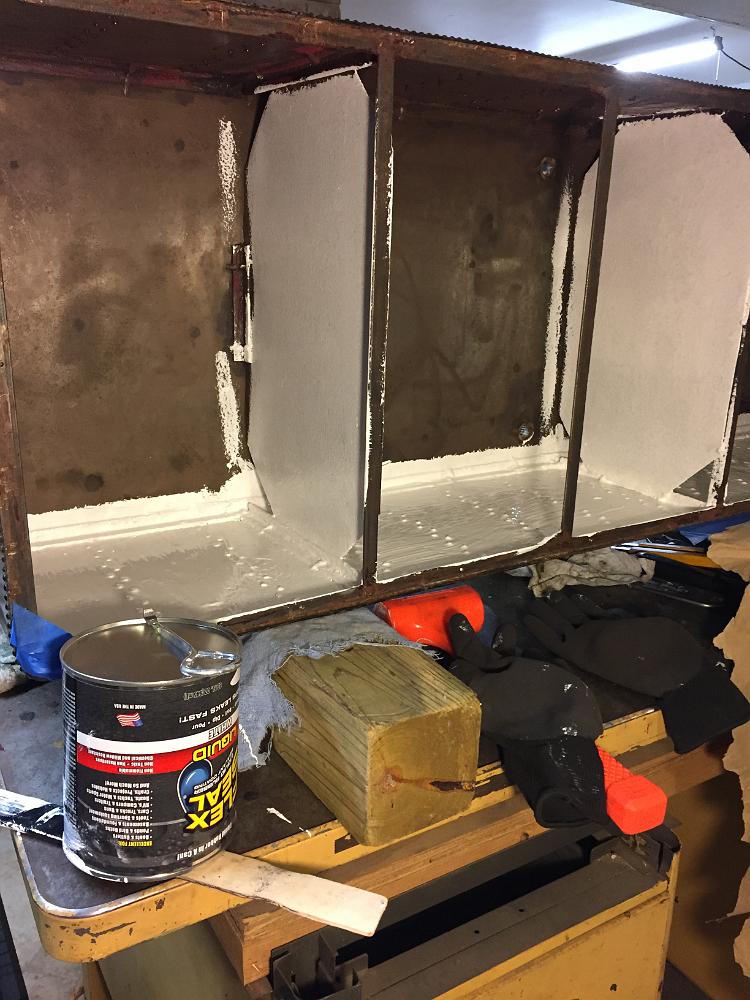
Tender Re-Coating with Flexsteel rubberized paint
2019-11-30 - After stripping the old coating off, I recoat it with Flexsteel brand rubberized paint, hopefully the last time.