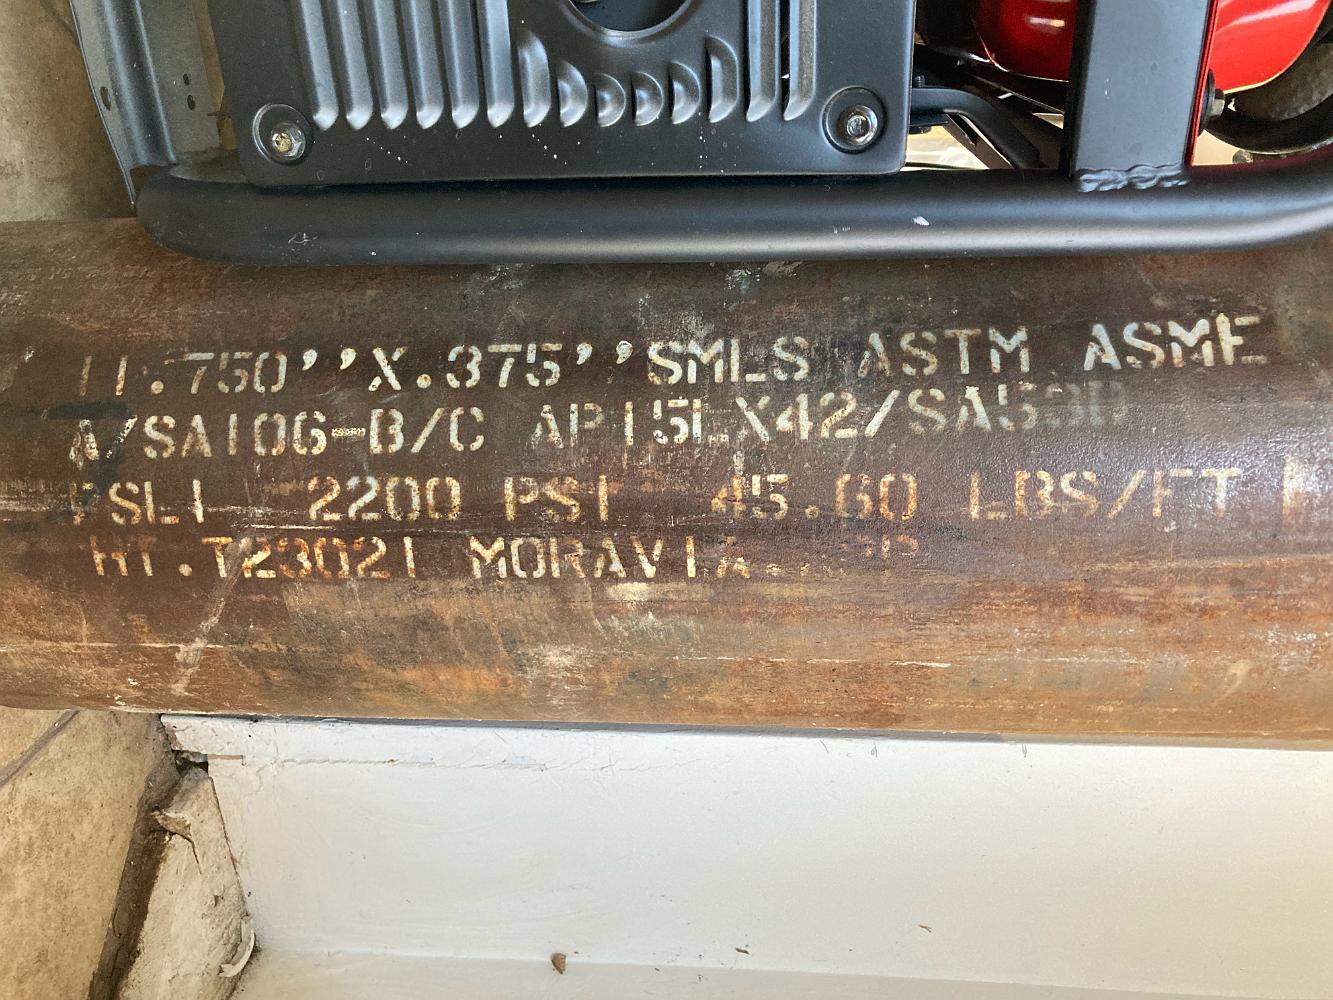
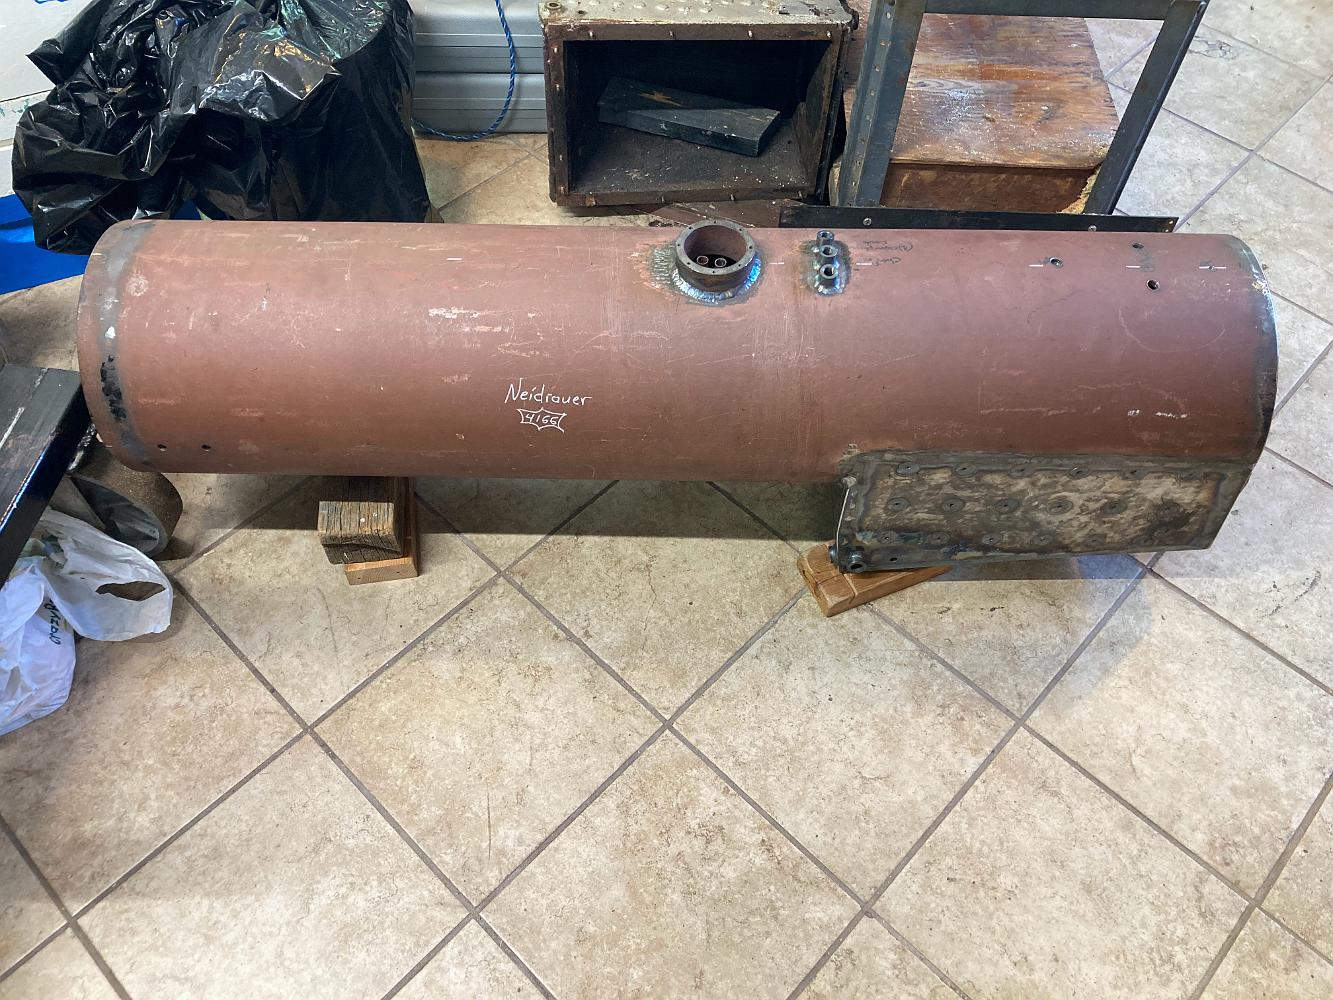
19-Feb-2022 The new boiler shell from a piece of 11-3/4 Drawn Over Mandrel steel. With all the layers of corrosion found in the old boiler, we decided not to…
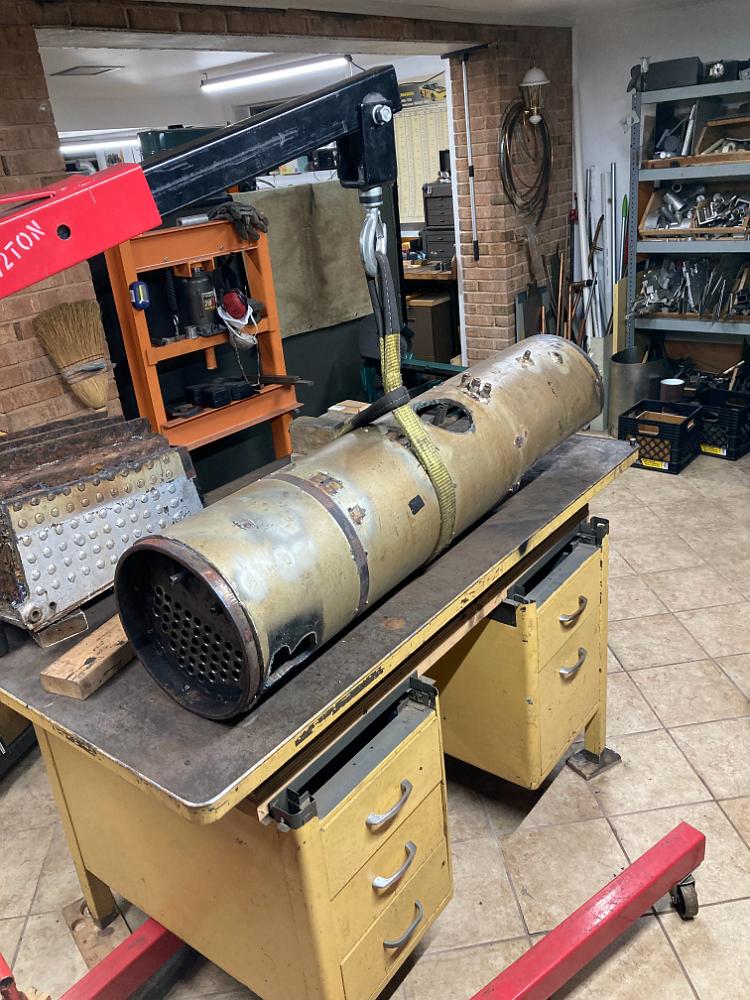
28-Feb-2022 I finish stripping all fittings, mounting bands and the steamdome from the old tube.

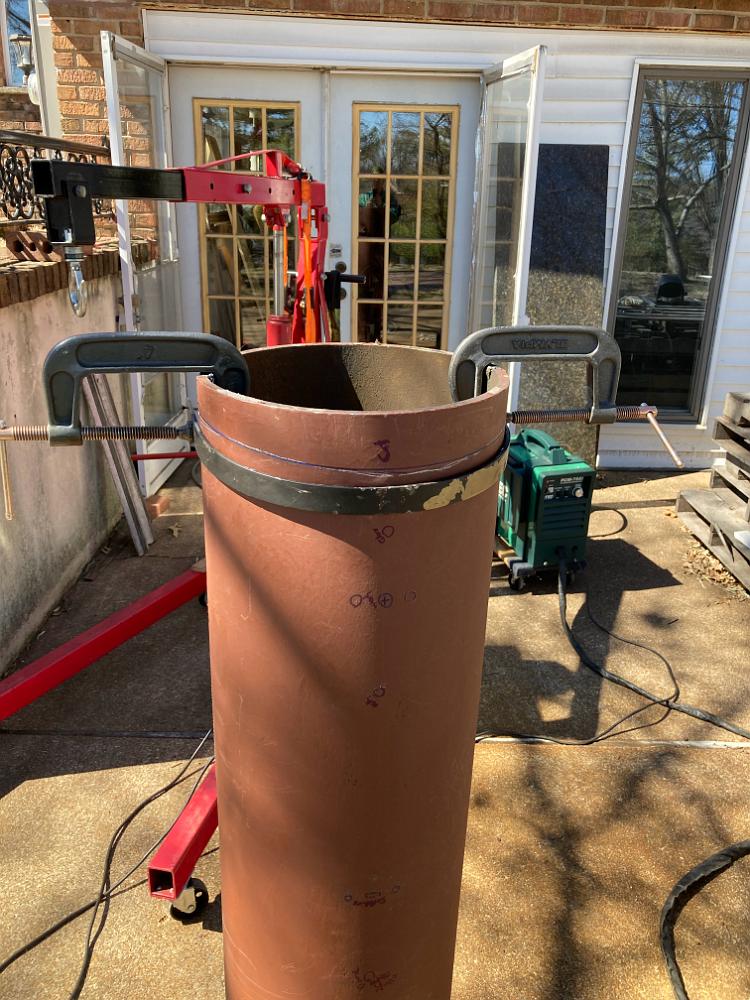
7-Mar-2022 We scribe three reference lines, Left center, Right center and Top center onto the boiler.
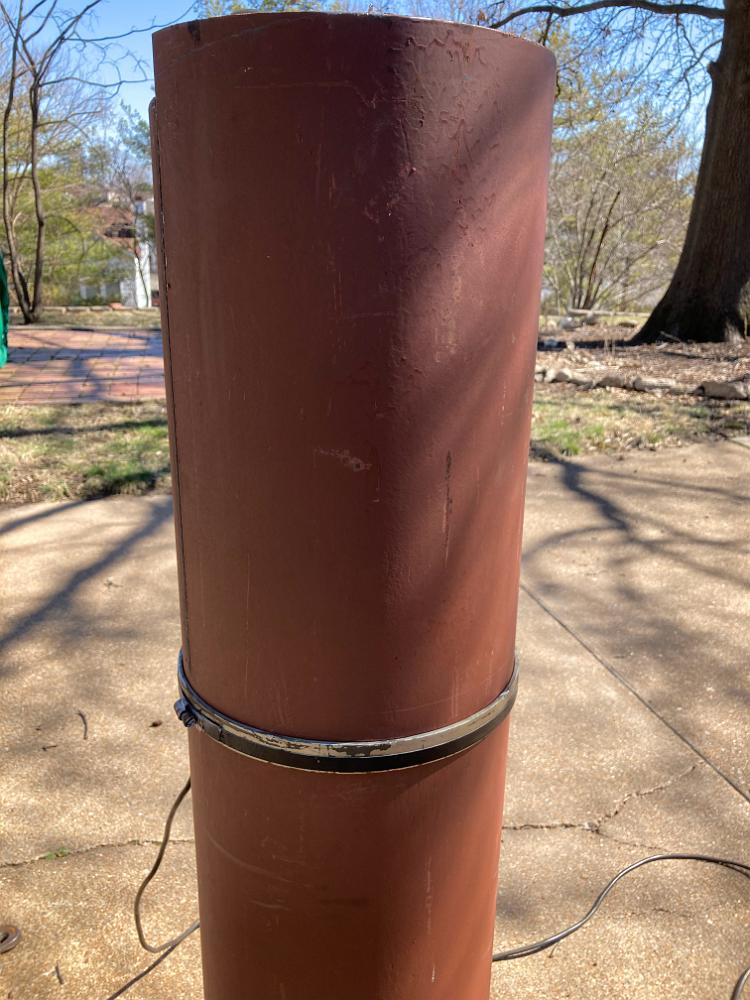
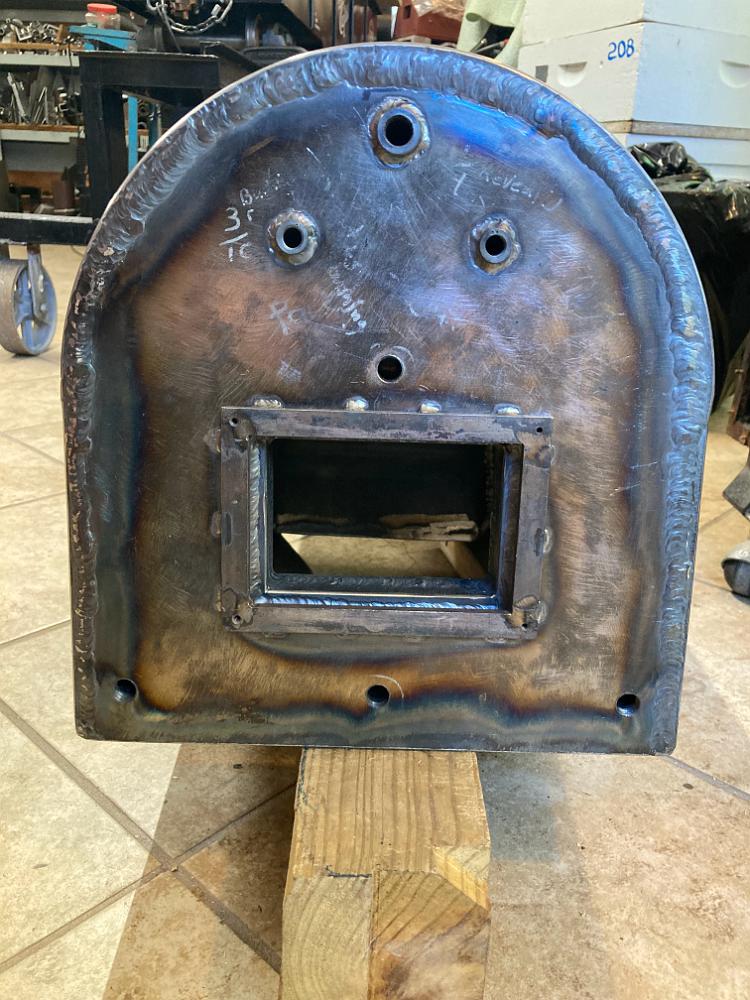
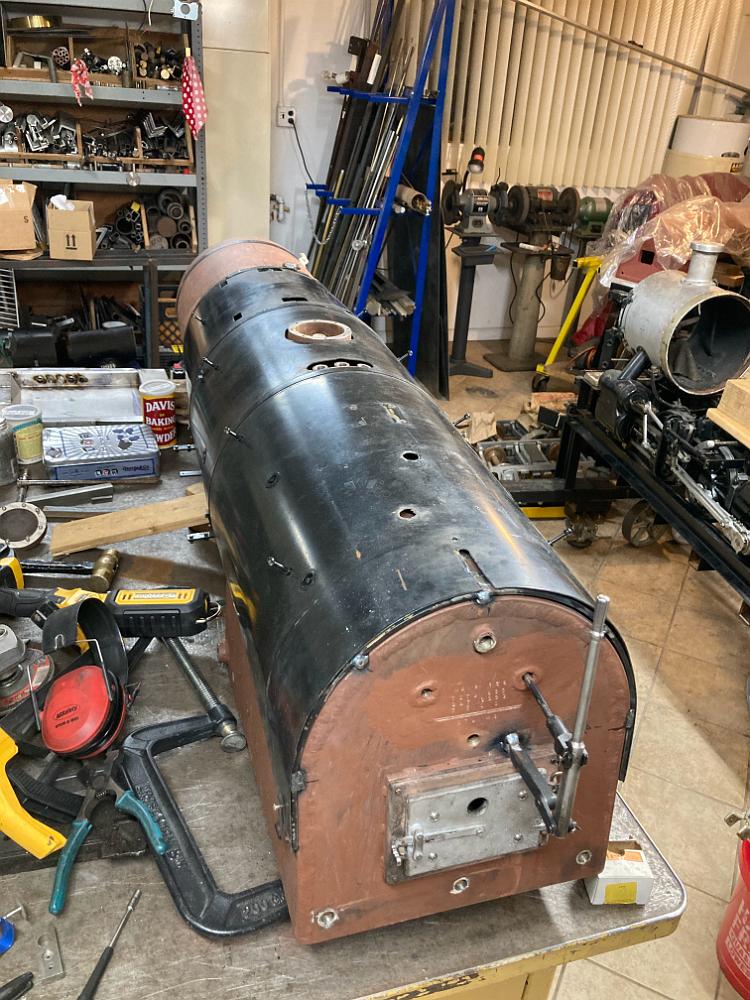
13-Mar-2022 Preparing to cut the angled backhead using the boiler jacketing band as a guide for the plasma torch. The band is tilted about seven degrees…
13-Mar-2022 Using a boiler band as a cutting guide for the firebox opening. Unfortunately the plasma torch developed a problem for this last cut, so I ended up…
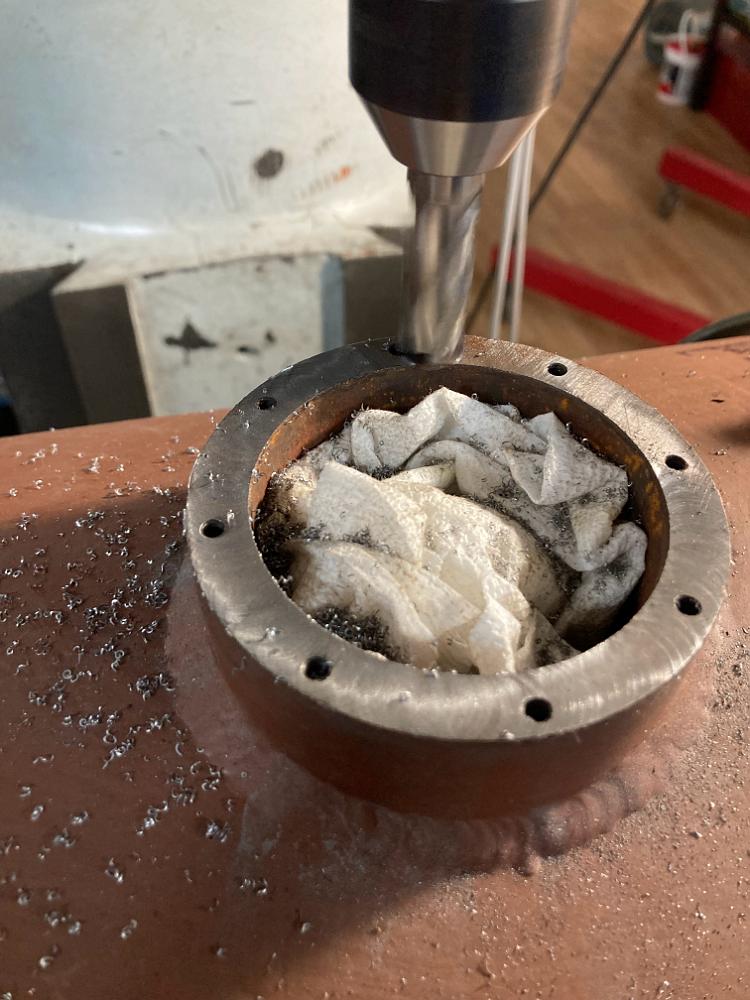
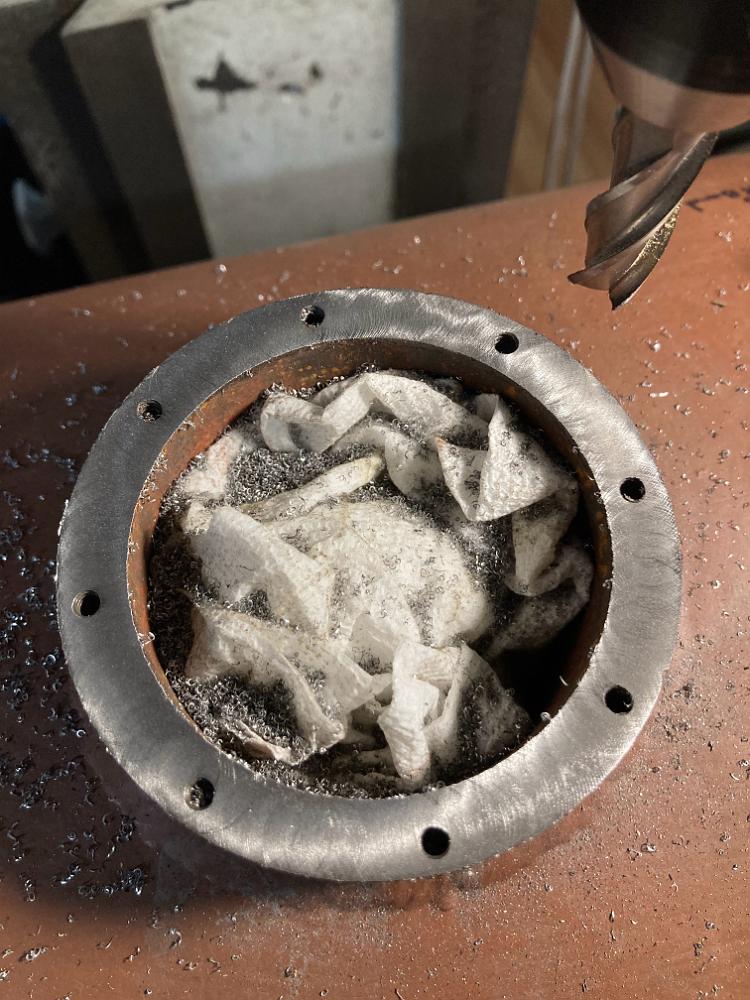
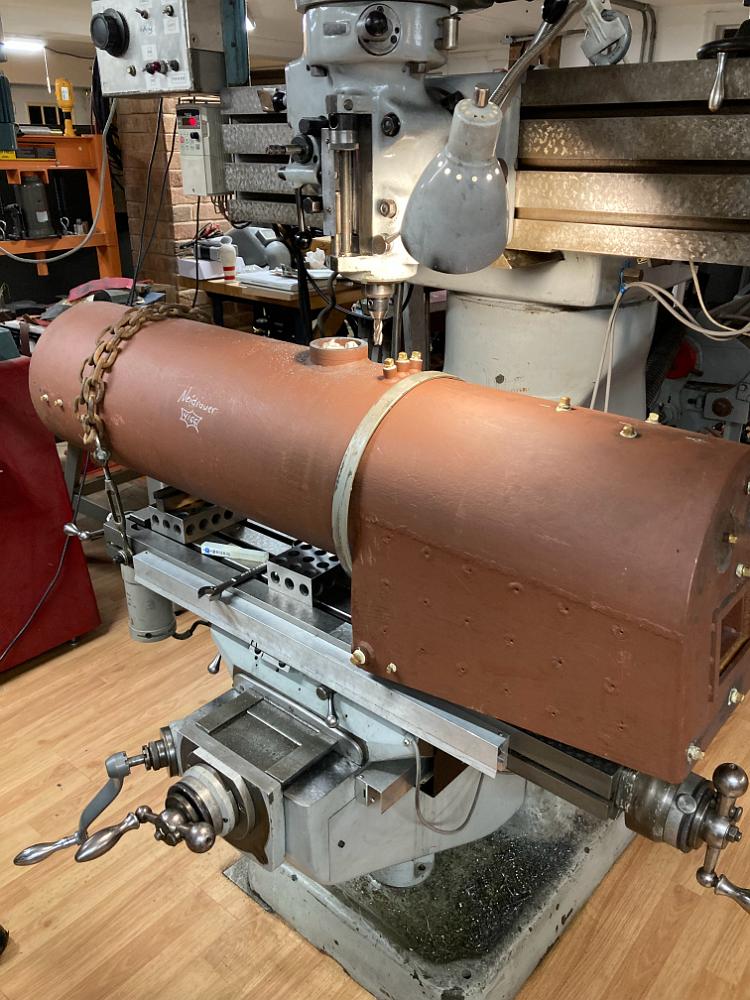
21-Mar-2022 the 3-1/2" diameter steam dome hole is made using a common hole saw at low speed and frequent chip clearing.
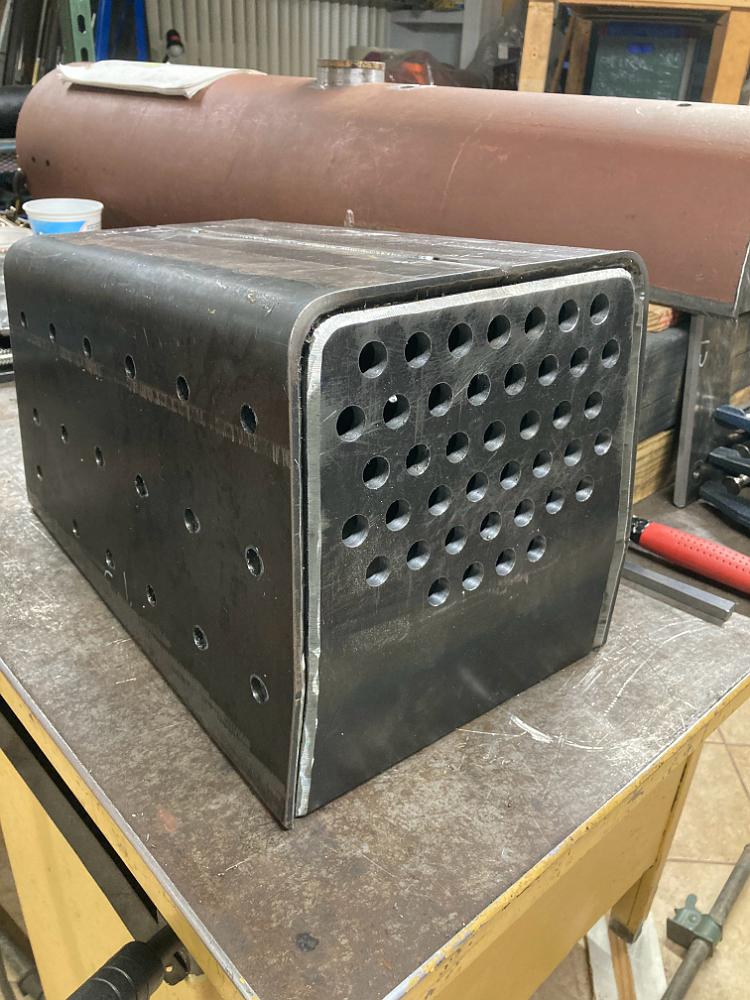
22-Mar-2022 I finally have all the parts for the boiler back from the supplier and the waterjet cutter, I had a metal fabrication shop bend the inner firebox…
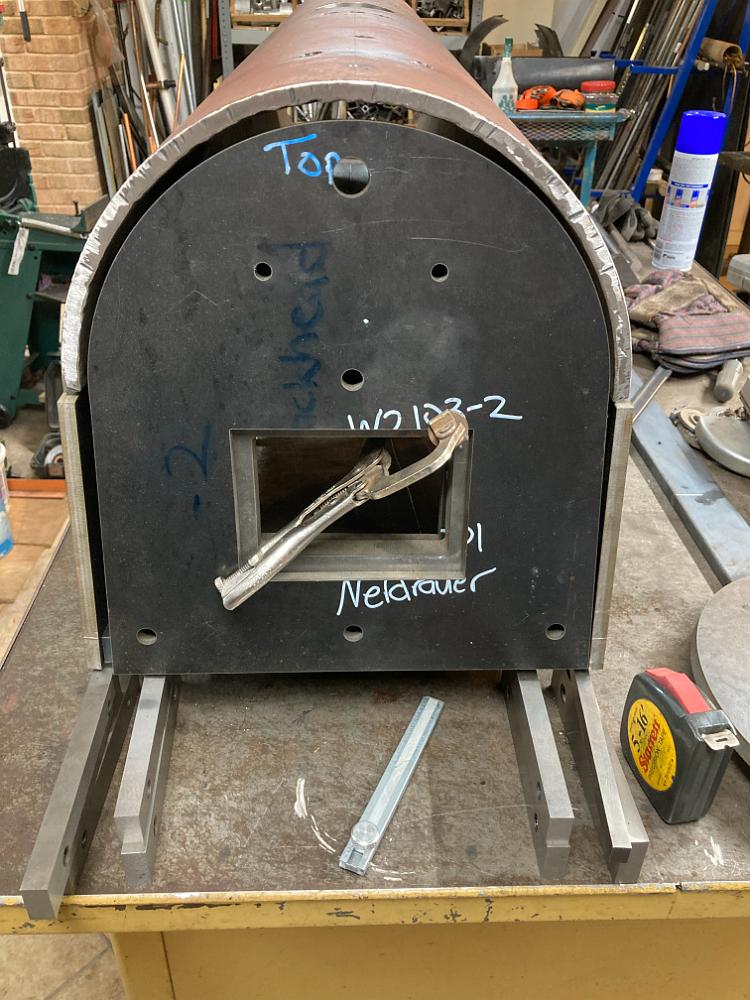
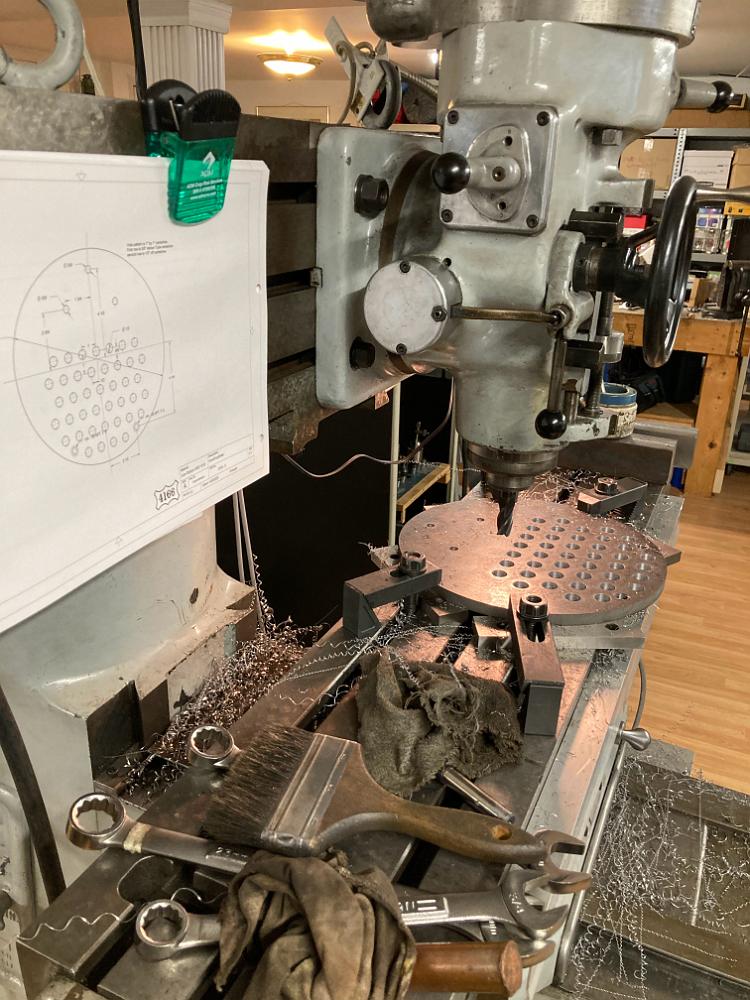
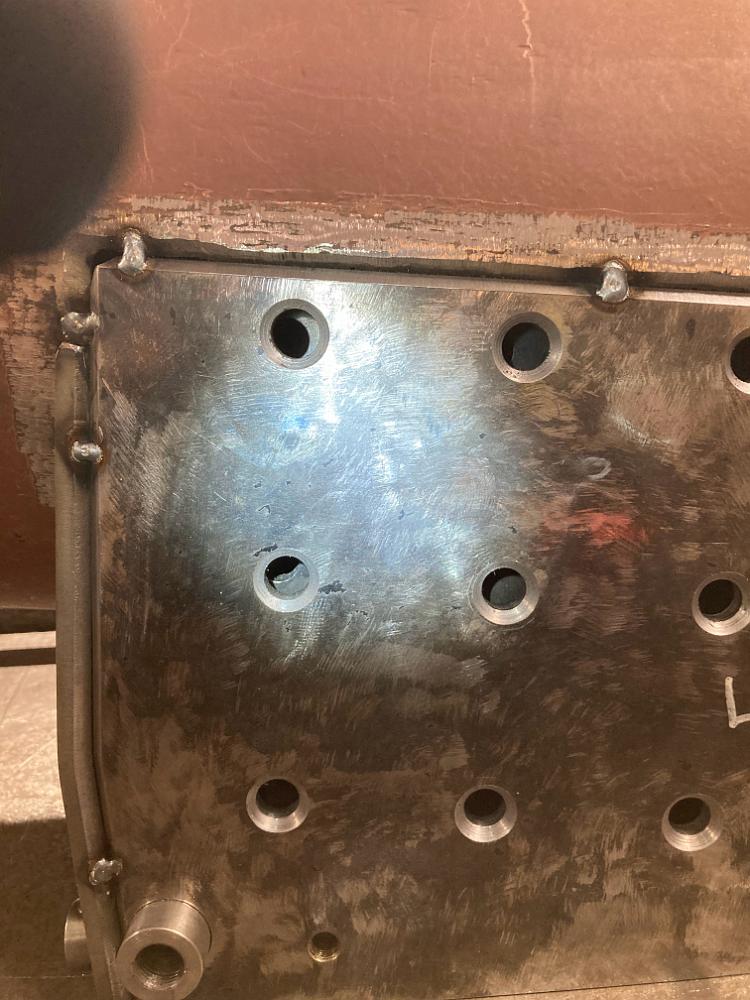
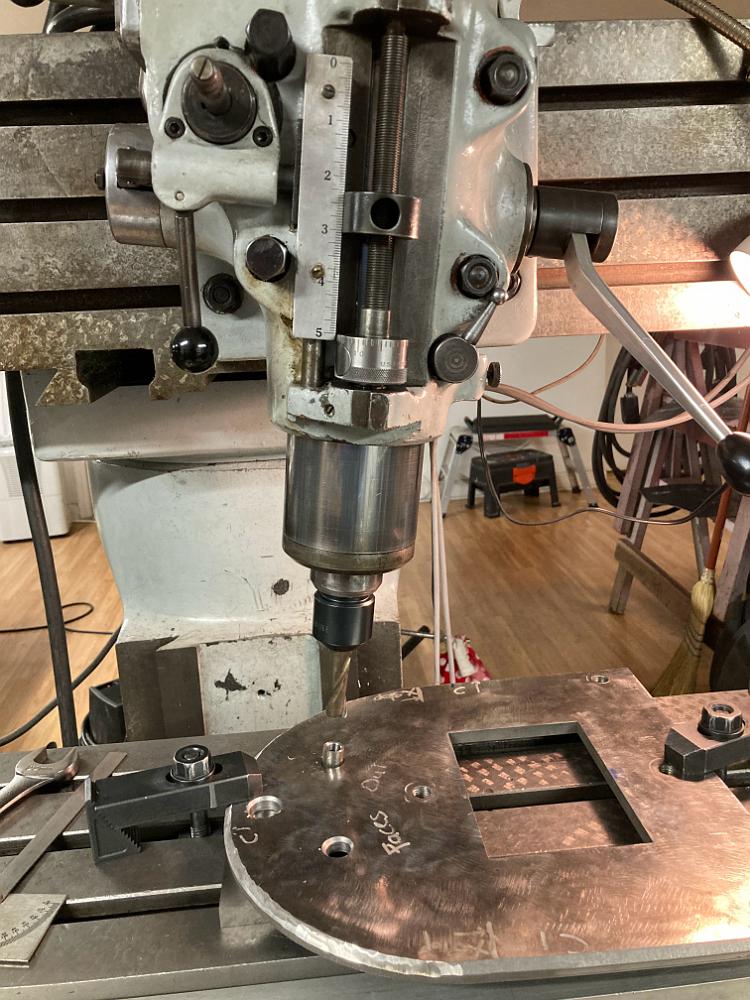
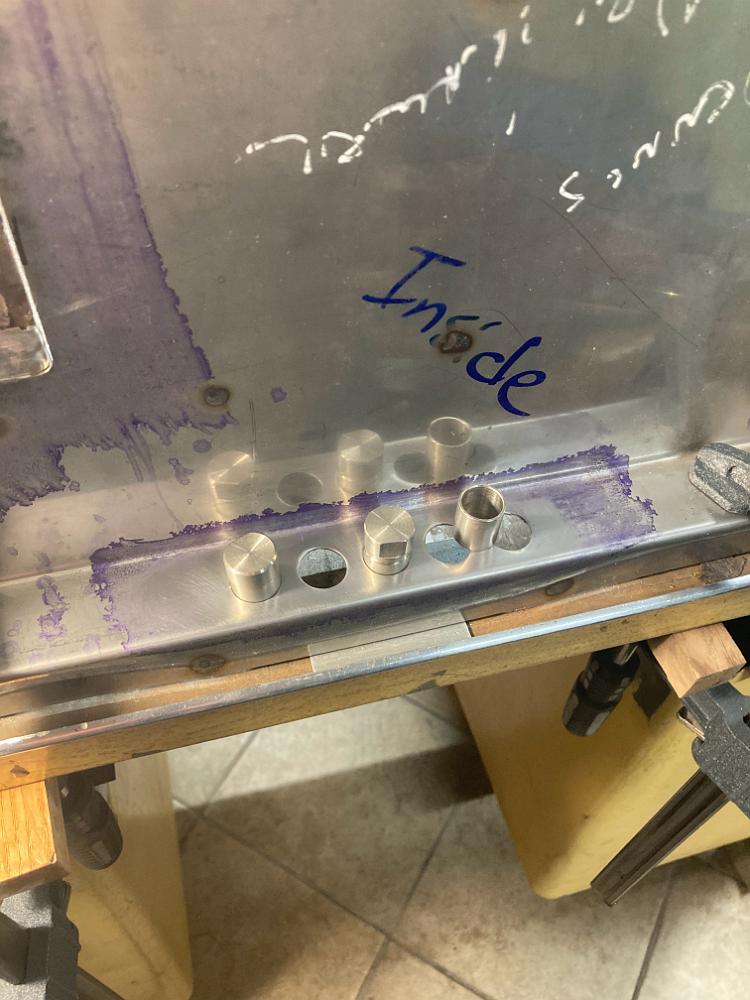
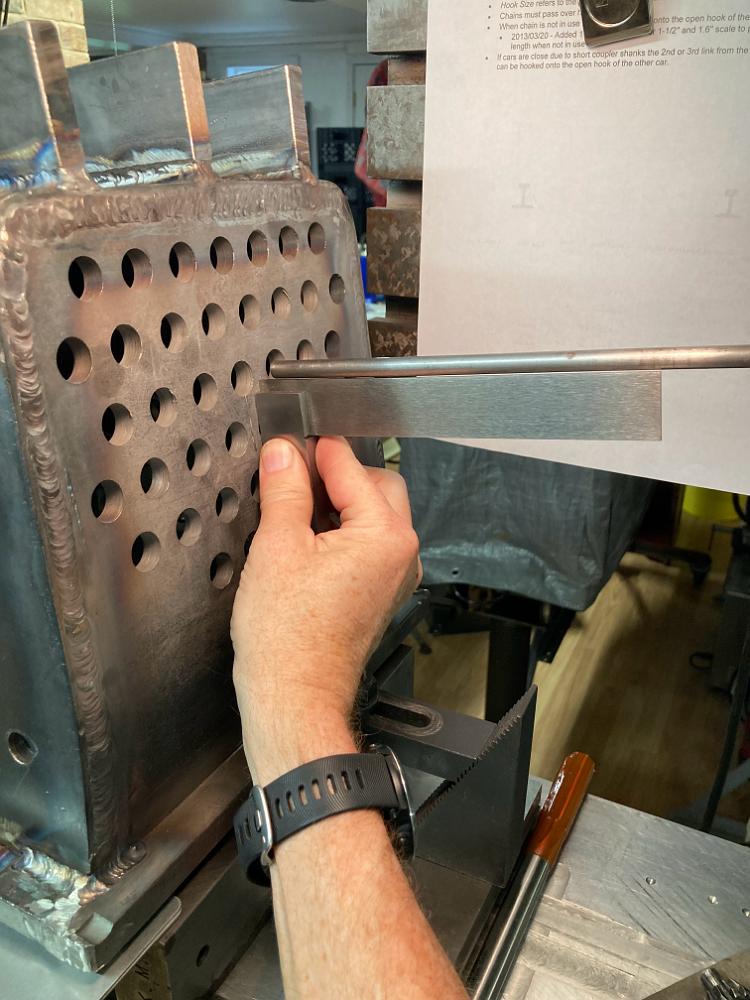
28-March-2022 Drilling new safety valve bushing holes. The holes are radial to the tube center, which will result in the safeties leaning away from each other…
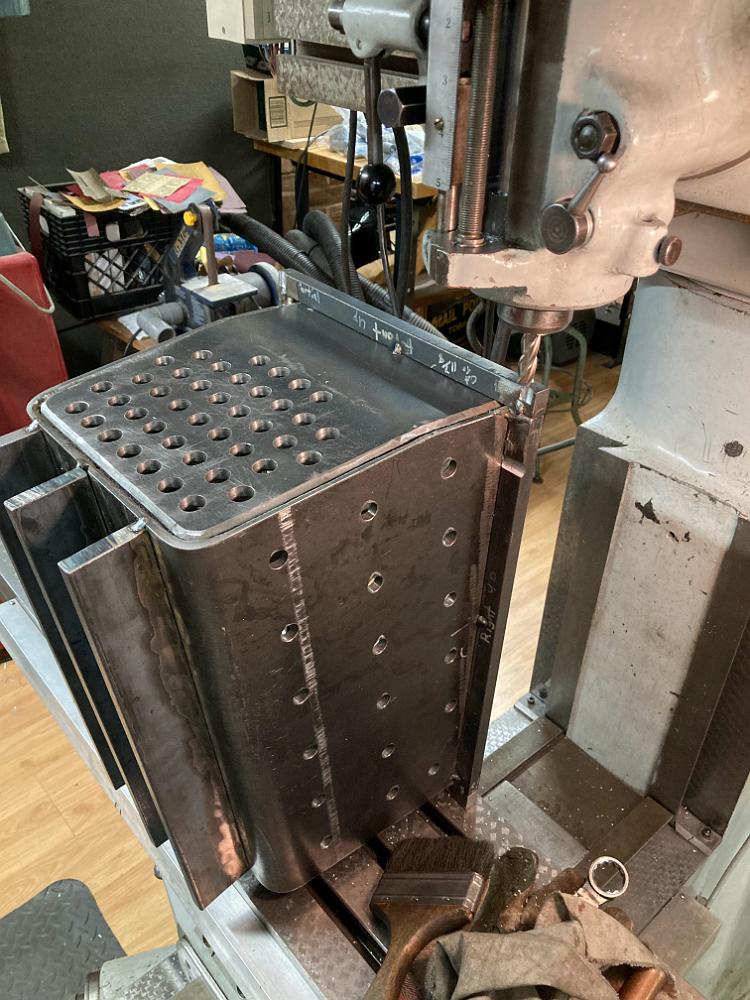
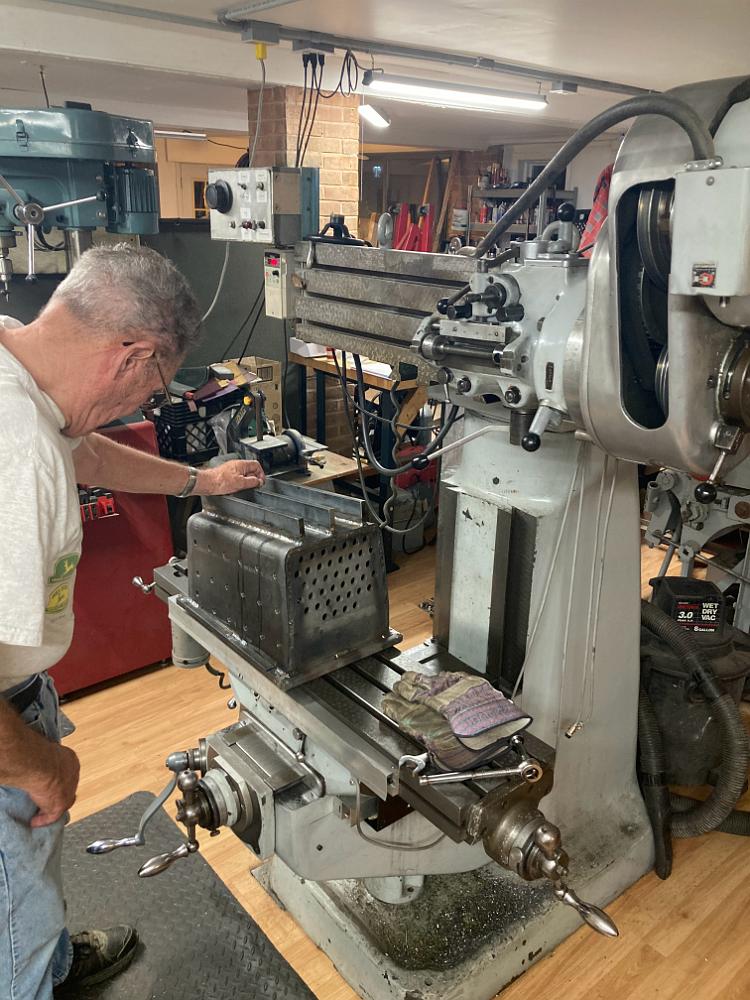
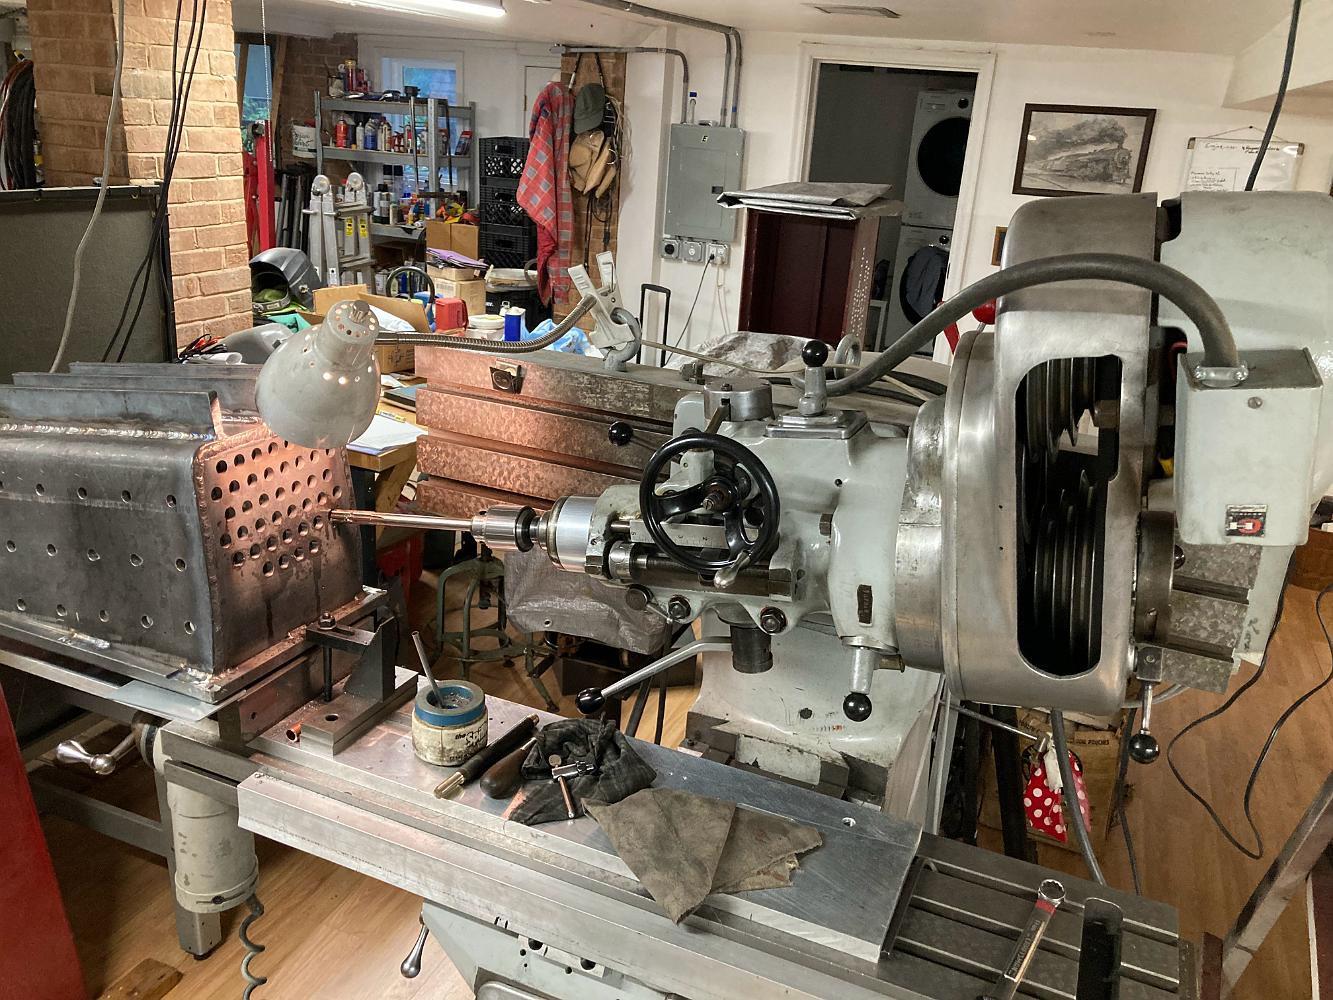
4-Apr-2022 Testing the limits of my mill table capacity, and my imagination, to clamp the boiler shell down securely for drilling and tapping operations.
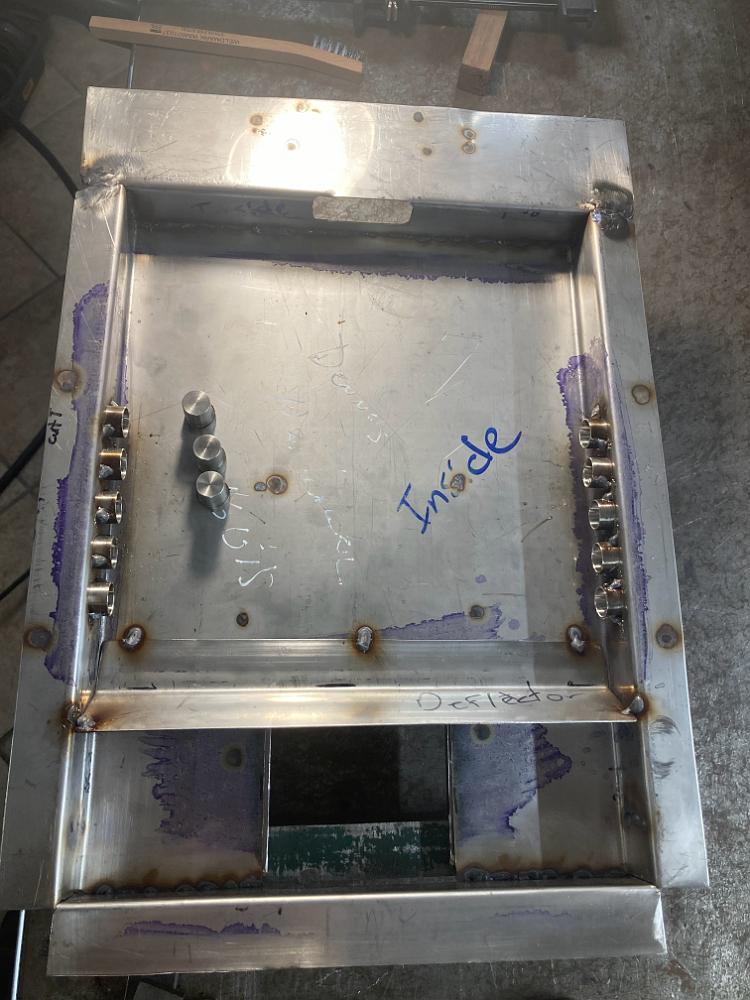
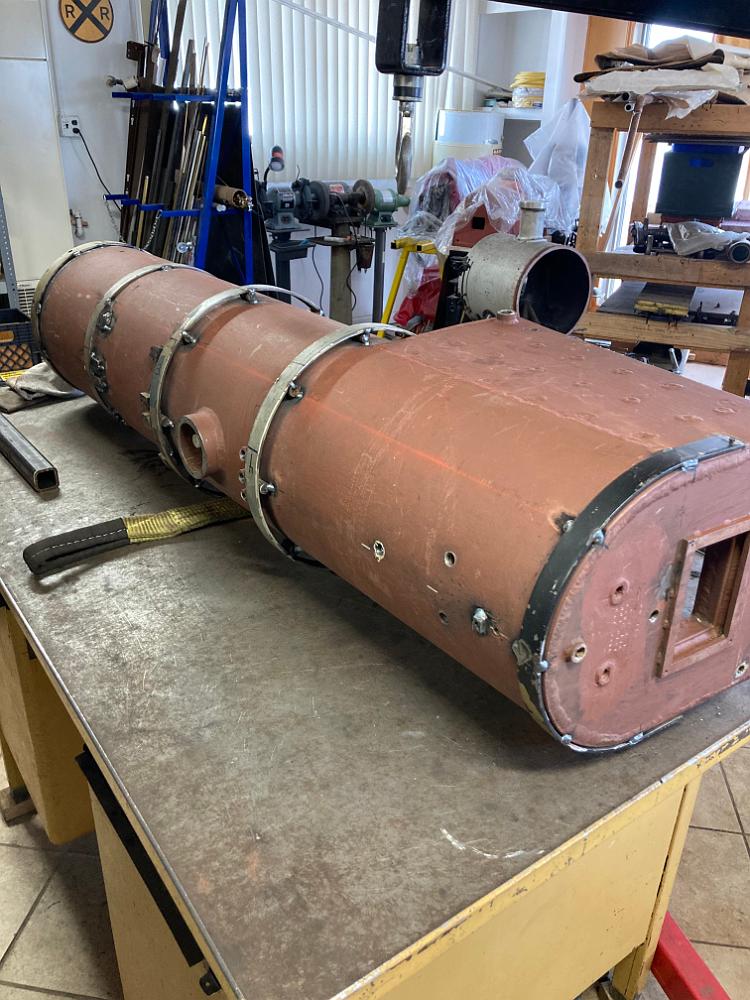
18-Apr-2022 A trial fitting of all the boiler pieces. Everything fits together! Up to now I wasn't sure, even though I spent two months working on drawings for…
24-Apr-2022 The 1/2" thick front fluesheet is bolted to the table for machining.
15-May-2022 Milling the welding chamfer onto the front fluesheet using the rotary table.
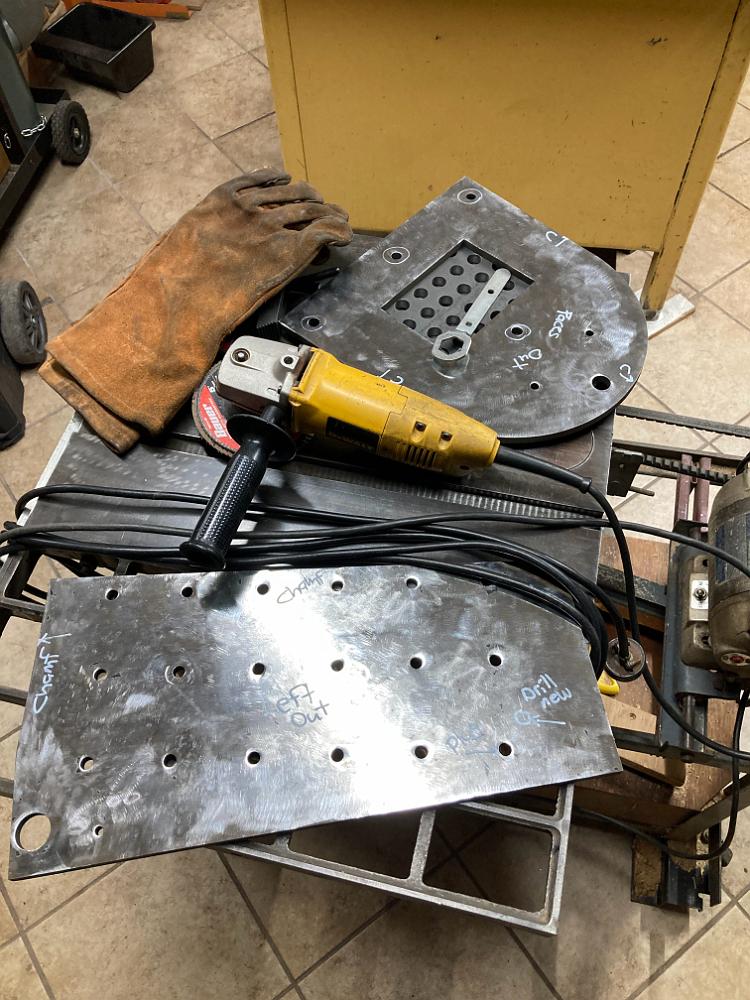
16-May-2022 Using the coarsest sanding wheel I can find, 36 grit, I sand the black mill scale off some of the parts back to bright metal for welding.
16-May-2022 3/8" diameter staybolts are cut, along with new crown bars. I cut them to exact length, the welder later informed me they should have been cut…
2-June-2022 Using a chamfering bit, we prepare the firebox front sheet, and the other pieces.
7-June-2022 I work on chamfering the one-piece firebox while Bill works on the flat pieces. Yes, I am using My 1960's Sears table saw as a work table; I can…
4-July-2022 The firebox front fluesheet is back from the fabricator with the necessary 7 degree bend in it so we can start drilling the flue pipe holes in it.…
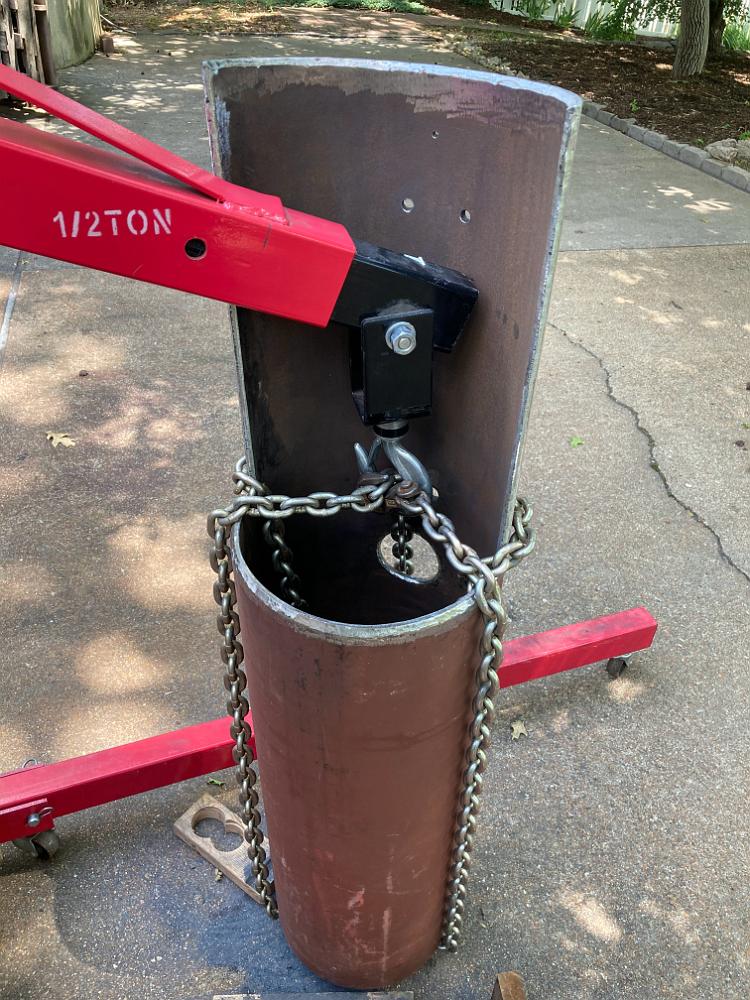
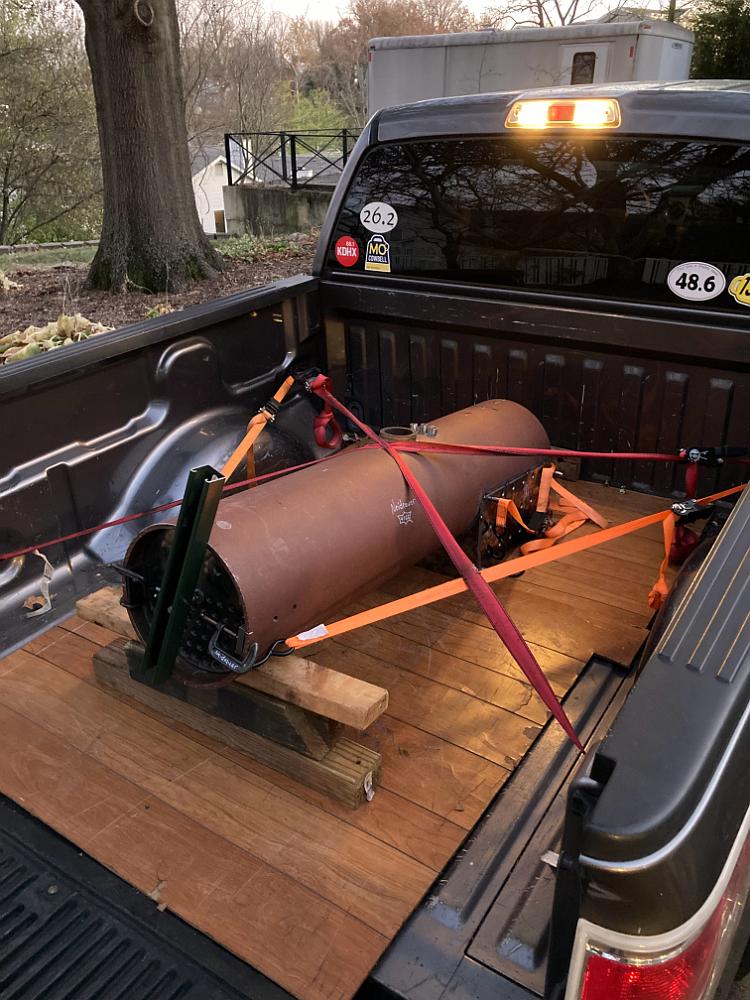
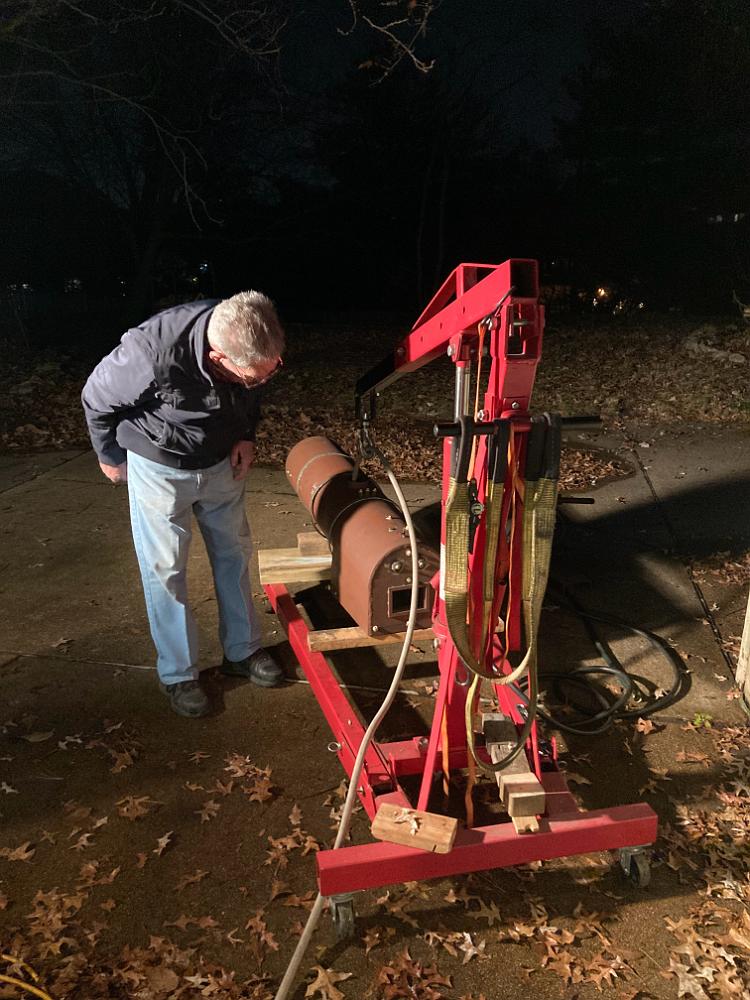
4-July-2022 I chain up the boiler shell and take it outside and chamfer the edges for welding.
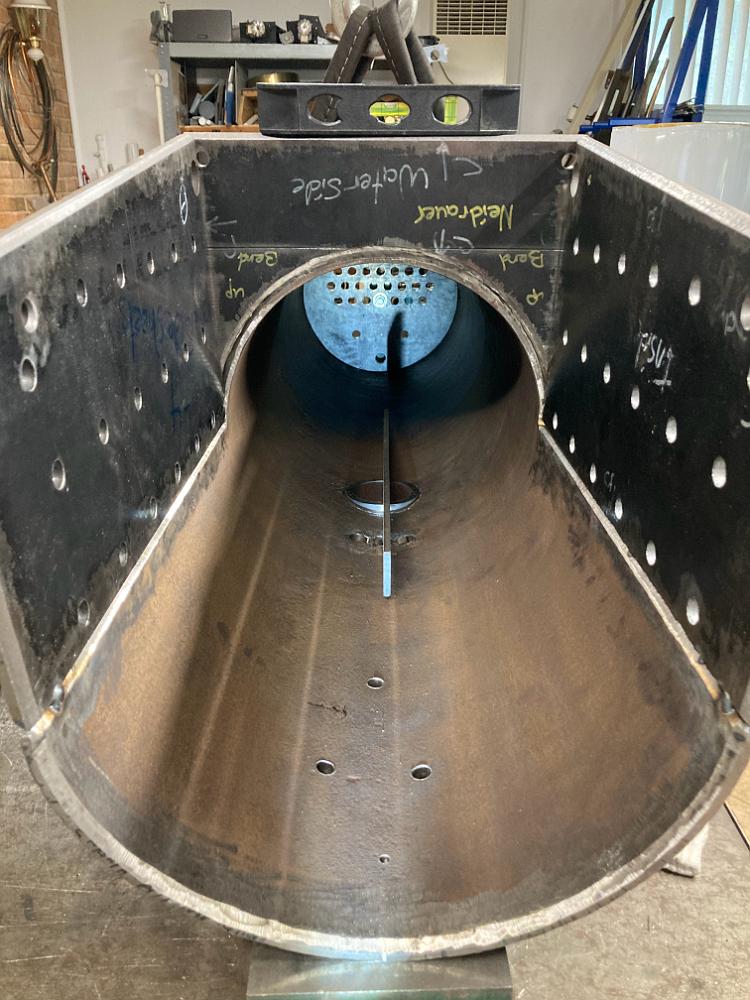
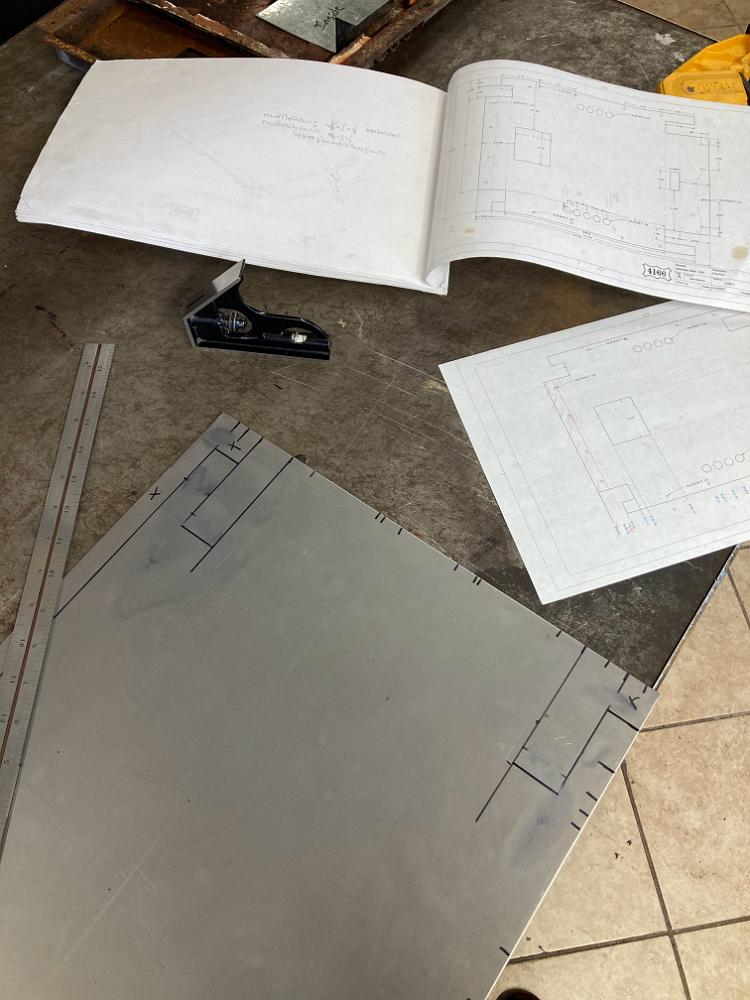
4-July-2022 With the boiler back inside, I trim the front flue sheet to fit inside the boiler tube; mark the top centerline and align it for welding.
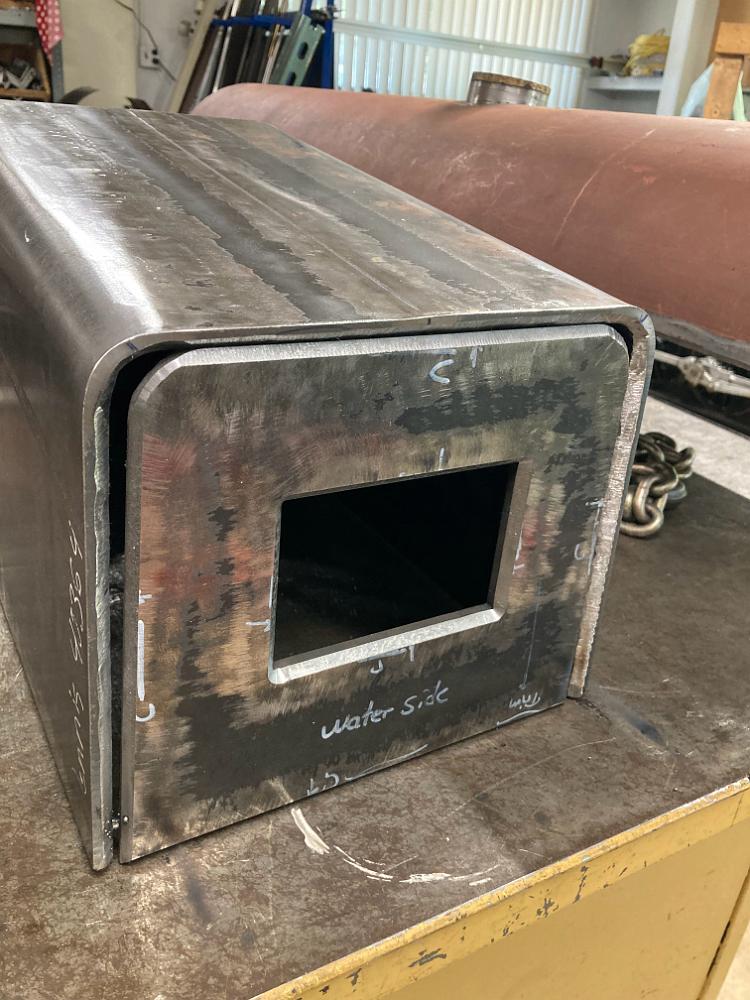
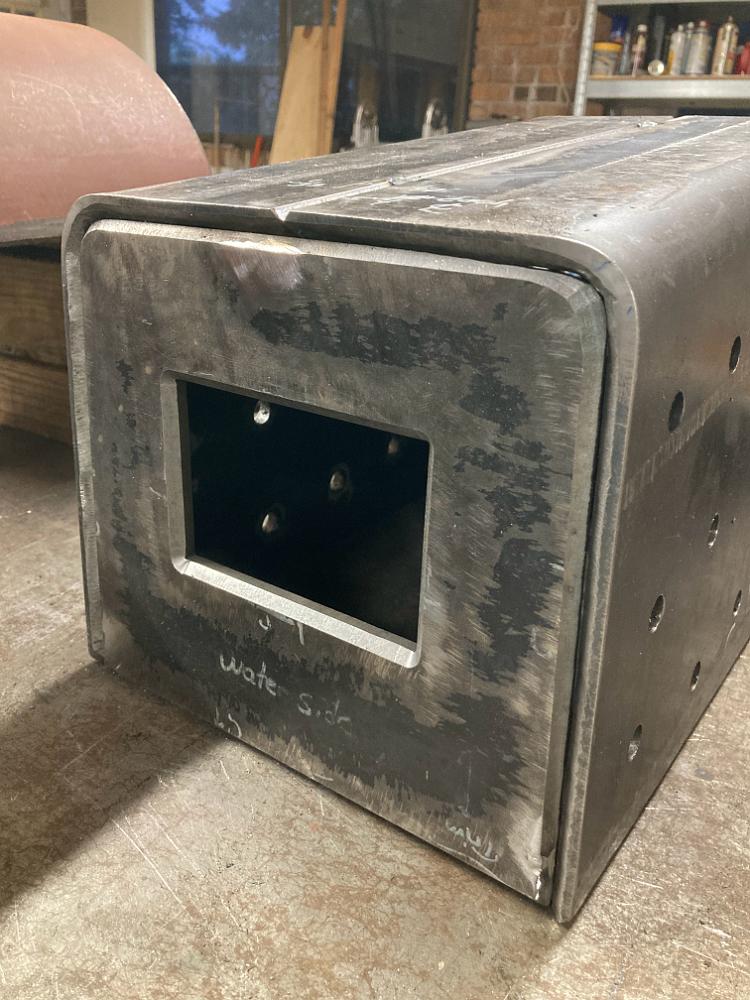
4-July-2022 So excited to test assemble the firebox with the drilled and chamfered pieces! A bit disappointed to see the corner radius is a poor match, the…
7-July-2022 My excitement of test assembling the drilled and chamfered firebox pieces is diminished when I see the poor fit of the rear firebox sheet in the…
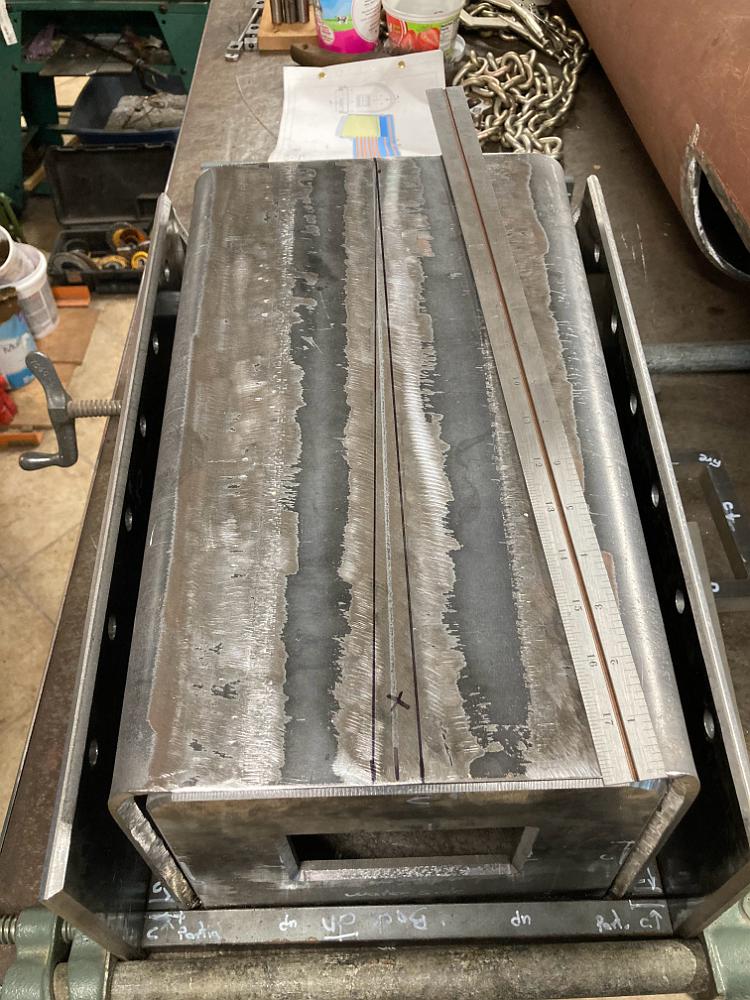
11-July-2022 We spend the better part of the evening measuring, remeasuring and checking the old boiler actual dimensions we are trying to replicate. I…
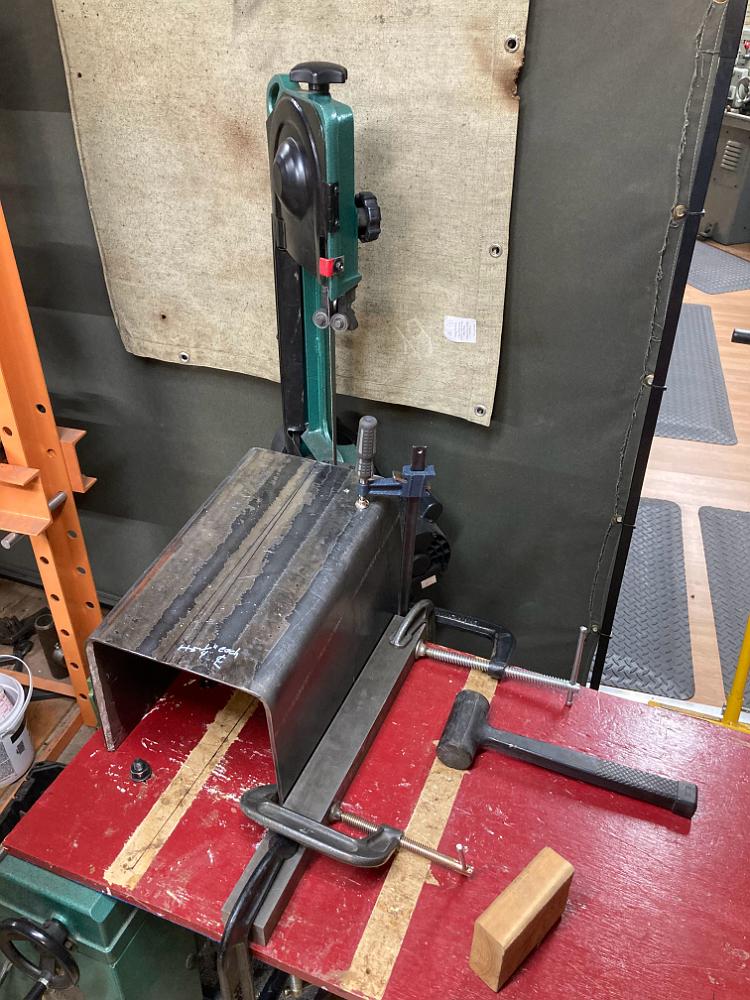
12-July-2022 We had to get creative to cut the firebox in half, using the small equipment I have on hand.
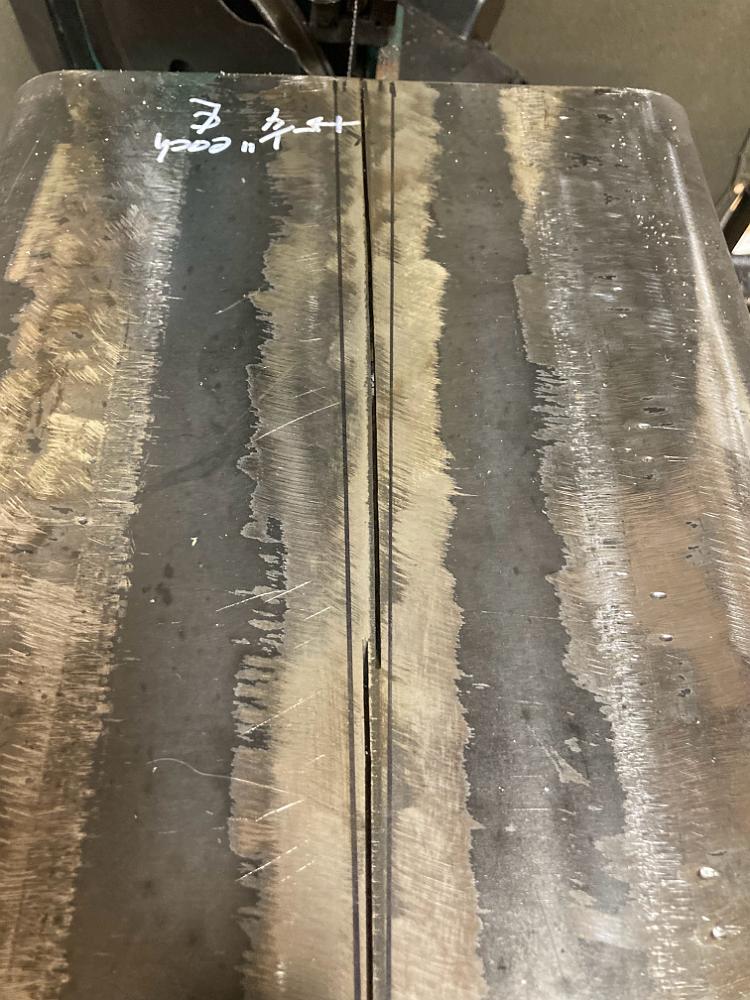
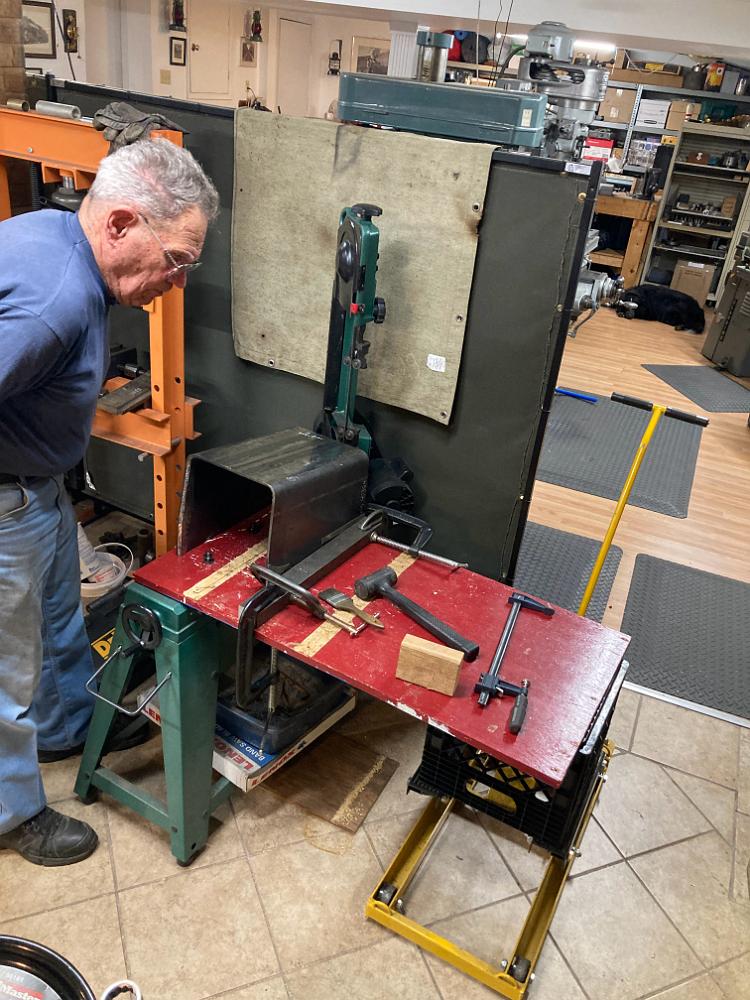
12-July-2022 How to cut a 17" long by 15" high piece on a little 3"x6" bandsaw. Bolt a 3/4" thick piece of plywood to make a larger table work surface. Clamp a…
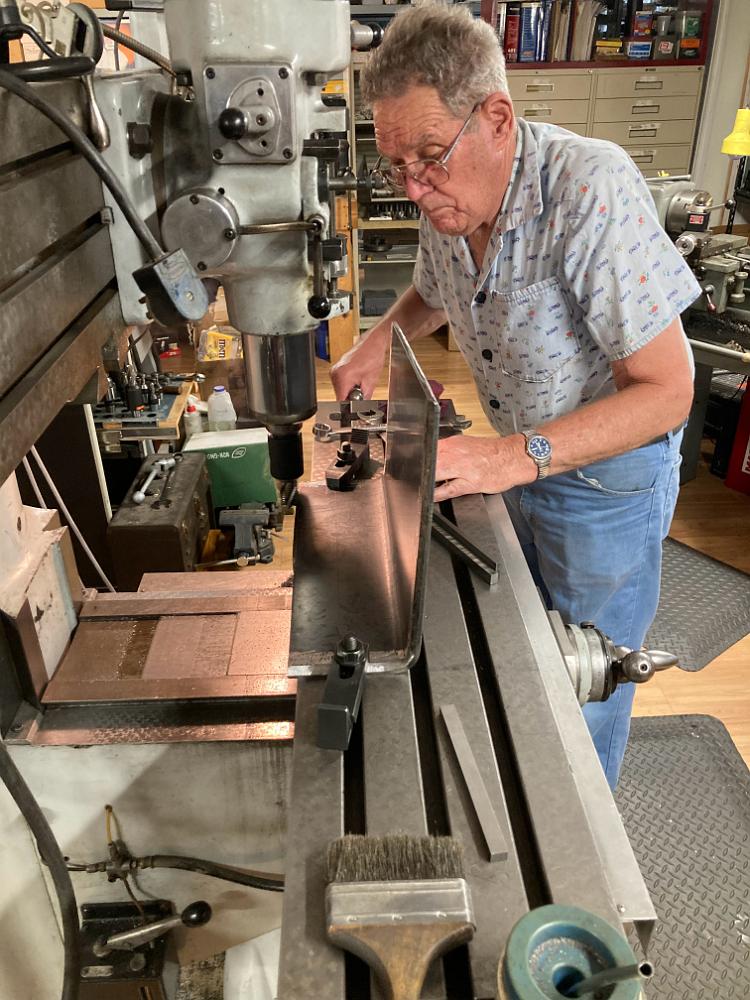
18-July-2022 With the one-piece firebox cut into two pieces, we bolt a firebox half onto the mill table and cut 1/4" off one end in a taper to make that end…
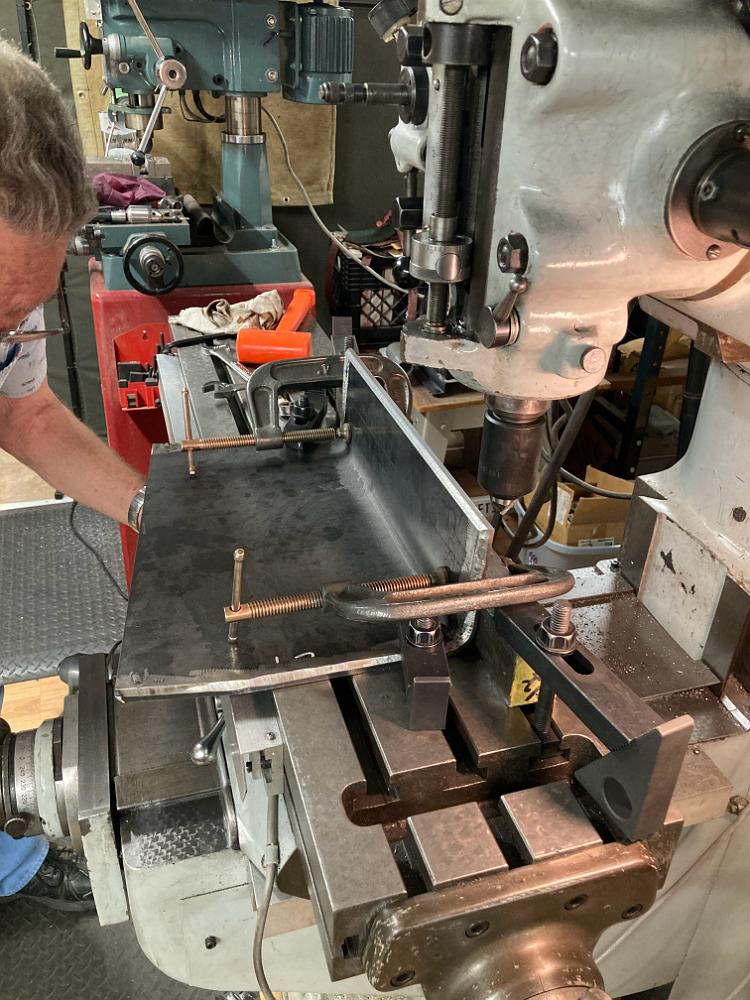
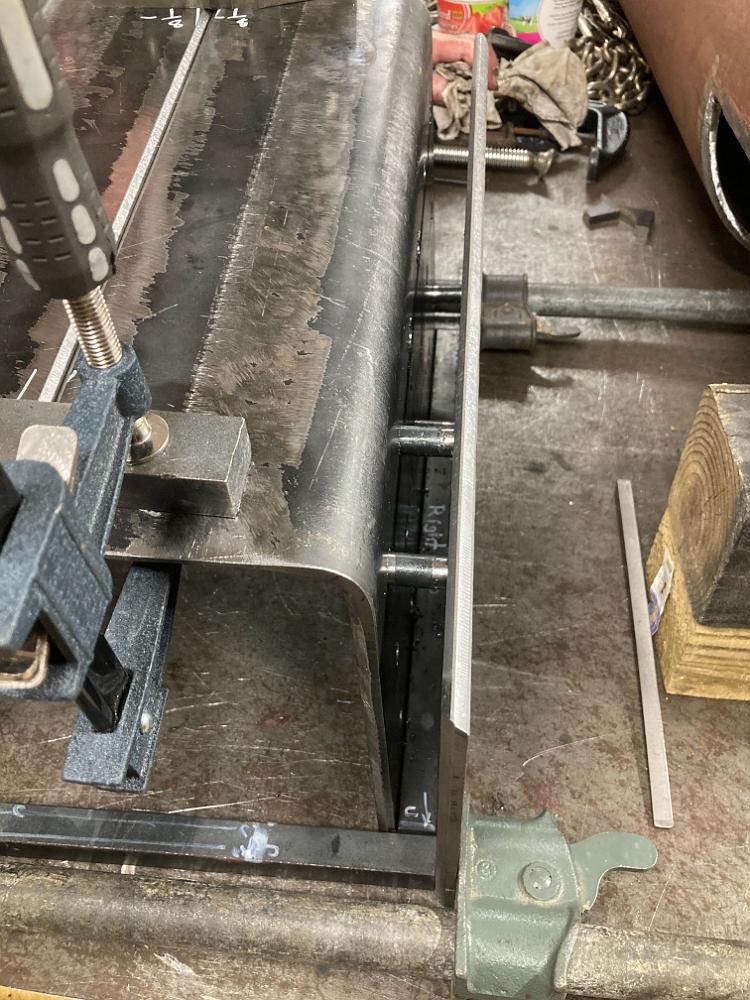
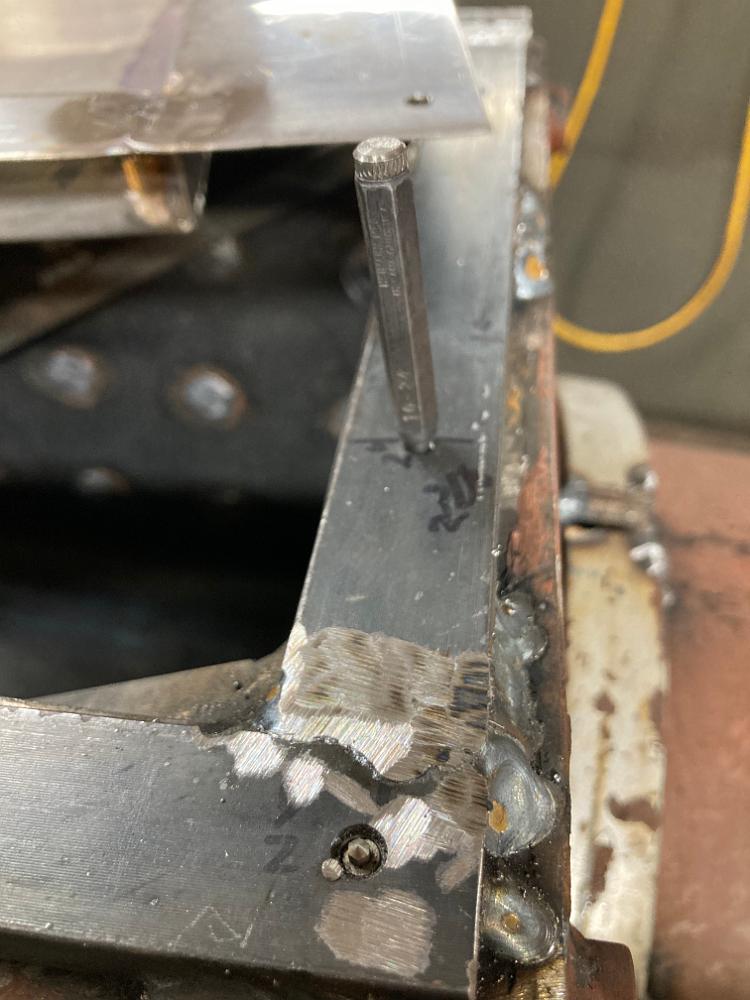
2-August-2022 We have to put a chamfer on both sides of the new cut for welding. We use the 2x2" bar again as an alignment and clamping stop.
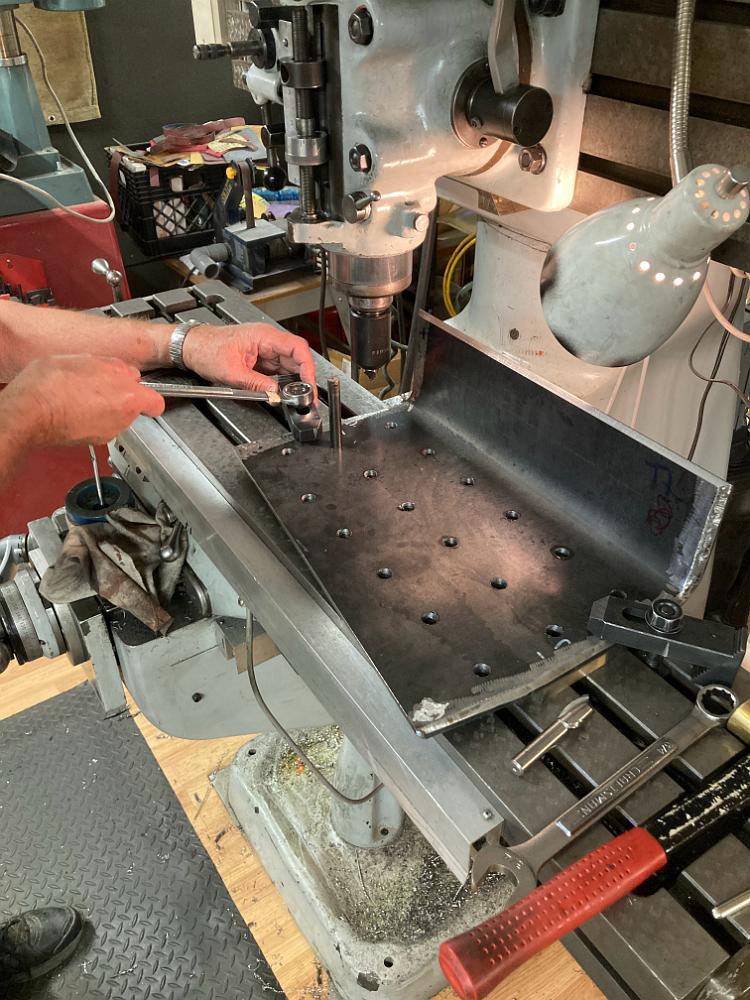
22-August-2022 Hey! By cutting the firebox in half, we solved another problem -- how to chamfer the inside of the staybolt holes for welding. Now we can just…
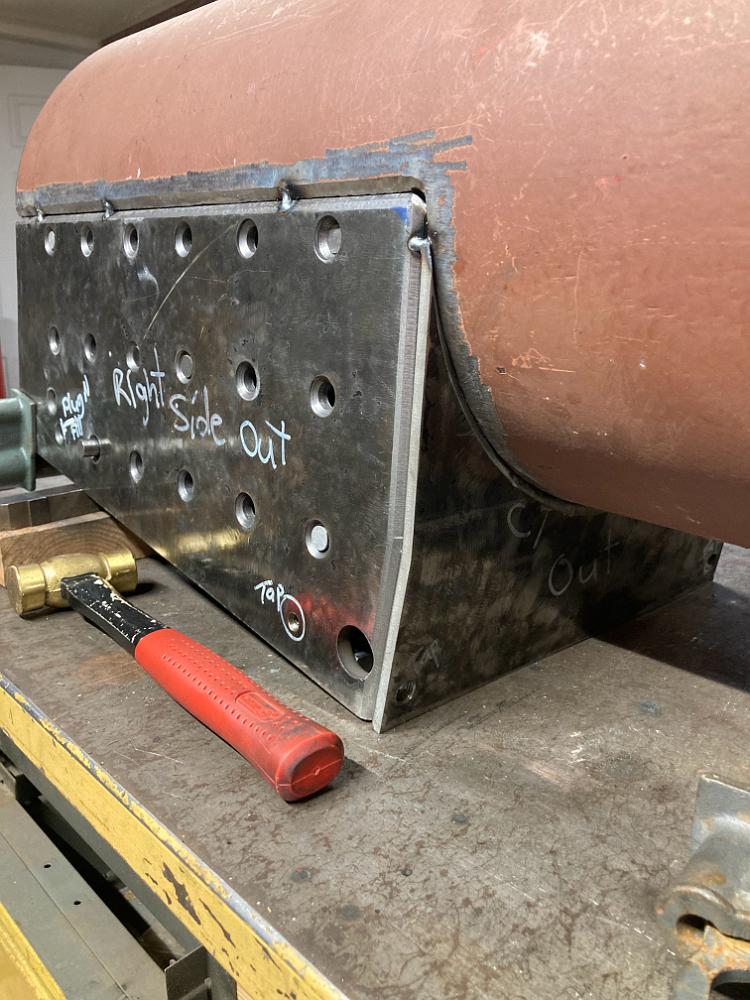
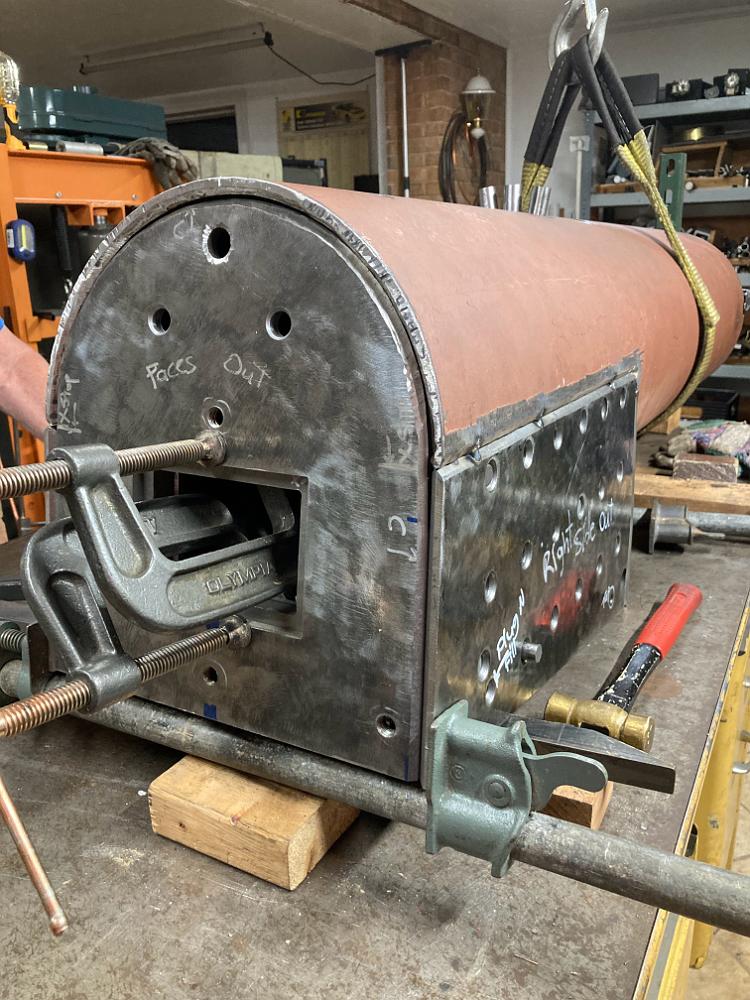
23-August-2022 Test fit time again! The existing holes in the sidesheets were used to mark and drill the mating holes on the firebox. Everything is pretty good,…
25-August-2022 The crownsheet is tack welded together and one of many trial assemblies is performed.
25-August-2022 Now that the inner firebox has been adjusted to size, the rear fire sheet fits much better. A little work with the hand grinder cleans up the…
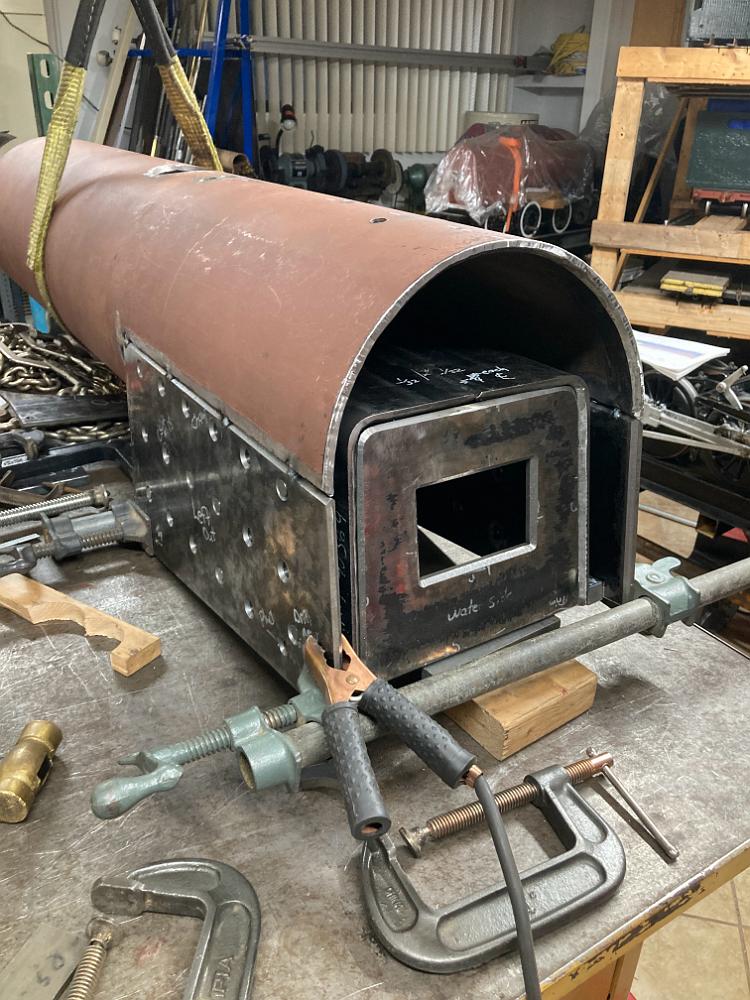
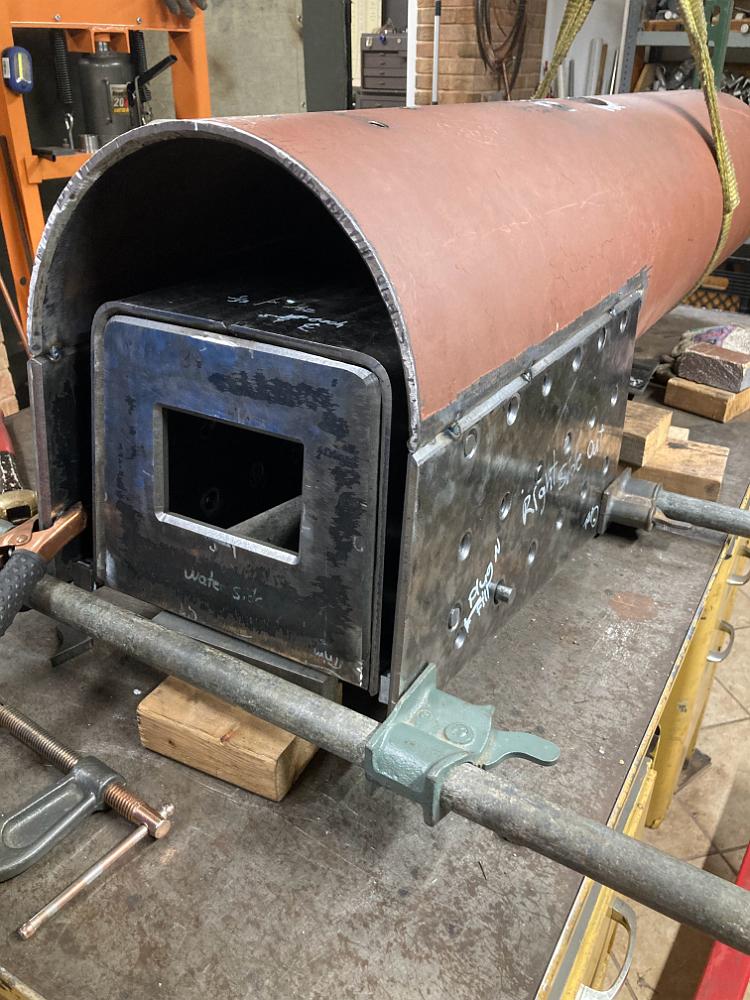
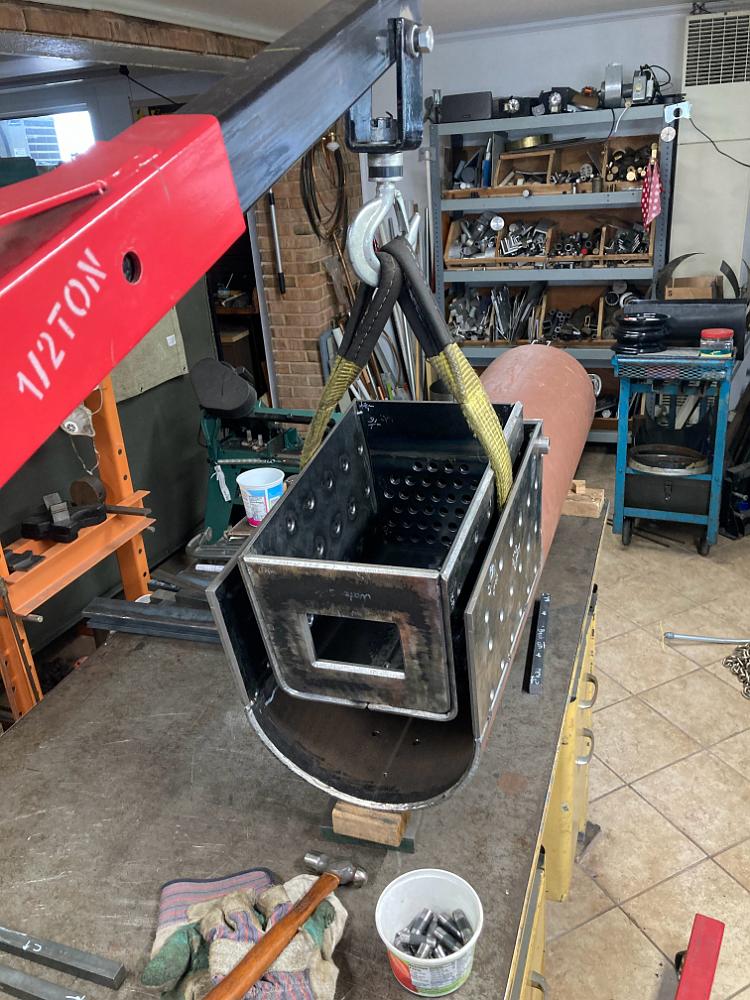
30-August-2022 Trial Assembly time! The firebox ends have been tack welded on and the sidesheets located by the staybolts, the whole assembly held together with…
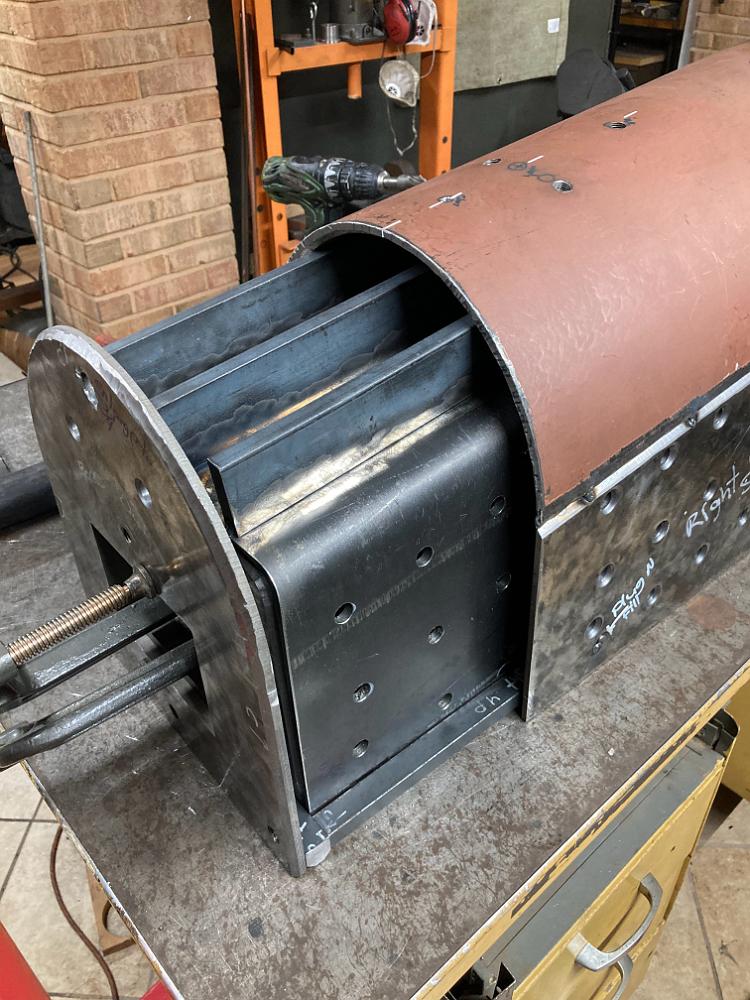
30-August-2022 With the firebox sheets tack welded to the boiler shell and the firebox installed, we fit some staybolts to check alignment. Some staybolts we…
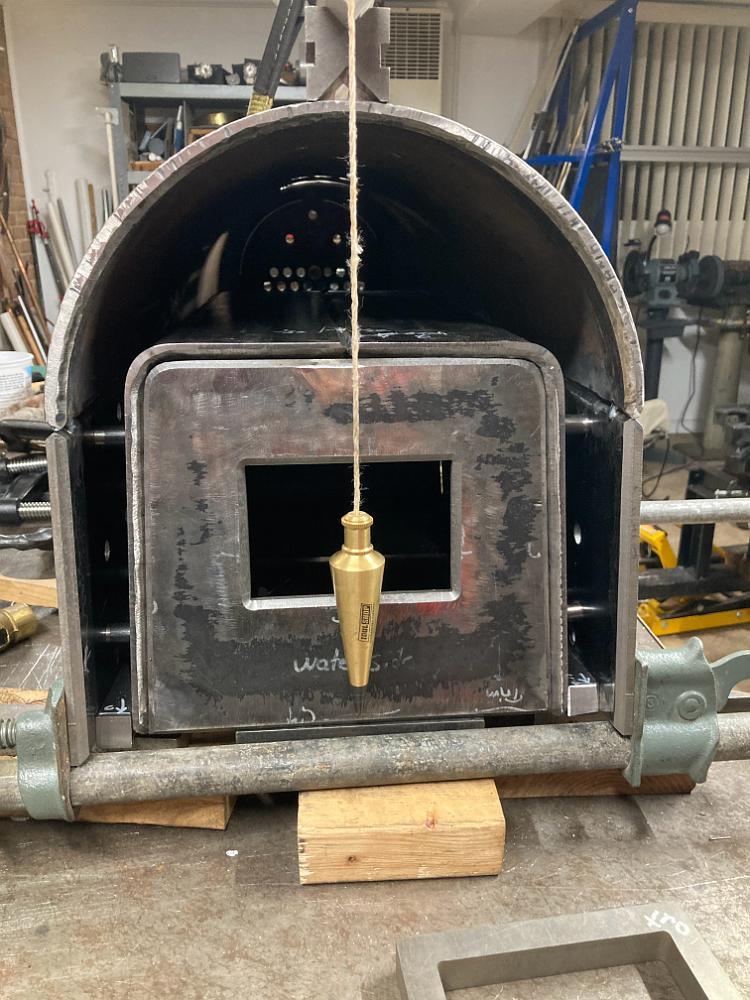
30-Aug-2022 Results of tack-welded firebox to boiler shell fit up. We observe that the boilershell has spread some at the end closest to the camera, causing the…
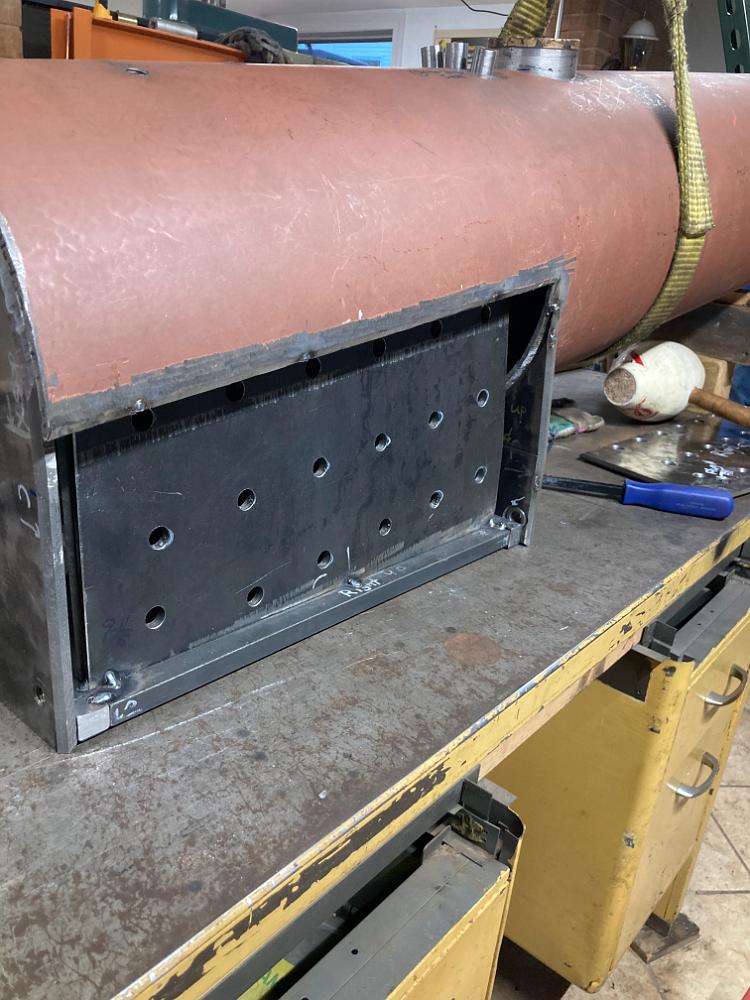
19-Sept-2022 We untack the sidesheet to examine why the staybolt holes are not lining up. We can see there is a 3/8" gap between the front mudring and front…
19-Sept-2022 A tack welded trial fitting of firebox to boiler shell shows a horizontal misalignment of the staybolt holes. This is very puzzling to me because…
19-Sept-2022 Our solution to the horizontal alignment issue is to trim the front of the sidesheets, effectively moving the sidesheets forward relative to the…
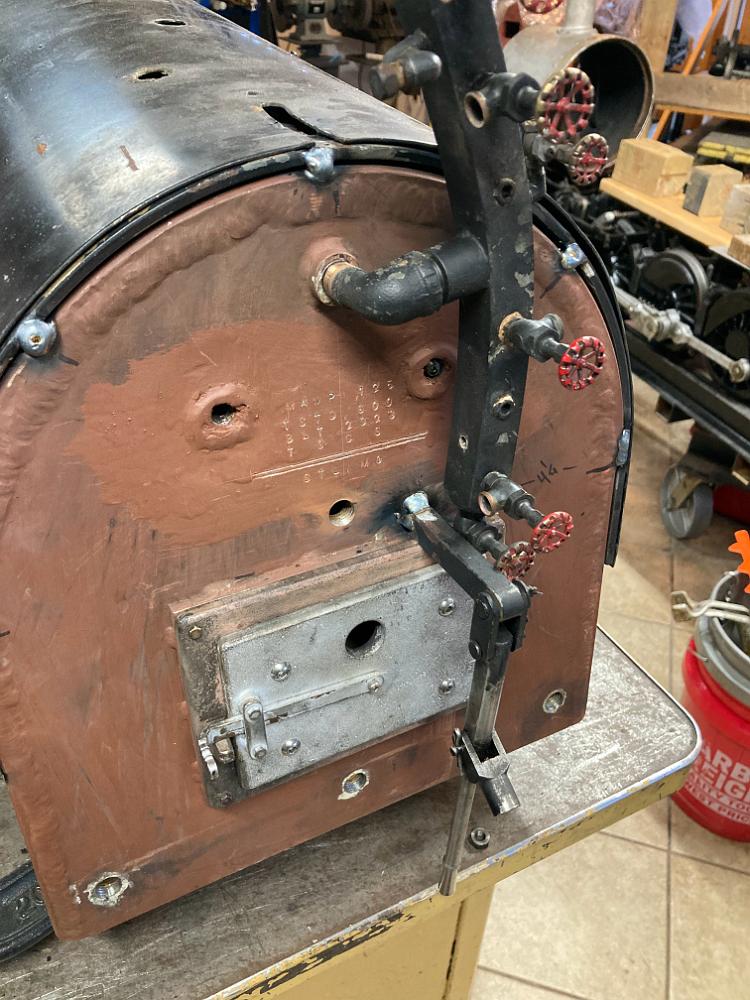
17-Oct-2022 The drypipes and main steam pipe with nice angled bends at the firebox end so they nicely fit the tilted backhead sheet. I silver solder steel…
17-Oct-2022 A case of not thinking through the consequences of a solution creating another problem -- the beautifully bent pipe now fits into the backhead…
18-Oct-2022 The backhead pipe holes were originally drilled nice and square to the backhead. But the backhead is tilted at a 7 degree angle whereas the front…
18-Oct-2022 During the trial fittings, and corrections, we noticed the firebox needed to be lifted 1/8" up relative to the sidesheets to align the staybolt…
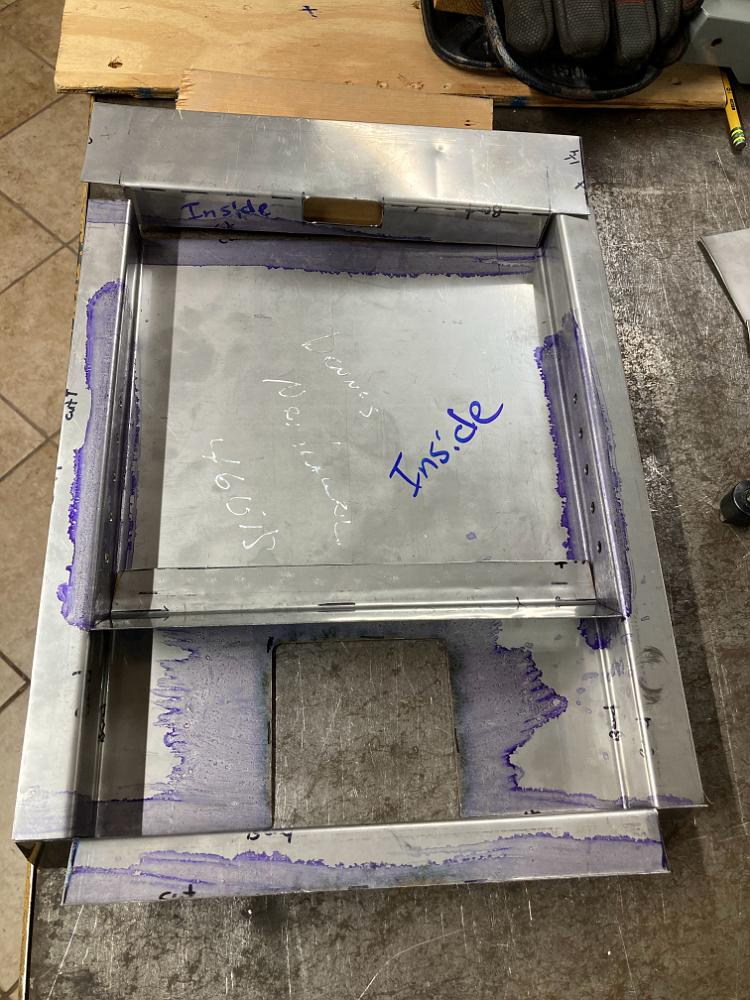
27-Dec-2022 With the boiler off to the welder, it is firepan sheetmetal time. Since the new firebox is smaller than the original drawings (to allow for bigger…
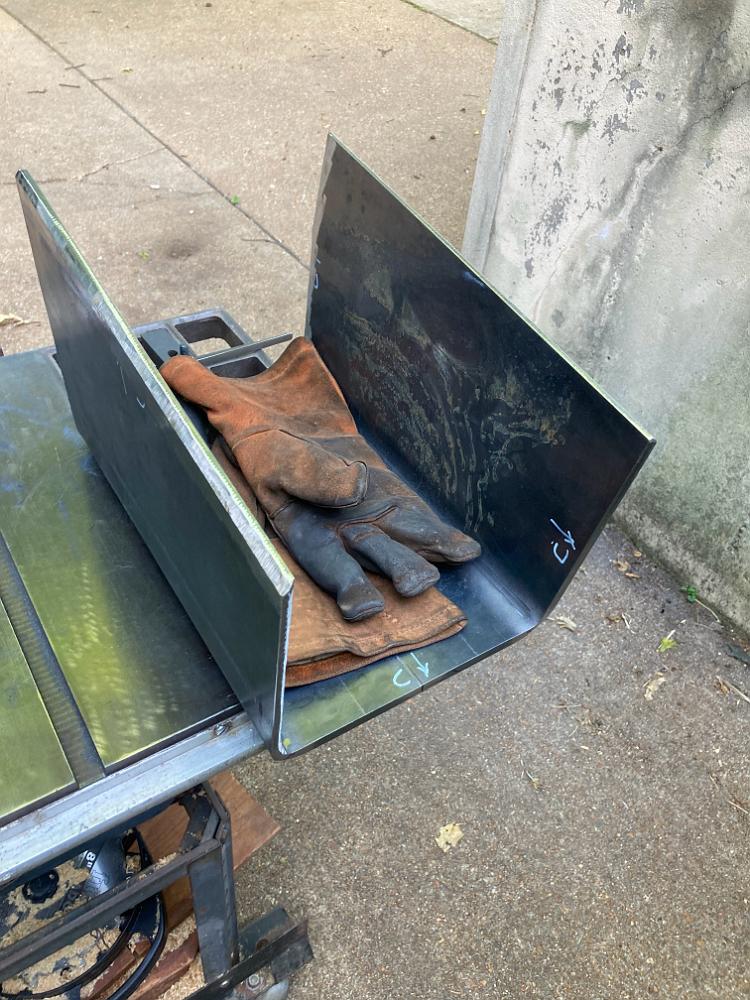
7-Feb-2023 The stainless steel firepan after bending. The ends (top and bottom of picture) are separate pieces and will be welded to the main body.
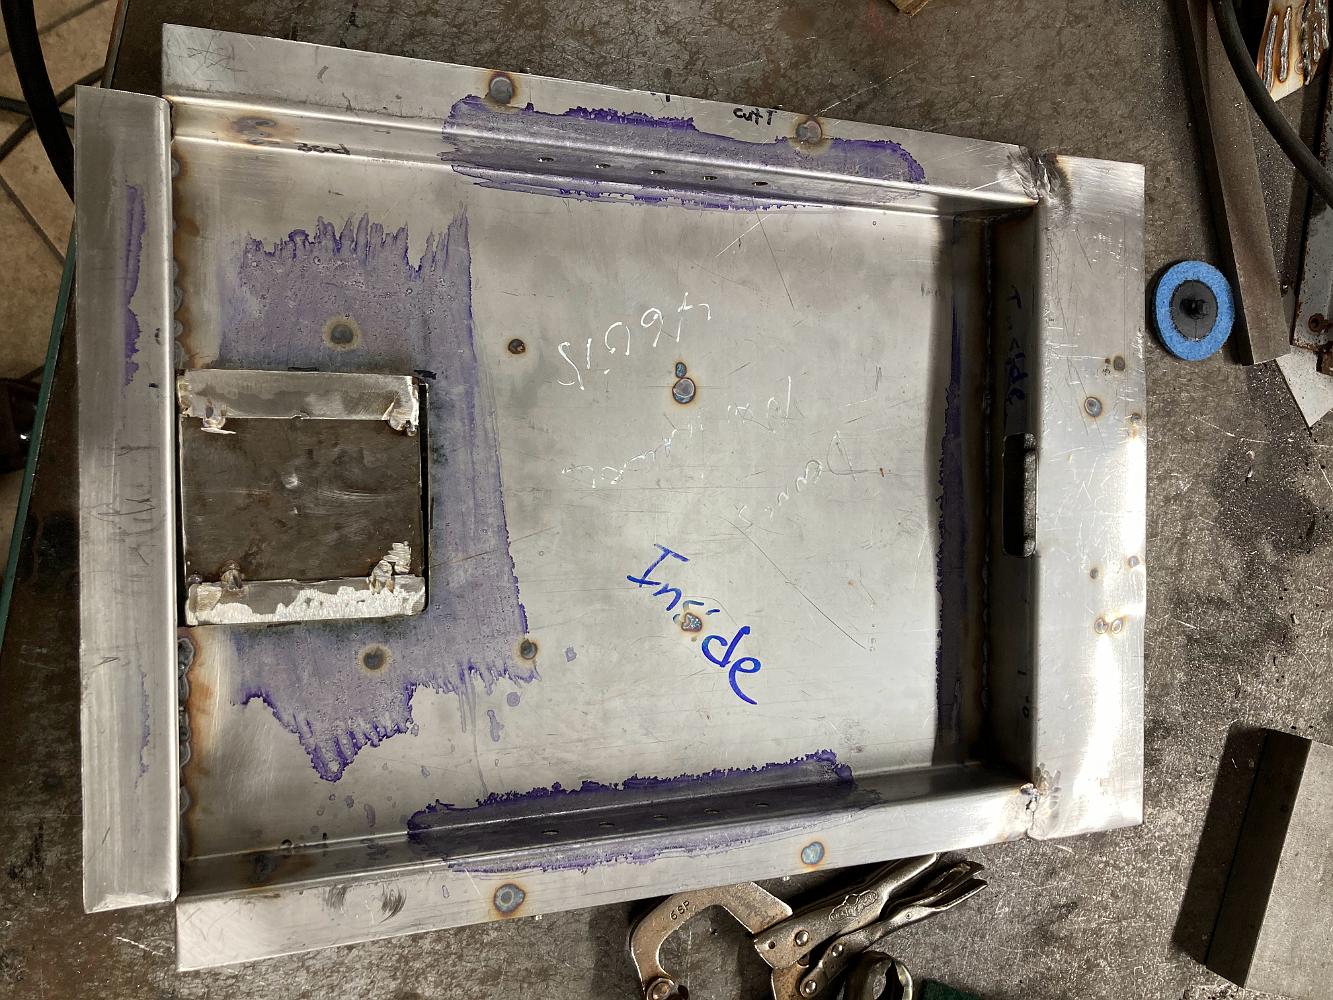
24-Feb-2023 Welding was done by MIG welding, 0.032 stainless steel wire and Argon/CO2 gas mix. I think I should have used smaller 0.023 wire for this thinner…
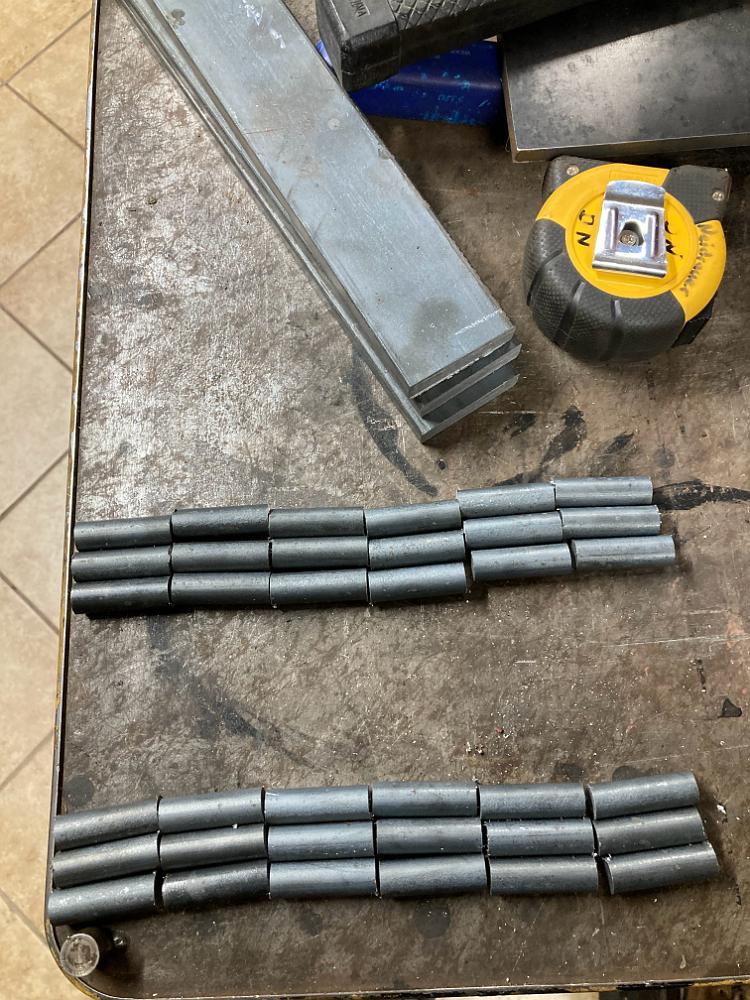
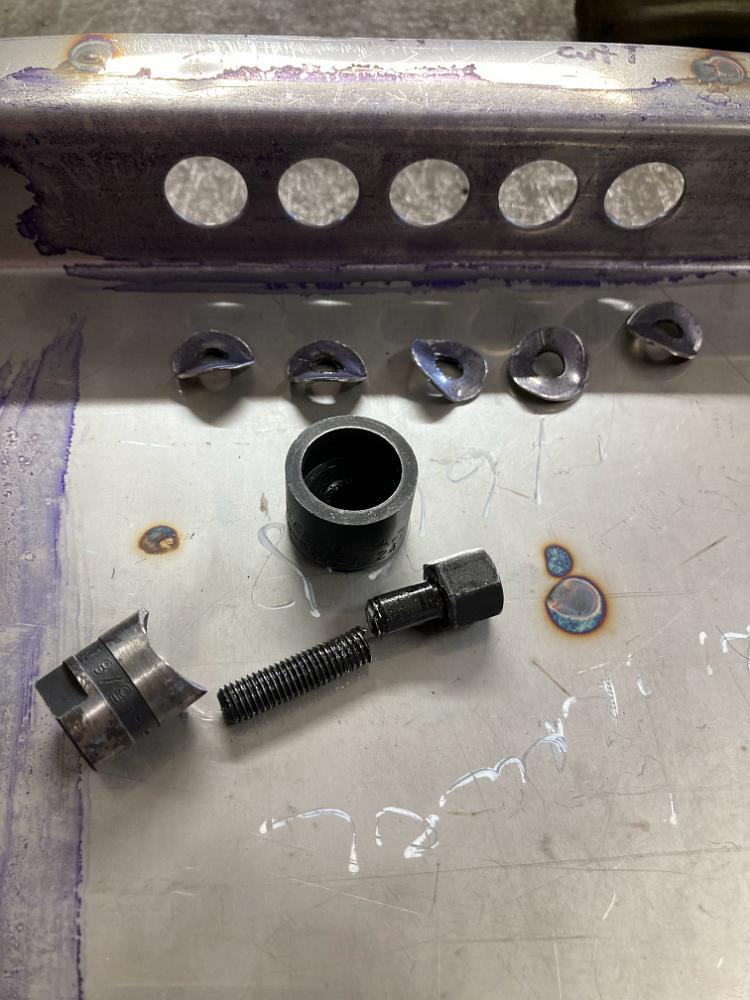
26-March-2023 The over-fire tubes are cut using the 5/8" electrical knockout cutter. I used this same one 12 years ago to do the same, but the stiff stainless…
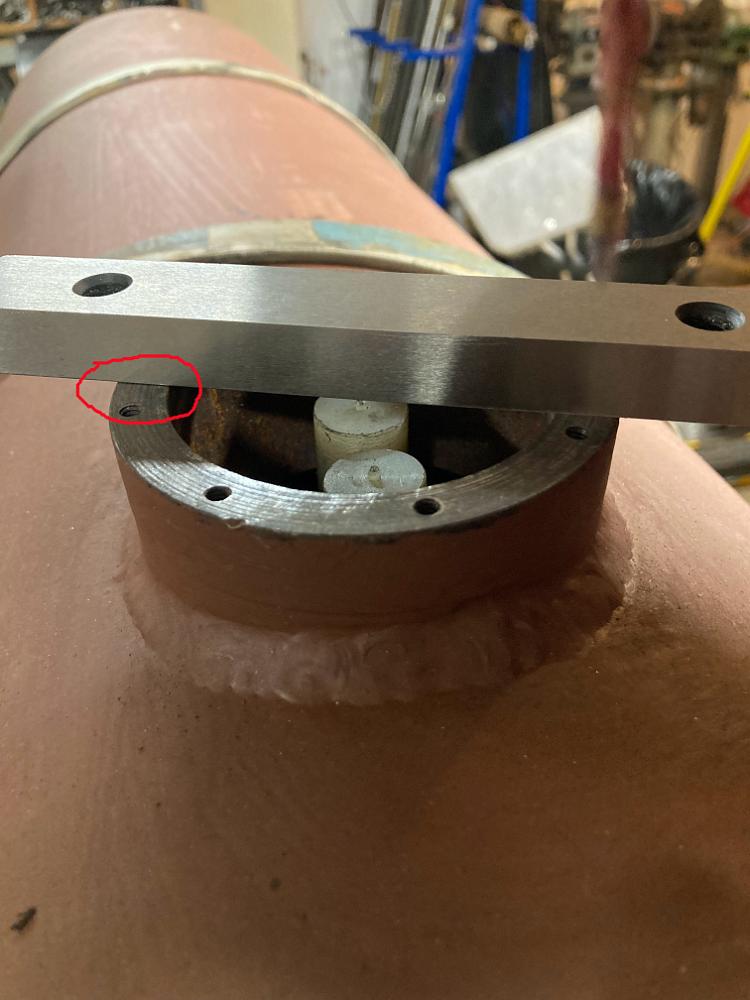
7-March-2023 I use the plugs we made to help install the tubes, the holes cut by the electrical knockout cutter were not perfectly round and the sheet metal…
22-August-2023 The inner firebox has been welded up into a single assembly. Before installation into the boiler, we will ream the flue hole while they are…
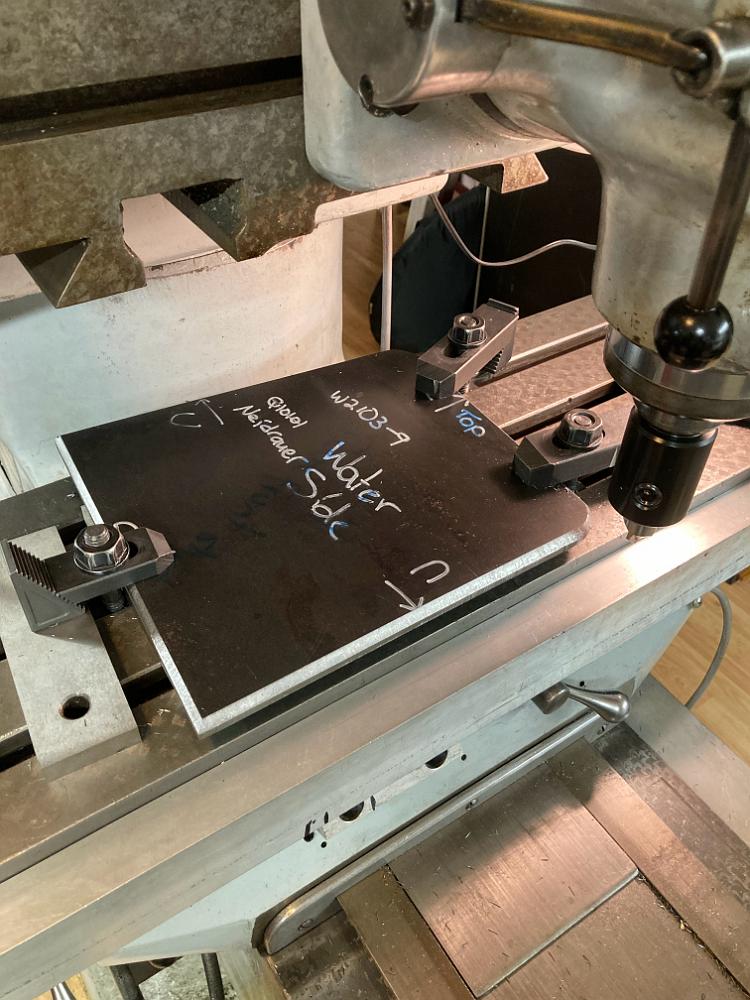
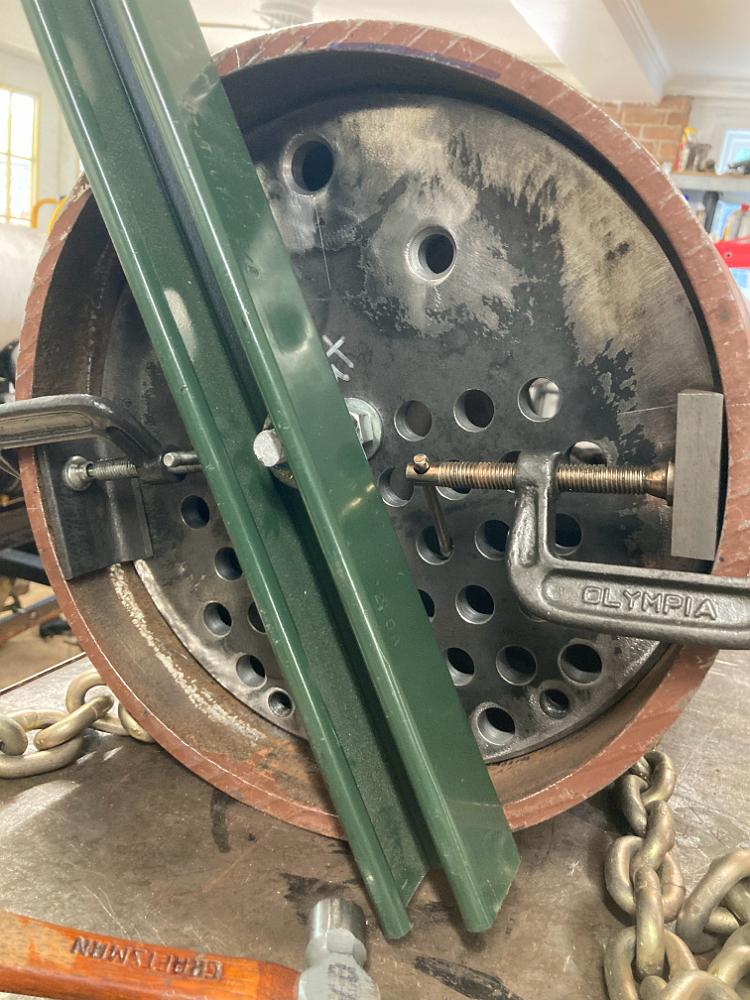
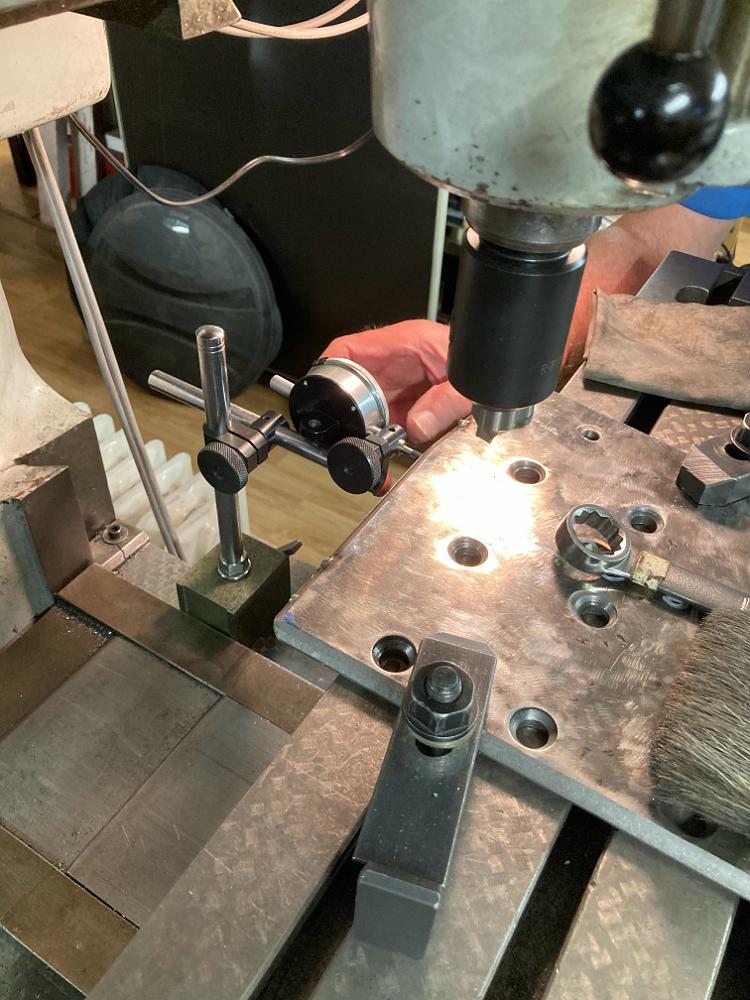
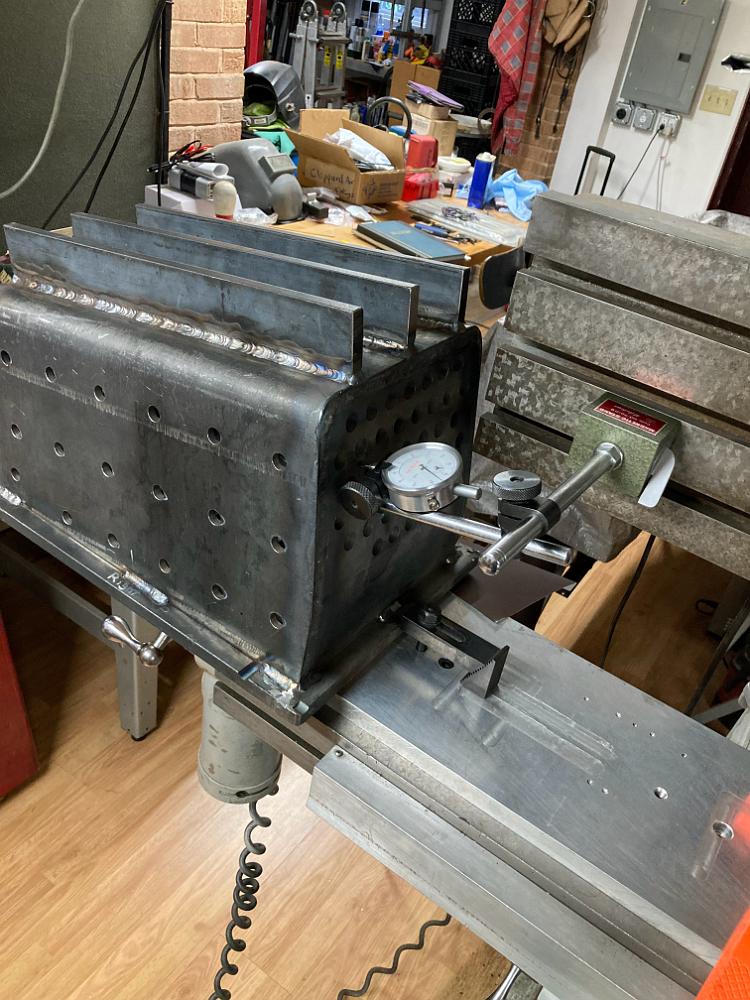
23-August-2023 With the table extension bolted on so the firebox can go past the end of the ram, I indicate the front flue sheet to square it to the table.
26-August-2023 Aligning the head to be square to the firebox flue sheet face, using the 'eyeball' method. I do not have graduation marks on my Bridgeport head…
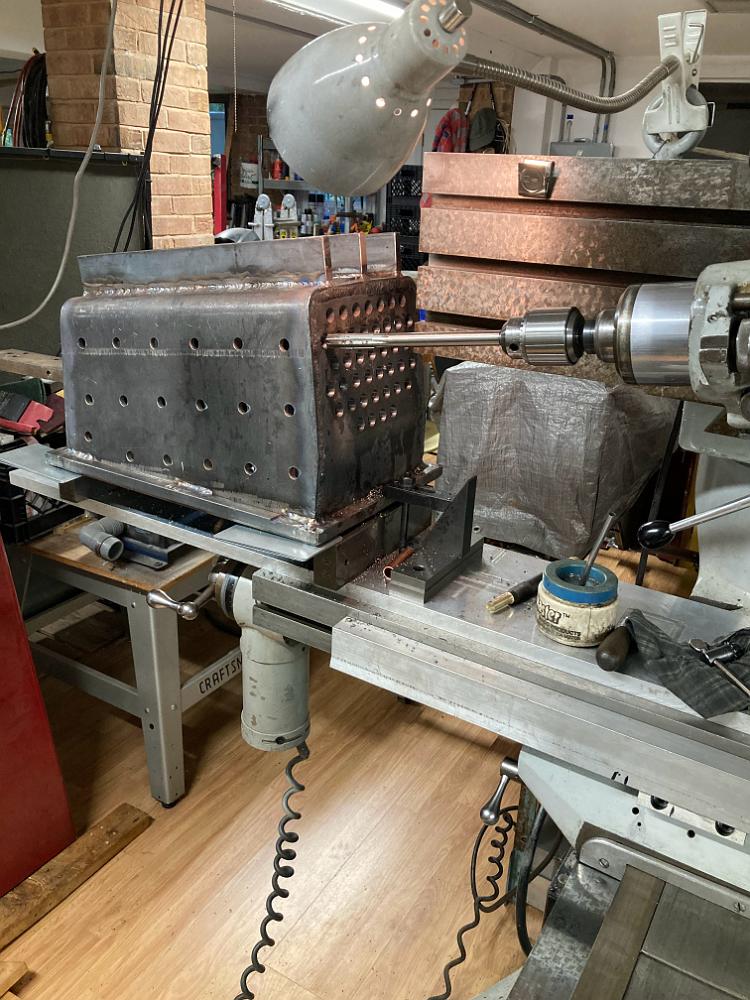
26-August-2023 Here's the final working setup to ream the fluesheet holes: The firebox is on the table extension, largely hanging off the table but able to…
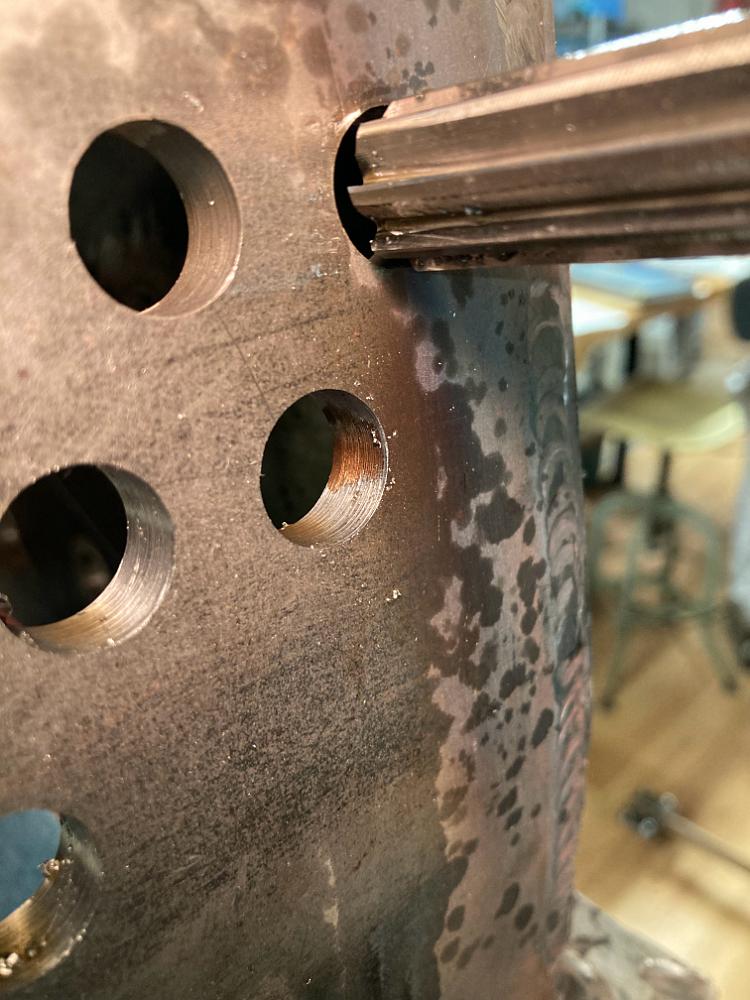
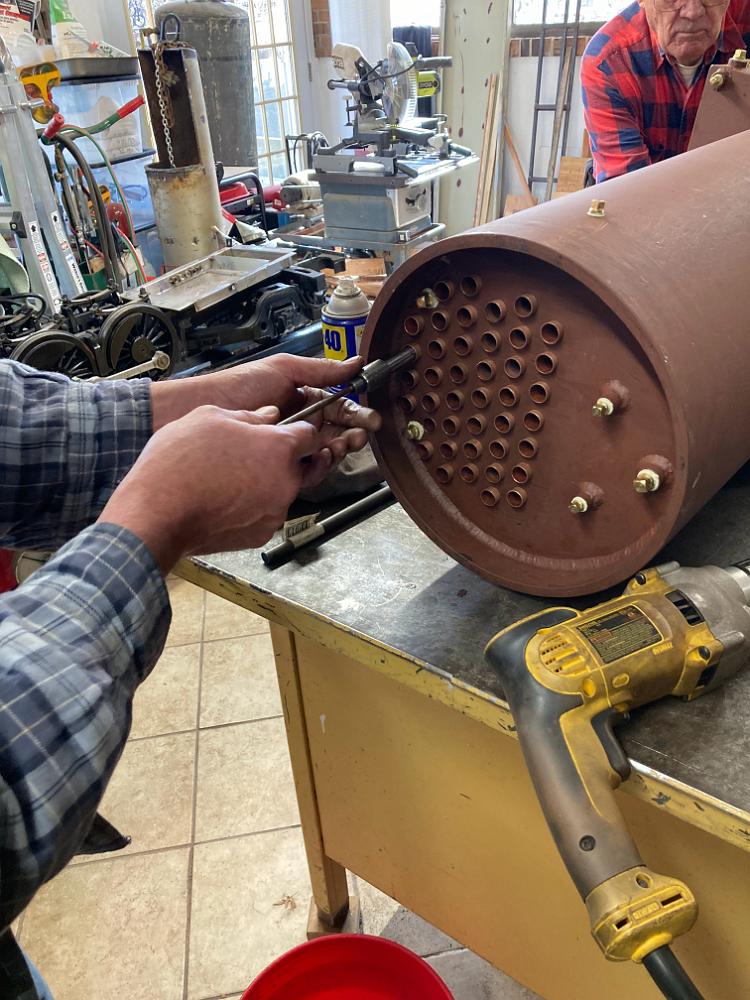
26-August-2023 Closeup of the reamed holes showing the effect of the welding process distorting the 3/8" drilled sheet. The brown/rust area inside the hole is…
26-August-2023 Almost done reaming the holes. You can see how the firebox is past the ram for the left-most holes, and the table extension required to make it…
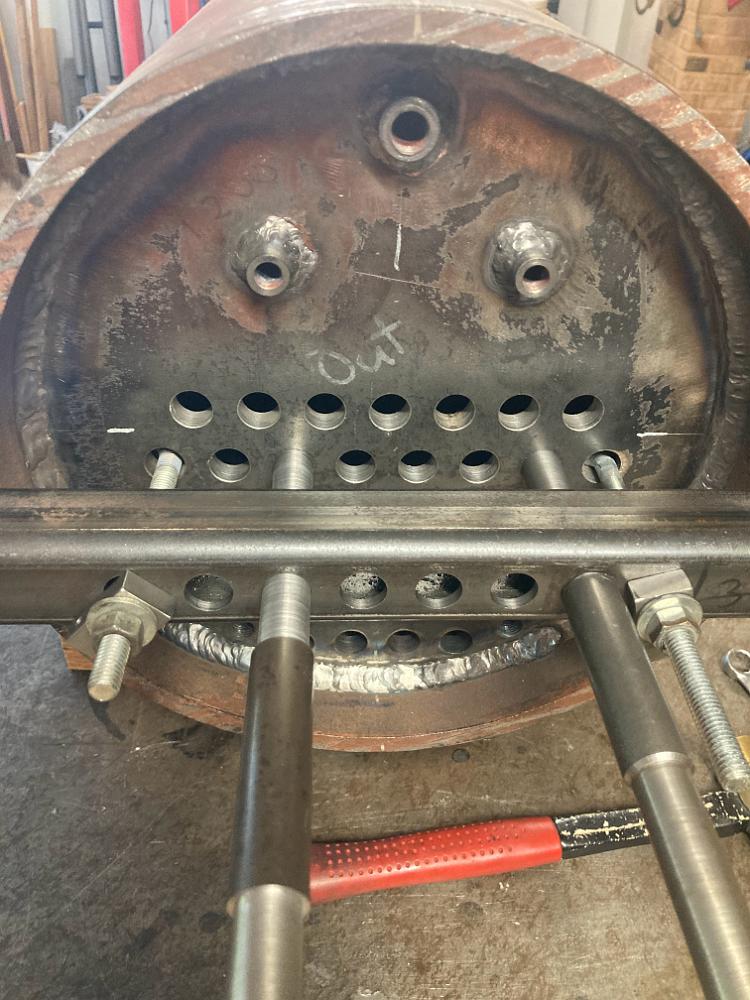
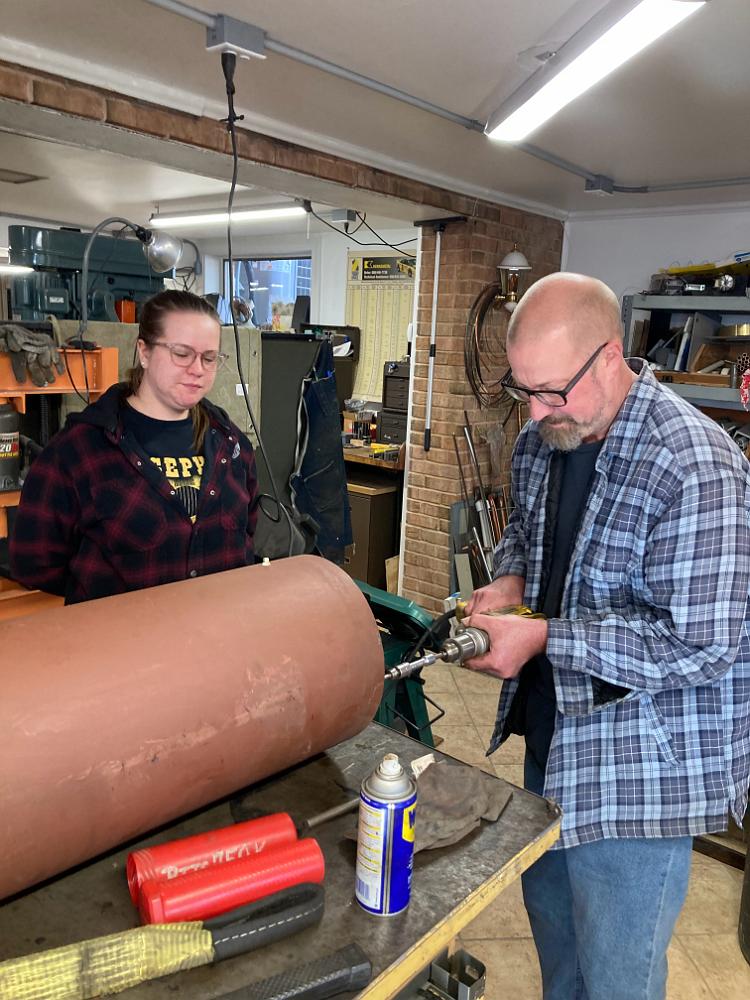
3-Oct-2023 Although we had drilled the flue holes undersize before the front tubesheet was welded in place, we still had to ream them to final size before…
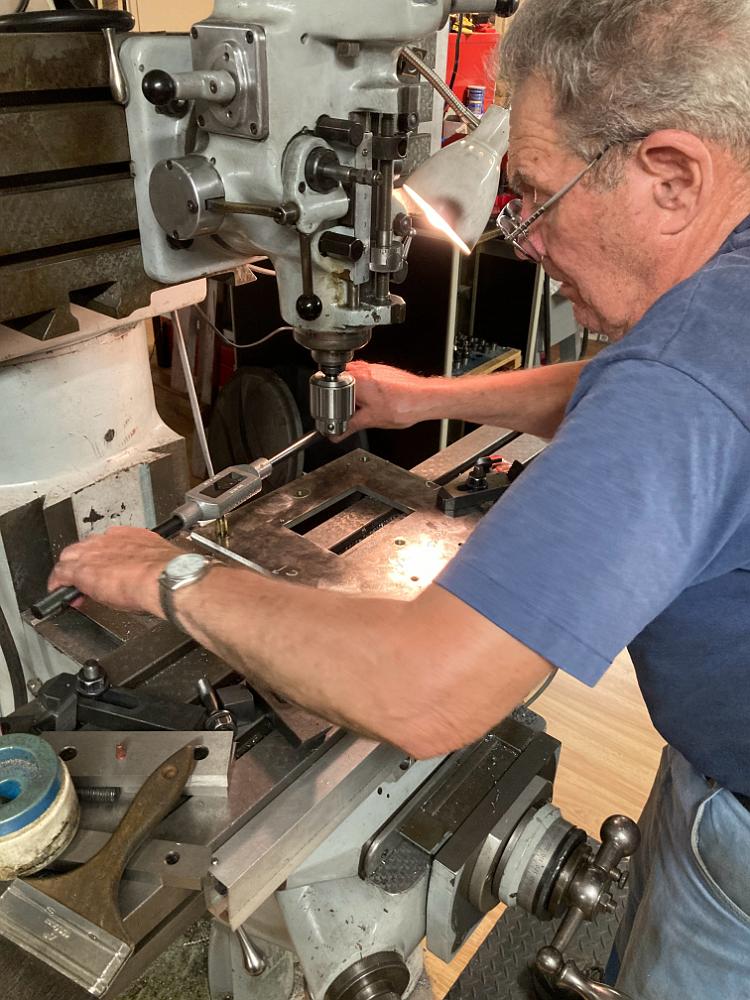
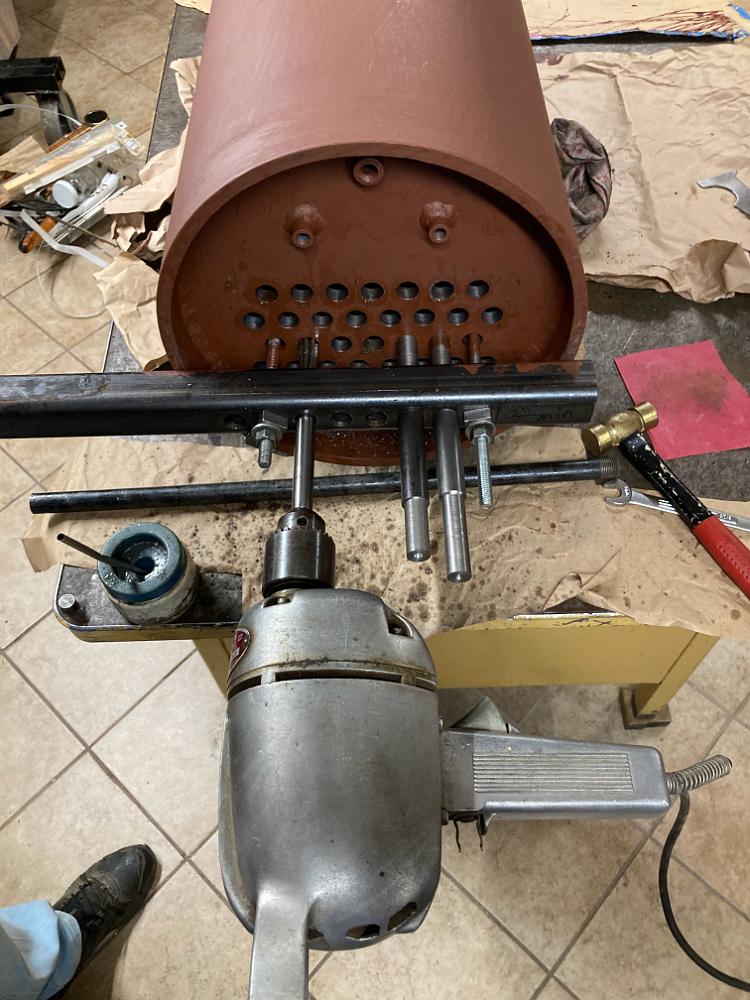
17-Oct-2023 Here's the reaming operation in progress using the guide. We have finished the top two rows and are working on the third. I can't have the alignment…
17-Oct-2023 Last hole reamed! After removing the drill, reamer and guide bar, we chamfer the holes breaking sharp edges, and then by hand deburr the inside of…
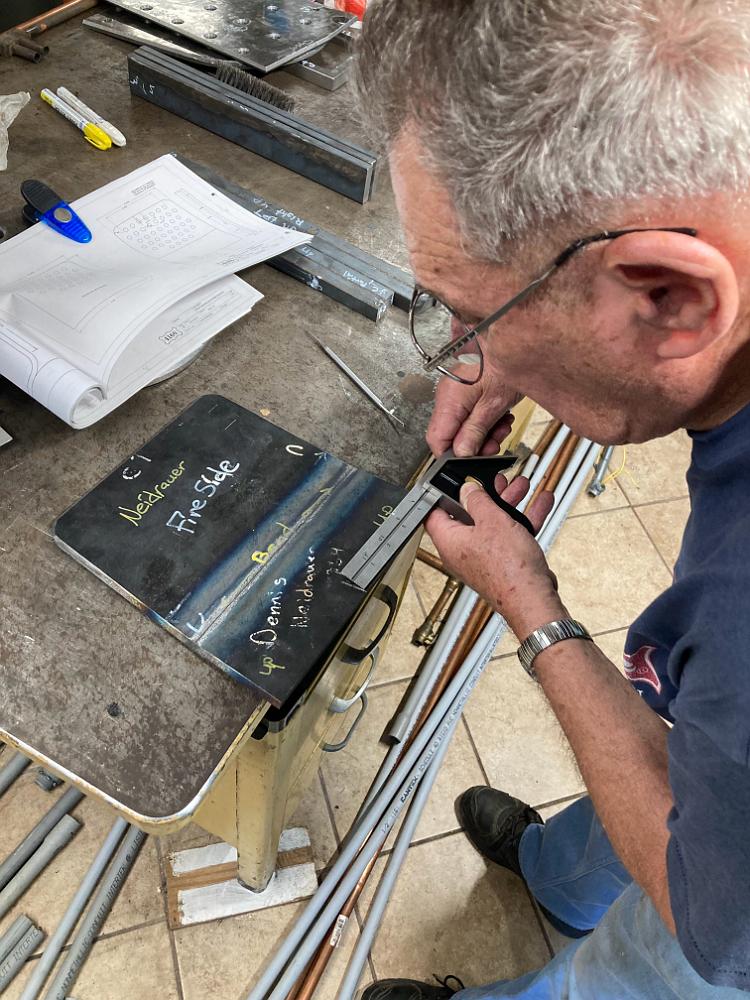
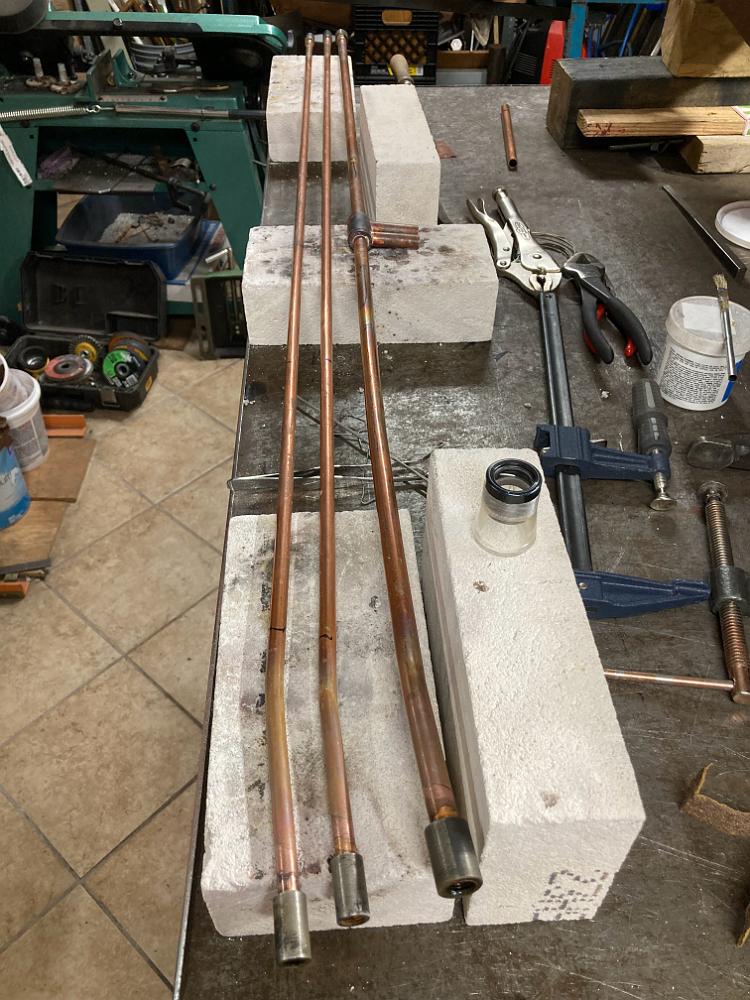
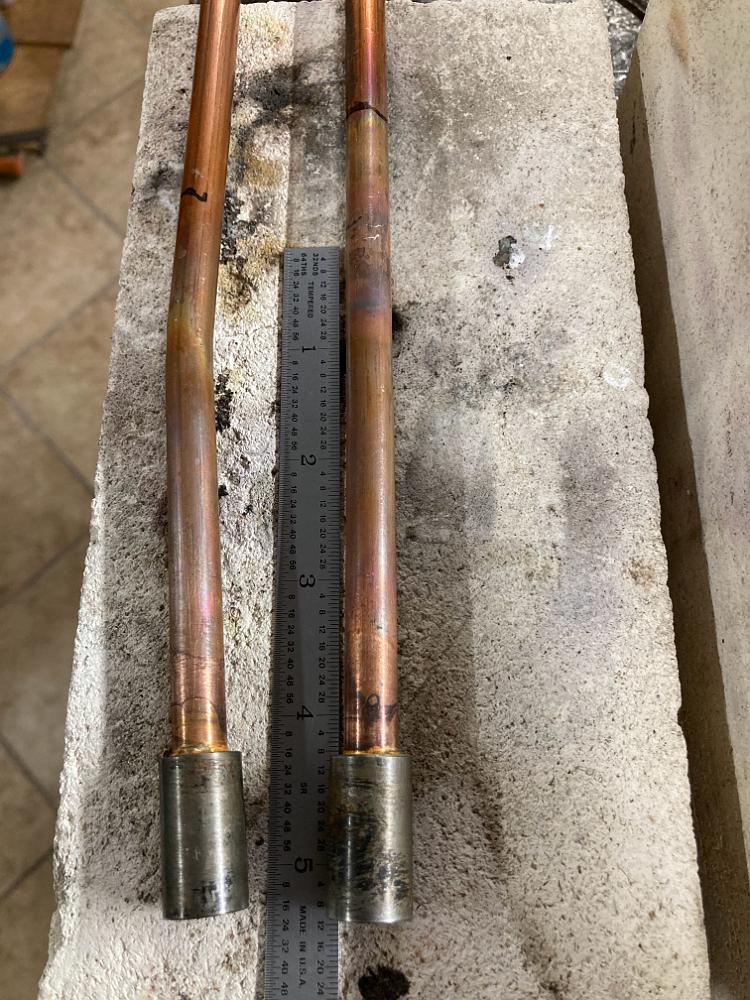
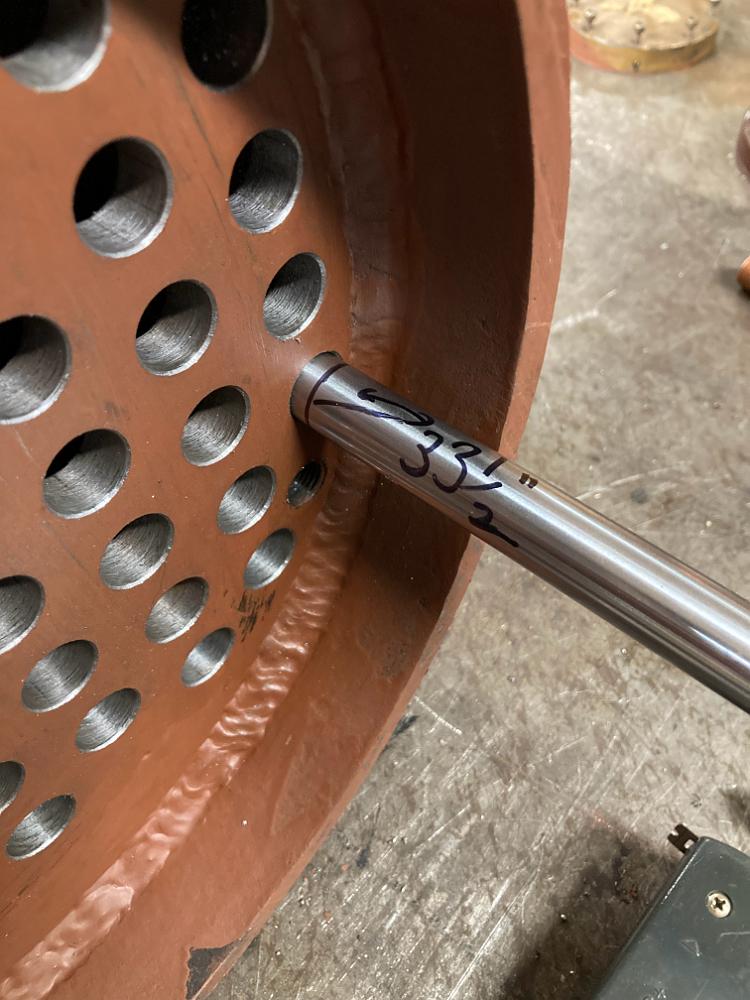
24-Oct-2023 Using a nice piece of straight rod, we measure to have 3/16" of the pipe stick out at each end, giving a finished cut length of 33-1/2" flue length.
24-Oct-2023 Here's the other end of the rod with the desired 3/16" overhang. We put the rod in each hole (41 of them) to make sure there is not significant…
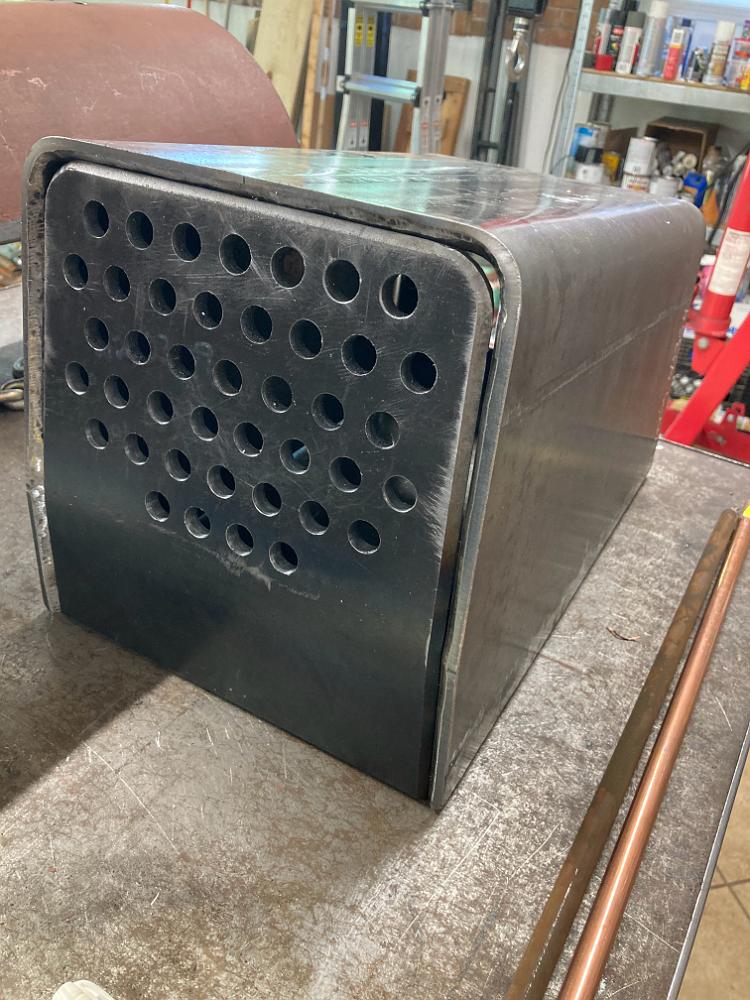
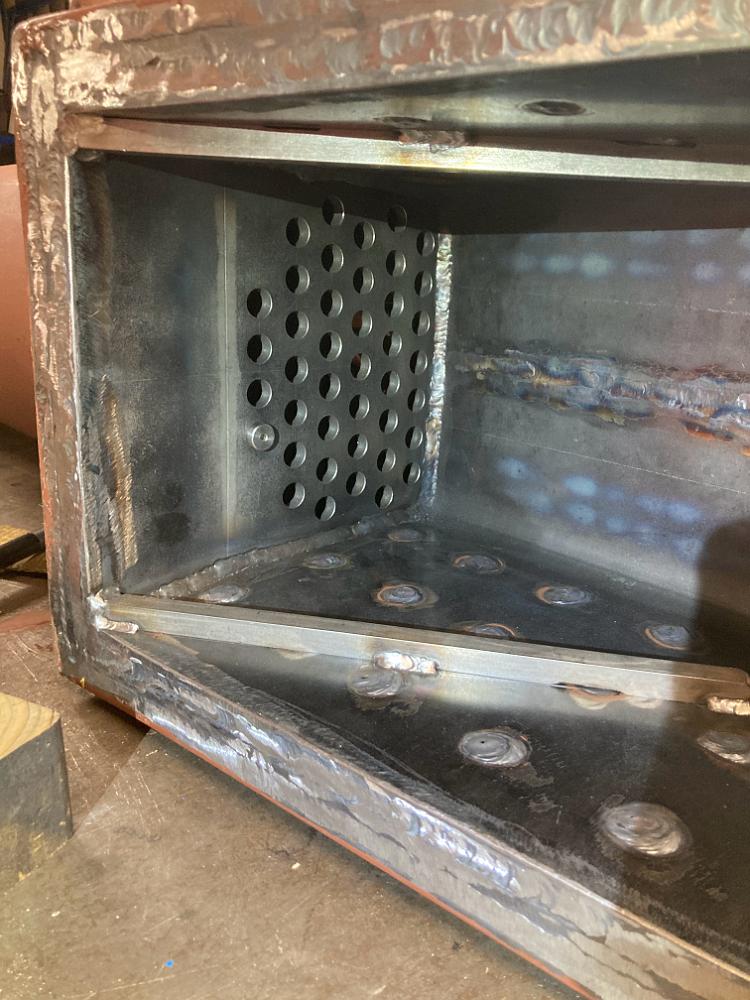
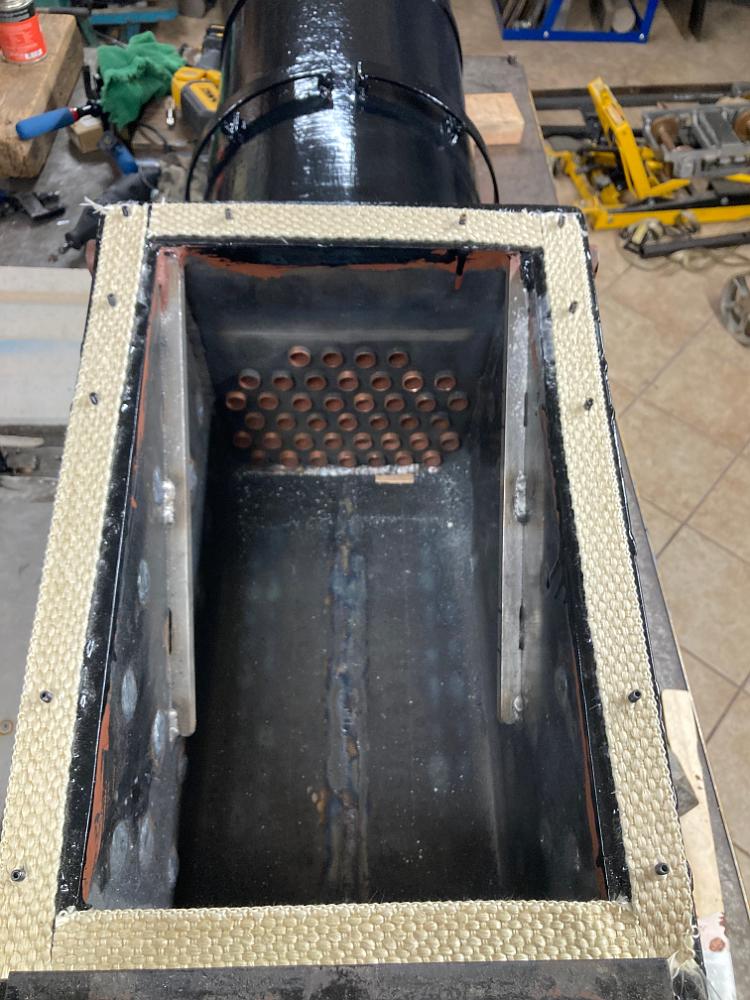
Firebox door end of the firebox. The arch support bars, welded to the sides of the firebox are visible (top and bottom of picture)
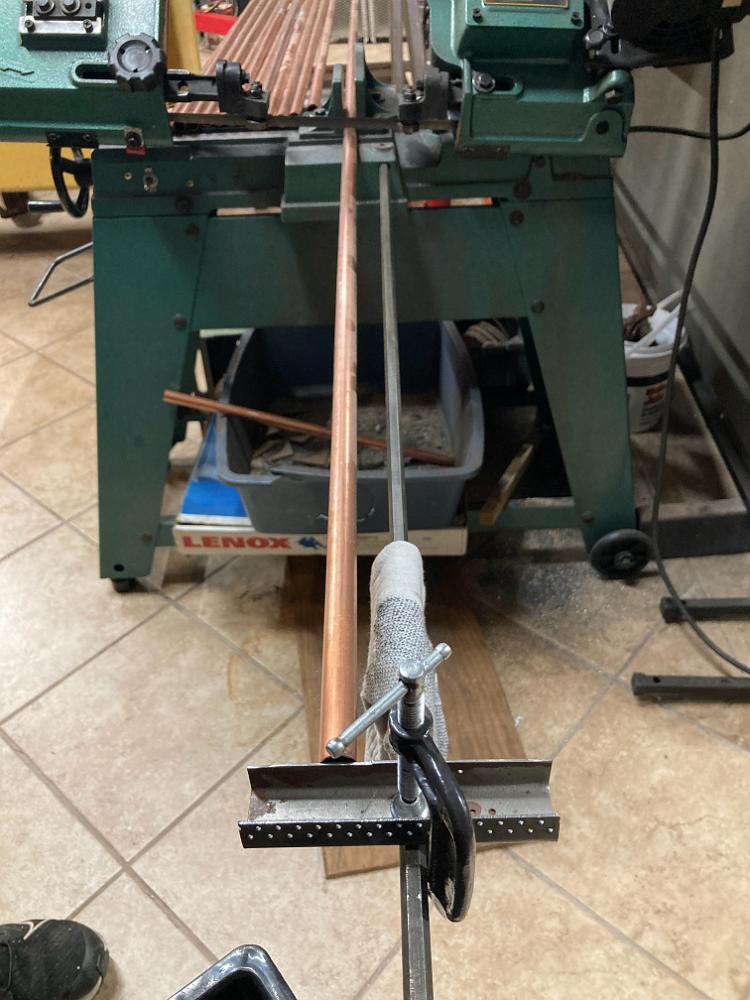
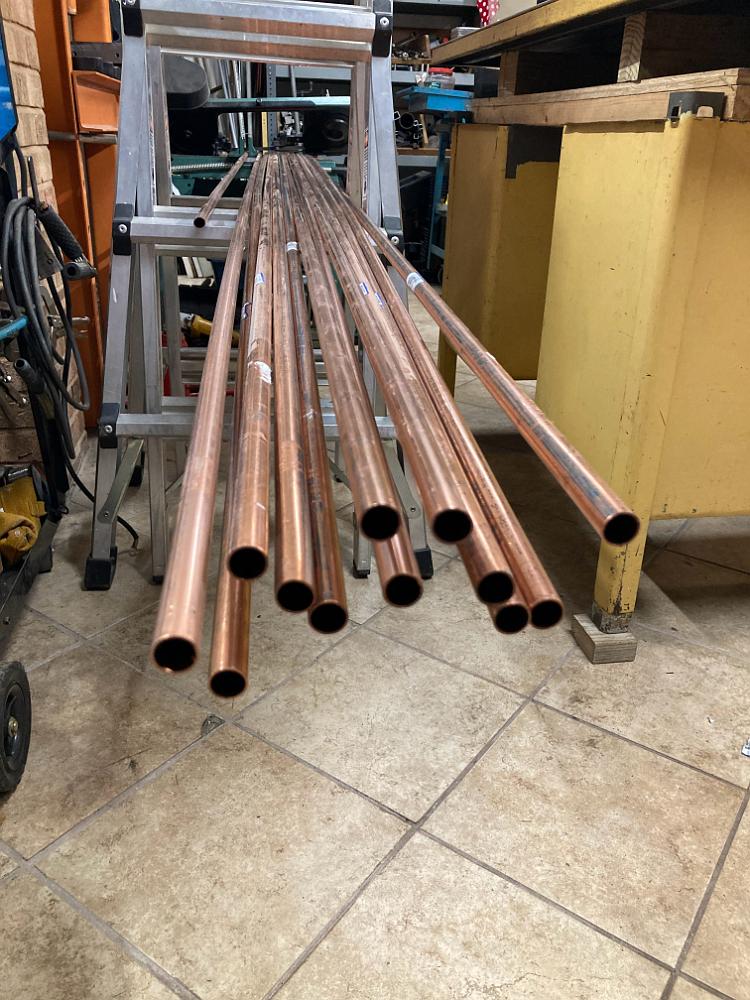
30-Oct-2023 Time to cut coper pipe. I make up a stop block at the 33-1/2", check everything several times, take a deep breath and start cutting. I only have…
30-Oct-2023 I bought the copper flues in 10 foot lengths. Using the rungs of the ladder as support at the other end of the bandsaw, you can see how bent the…
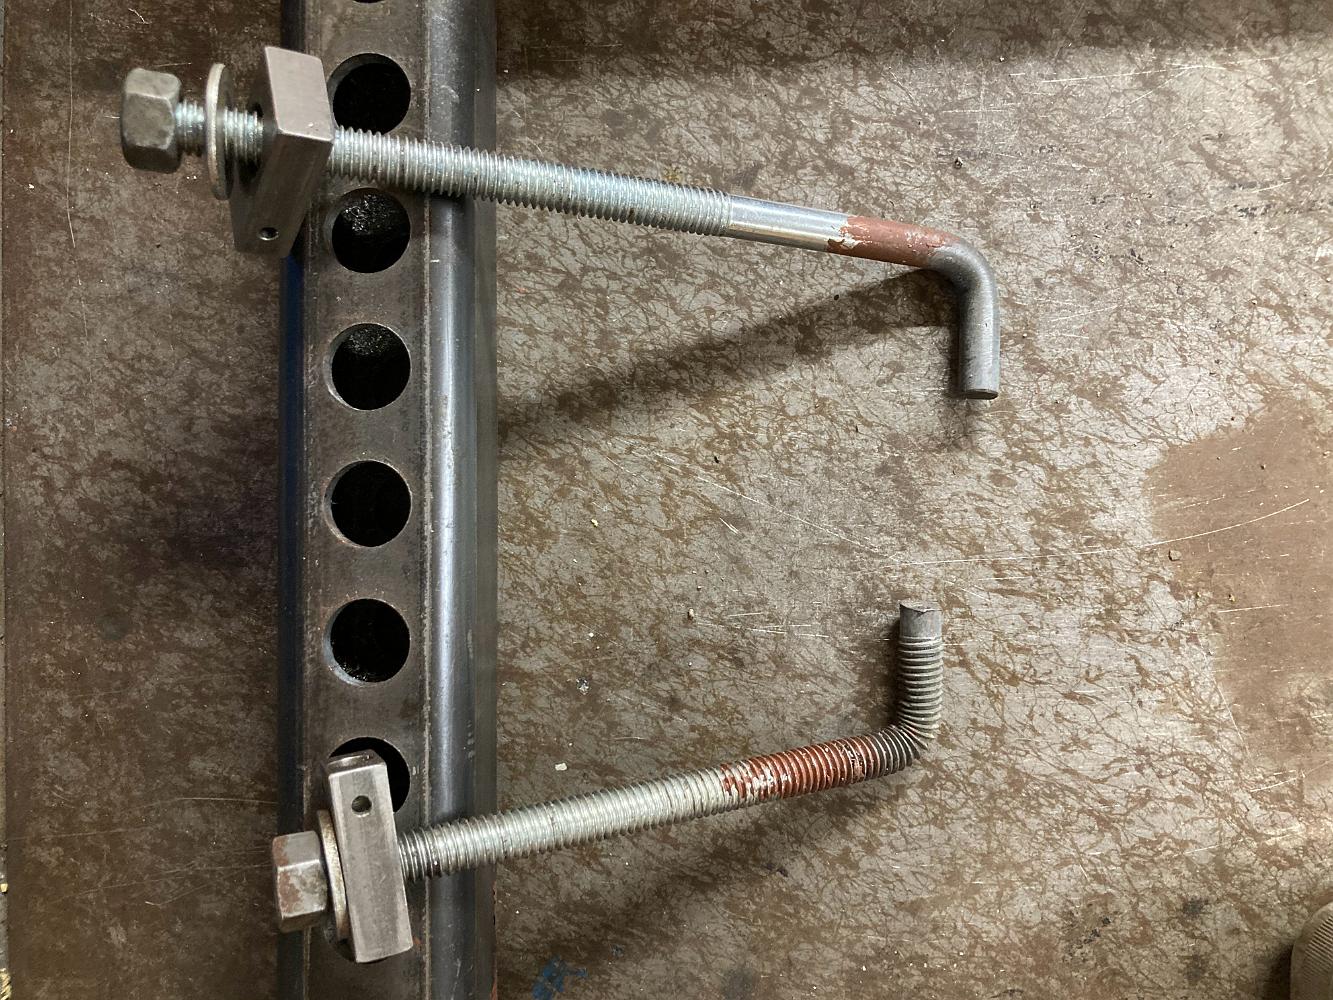
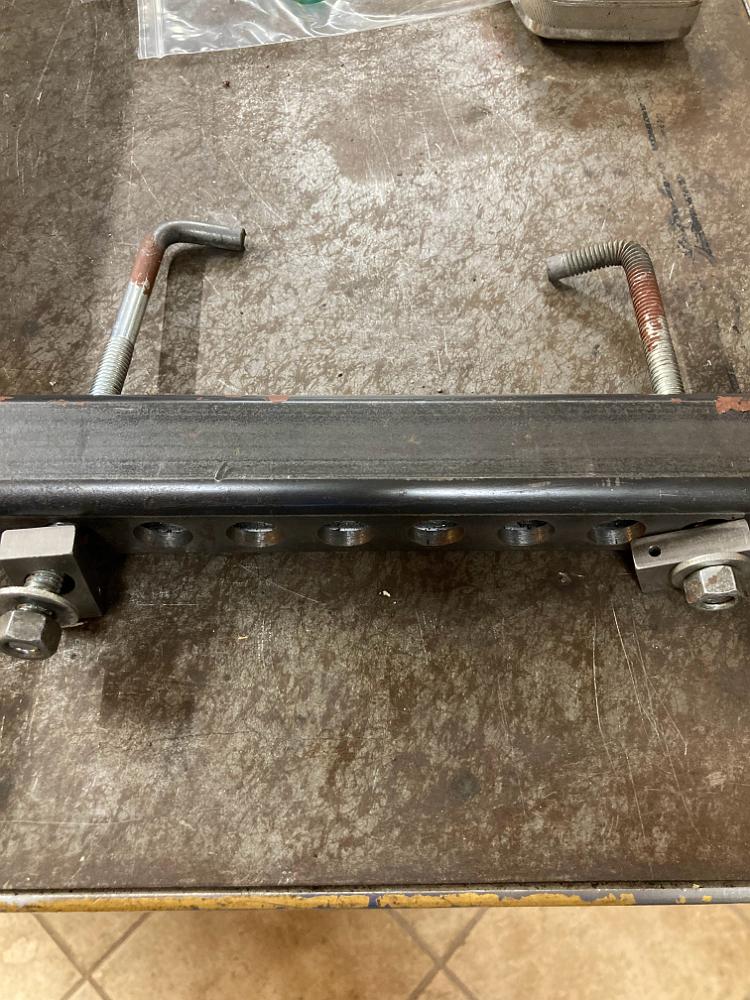
31-Oct-2023 Here's some more details on the reamer guide we made. The J-hooks were made form 3/8" bolts heated and bent in vise. The reamer guide is 1" square…
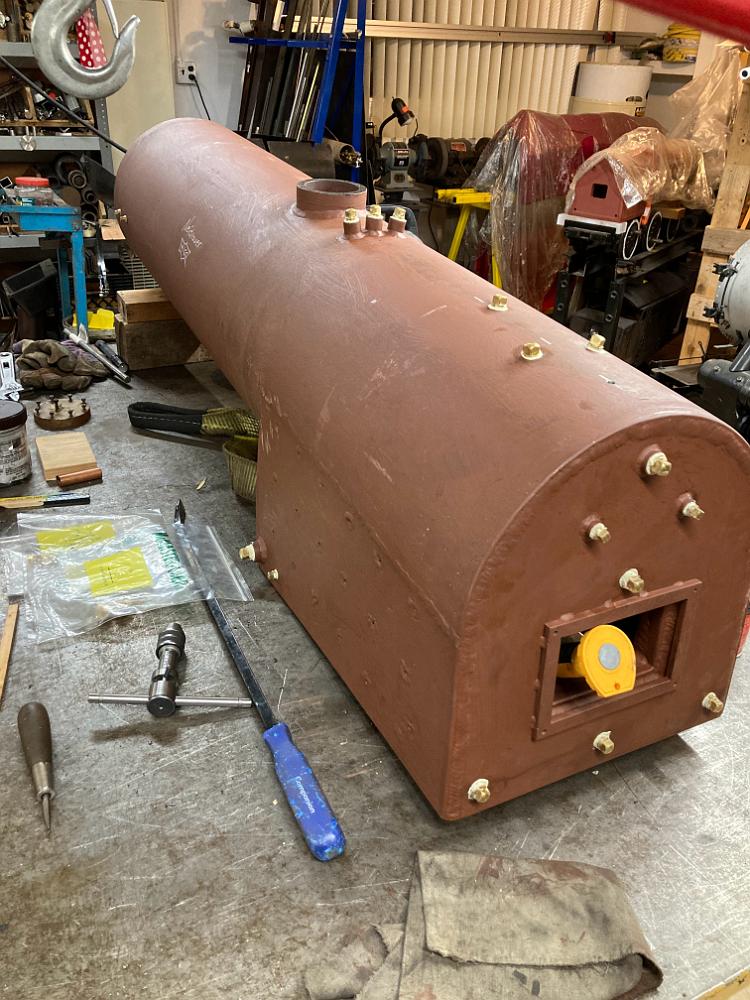
21-Nov-2023 We finish tap every threaded fitting on the boiler, and install plugs in anticipation of the first hydro test.
24-Nov-2023 Tim Mikko and daughter Maggie come by the shop with his tube roller, and experience, to help us install the flues and roll them in.
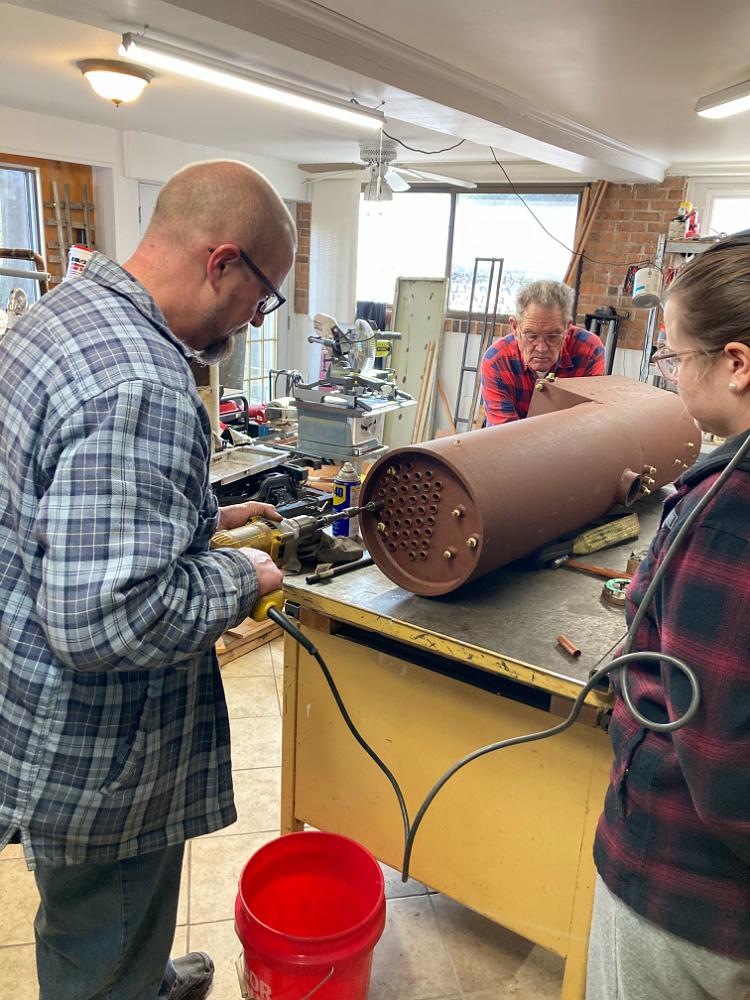
24-Nov-2023 Tim rolls in the last tube while Bill holds it in place at the other end to keep it from shifting.
24-Nov-2023 Tim hold the flue roller for the camera. It took about two hours to install and roll the flues at both ends.
24-Nov-2023 Bill monitors filling the boiler with water as we prepare for the important hydrostatic test. We will test to 300lbs.
5-Dec-2023 While pressurizing the boiler during the hydrostatic test, the steam dome gasket let loose with a dramatic spray of water, giving me a soak. This was…
5-Dec-2023 After a previous failure of the dome gasket, and weepage leaks around the throttle dry pipe bushings, Bill and I perform another hydro test.
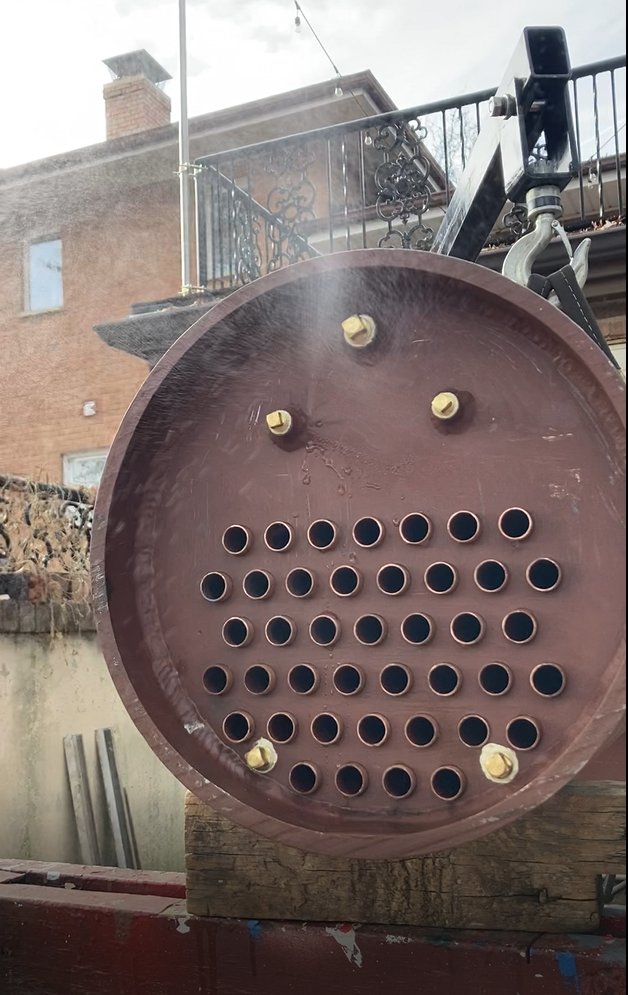
5-Dec-2023 Hydrostatic test number one result: FAILURE. The 41 flues we rolled in: complete SUCCESS. But the throttle dry pipe bushings leak at both ends.…
12-Dec-2023 We investigate why the steam dome cover will not seal. At first we try using a large bastard file, but I'm not good at stroking a file dead flat…
12-Dec-2023 We put the boiler on the mill table and machine the steam dome lip flat again. The circular cutter marks from 3 o'clock to 12 o'clock (with 12 being…
12-Dec-2023 The cutter has made it completely around the steam dome lip cutting a new flat surface on it. We had to machine 0.015 inch off of the high portion…
12-Dec-2023 Here's what a 52 inch long boiler looks like on a 6"x32" Bridgeport table. Spacer blocks under the front barrel to make it level and a chain strap…
12-Dec-2023 Looking through the firebox door at the boiler hold down bar clamping it to the table. I think my phone camera had trouble figuring out this shot as…
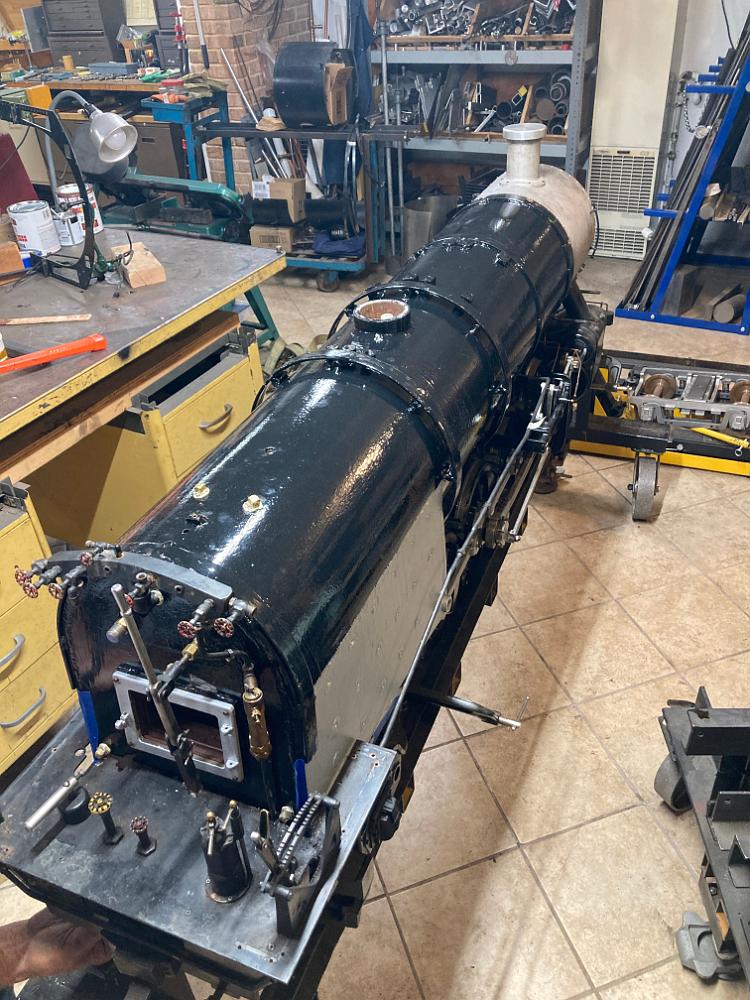
29-Dec-2023 The old jacketing boiler bands are located on the new boiler and welded in place. The jacketing is test fitted multiple times. I'm so eager to start…
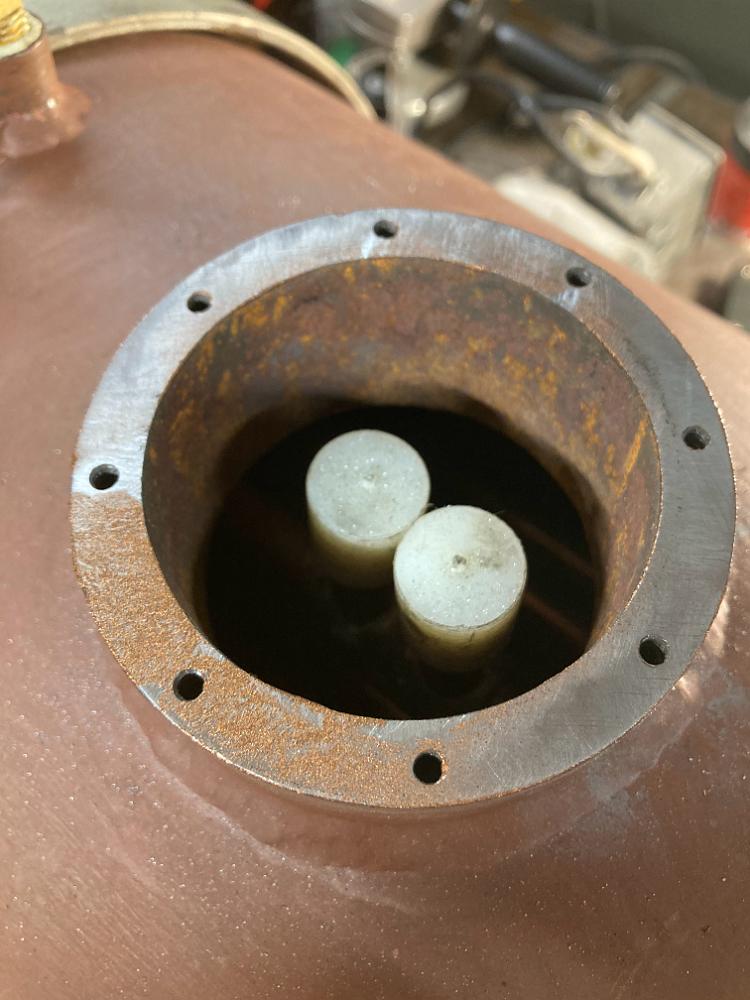
31-Dec-2023 My eagerness to put things back on the boiler creates an assembly issue with the turret. The injector valves on the end of the turret, which I could…
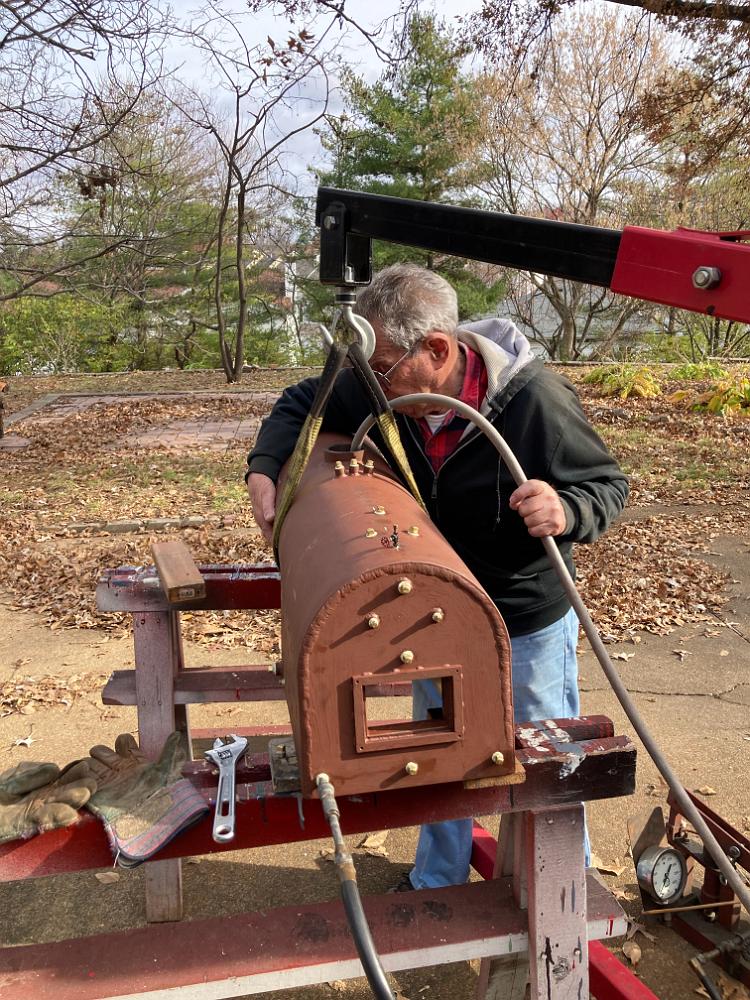
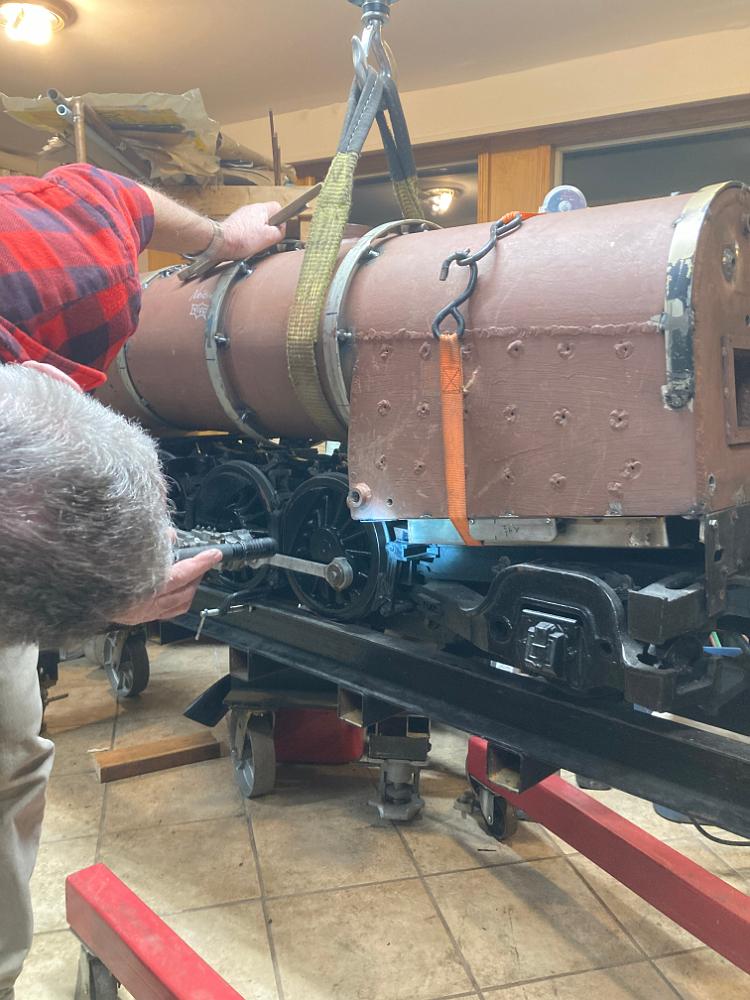
27-Jan-2024 Trial fitting of boiler with front boiler band to smokebox connection and rear boiler support bracket installed. So far, the new boiler is matching…
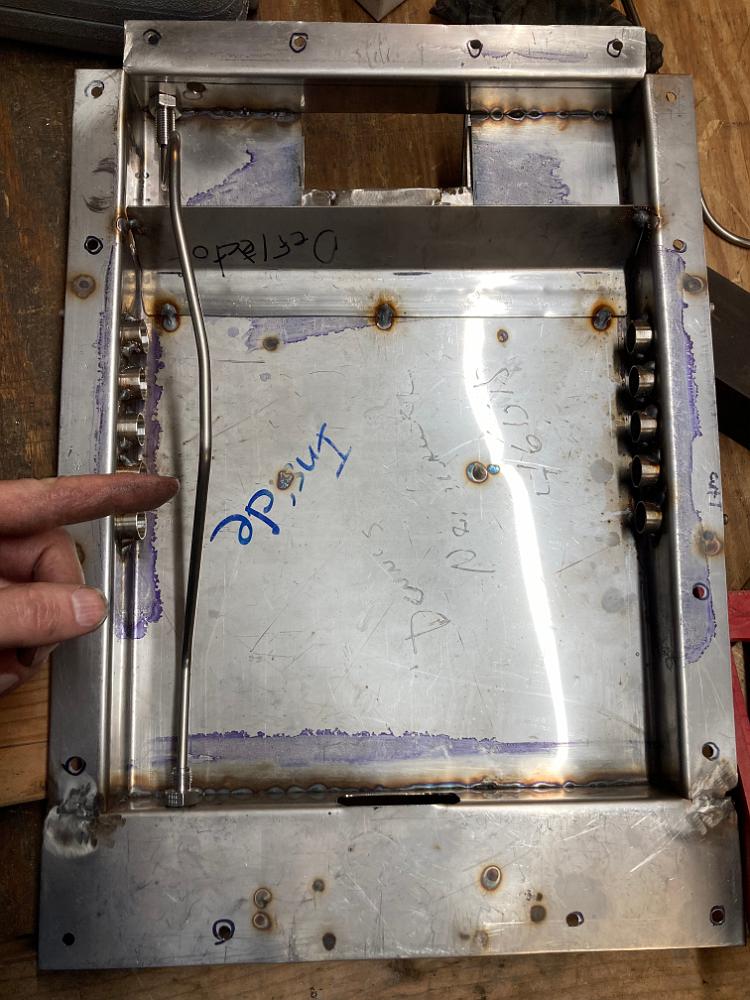
27-Jan-2024 New 1/4" bars are fabricated and welded to the mudring to enable mounting of the firepan. We use screw points to mark the firepan lip and match…
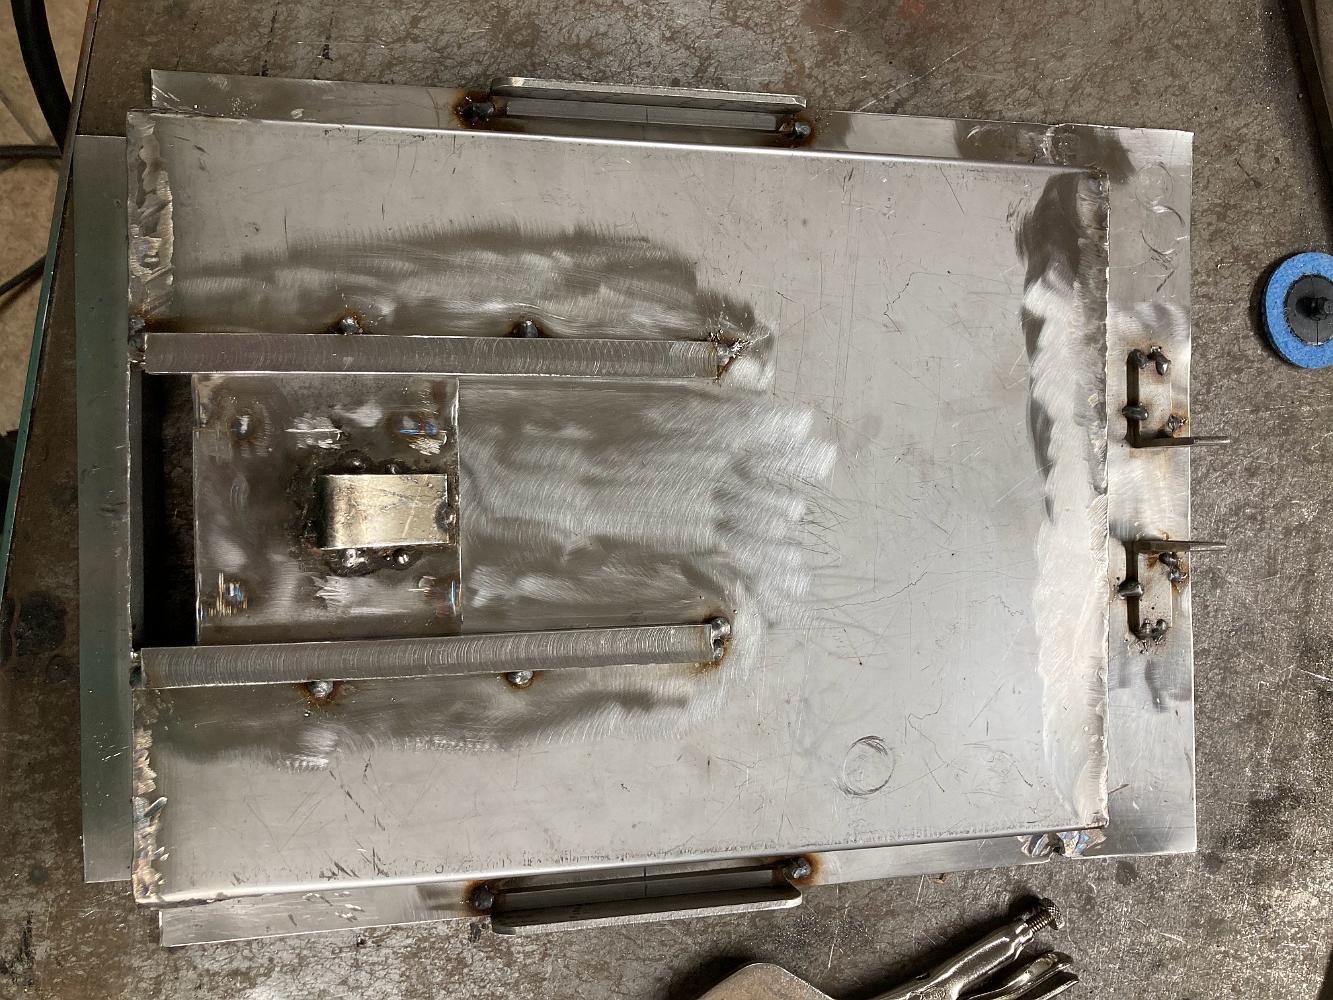
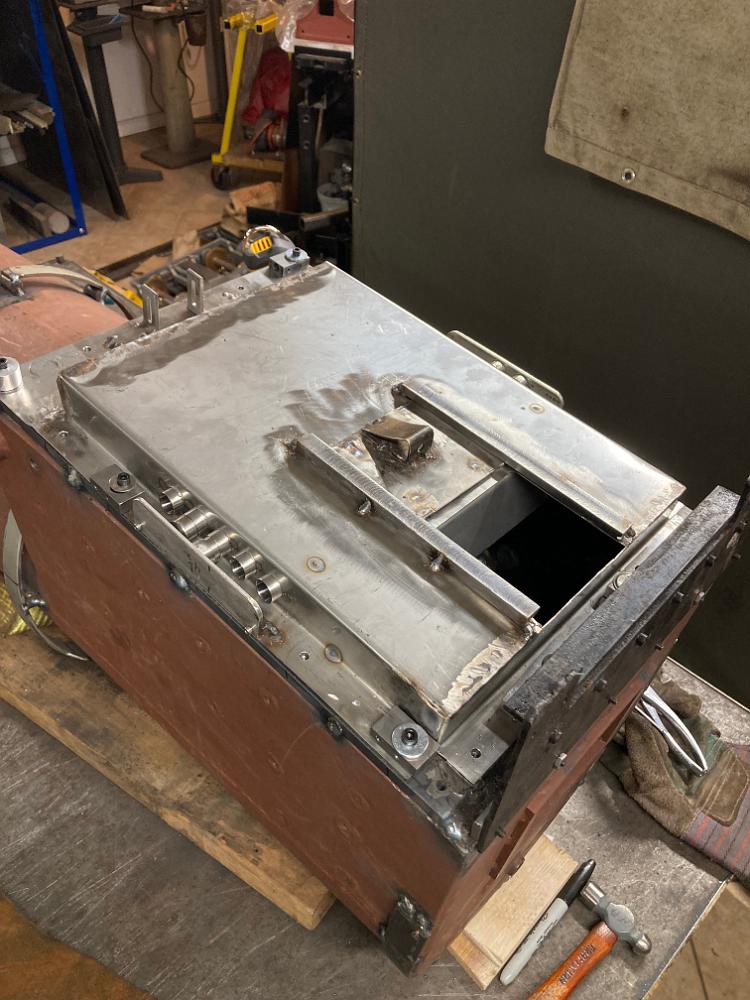
30-Jan-2024 One of the design changes I am making with the new boiler and new firepan is to route the burner atomizer line through the firebox instead of…
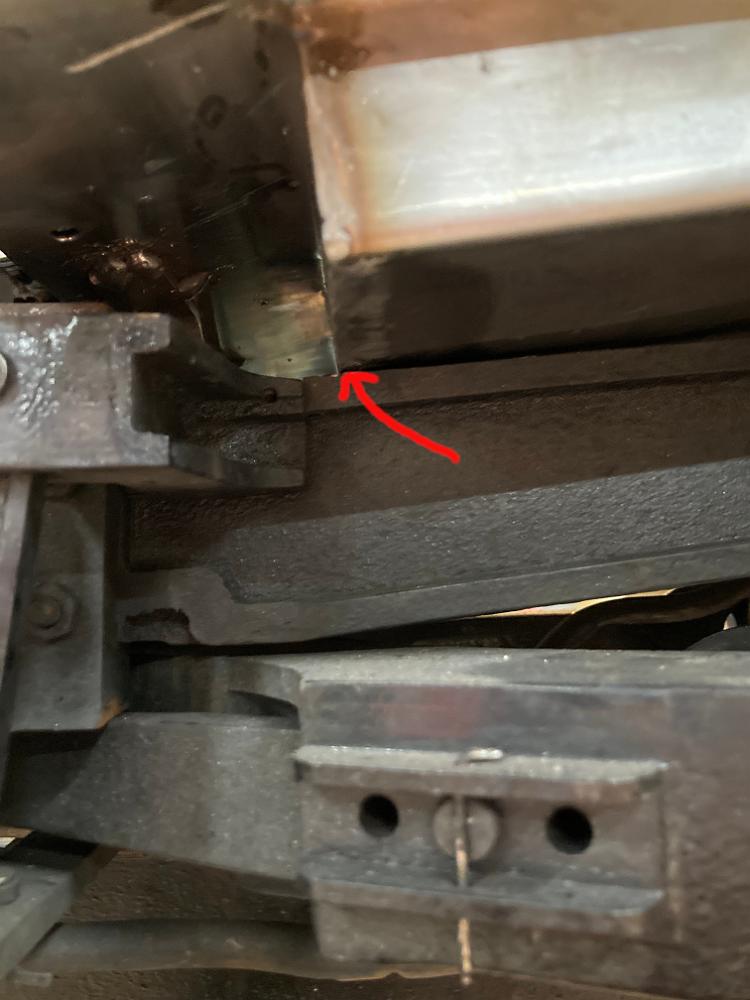
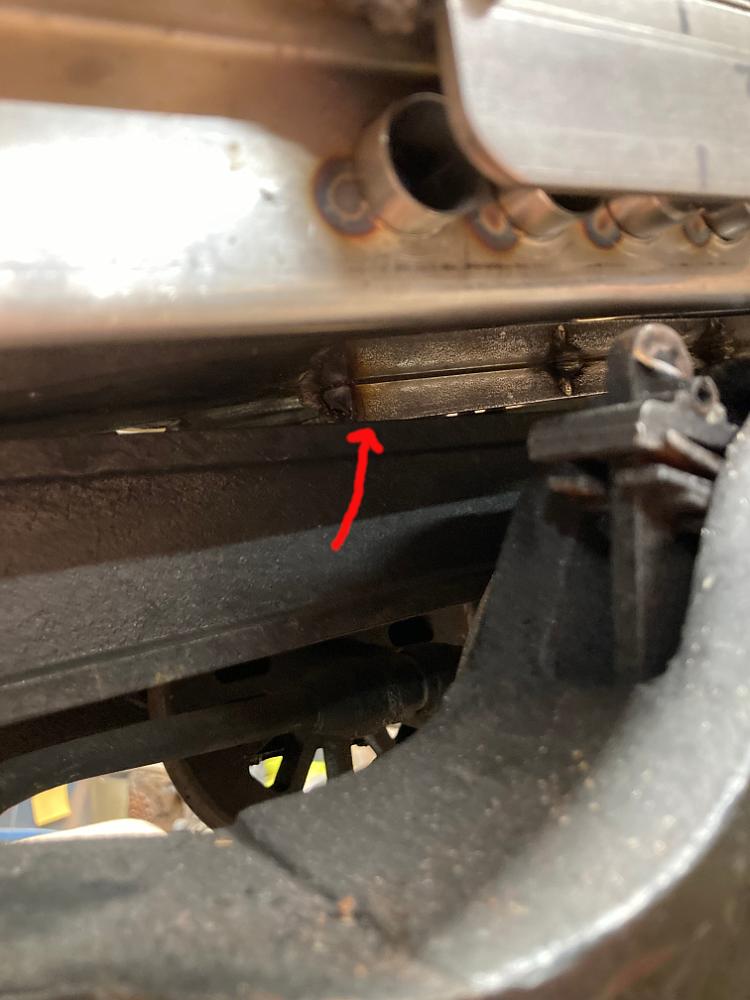
13-Feb-2024 Problem! During a test fit of the combined boiler and firepan, the rear boiler support bracket does not rest on the tailcradle. The firepan is…
13-Feb-2024 Problem! During a test fit of the combined boiler and firepan, the rear boiler support bracket does not rest on the tailcradle. The firepan is…
13-Feb-2024 Bill and I try to figure out why the firepan is holding the boiler up. After investigation, we find the new firepan mounting bracket, 1/4" thick…