Up one level Neidrauer Live Steam Locomotives Photo Albums » Building a Live Steam Locomotive - the Mikado Project » Section 18 - Tender
Section 18 - Tender
Lessons in steel tank coatings. 2015 Added the "doghouse" - the brakeman's shack to the tender deck, a unique Frisco detail, and backup light. 2014 - Finished over the winter and in service! Some detail work remains. The July 2013 Assembly continues, riveting and welding are in progress. I have already learned one lesson: Cut the tender frame to length AFTER the tank is made. Maybe you will do better than I did, but my tank is a about 1" shorter than planned making accurate bends in the sheet sides is hard! After using a borrowed tender for the first fire up of the locomotive, all attention is turned to fabricating one this winter. November 2012 - raw stock for Tender Frame cut. Steel side sheets for tender tank laser cut. Fiberglass Tender received 2003. June 2009 - I decide to make a tender instead of using the fiberglass one since the 3 axle trucks I have will not fit under the frame.

Previous page At last page 129-164 (of 164 found)
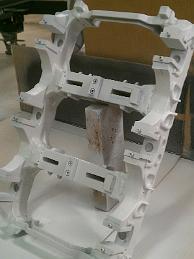
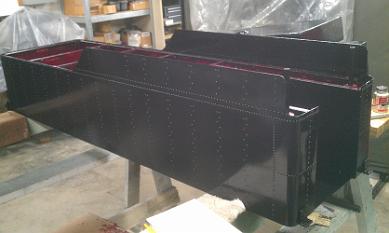
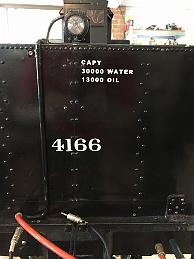
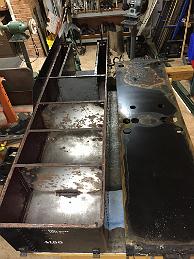
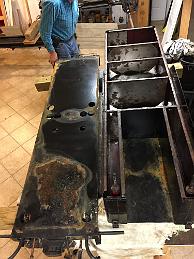
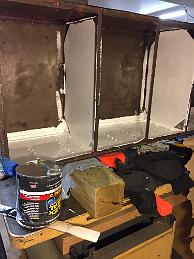
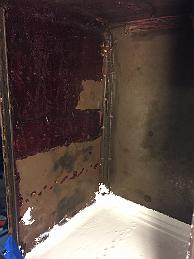
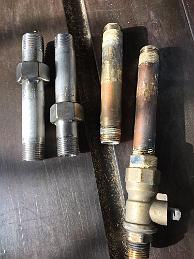
IMG_5492 12-Apr-2014 The oil tank, upside down, with a coat of primer on it. IMG_5493 12-Apr-2014 Tender deck with a coat of primer. IMG_5495 13-Apr-2014 Paint! The tender frame and tender parts get two coats of black paint, brushed on. IMG_5496 13-Apr-2014 Using up several paintbrushes this night, the top sides of the oil tank are primered. IMG_5497 13-Apr-2014 Coating the sides of the tender to make them waterproof. I found it easiest to work with gravity and put the tender on its side to apply the Red-Kote tank liner. IMG_5498 13-Apr-2014 Water proofing the underside of the tender top. I had painted the top side five days and thought the paint was cured enough for me to paint the bottom, so I put the top on several spray-can lids to keep table from damaging the finish. Turns out the paint was still green and I ended up with ring prints where the caps marked the paint. IMAG0341 13-Apr-2014 No, not ghost trucks, just aluminum primer for the aluminum truck frames. IMG_5499 13-Apr-2014 Almost done coating the interior of the tank! It took two quarts of tank liner to do the job. IMG_5500 13-Apr-2014 Tender hatch lids with fresh paint. IMG_5501 13-Apr-2014 Oil tank with glistening wet paint. IMAG0348 14-Apr-2014 The tender with paint all around and tank liner finished. IMG_5506 14-Apr-2014 First test fit of the oil tank cap. Bill is hanging onto the stub used to chuck it in the lathe, he has threaded and knurled the cap portion of the stock. IMG_5509 19-Apr-2014 With the tank installed on the frame, we install the plumbing. IMG_5512 19-Apr-2014 The drawbar is installed and the engine and tender are mated for the first time to route the pipes and hoses. IMG_5513 19-Apr-2014 The drawbar is installed and the engine and tender are mated for the first time to route the pipes and hoses. IMG_5514 21-Apr-2014 Top view looking down between the engine and tender routing the pipes and hoses to allow movement without kinking or rubbing. IMG_5515 21-Apr-2014 Hose loops to allow for movement without interference, touching the ground, and staying away from our boots on the tender footpeg. IMG_6090 8-Sep-2014 Well, these footpegs did not last long before getting damaged - 4 months. Forgetting to remove them before loading the engine, I crashed them into the support rack, bending and cracking the pegs at the thread. Bill machined the broken portion back and re-threaded them. IMG_6465 16-May-2015 Fabricated hand rails for the brakeman's shack. There are two handrails on the roof and one by the door. IMG_6468 16-May-2015 We fabricate a door handle (non-functional) and handrails from 1/8 brass rod. IMG_6471 18-May-2015 Fabricated brakeman's shack roof with handrails installed. The aluminum roof has been rolled to match the curve of the sides, awning overhangs bent and handrails installed. Opting for a simple solution to mount the roof to the shack, I glue some magnets to the underside to hold it in place. IMG_6476 1-June-2015 We match drill holes from the brakeman's shack floor through the tender deck. Using stainless steel #10 screws, installed from the bottom of the deck and bolted on the top, we create studs to mount the shack to the deck. By removing four nuts inside the shack, we can remove the shack from the deck without having to remove the whole tender deck. IMG_6478 1-June-2015 Machining a piece of PETG (Lucite) plastic to form the windows of the brakeman's shack. IMG_6479 8-June-2015 Interior view of Brakeman's shack showing little welds holding the floor and sides together. IMG_6480 8-June-2015 Brakeman's shack welded together IMG_6485 8-June-2015 Woodworking in the metal shop. Milling some 5-ply model aircraft plywood down to size to make a faux window frame for the brakeman's shack. IMG_6487 15-June-2015 While we have the tender deck off to install the brakeman's shack and back up light, Bill rolls some IMG_6488 15-June-2015 A unique detail to Frisco - Brakeman's shack on the back of the tender (the IMG_6489 15-June-2015 New bracket riveted to the back of the tender deck and backup lamp from supplier Mercer bolted on. IMG_6490 15-June-2015 New stainless steel mesh screens added to water inlet fittings. 20190406_211350193_iOS 2019-04-06 - I get around to lettering the tender capacity amounts - which are actually 30 gallon for water and 9 gallons oil, not the 30,000 and 13,000 amounts. Tender Tank Leak Overhaul 2019-10-28 Tender Tank Overhaul -- The tender has been leaking water. Opening it up revealed a failure of the coating, due to poor application. I begin stripping the old Redkote coating off revealing some prime bare metal and some rusty metal. Tender Tank Leak Overhaul 2019-10-28 - Tender Tank Overhaul. The tender has been leaking water. Opening it up revealed a failure of the coating, due to poor application. The water had also been pooling under the tank on the frame deck and rusting the deck for some time. Tender Re-Coating with Flexsteel rubberized paint 2019-11-30 - After stripping the old coating off, I recoat it with Flexsteel brand rubberized paint, hopefully the last time. Tender Re-Coating with Flexsteel rubberized paint Tender Re-Coating with Flexsteel rubberized paint (white), removing the old red coating and cleaning the metal again. 20200101_184407768_iOS 2020-01-01 In order to separate the tank from the frame we have to unscrew the water pipes from the tank bottom fittings. The brass pipes are so close to the tank floor we cannot get a pipe wrench on them and using vise-grip pliers is a major pain. We solve this problem by welding flats to new pipe in the form of nuts.
Page 3 of 3 At last page